

Brainstorming
When it came to brainstorming ideas for my final project, I wanted to create something somewhat similar to my upcycle project, that being a piece that serves a functional purpose in my everyday life. So when scanning for issues, there was one I happened to come across quite often and had complaints about myself, and adjacently my brother: my microphone currently stands on a tripod which takes up a fair amount of space on its own, which is fine, but the issue is that my desk setup happens to be quite small with a table that has a smaller depth than normal due to its portable nature. This means I don’t have much space between my microphone, mouth space, and laptop, all of which intrude on one another.
Currently, my situation is that I push my laptop against the wall and a bit off the table, which can limit the airflow by covering the vents as it hangs off slightly, affecting my poor little GPU. Another common complaint I’ve often had is that the proximity of my microphone to my mouse and keyboard means it frequently picks up feedback, whether from the physical sounds of me clicking my keyboard or mouse, or the vibrations that come from tapping on the table. Sometimes these sounds come through on my microphone, which can be quite distracting during meetings or voice chats.
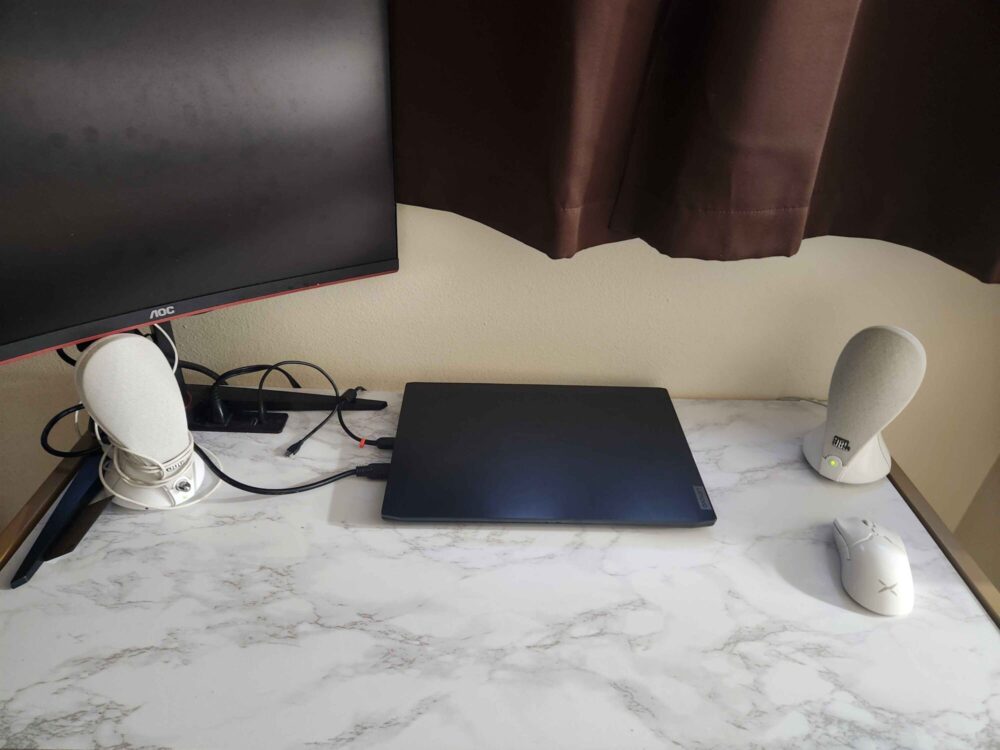
Image [1]: My Desk Setup (It is Tiny)
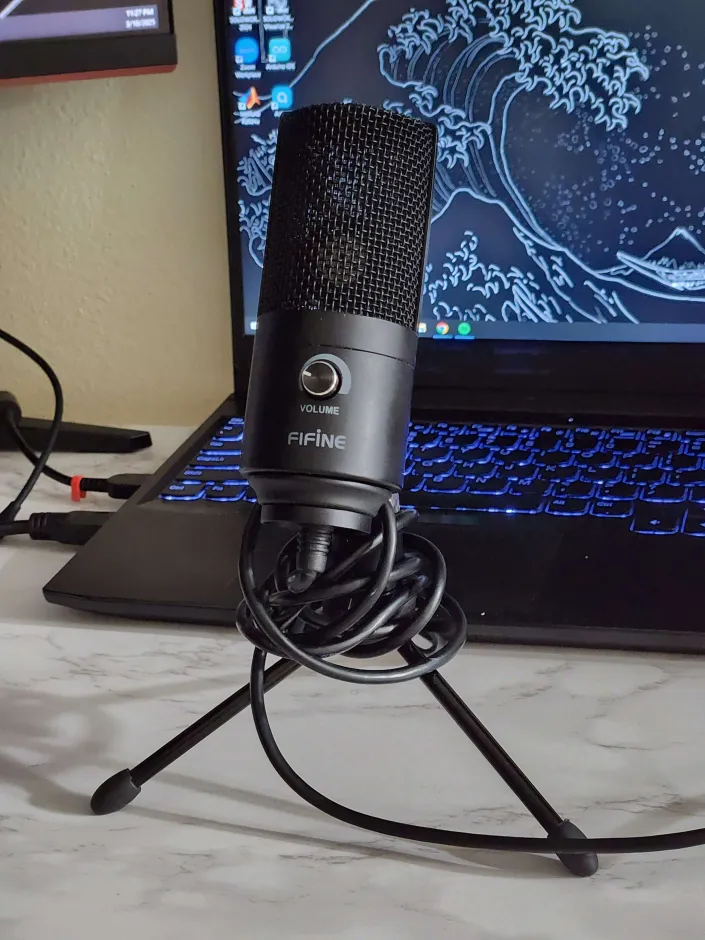
Image [2]: My Current Microphone
I considered a few options, but my first option was a bit more ambitious.
Initially, I was inspired by DIY Perks on YouTube to build my own microphone from scratch. My vision was to create a custom setup that would address specific issues—elevating the microphone from the table and reducing vibrations that travel to the central mic unit housed within the metal mesh. Rather than simply replicating the YouTuber’s design, I planned several improvements. While DIY Perks soldered components onto a breadboard, I intended to design a PCB based on his schematic for a cleaner implementation. I also envisioned using different materials—moving away from the brass rustic look toward a modern, sleek aesthetic with black and white elements to match the minimalist style I wanted for my project.
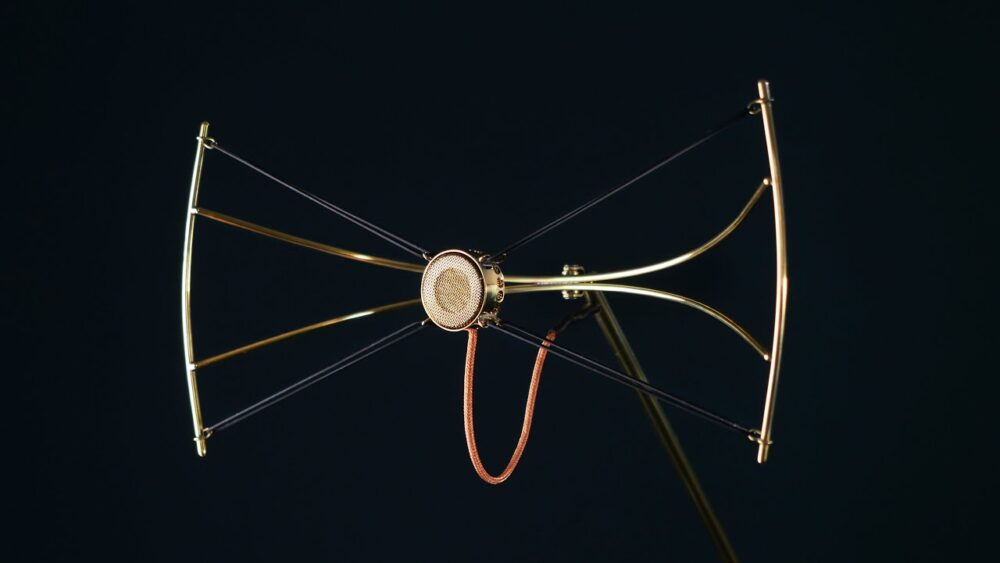
Image [3]: Image of DIY Perks Self-Built Microphone with Stand Arm
After carefully evaluating my schedule, I realized the significant knowledge gaps, troubleshooting time, and equipment access needed from the Idea Forge or Project Depot would make this project overwhelming. Being in my senior year with multiple other commitments, I reluctantly decided against pursuing this path—though I still intend to build my own microphone someday.
Instead of abandoning my goal of addressing my microphone issues entirely, I pivoted to a more practical solution. This brings me to the idea I developed for my final project, although it did change a bit from what I originally wanted to accomplish. I mentioned that I wanted to modify or create something based on what I currently have, which is my Fifine K20 microphone. While a straightforward solution to many of these issues would be to simply buy a microphone boom arm, I was concerned that they tend to be quite large and would disrupt the minimal aesthetic I aim for at my desk. Therefore, I explored other boom arm designs and was inspired by the low-profile boom arm, which extends from the back of the desk and leans forward. This design achieves the same purpose of raising the microphone above the table to reduce vibrations and hopefully mitigate some of the unwanted sounds it might pick up. I know that many current boom arms use springs for tensioning and holding their position. However, if they are bumped, these springs can resonate, causing undesirable noise on the receiving end due to the microphone picking up all that sound. For this reason, I wanted my design to exclude springs.
Below is an image of the low profile boom arm on the market:
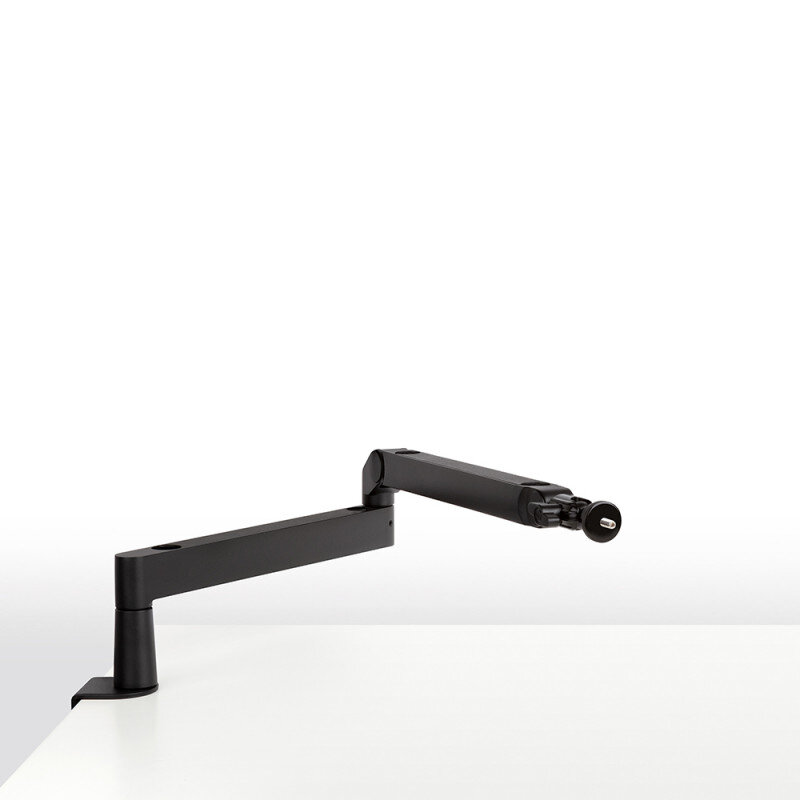
Image [4]: Elgato Wave Mic Arm Pro
Initial concept
When it came to envisioning how my artifact would look, I knew I needed a table clamp. This piece would need to lay flat and interact with the first arm, allowing it to be securely grounded to the table through a threaded object, similar to what most table clamps have today. In addition to that clamp, I recognized that this surface would occupy the most area on the table, giving it the highest chance of distributing vibrations and sounds to the base. Therefore, I aimed to use a type of material that would not only rubberize its contact surface to prevent it from sliding around the table easily but also mitigate and absorb some of the vibrations before they reached the capsule in the metal mesh of the microphone.
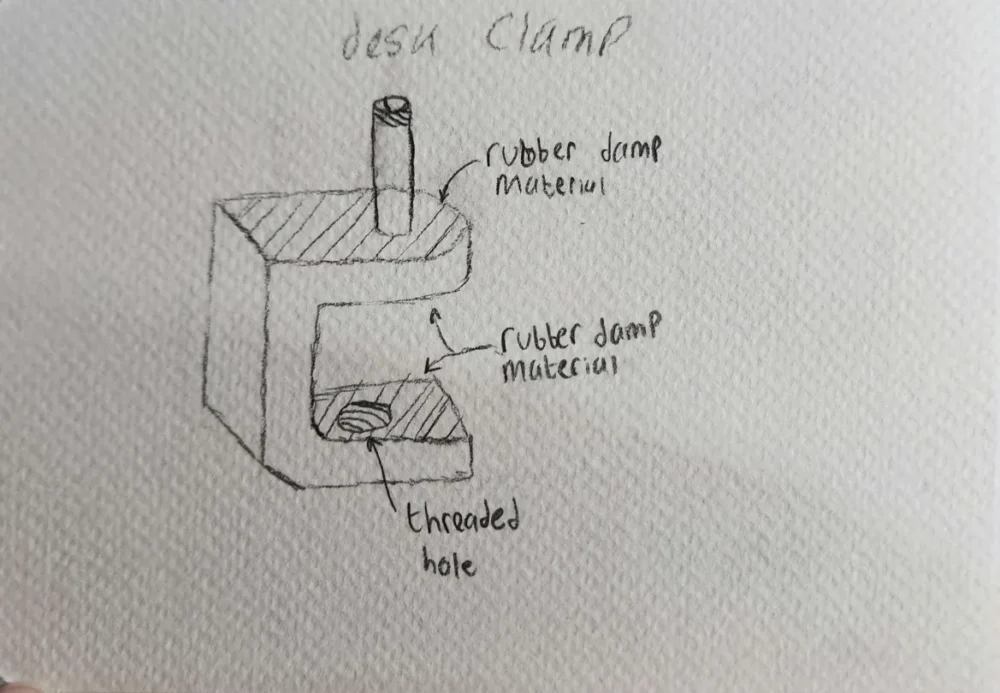
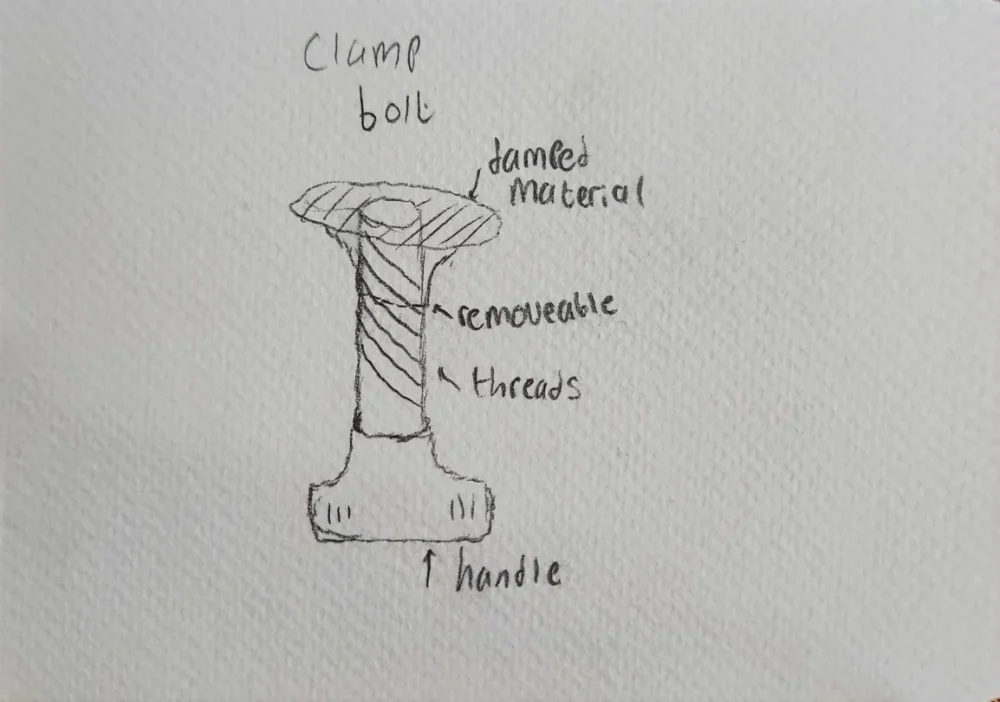
Image [5 & 6]: Drawing of Microphone Clamp and Table Bolt
As for the first arm that would attach to the base table clamp, I drew some inspiration from looking up other low-profile boom microphones currently on the market. I noticed that some of them featured a first arm with a short height that protruded directly out toward the table. While these models offered the extra functionality of being adjustable vertically, I envisioned that once my microphone was set in place, I wouldn’t need to change its height very often.
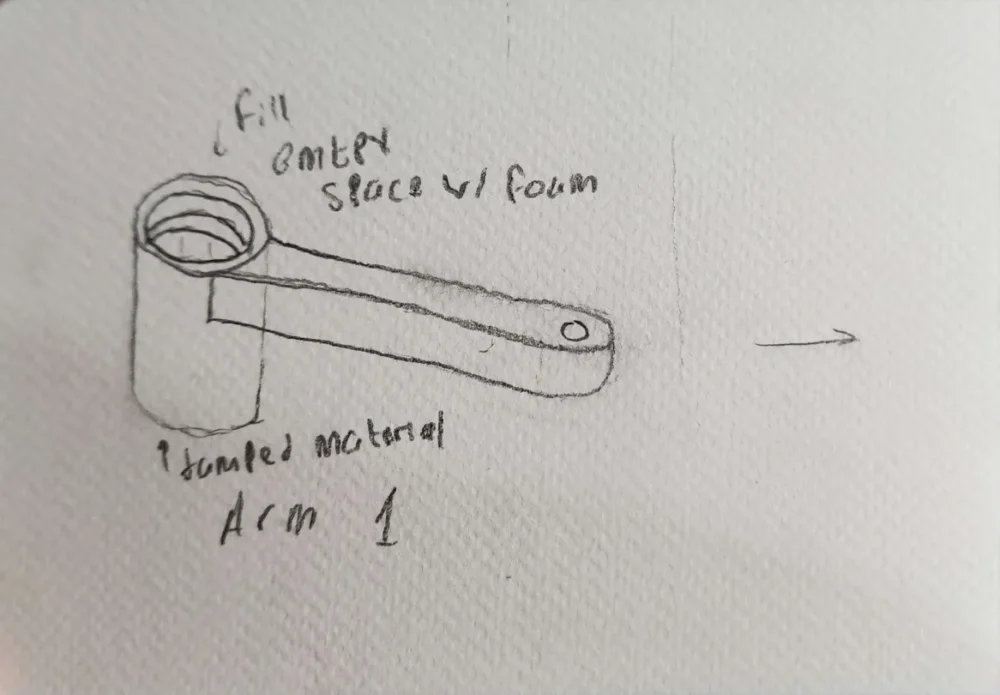
Image [7]: First Arm of Boom Arm Assembly
To add verticality, a second arm would be used to position the microphone at the proper height, allowing it to clearly pick up my voice while remaining in a comfortable position that doesn’t obstruct my visibility of the screen. This design also helps because being raised above and angled correctly means I can keep my hands near my keyboard and mouse without interference. Previously, it was possible for me to accidentally hit the microphone or have my computer positioned too far back, limiting airflow, or too far forward, which could cause the microphone to fall and yank on the cable.
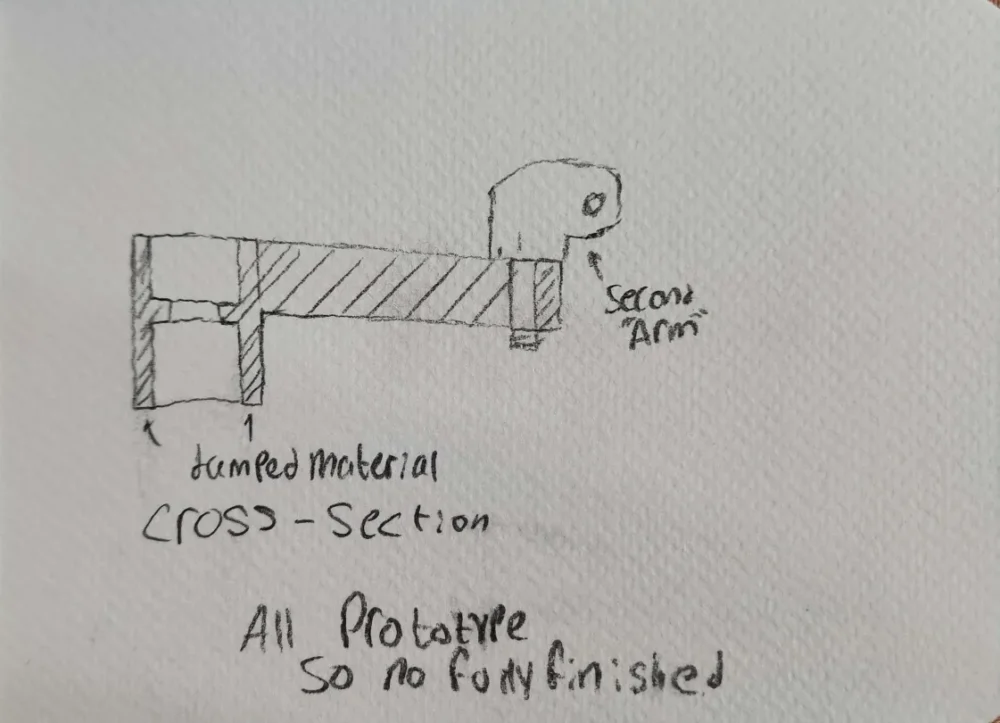
Image [8]: Draw of the second Arm Idea
To further outline the concepts I’m discussing, I created some CAD models that I believed would work well for my project based on the sketches I had previously made. I used SolidWorks software to add threading and purchased hex nuts according to the thread specifications I chose in the software. However, I had not yet accounted for the scaling differences between models on a computer and those printed, which, as we will see later, affects whether the components can match with one another. Below is an image of the finished final assembly.
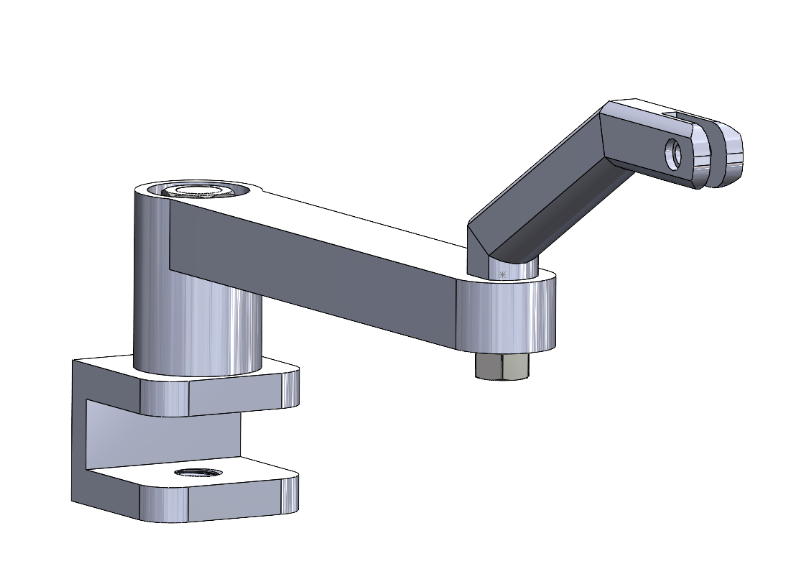
Image [9]: Screenshot of Fully Assembly
Now, the thought process of designing this artifact for myself is all fine and dandy, but what part about this piece is the most important? That’s right—it is the aesthetic and whether that aesthetic is able to match with what I currently have as my own personal aesthetic. I was trying to aim for a minimalist aesthetic that would complement my current desk setup, which has a somewhat marble-esque finish to it. I feel that having a similar color scheme and pattern would make it blend into my overall setup of not only my desk but my room, which follows a similar color scheme. I’m using more neutral colors such as gray, beige, white, and cream colors, all of which I feel fit into that minimalist aesthetic. I also don’t like much clutter when it comes to my setups, so making sure that this boom arm microphone was able to be assembled easily with a minimal amount of parts and be somewhat self-explanatory helps with that mindset, as I don’t want an overly complicated piece to stand out in comparison to the rest of my setup.
Originally, my plan was to paint the boom arm in a cream color and add a similar marble desk patterning using techniques of pencil and shading, along with spraying a clear coat to protect that pattern. However, due to time restrictions—some being the fact I didn’t have a proper area to paint my artifact—and me realizing that having a white boom arm is kind of out of the ordinary (as boom arms are supposed to look sleek, and white is kind of a bright version of that), especially considering that the microphone that is going to be attached to it is going to be a black microphone, it would have seemed a bit off.
Another thing is that ultimately, at the very end, I’m planning to give this to my sibling who I feel has a better use for this type of device, considering that he streams and uses his computer more often for voice chats. I feel like the black aesthetic is better with both my current setup and the setup that we have at home, which still also includes a minimalist aesthetic. As me and him happen to have a similar style where we like keeping things to a bare minimum number of parts—our tables are the same grayish tone and a lot of our electronics and other appliances happen to be in that black color scheme—I thought that it would match overall better if I kept it as is.
My design ultimately did not live up to my expectation of it being minimal, as I was trying to originally make it less visible by having holes that I would guide the USB cable through so you wouldn’t see the clutter of the cable on the stand. But I couldn’t exactly figure out how to incorporate that hole or clips on the side without compromising its minimalism, as I feel like the complex geometry could add some visual appeal to it, making it stand out in comparison to the rest of my desk setup, so there were some conflicts with that.
Ultimately, I think leaving it as is better matches the hardware that I used for it, as they were all also in neutral tones such as silver and black. The black color still fits the theme of being minimal as it’s the absence of color, so you can’t get much less than that in terms of visual appeal. Also, black makes the object look a lot smaller to the eye, so it ends up benefiting what I’m trying to go after, though again, I don’t think I lived up to my expectations of what I wanted the product to be at the end.
Citation:
[3] Matt. (2021). Building a quality USB-C microphone. DIY Perks. Retrieved 2025, from https://www.youtube.com/watch?v=LoQu3XXIayc&ab_channel=DIYPerks.
[4] https://audioeffetti.com/en/category/pro-audio/accessories-for-audio-pro/elgato-10aan9901-studio-grade-boom-arm-for-microphone-p30144
2 Comments. Leave new
I really like how you broke down your entire process so clearly, especially your decision-making between building a full microphone versus focusing on the boom arm. You were super thoughtful about how the design needed to match your aesthetic and setup, and it shows. I also think it’s smart that you adapted when time and practicality became factors—it’s easy to overcommit to huge ideas, but knowing when to pivot is part of good design. Even if it wasn’t exactly what you envisioned, I think the minimal black boom arm still fits your goals really well and will be super functional.
Really excited about this project! I think it is really cool that you picked something that you know you will be able to use for the foreseeable future, and its something that matches the aesthetic you like! I think you could buy some clips off of amazon to attach under the bottom of the arm to help hide the cable, since you have some flat surfaces to mount to. Along with a black cable, I think you could keep your minimalism going! Great job!