
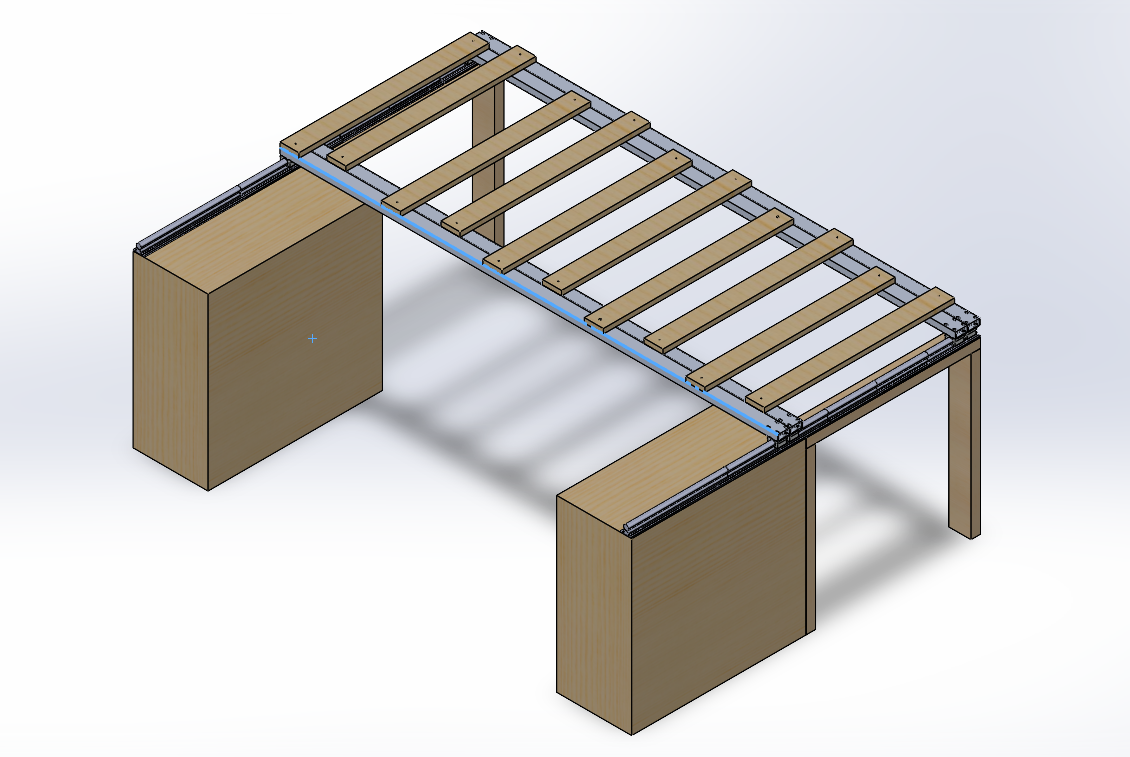
Featured Image: final CAD rendering of my telescoping bed frame design
My motivation for this project was rooted in a shuttle bus I had been building out over the past year. It has been a long-term endeavor that I have really enjoyed. Most of the functional components—like the solar power system, heating, and insulation—had already been completed. More recently, I shifted my attention to the interior design phase of the build, where I appreciated the opportunity to explore my artistic side and curate a personal aesthetic.
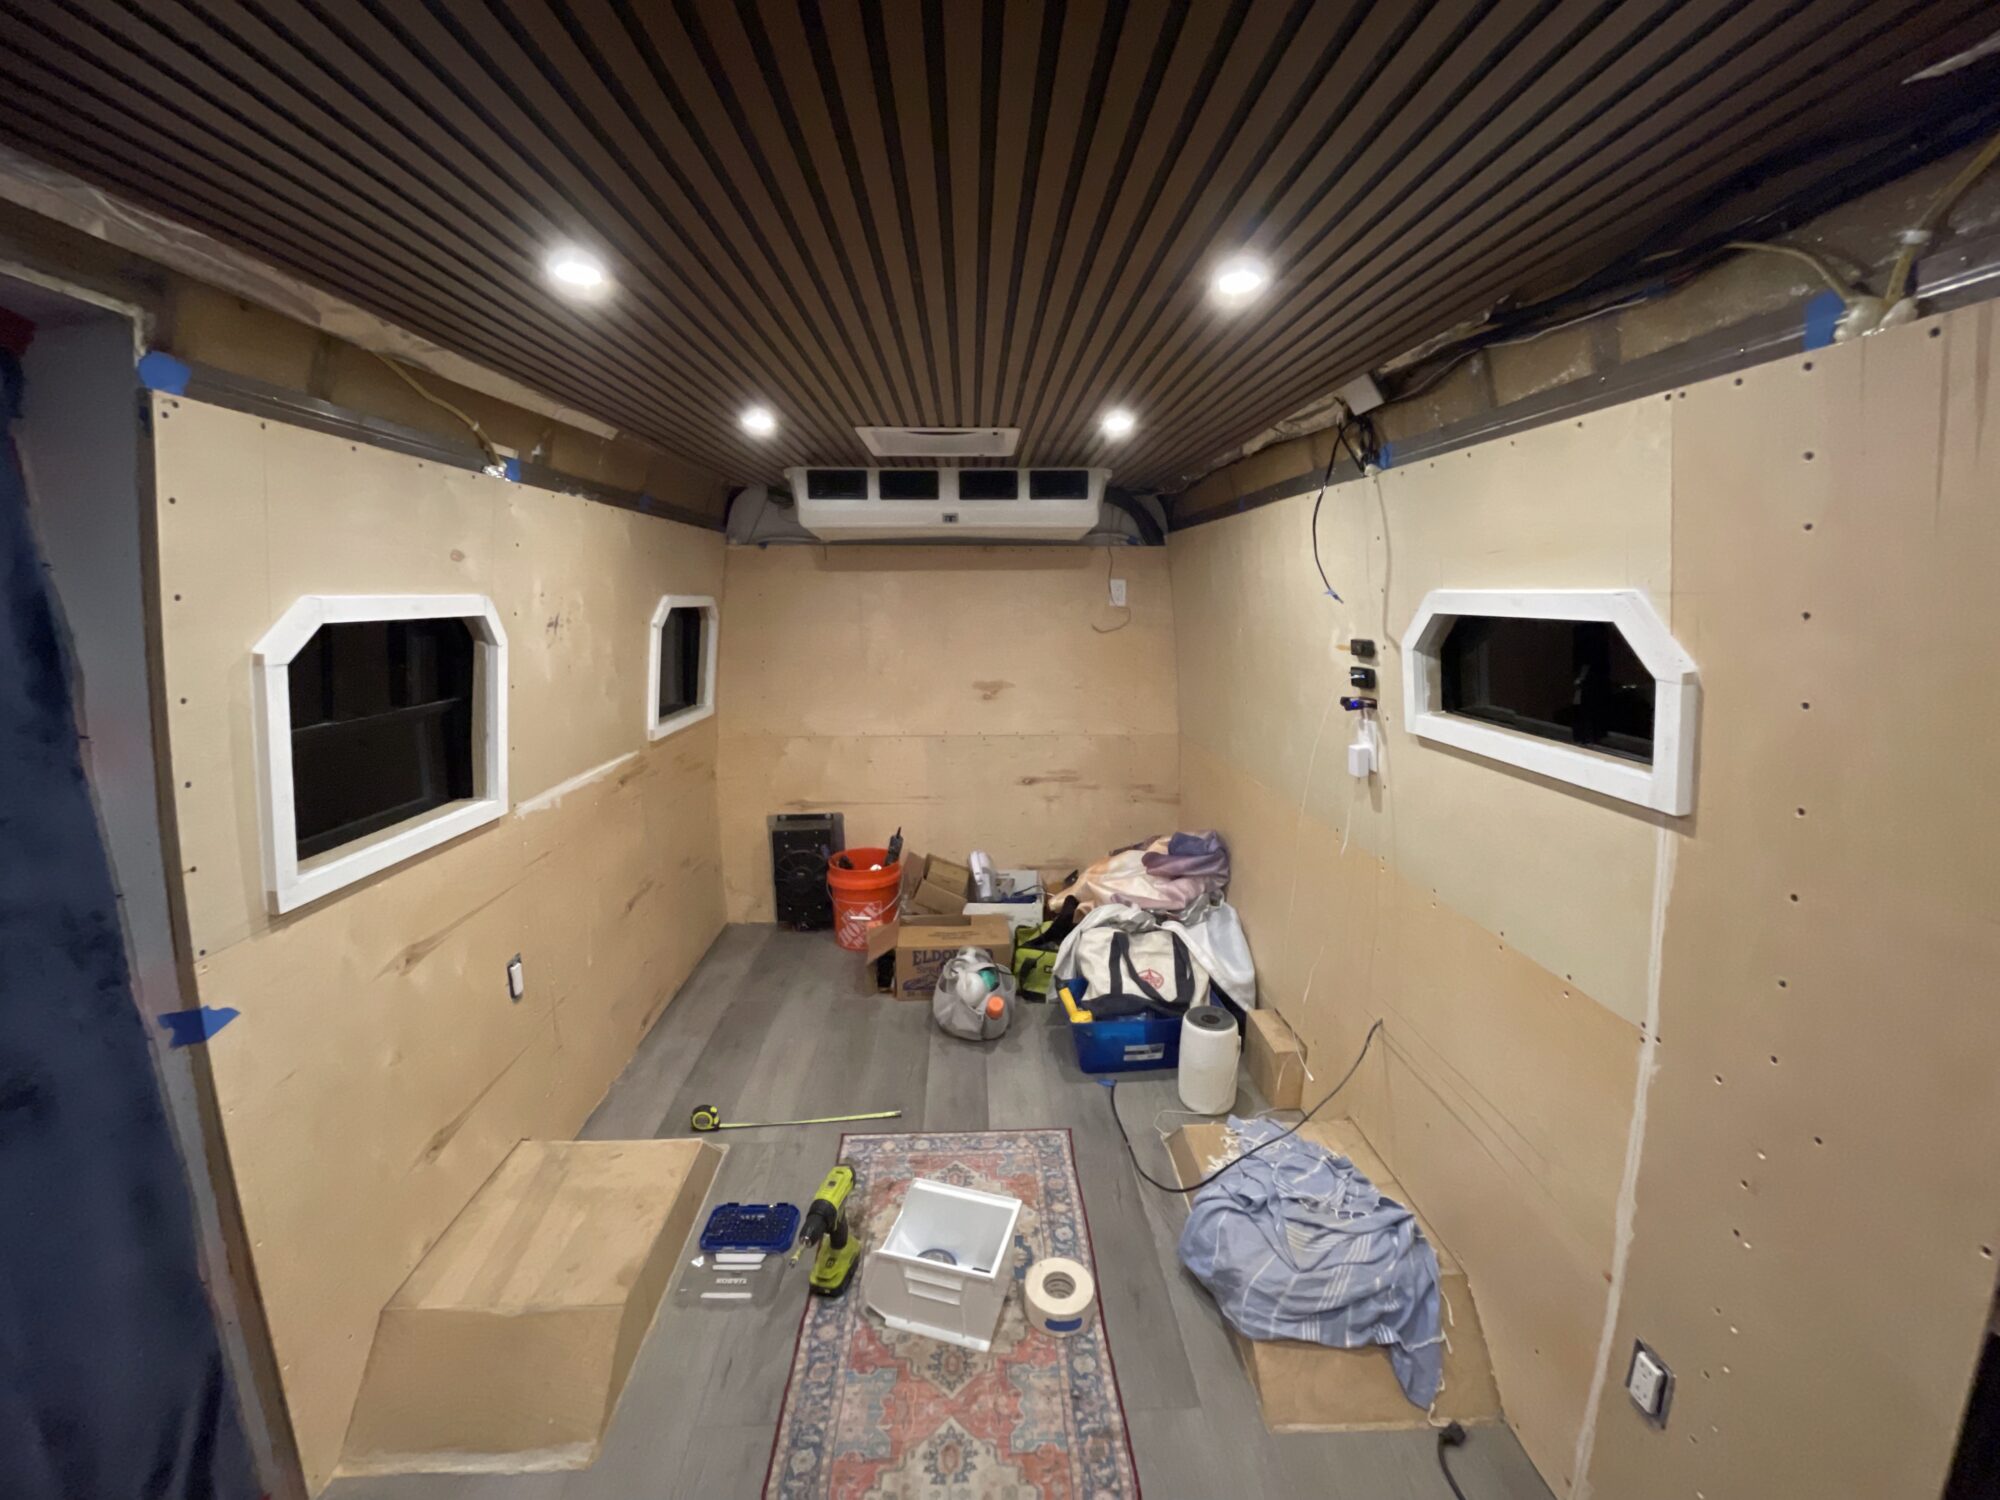
Image 1: The previous space in my bus prior to adding my bed frame
As I worked on the bus, I was also living in it. One of the first things I knew needed immediate improvement was my bed frame, which, at the time, was an Ikea bed wedged into the back of the bus and resting precariously on wooden blocks. I addressed this in an earlier upcycling project by repurposing Skorva beams from another bed frame and integrating them into the bus’s structural walls. I raised the bed and created open storage space underneath. While this was a major improvement, I aimed to take it a step further with this main project by adding more organization and functionality.
In exploring design aesthetics, I was drawn to a natural, rustic look paired with clean, modern simplicity. I felt this combination would reduce visual clutter and complement the outdoor lifestyle the bus was intended to support. I admired Scandinavian design—especially the type seen in IKEA’s furniture—for its balance of form and function. I was particularly fond of smooth, clean wood finishes and decided to use sanded wood as the primary building material. I also planned to color-match the wood supports to the dark brown slatwood ceiling paneling in the bus to create a unified look that helped the space feel more open.
This design approach had already taken shape in my upcycling project, and I was proud of how well the minimalist, Scandinavian-inspired aesthetic came through. Using wood and matching tones helped reinforce the overall modern-rustic vibe of the bus. One of the most valuable pieces of feedback I received was the suggestion to dual-purpose space with the bed frame—using ideas like Murphy beds or integrated shelving. I agreed that increasing the functionality of the bed frame was essential, especially when building a tiny home on wheels where every inch matters.
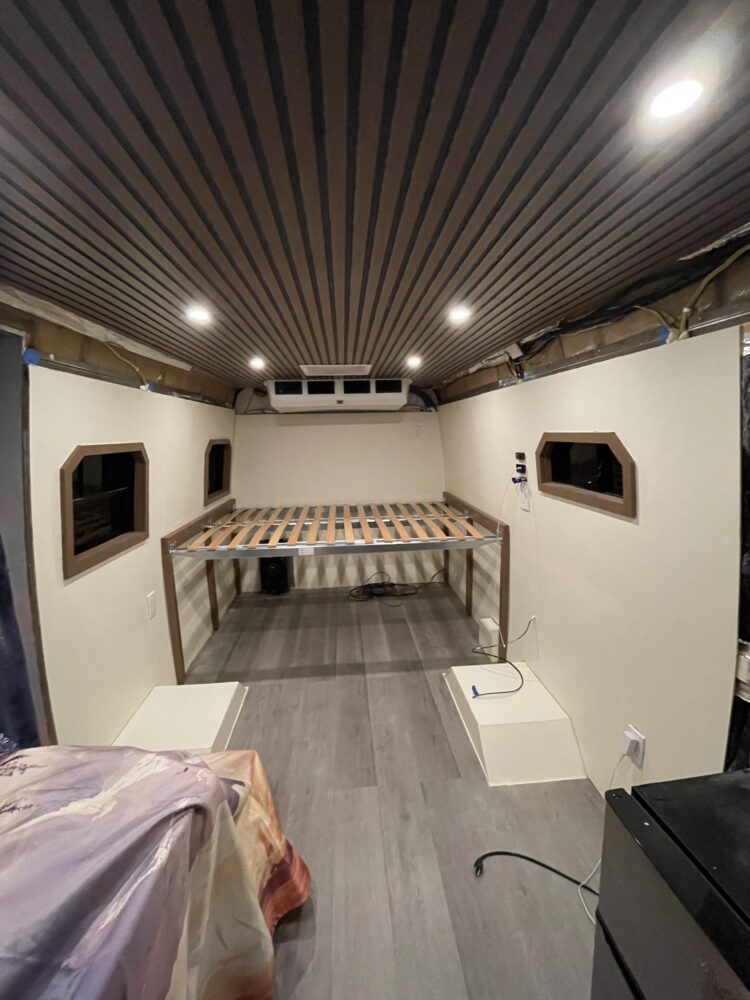
Image 2: My bedframe after completing my upcycling project
After brainstorming several concepts, I settled on the idea of a telescoping bed frame—a solution that aligned perfectly with my minimalist goals. I loved the simplicity and effectiveness of staggered wooden slats sliding into each other, and it allowed me to reuse the Luroy slats from my previous bed. This concept offered a clean and efficient way to collapse the bed and open up floor space during the day.
I drew inspiration from Timber Van Kits, which offered modular telescoping bed frames. I also liked their integrated side cabinets, which I planned to incorporate into my own design. These cabinets would serve a dual purpose: providing storage and structural support, replacing the compressive load-bearing legs I had used before. The goal was a solid bed frame that could telescope down to half its length, sitting atop cabinetry that offered additional storage for the bus.


Images 3 and 4: Telescoping bed frame design inspiration from Timber Van Kits
The biggest challenge was finding a sliding mechanism that could handle a 400 lb dynamic load while fitting within my space constraints. After considerable research, I chose the VEVOR sliding rail system from Amazon. These rails mount directly onto surfaces and include sliding square blocks that I could attach to cross rails using aluminum tubing. This setup gave me four beams that could slide side-to-side across the bed’s width.
Initially, I considered using 8020 aluminum extrusion for the beams due to its modularity. However, I needed a custom hole pattern to interface with the sliding blocks, which defeated the ease-of-use benefit of 8020. I ultimately switched to 2″x1″ aluminum tubing because it was easier to fabricate and better suited design requirements.
The VEVOR rails came with four linear slide bearing blocks that allowed for smooth movement along the rails. Each beam was supported by a pair of blocks, maintaining system stability. The simplicity, strength, and ease of installation were the biggest advantages of this system—especially since it didn’t require cutting into the floor or making irreversible modifications to the bus. This kept the design modular and adaptable for future changes.
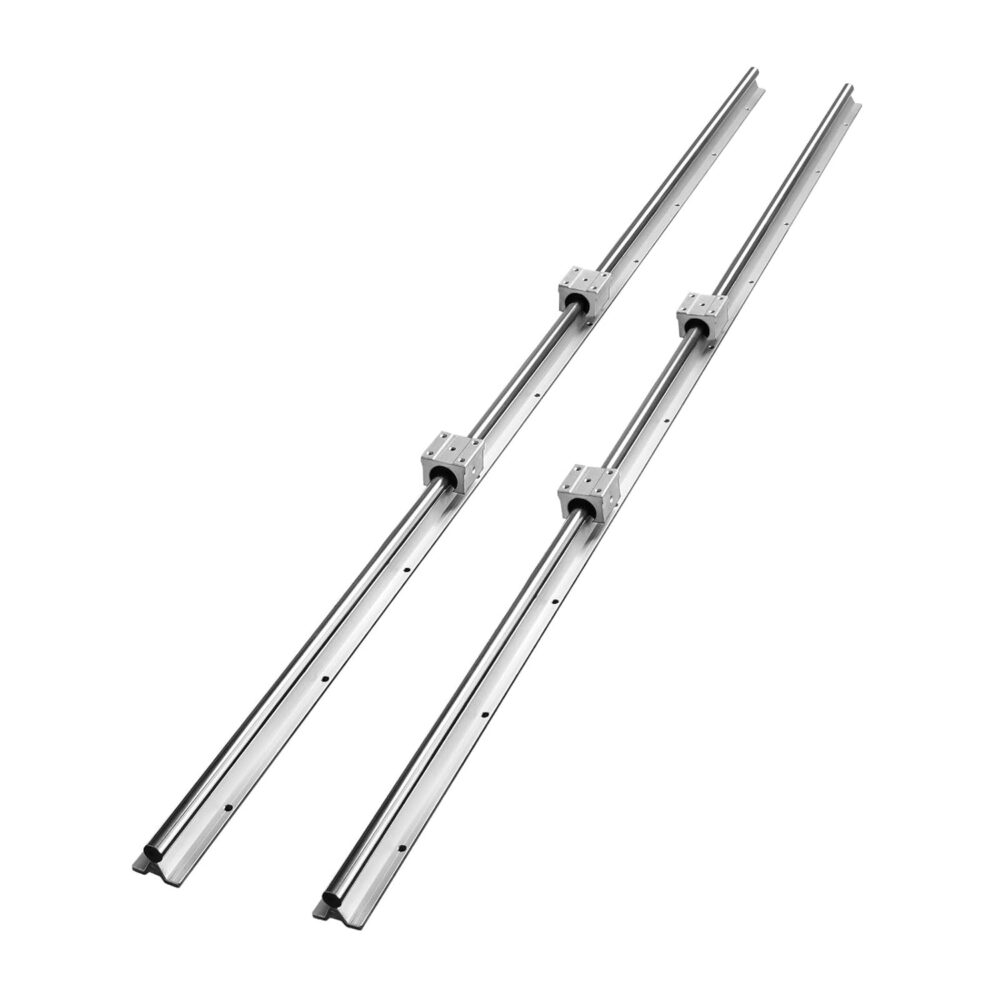
Image 5: Sliding Vevor rail system to allow lengthwise beams to move horizontally
To ensure everything fit together, I sketched out the layout. The plan included two dressers at the foot of the bed, which would support the frame when fully extended. These dressers also formed the base of the runner system that extended into the back of the bus, creating a sturdy, flush setup with extra storage. This runner system was made of sanded 2x4s that kept the simple rustic aesthetic going. I added 2x4s as legs as well to provide structural support where the dressers ended.
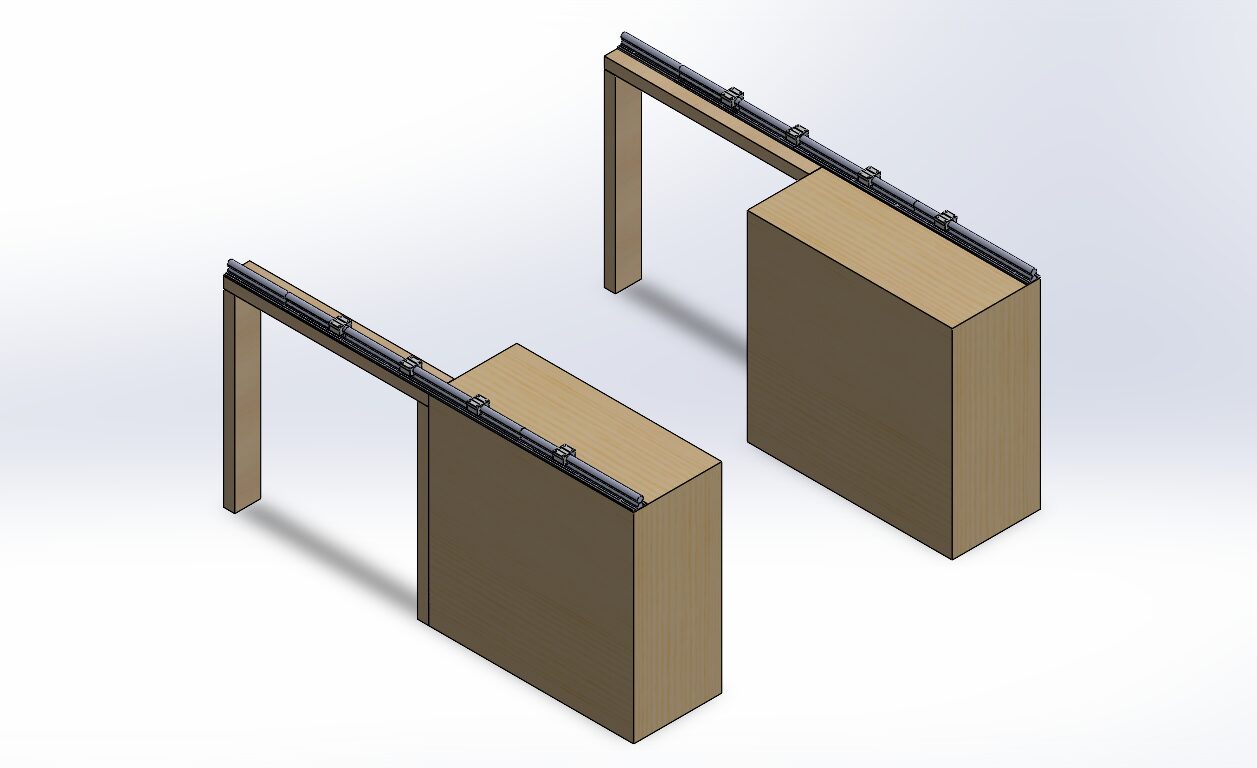
Image 6: CAD rendering of the design layout for the foundation of the sliding bedframe
Choosing the right dressers was surprisingly critical. They needed to be about 27” wide—half the width of a full-size bed—so the bed could nest on top of them. They also had to be between 24” and 30” tall to leave enough clearance under the frame without blocking the windows. This was a problem I noticed after the upcycled bed frame that I made. The mattress stuck up too high on top of the bed frame and obstructed some of my window view.
After plenty of searching, I landed on the Portland 3-Drawer White Chest from Home Depot. They fit the dimensions perfectly and had a clean, minimalist finish that aligned with my aesthetic. I debated several drawer styles—some too rustic, others with clashing hardware—but ultimately chose the simplest design so that attention remained on the bedframe.
These dressers provided just the right amount of storage without taking up too much floor space when the bed was collapsed. Once they were in place, I planned to mount the sliders parallel to one another on top of the dressers and secure them to a runner system extending into the bus’s rear. This would keep the bed level and supported throughout its full range of motion.

Image 7: Portland 3-Drawer White Chest from Home Depot that I used as organizational cabinets
To make it all work, I connected the four beams into two sliding sets using interlocking wooden slats. These slats created the telescoping effect, allowing the bed to shrink down to half its size when not in use while still supporting a full-sized mattress when extended. The first and third beams were interconnected, and the second and fourth beams were interconnected so that each set could slide in without interfering with each other. This would allow for my bus to provide a full-sized sleeping setup but still have optimized floor space when not in use.
The biggest benefit of this design was that it didn’t rely on complex hinges or folding parts. The interlocking slats transitioned smoothly between compact and extended states without compromising stability. I briefly considered using a folding foam mattress but decided to keep my current one to maintain comfort. Eventually, I might add the folding mattress when I am using this shuttle bus as a weekend rig where comfort is not as important.
The parallel cabinets were connected with support runners, and the VEVOR rails ran across the top. I included a rendering of the pillow block mounted on the sliding rail for reference. These blocks moved freely and were where I mounted the lengthwise bedframe beams.

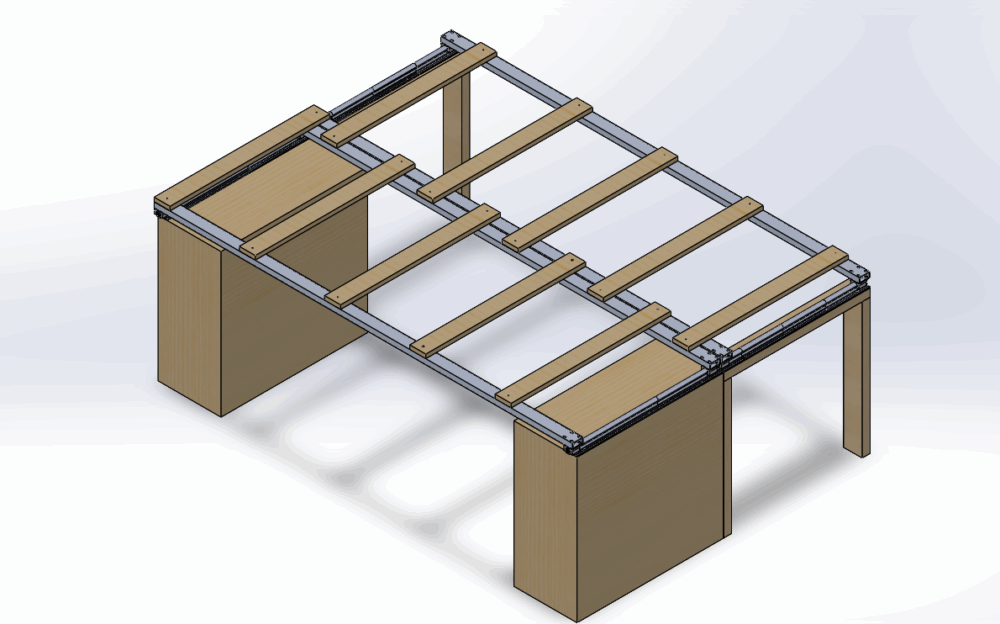
Images 8 and 9: Final CAD rendering of closed and extended telescoping bedframe with interlocking slats
There were some hiccups during the process, mainly with materials. I initially ordered the wrong sliding blocks, which delayed my ability to measure and cut other components. Although I recently received the correct aluminum tubing, I still needed to machine the custom slots for the mounting screws. Fortunately, all other fabrication tasks were complete, and I plan to provide more detail in the coming week. At this point, only the final assembly remains.
By week 13, I realized I might not be able to finish the project entirely before the semester’s end. I was satisfied with completing the design and fabrication stages for this final report, but I still hope to finish the assembly to show off at expo. This means my final report covers all progress made up until this point, and the assembly will still reach completion in the next week.
Overall, this was a complex and rewarding project. While I didn’t meet the original end goal in time, I was proud of the progress I made. The shuttle bus continues to be an evolving personal project, and I am grateful to integrate it into my coursework and focus on design elements I might have otherwise overlooked.
2 Comments. Leave new
This is a super cool and well-executed project! I love how you balanced design and function, especially by reusing materials like the Luroy slats and matching the wood tones to your bus interior. The telescoping design is smart and fits perfectly with your minimalist goals. I have one question: How did you test the sliding mechanism’s stability under load before committing to it?
Hi Nita, I appreciate your comment on my post! I am very proud of the telescoping component. As for load stability, I had not yet assembled the bed frame when I created this part 1 post. I did, however, run preliminary FEA and hand calculations to verify the beams I selected (all other parts were purchased rated to my desired load). When I did these processes, I got a coinciding safety factor of 2.5. This made me proceed with buying the aluminum tubing that I selected for this project, but I also conducted a weight test upon assembly of the overall bedframe. This will be discussed in my post this upcoming week for part 2 describing my process of the build.