
How does a luthier make an electric guitar? At the outset, my guess was as good as the next guy’s. Building isn’t terribly complicated, like putting parts together into a Franken-Strat, but what about cutting an original shape yourself?
The Extol electric guitar is my own custom design that seeks to embody the characteristics of instruments made in the Traditional Lutherie aesthetic. Lutherie is the practice of luthiers – makers of stringed instruments (and especially, in this case, guitars). This includes earthy color tones emphasizing unique and/or exotic wood grains via bright (clear) finishes and preservation of the grains’ kinesthetic appeals as well, i.e. feeling the grain of the neck in your hand as you play. It also relies on body shapes that are the opposite of wild, favoring those similar to acoustic guitars which are driven by necessity of their acoustic characteristics. Also referring to shapes, traditional instruments often feature traditional f-shaped sound holes as are familiar on violins, cellos, etc. Hardware and pickguards minimize the attention they draw or are altogether absent so the grain is emphasized.
Timeline Summary
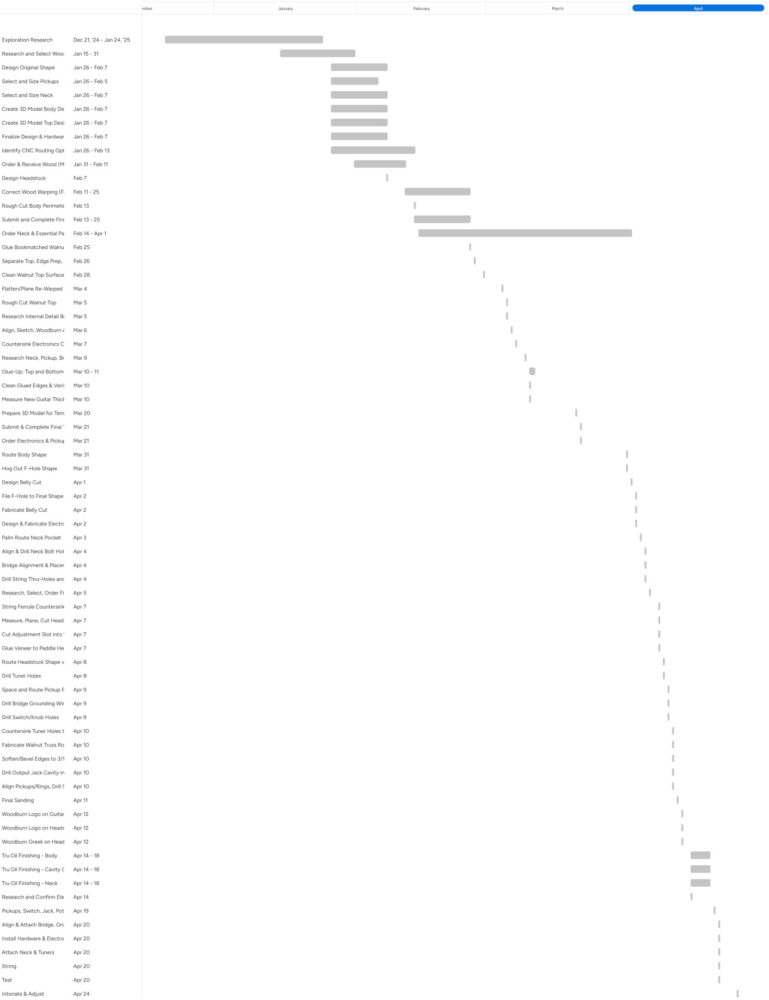
Start-to-finish, the designing and manufacturing process took me just over four months, December 2024 to April 2025. I had to begin with some pretty extensive research – understanding the differences between various existing guitar models, what each does best, how they’re made and why, and simply what about them I liked or didn’t like. Once I had the basic driving characteristics I wanted to imitate and build upon, I did some rough sketches and tinkered around with the lines in CAD, where I could make small adjustments to small sections of my lines at a time. Those lines were soon translated to the physical artifact with first cuts to the mahogany body in mid-February. Phase One of construction concluded on 10 March with the glue-up of the mahogany body and walnut top. Then came a waiting period for critical parts to arrive over Spring Break and acrylic templates to be laser cut ahead of Phase 2. Work picked up again on 31 March and moved very quickly (by virtue of lots of hours in the woodshop) until finish sanding and detail woodburning finished Phase 2 on 12 April. I applied finishing oil over five more days and, once cured, learned to solder on the fly in wiring all electronics. I finally tested the guitar on 20 April to a resounding and feedback-hum-free success. A detailed Gantt chart with a full 70-step breakdown is featured at the end of this post.
Design & Fabrication
Pictures help tell the story. Lots of pictures.
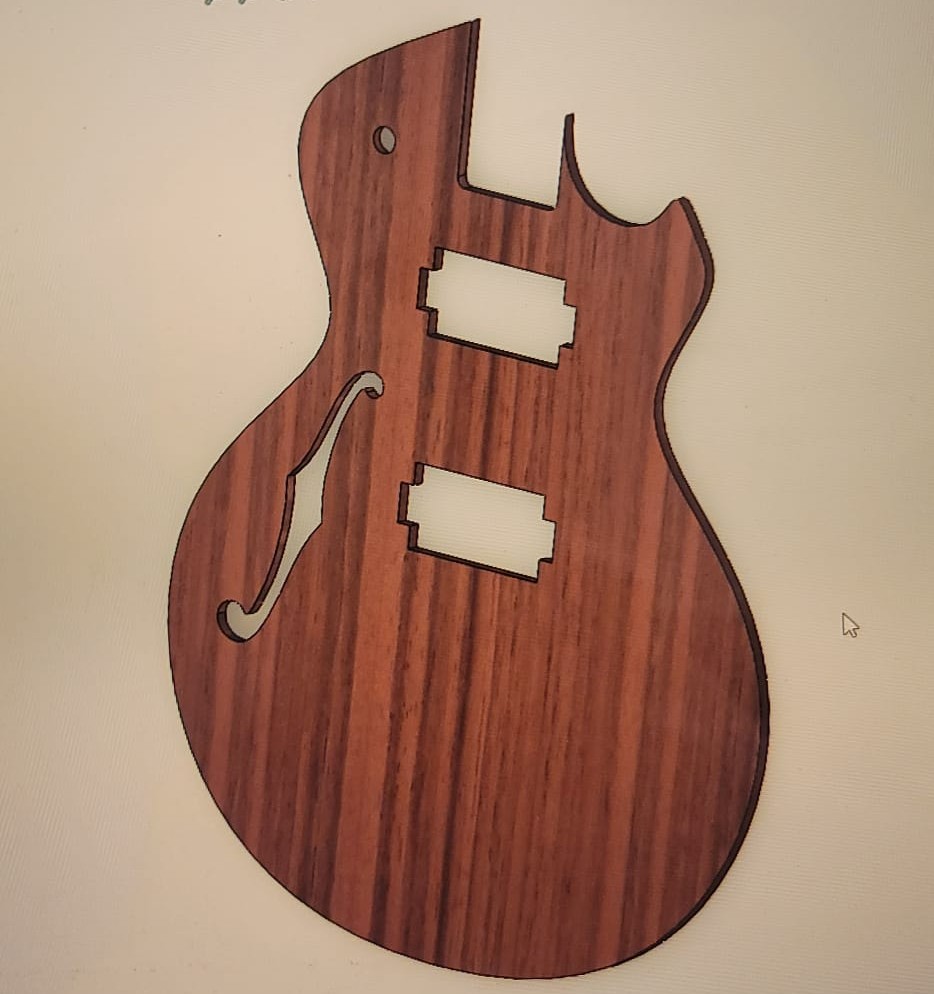 While researching and trying ideas on for size, I found the best way to visualize what this guitar might be was through 3D modeling. I created an outline of my original guitar body style and found ways to make it a semi-hollow design with potential for some acoustic resonance. A general yet not final layout was created in SolidWorks to fully visualize the aesthetic. So as to not “cheaply” mimic a true archtop design, I’ve opted for a single F-Hole to communicate the acoustic effect without pretending to be something it’s not.
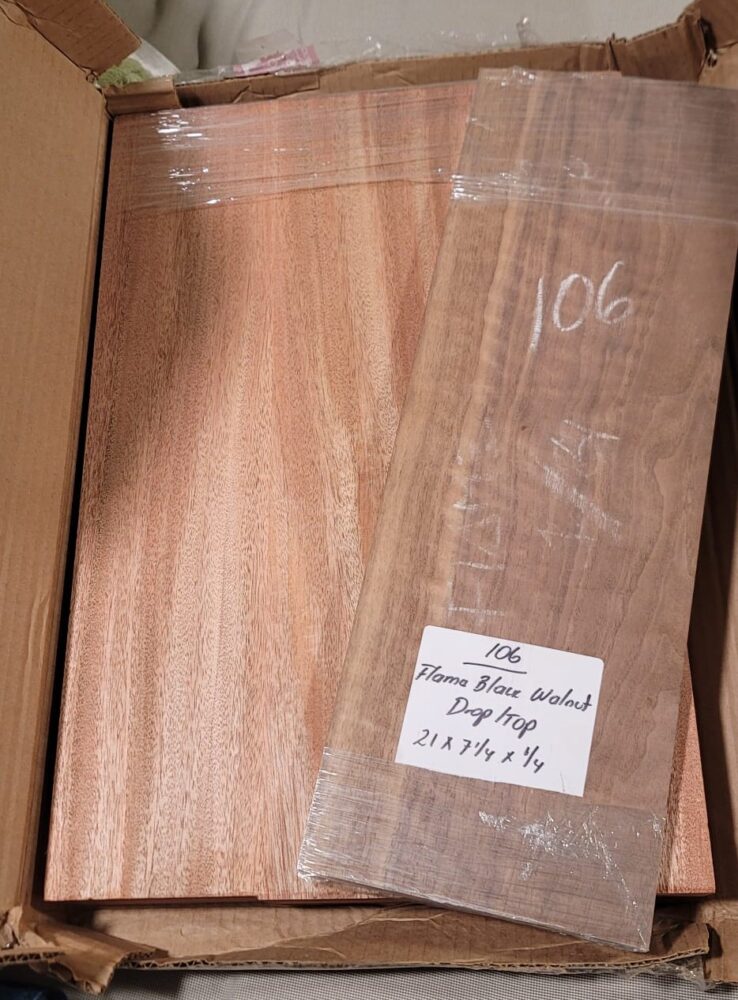
I then committed to the endeavor by making the project’s first purchase: An African mahogany guitar body blank and 1/4″ drop top boards made of bookmatched flamed black walnut.
Fabrication Phase One
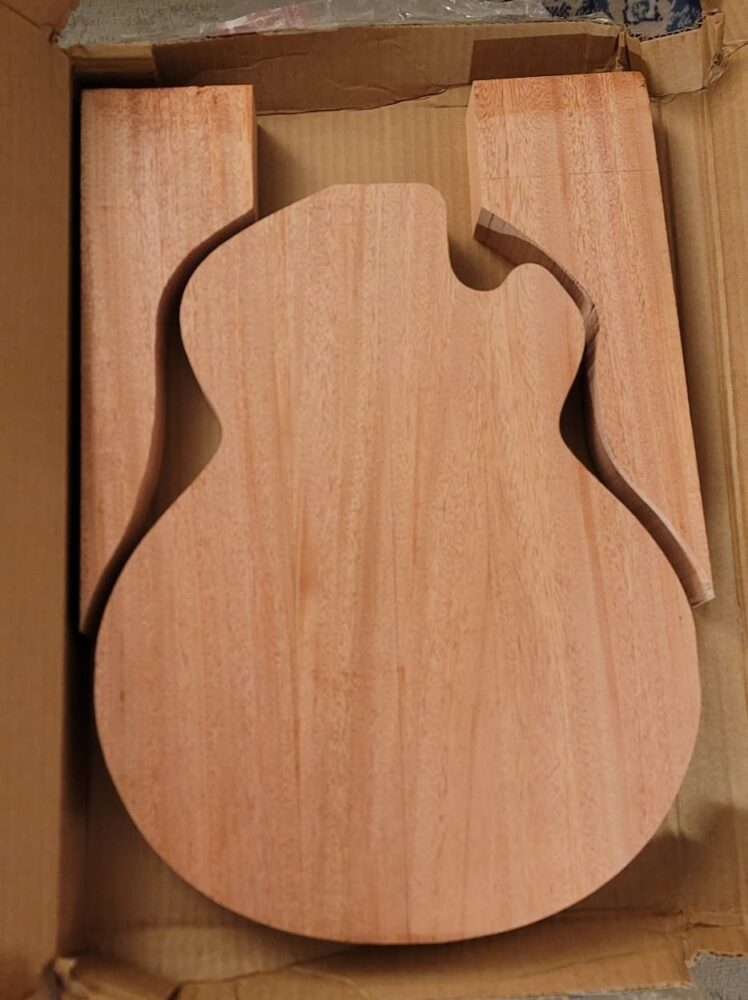 The first of many fabrication evolutions was to trace from a blueprint the guitar’s rough outline (with a 1/2″ offset around the perimeter in case of early errors), and cut it out of the mahogany body blank with the band saw. This was the first and early “aha” moment, seeing a guitar-shaped object become real and tangible.
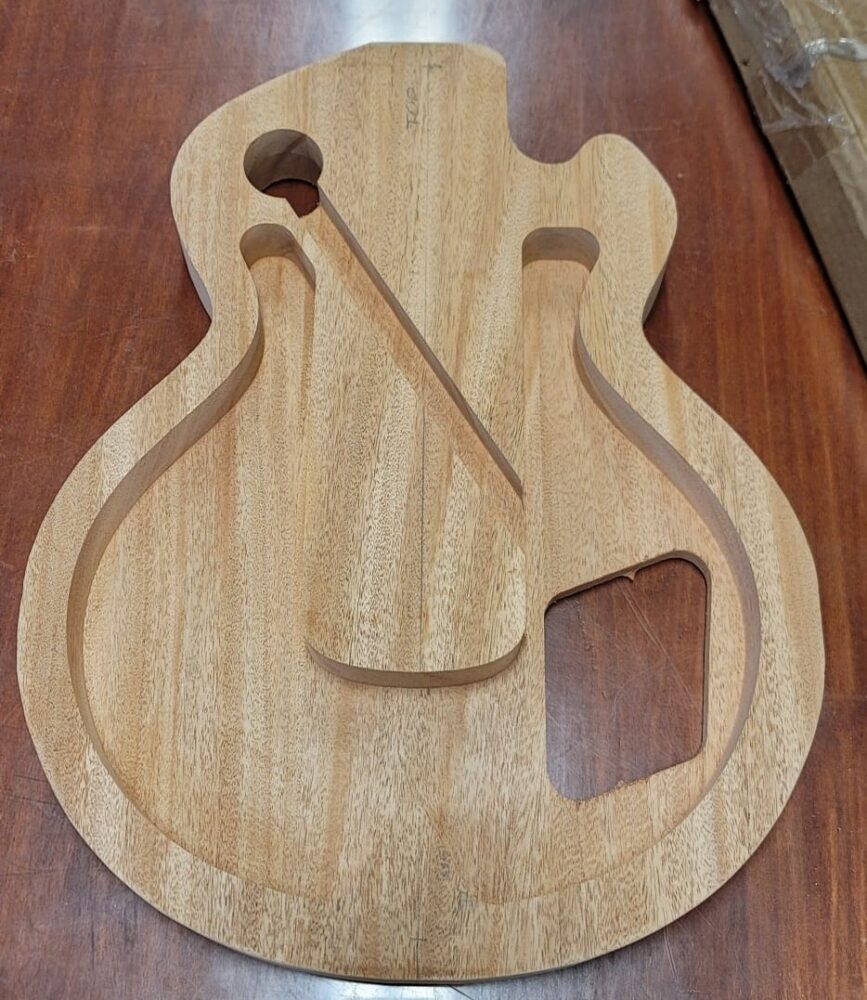
I submitted this roughly cut body for CNC routing through the Environmental Design school’s CLC. The cutting and hollowing turned out excellent but had a notable 1/8″ offset to the right of center. I re-marked the centerline true to internal structure and would ultimately remedy this by performing the final perimeter cuts later relative to true structural center. Much of this process was learning how to correct mistakes when they happened, and I’m very thankful to have left that 1/2″ offset for such a purpose.
![]() I ran into challenges gluing the bookmatched walnut top together to make one single board/panel. The walnut cupped significantly over a few weeks in the dry Colorado air, and I learned a lesson in using too little and too weak a variety of glue. This required me to saw the poorly joined edge again and make another attempt with lessons learned. Fortunately, the gluing held the second time, and I only had to clean glue off of and flatten the seam of a very nicely bookmatched walnut drop top (albeit extremely warped).
I ran into challenges gluing the bookmatched walnut top together to make one single board/panel. The walnut cupped significantly over a few weeks in the dry Colorado air, and I learned a lesson in using too little and too weak a variety of glue. This required me to saw the poorly joined edge again and make another attempt with lessons learned. Fortunately, the gluing held the second time, and I only had to clean glue off of and flatten the seam of a very nicely bookmatched walnut drop top (albeit extremely warped).
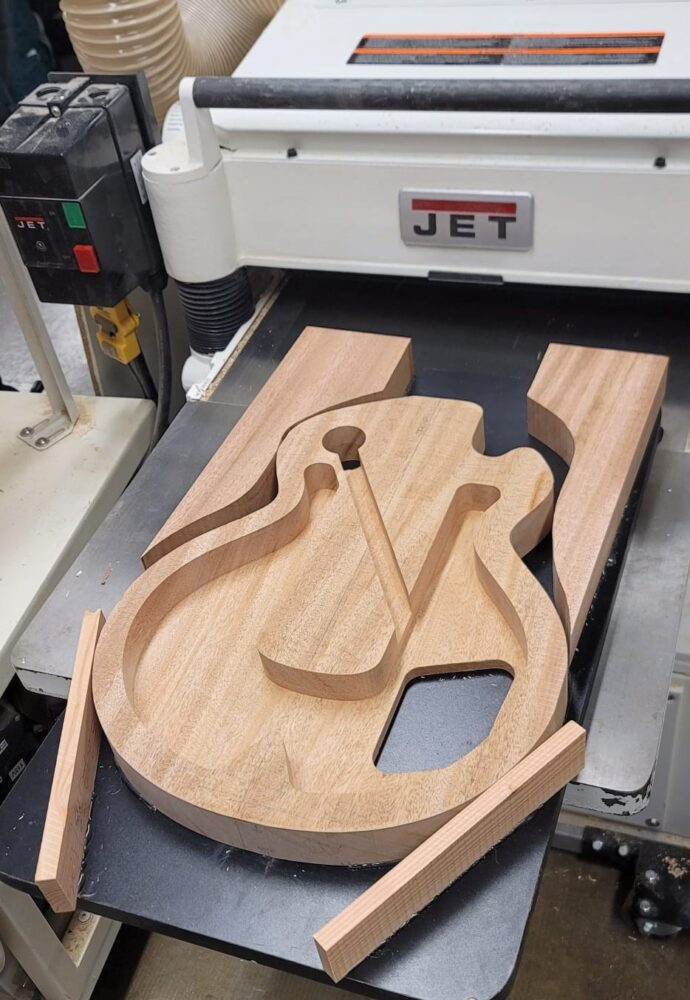 More warping trouble early… With the removal of so much material through CNC routing, my mahogany body also began to warp… a lot. Once it settled, I had to learn how to gradually flatten an already carved component by removing material through a planer. Making passes on both sides of the guitar, just enough material was removed to make it flat and flush once more.
 This also meant I could confidently trace the guitar’s shape against the walnut drop top. I marked the guitar’s outline with pencil and took the walnut board to the band saw to make a rough outline. After some cleaning up and sanding the joining side, the flamed walnut drop top was ready for gluing to the main body.
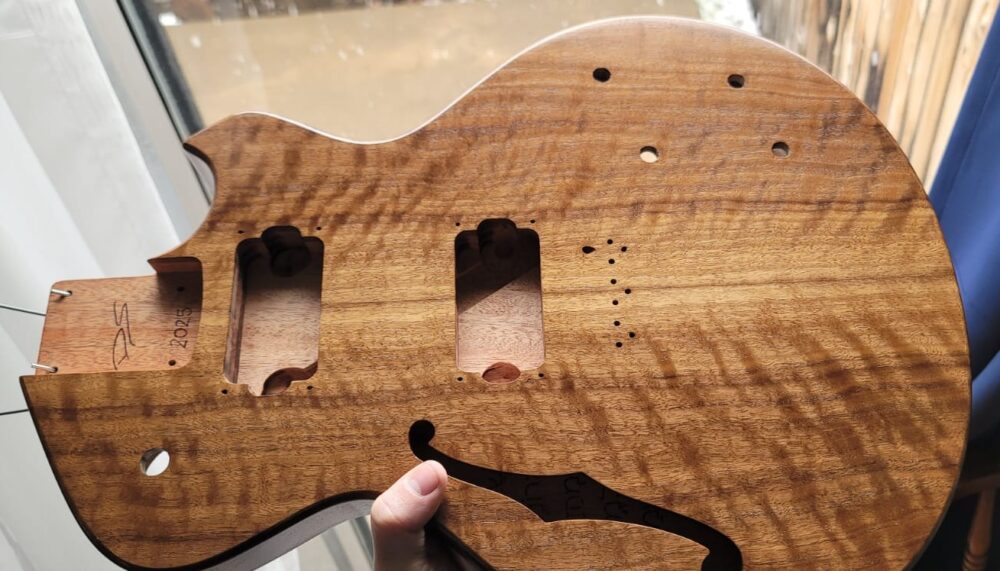
 With my plans to have an F-hole on the guitar’s left side, I wanted to add a subtle artistic feature to the inside of the guitar that would eventually be visible through the opening. I turned to Scripture for a phrase that would be thematic of my motivations to build and play an instrument in the first place. From the Bible’s original Hebrew, I found and included the words read in English, “praise and extol and honor the King of heaven.” Tracing these ancient letters first in pencil, I made them a permanent feature on the guitar’s interior by woodburning. So thrilled with the process and end result, I found more ways to tastefully incorporate subtle woodburning in later design stages.
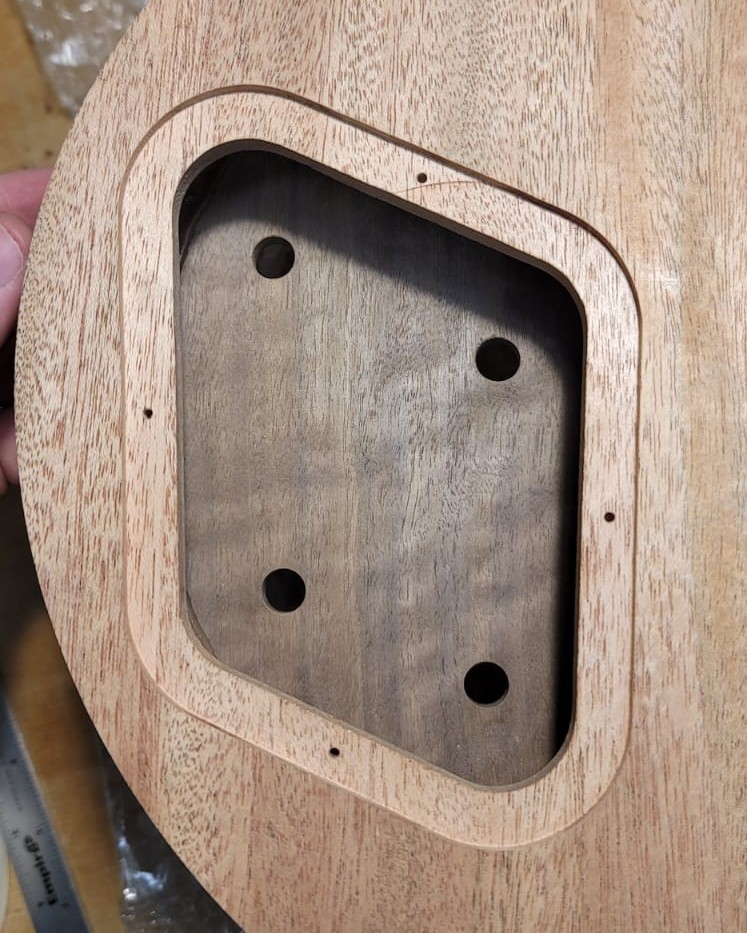
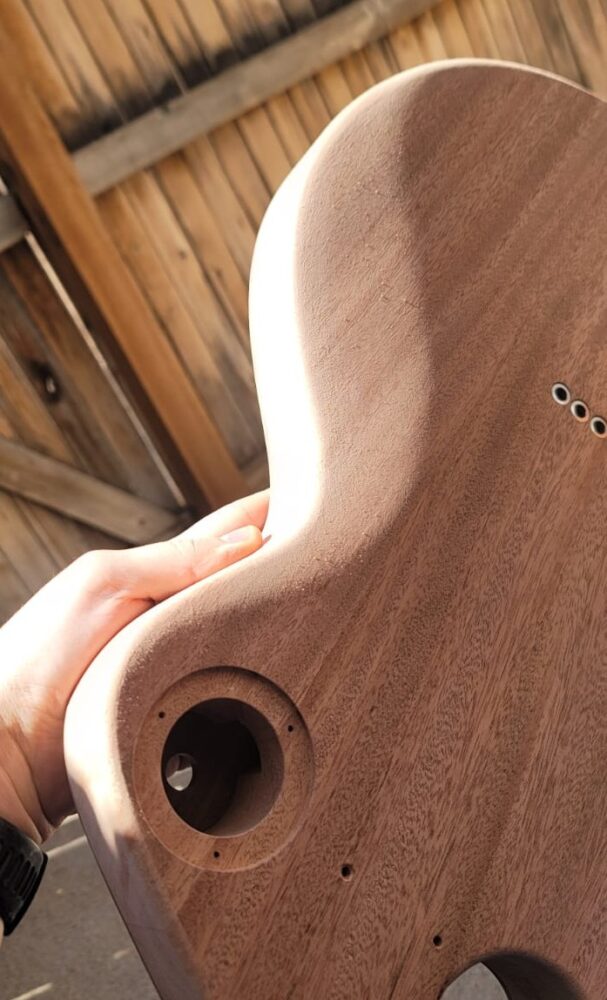
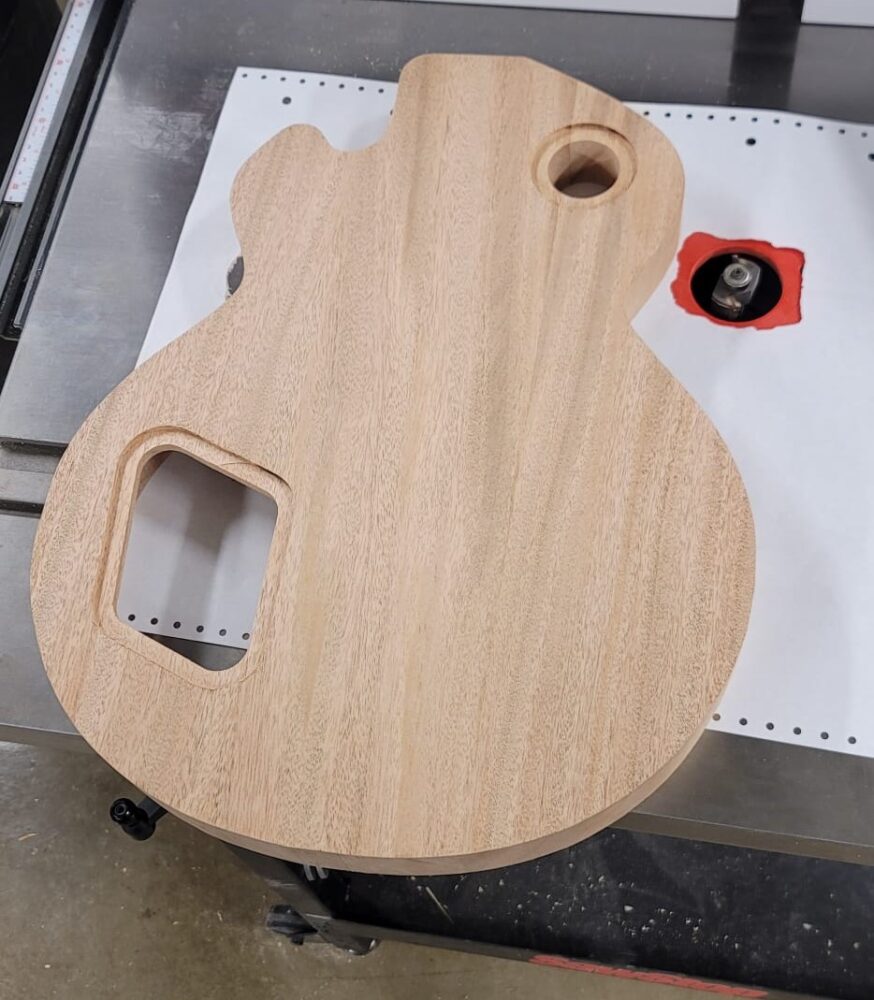 I also opted to countersink the cavities for my electronic controls at this stage in the design since the guitar would be easiest to handle and navigate on a table router without the top glued on. I used the table router to add a 1/8″ deep, 3/8″ offset around the perimeter of both cavities. This allows me to fabricate custom covers later on that will screw in overtop the electronics inside and hide them behind another nicely finished piece of walnut
 The first pivotal and stressful operation to date, my next step was to glue the walnut top and mahogany body together. This meant I’d be fighting against the warped walnut top to get a proper seal – and I’d be racing against time. Glue strong enough to hold the warped corners of the top down (Titebond III) only has minutes before it begins to harden and set. I decided to glue the guitar face down on a perfectly flat piece of granite countertop available in the Makerspace.
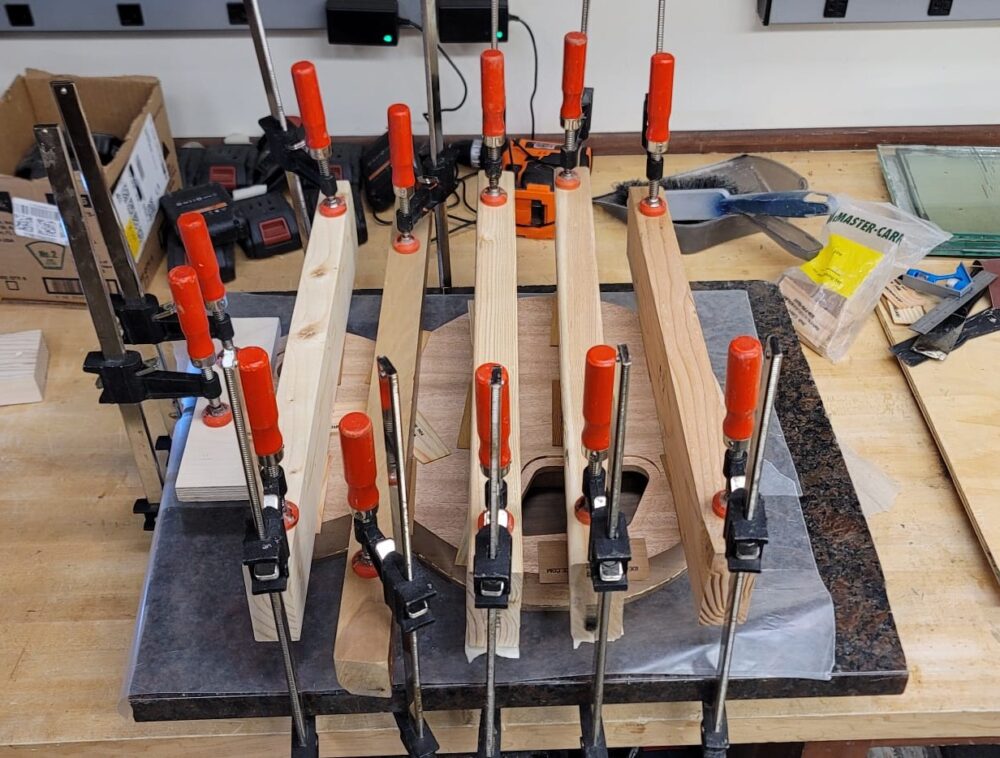
After trying a few configurations, I prepped my station with a cross-beam pattern of cauls that would distribute force across the body of the guitar. 12 clamps would mean plenty of clamping force to hold the guitar flat against the granite and tightly for ensuring the entire mating surface was working for me. I completed the glue up in about 12 minutes and then left it over the weekend to cure.
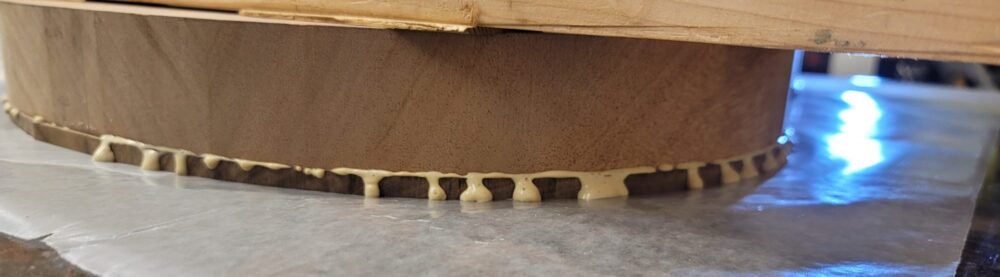
After an entire weekend of stressing over my gluing rig, I returned to find the body glued tightly and with near perfect seams.
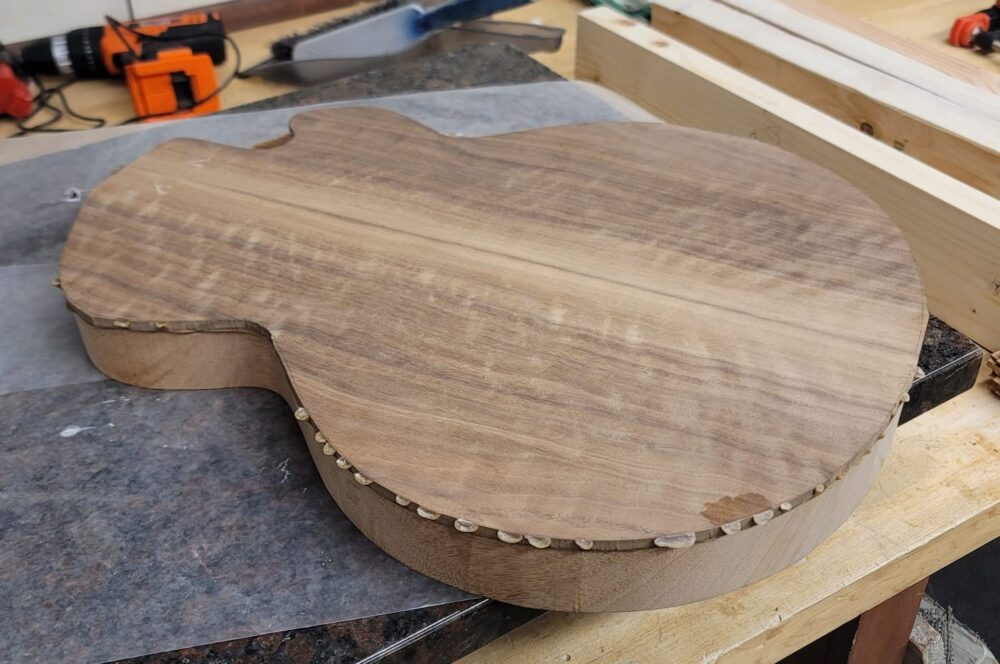
Not only was the glue tightly bonded, but compressing the guitar against flat granite also resulted in an extremely flat top that was previously warped beyond repair. I cleaned up the dried glue squeeze-out to make it easier to handle and tapped a few times against the face to hear the acoustics; subtle yet recognizable. It’s exactly wat I was going for.
 This stage concluded the first phase of fabrication and put the project on hold to wait for critical parts arrival. Apart from hardware and electronics, I ordered a “paddle head” neck from Warmoth.com. I didn’t want to risk error in the fretboard which would make the instrument unplayable, so I’m very glad to have gone this route in hindsight. A paddle head is effectively a blank headstock, which allowed me to cut my own original headstock shape and truly set this guitar apart.
Spring Break also meant the various shops on campus were closed, forcing me to take a break until after.
Fabrication Phase Two
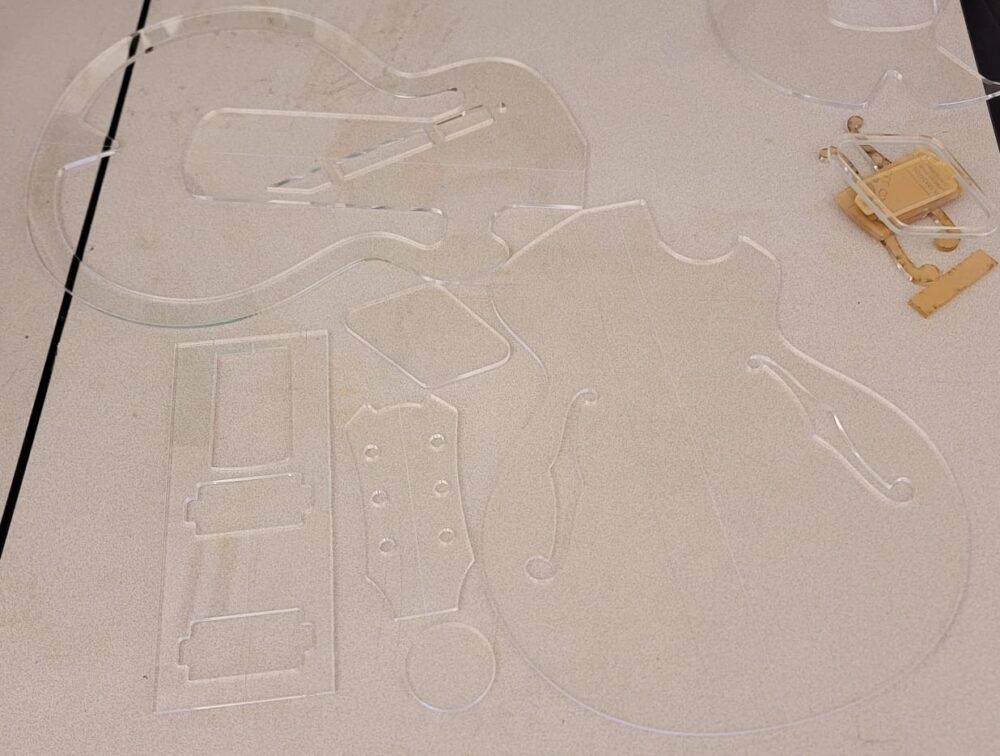
Just before the break, however, I created 1/4″ acrylic templates for all critical shapes and dimensions with the CLC’s laser cutter. In theory, now, I could replicate this guitar in the future without a CNC router. Over break, all of the remaining part’s I’d ordered arrived in the mail as well. All parts in-hand meant more accurate measurements and no more time waiting for critical pieces to arrive.
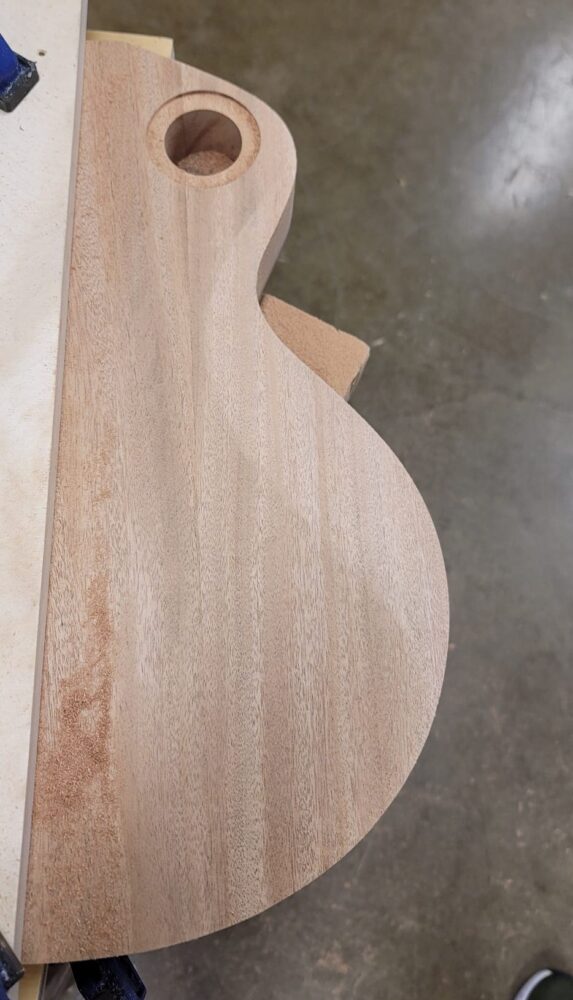
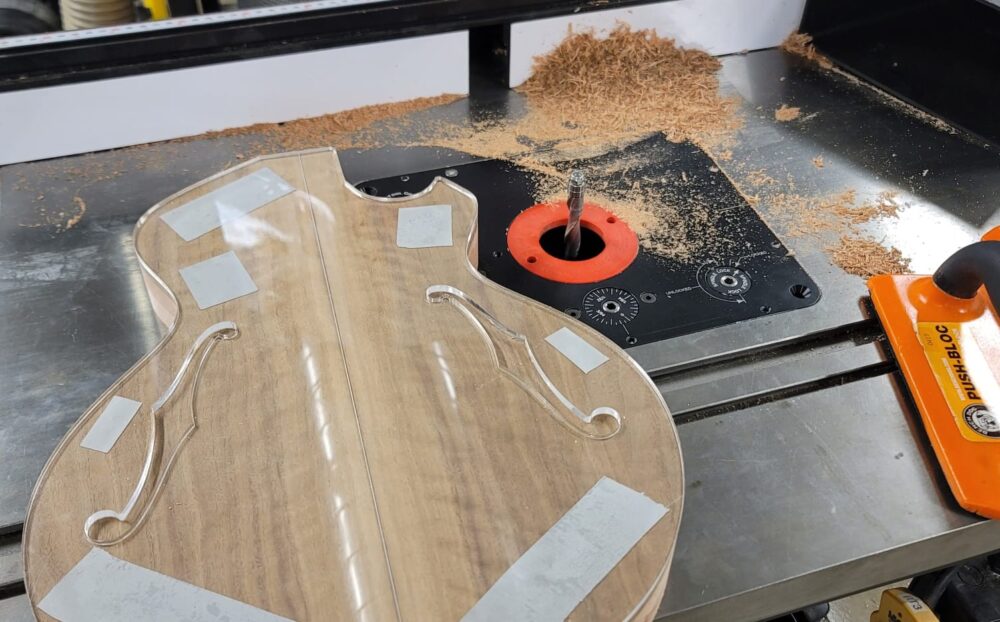 After the week’s hiatus, I hit the ground running in fabrication phase two with some very important routing work: Aligning the body shaping template along the guitar’s center seam, securing it to the body with double-sided tape, and routing its final shape on the routing table.
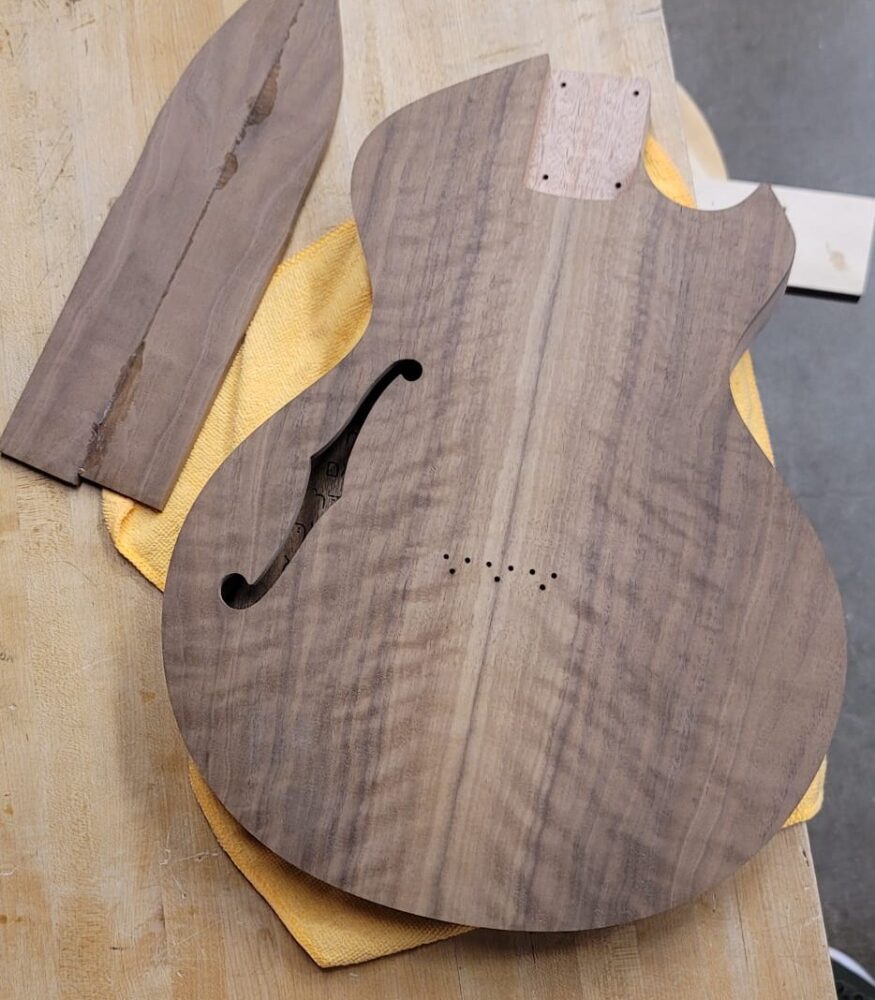
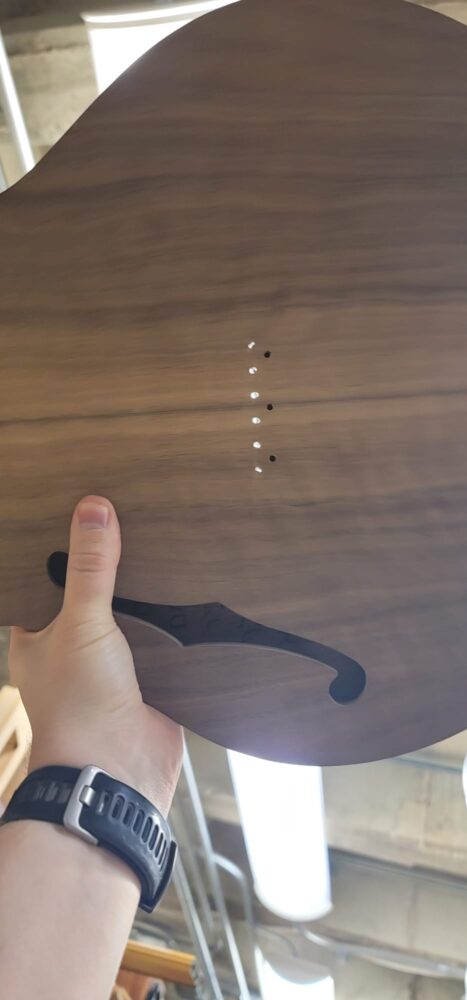
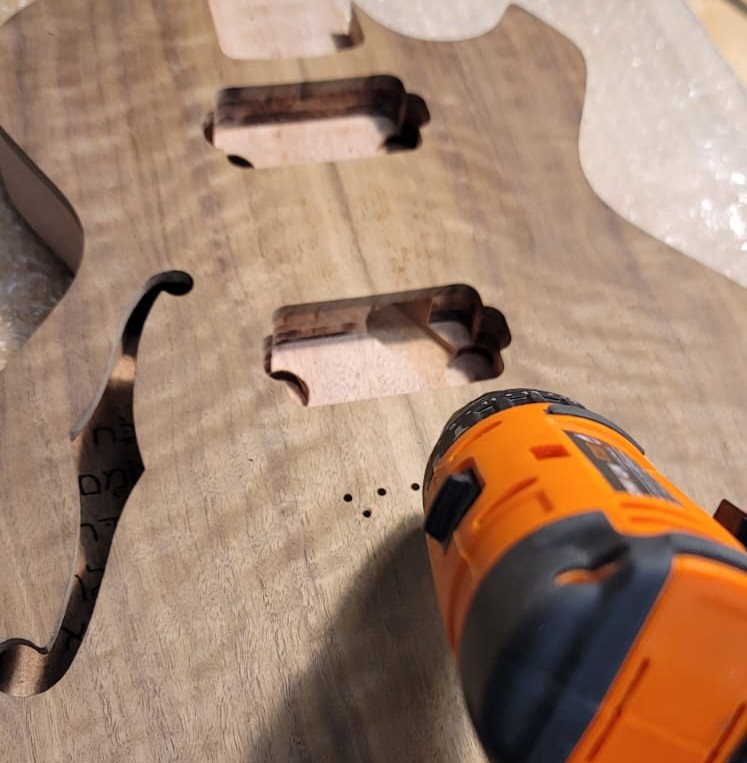
![]() With the body template still attached, I drilled away material from what would soon be the guitar’s single, left-sided F-hole.
With the body template still attached, I drilled away material from what would soon be the guitar’s single, left-sided F-hole.
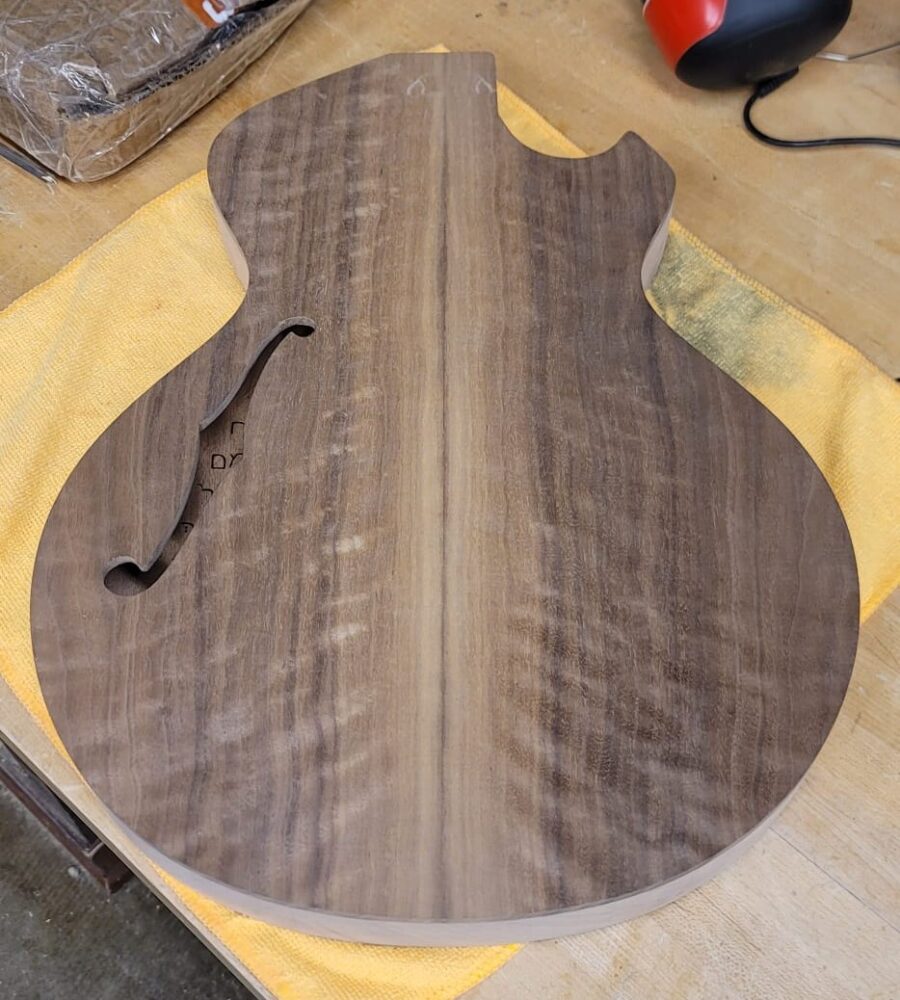
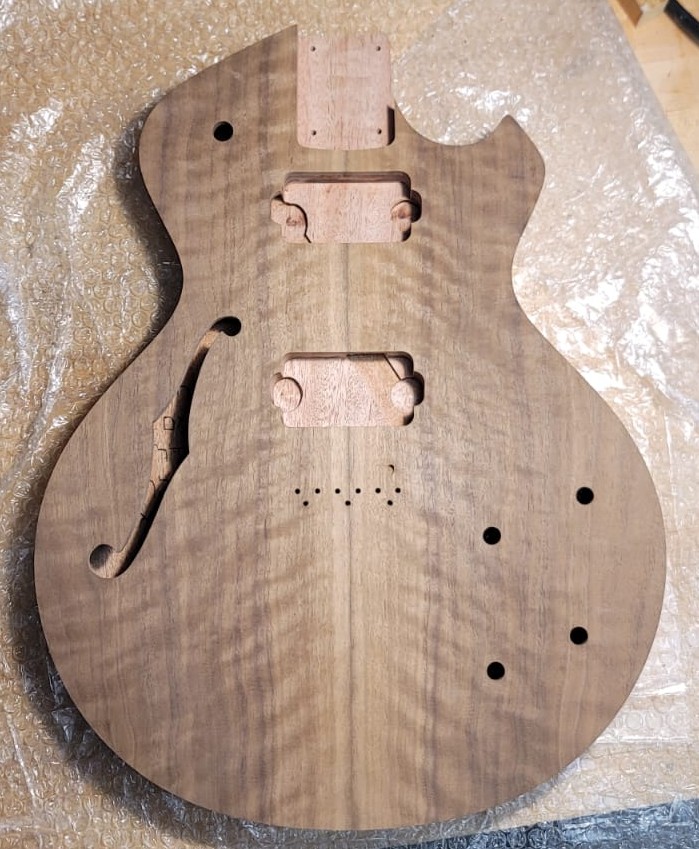
I then removed the template and wiped away any tape residue using mineral spirits. This gave a first sneak peak at what the walnut top will look like when an oil finish was finally applied. The color deepens richly, and the flaming in the wood emerges just a beautifully.
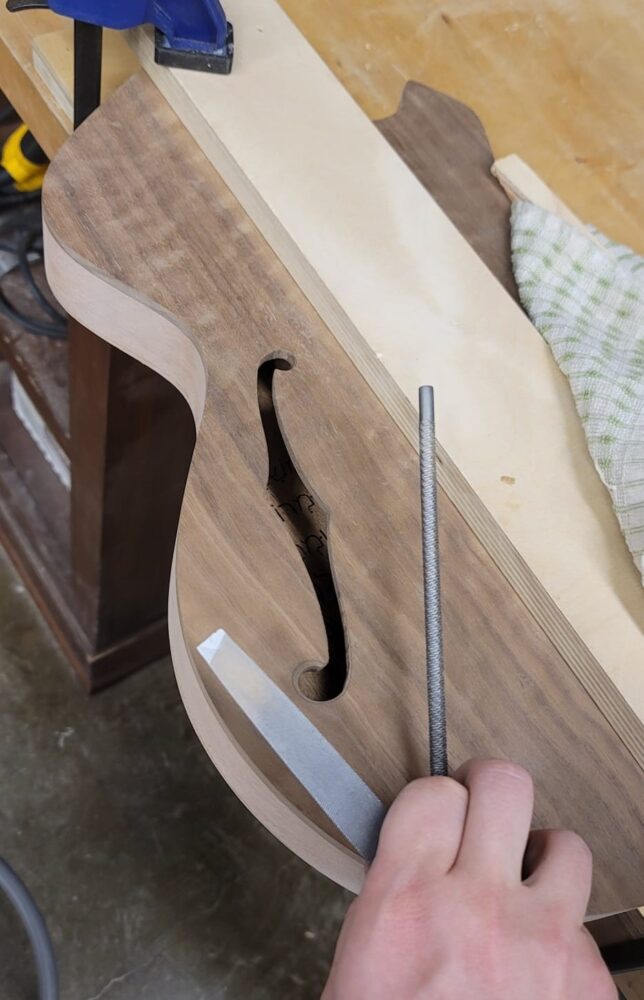 With much of the material drilled, I used files to shave away the remaining material from the F-hole up to its final shape I’d traced with the template still on.
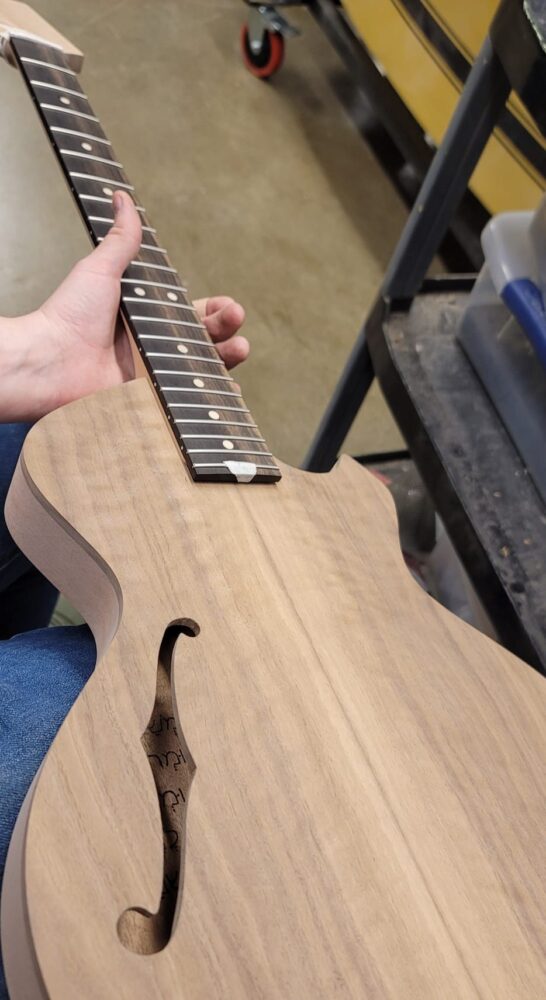
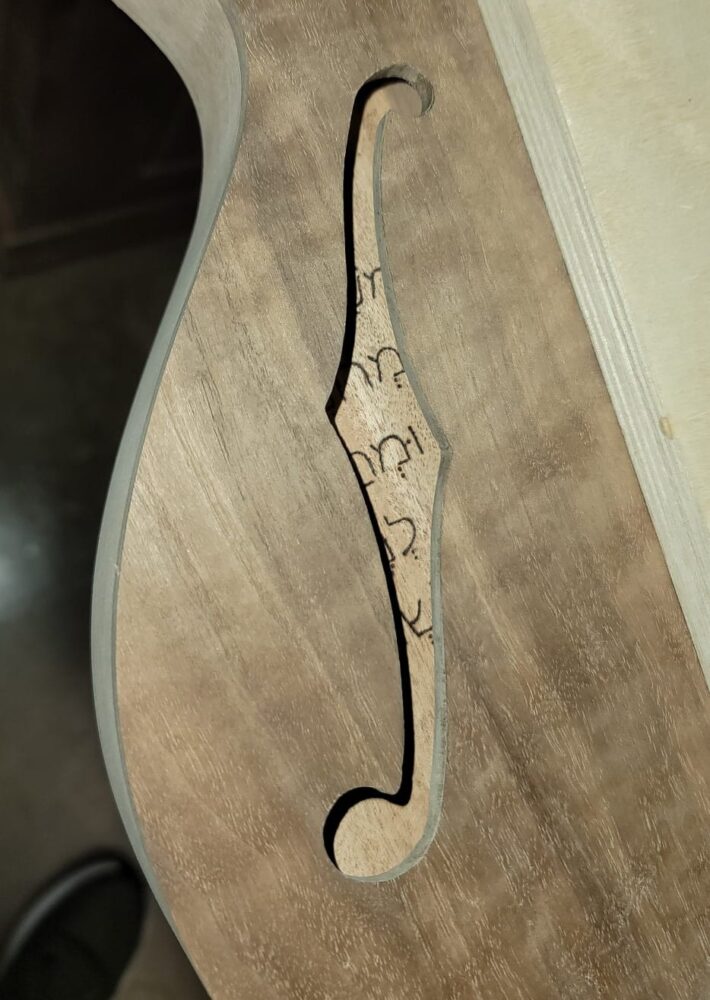 I’m extremely happy with the result and found the Hebrew script I’d written inside the body hollowing prior to glue-up to show itself subtly yet clearly – exactly as intended.
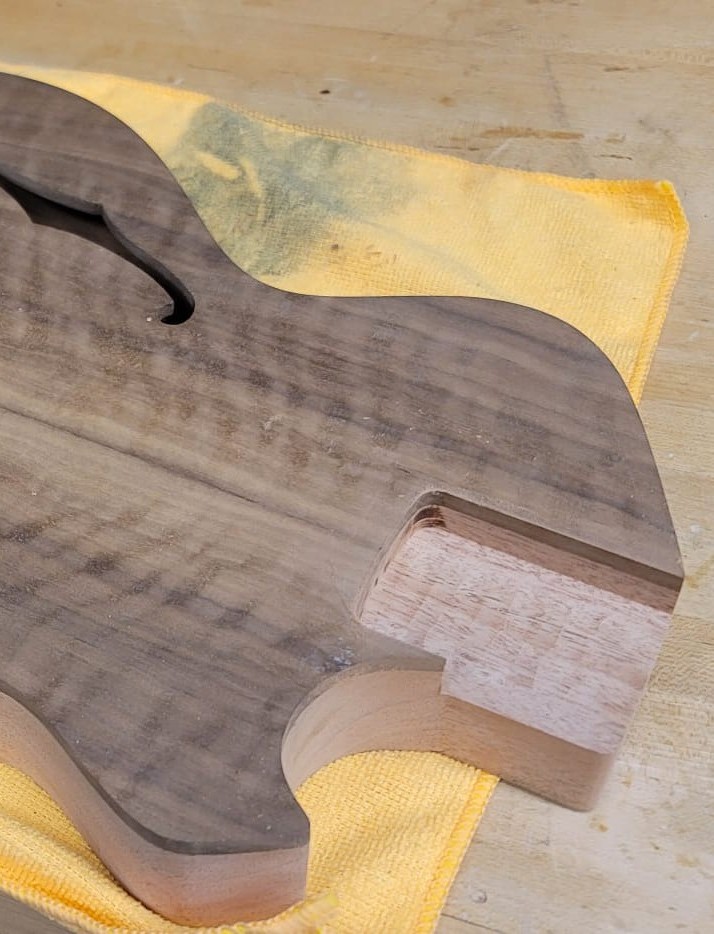
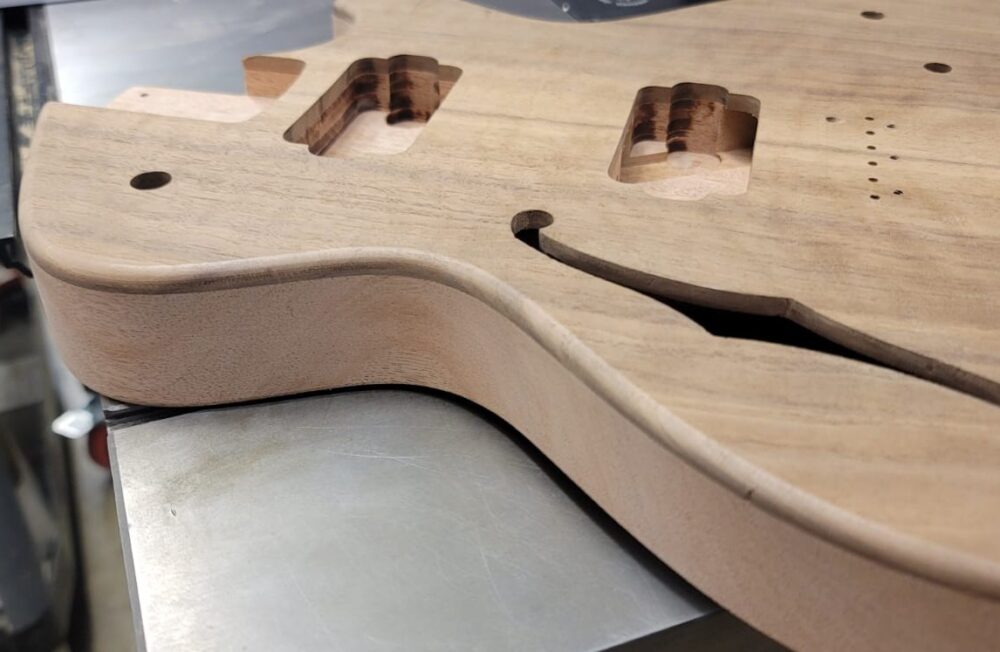
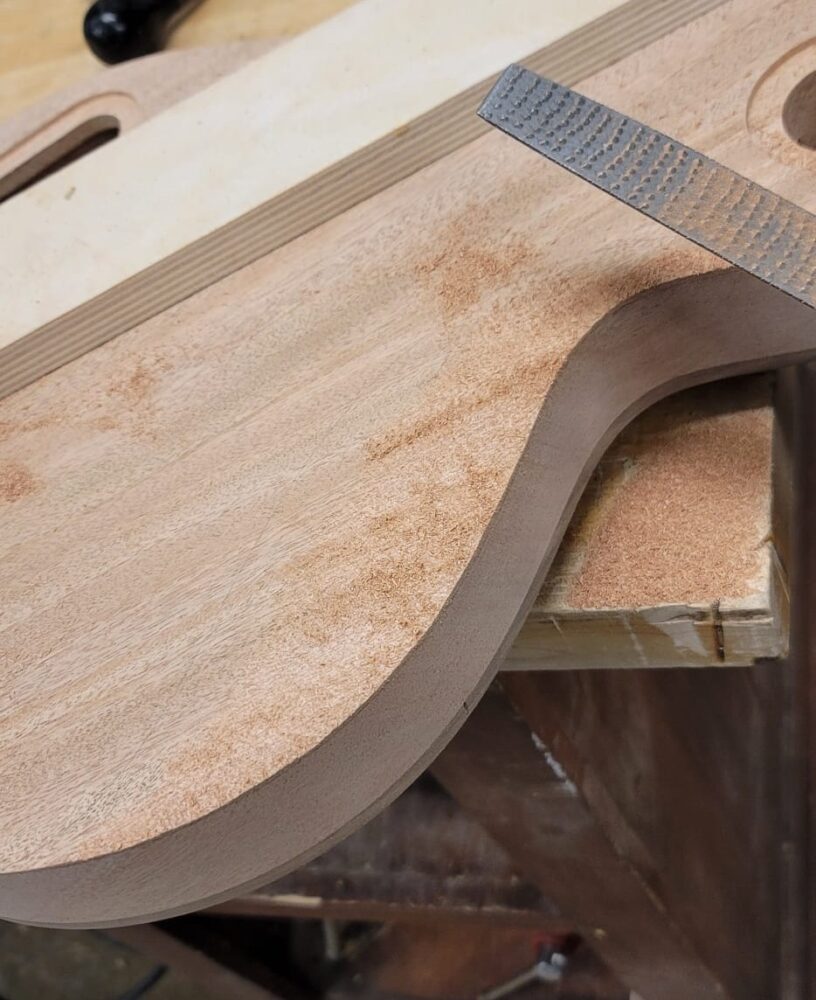 I did a little more CAD work and found I had enough material remaining around the guitar’s rear waist edge to add a belly cut. A belly cut is purely ergonomic, allowing the guitar to sit more comfortably on the player’s side by creating a slight recess in the body where a sharp edge would otherwise be. My aim is to improve both comfortability and playability. This meant simulating the cut in CAD before printing traceable templates to bring to scale on the guitar. With proper lines traced, I could begin filing away material.
 This took a good amount of tender love and care, filing away so much material and very slowly. The lines came out accurate enough, and I’ll give them another once-over during the finishing sanding process to be sure my edge lines are crisp and blend nicely with an edge fillet (one of the final steps in construction).
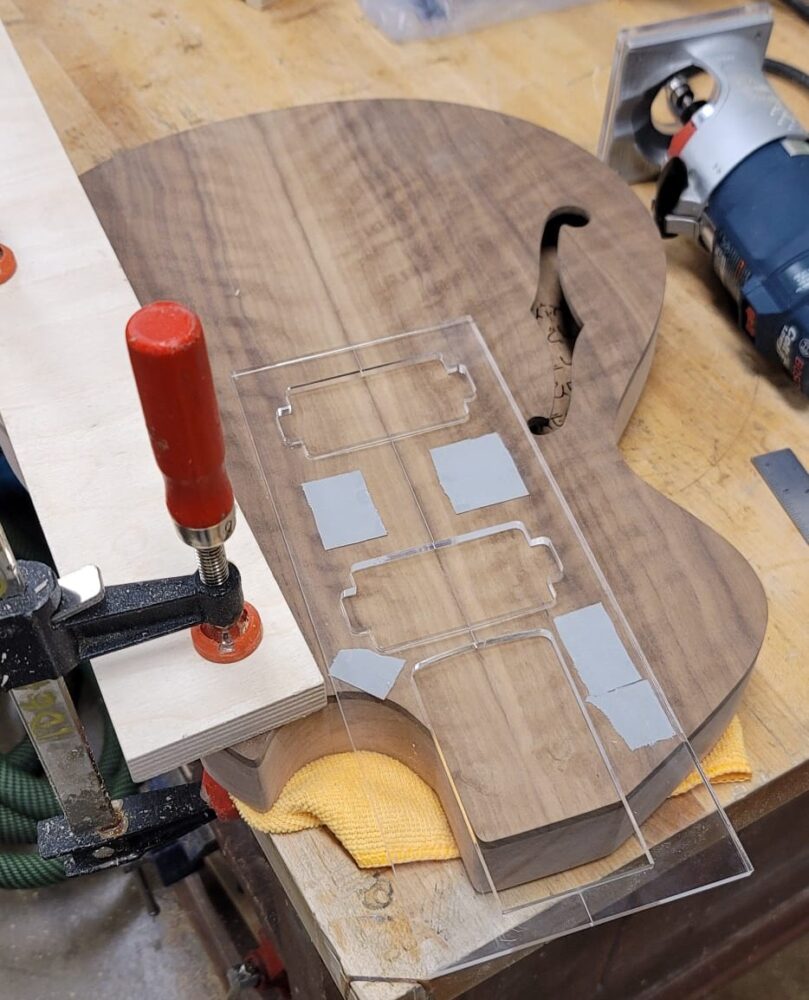
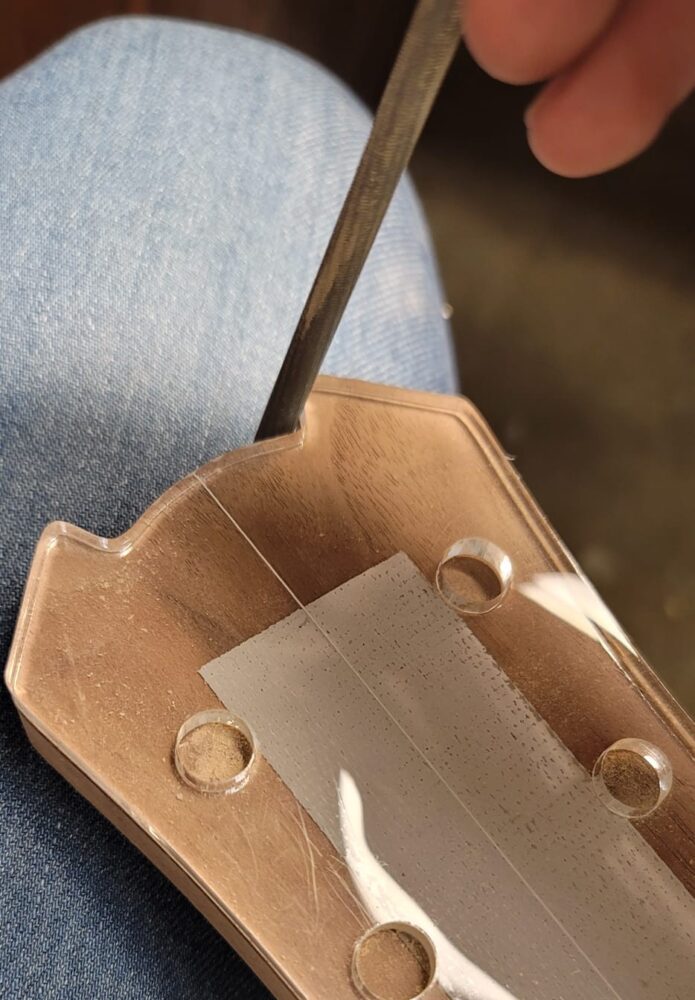
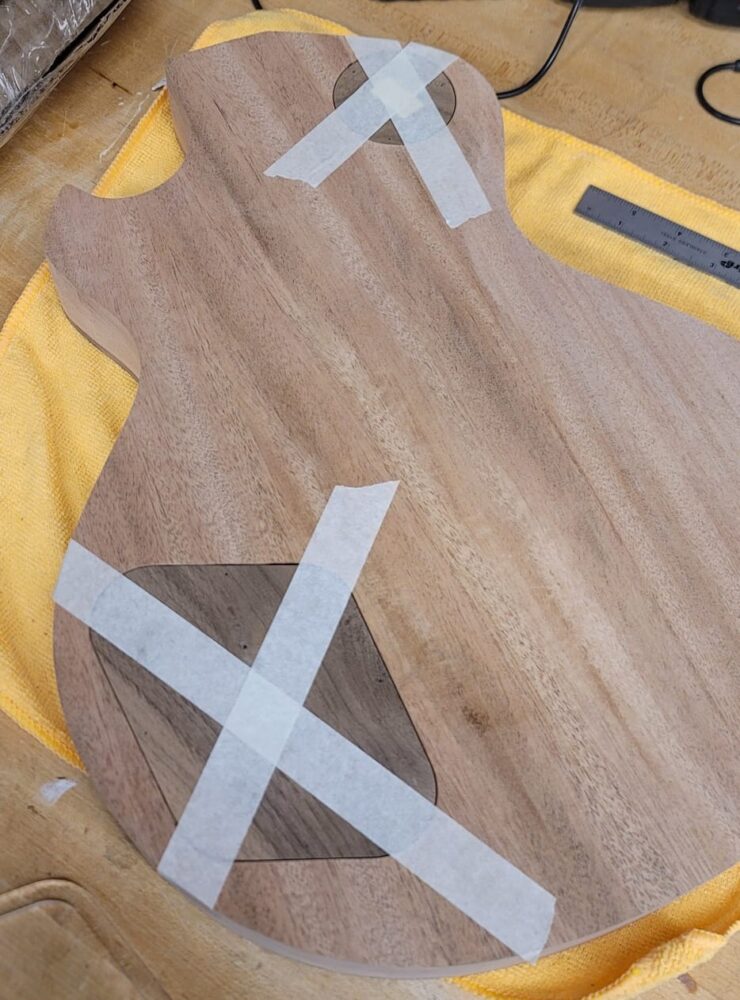 Then I made my control cavity covers out of another piece of walnut. After planing down to approximately 1/8″, I cut the covers with more acrylic templates and cleaned the edges with the routing table and a bit of belt sanding. Shown here, I taped them centered in their respective slots to drill holes for the screws that will fasten them. I countersunk these holes to allow the screw head to sit comfortably lower on the surface.
 Shots like this are exciting. Progress from a lot of hard work is visible, and the developing product slowly starts to look like the final, making it incredibly easy to stay motivated and put in more hours. Also, the light just catches that flamed walnut perfectly.
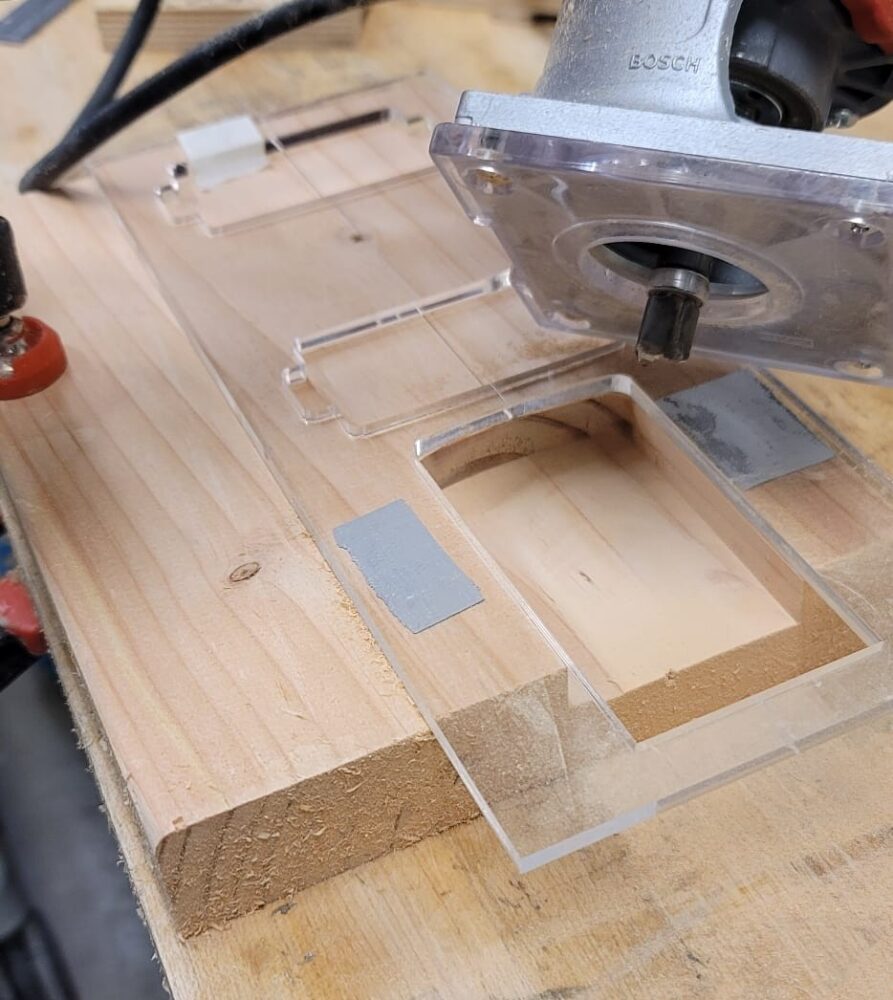 Next up were the two most important operations of the whole build: Setting the neck and aligning the bridge. If the scale length is wrong or strings aren’t aligned with the neck, the instrument is completely unplayable. So, I practiced on scrap. With a plunge router, I carved a neck pocket into a large piece of scrap wood and sat the neck inside to verify it was straight and snug. All checked out, so I moved on to the guitar itself.
 I spent the extra time to be sure my template was perfectly aligned on the guitar’s center seam before sticking it to the walnut face.
 I then routed about 1/4″ into the guitar before slowly increasing the depth until I was just past the ideal 5/8″ depth. Going a little further gives some wiggle room to account for material that might be lost during final sanding – and it lowers the action on a guitar that won’t have a pickguard underneath the strings.
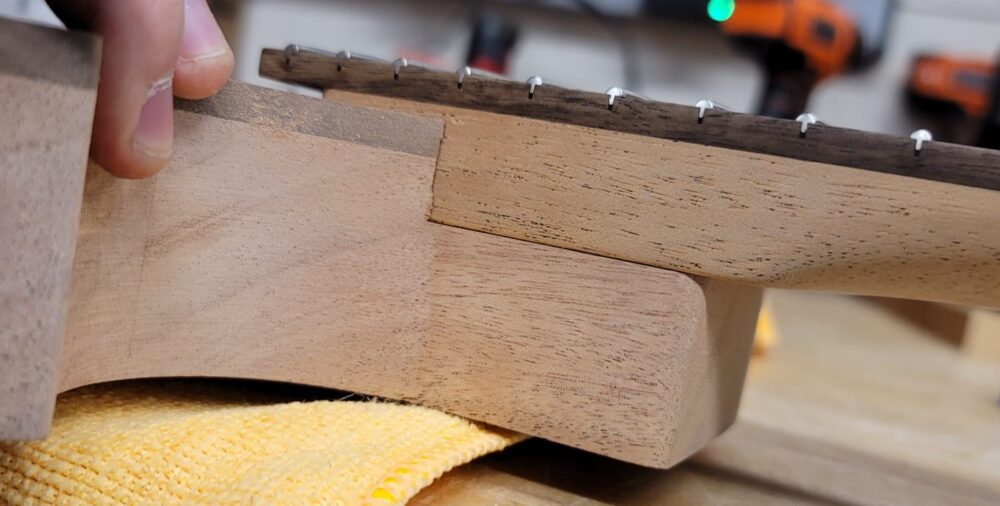 I tested the neck inside the pocket and, sure enough, it fit as well as it did in the scrap. The little bit of overhang you can see between the fretboard and the top of the guitar is standard on most all Fender guitars because it allows room for that 1/8″ thick pickguard underneath (which I won’t be integrating) and closely matches the height of most flat-mount bridges.
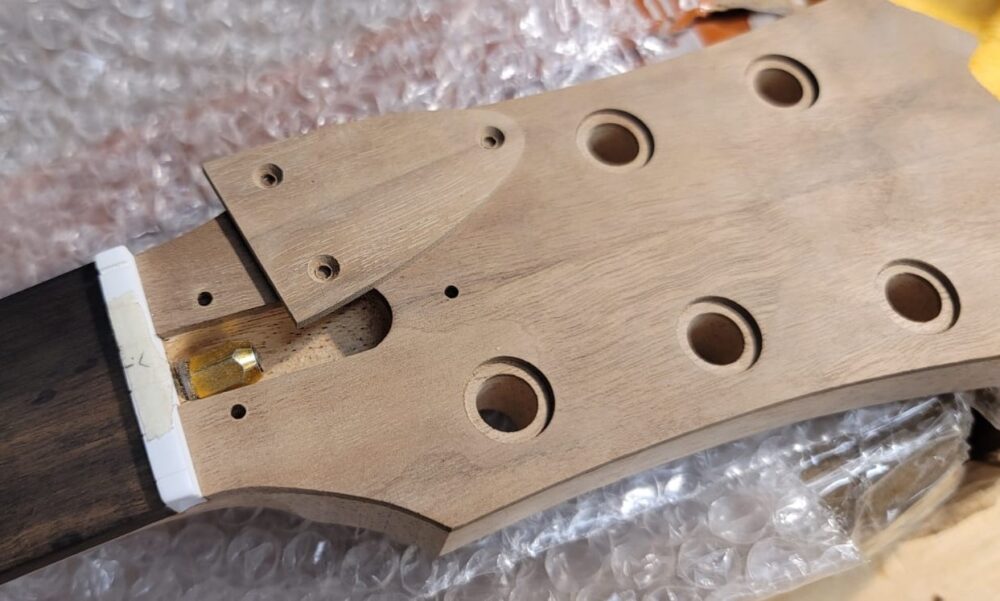
 The problem I had, however, was that the new neck I ordered already had screw holes in the heel, and my guitar body didn’t. If I’m even slightly off in this alignment, it could throw off the alignment of the whole guitar. So, my solution was to hacksaw the tips of four nails the same diameter as the pre-drilled holes. I fitted them snugly inside the holes and then aligned the heel of the neck inside the body’s neck pocket. Once the alignment was correct, I pressed down to make small impressions where each hole should be drilled.
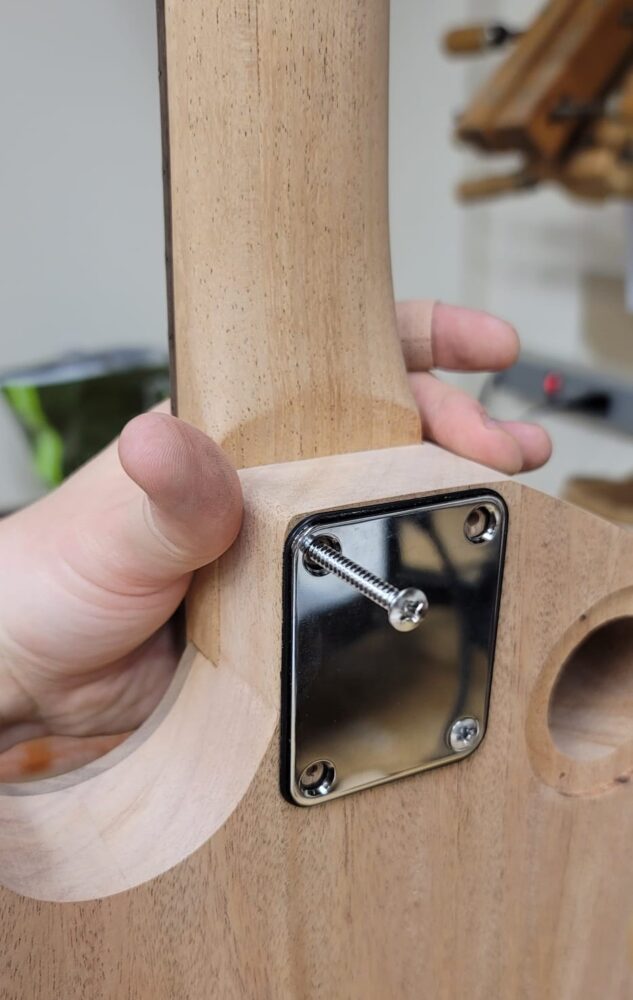 I then drilled the neck bolt holes trough the body and mounted the neck to check my work. While not dead center, the guitar’s new centerline based on the neck is only 1/16″ shifted, and I’m very happy with that margin of error for such a difficult and abnormal operation of aligning existing neck holes.
 With the neck bolted on, this chunk of wood is really began to look like an instrument.
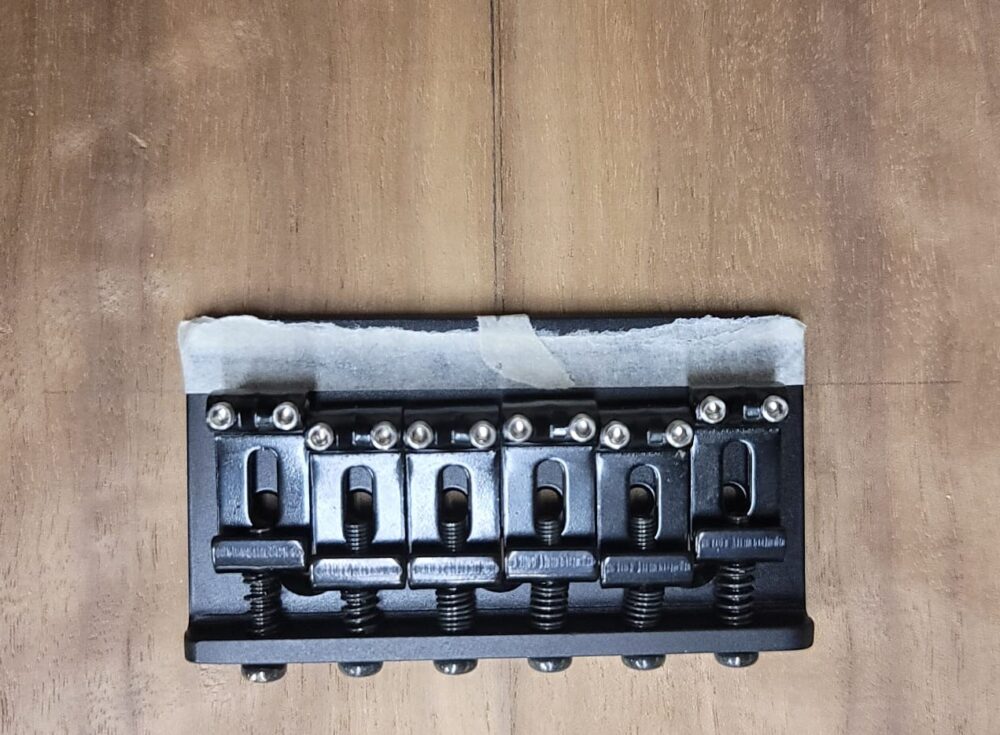
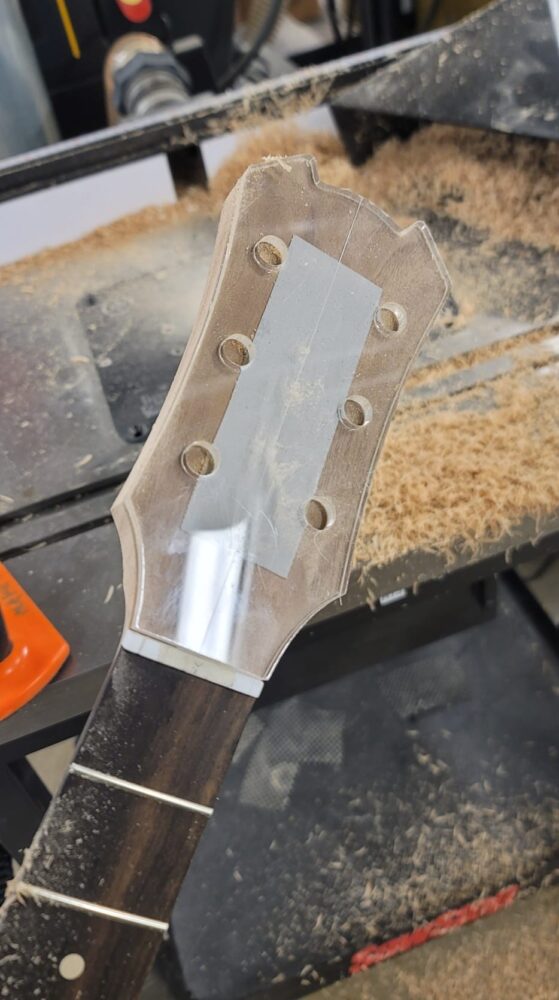
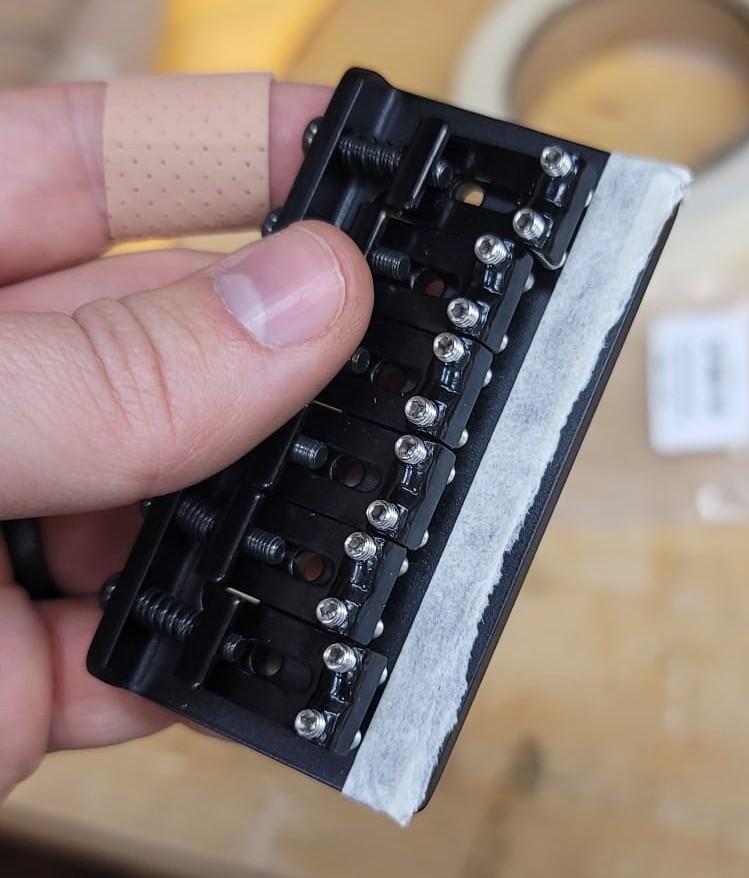 Next up and of critical measurement specificity was the alignment and placement of the bridge. My first task was to adjust the saddles on which each string rests so that they were exactly in the center of their adjustable range (adjustment allows for fine-tuning called intonation). I marked this line with a piece of scotch tape and set the bridge aside.
 I then marked the guitar’s exact centerline based on the neck as-mounted. Measuring from the nut (the white piece of corian at the top of the neck on which the strings rest), I then marked the guitar’s scale length (distance from nut to bridge saddles) on the face of the guitar, extending sideways exactly perpendicular to centerline. I’m using the shorter 24 3/4″ Gibson Les Paul scale length for which my neck is fretted. After marking center on the bridge, I aligned the bridge to centerline and the scale length. To make life easier, I also placed masking tape along the front and side edges of the bridge to help me place it accurately again. I then double-stick taped the bridge to the guitar in this position without the saddles.
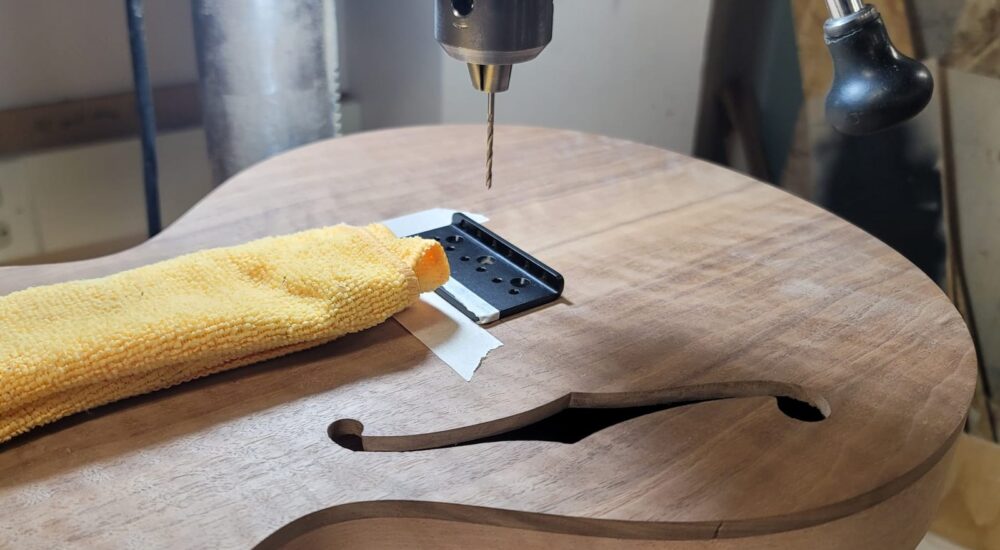
I took the guitar body and bridge to the drill press and made holes for each of the bridge’s mounting screws.
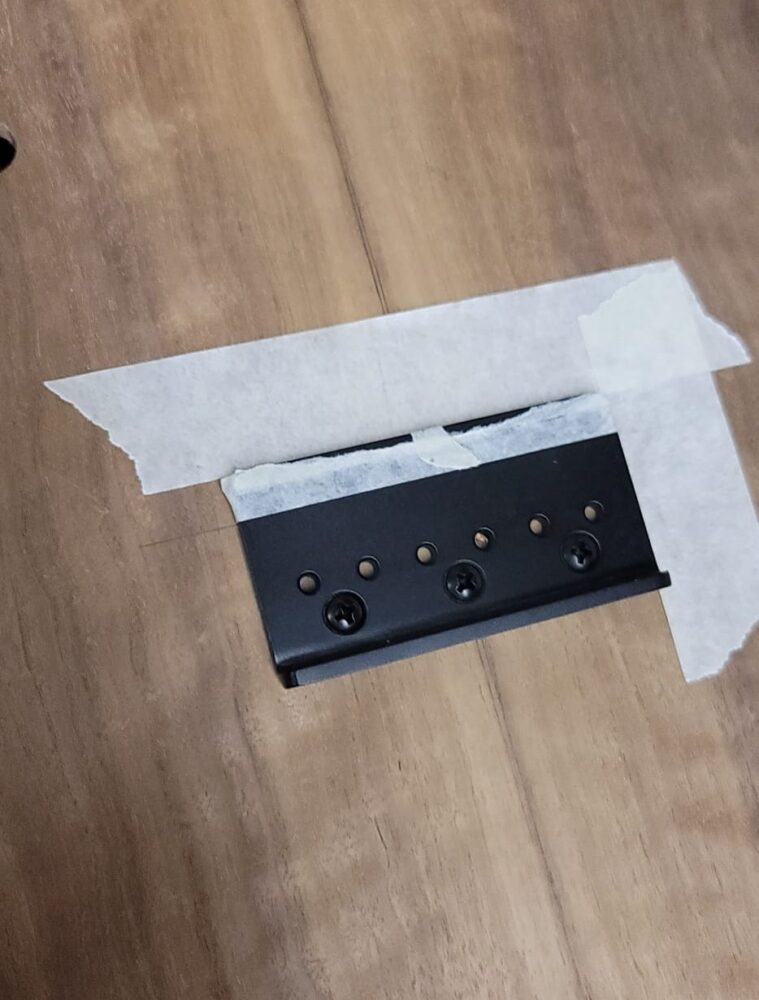 The holes aligned extremely well, and I screwed on the bridge plate to make the next step easier and more accurate.
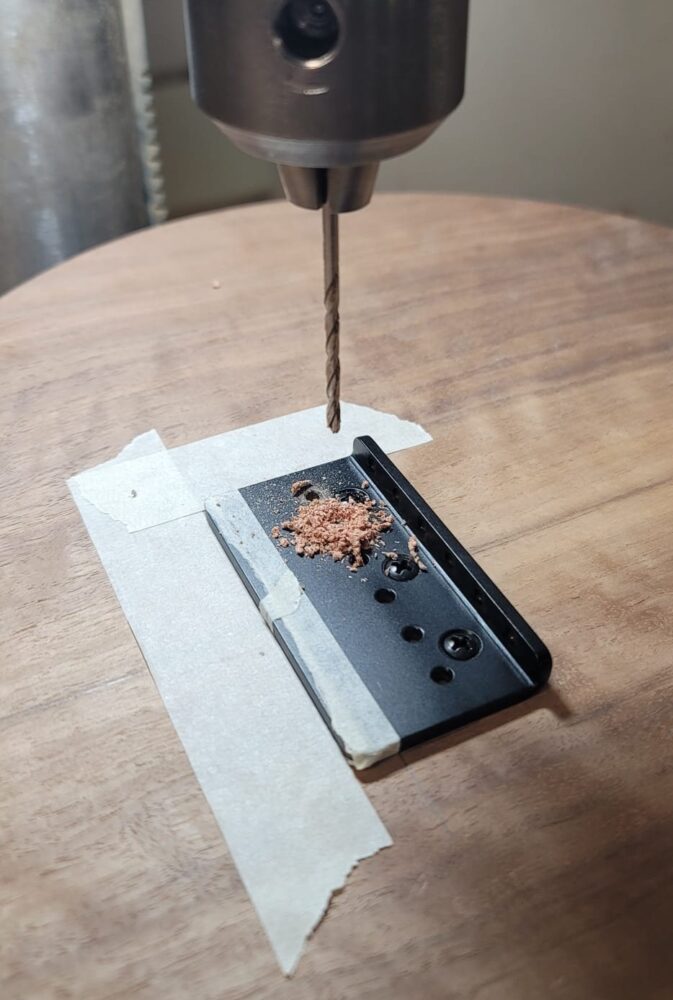 For a hardtail guitar like mine, the strings feed up through the back of the guitar. My next operation was to drill string holes almost through the guitar body from the top – but not quite all the way through. More on this soon.
With mounting screw and string holes drilled, I removed the bridge again and cleared the tape residue.
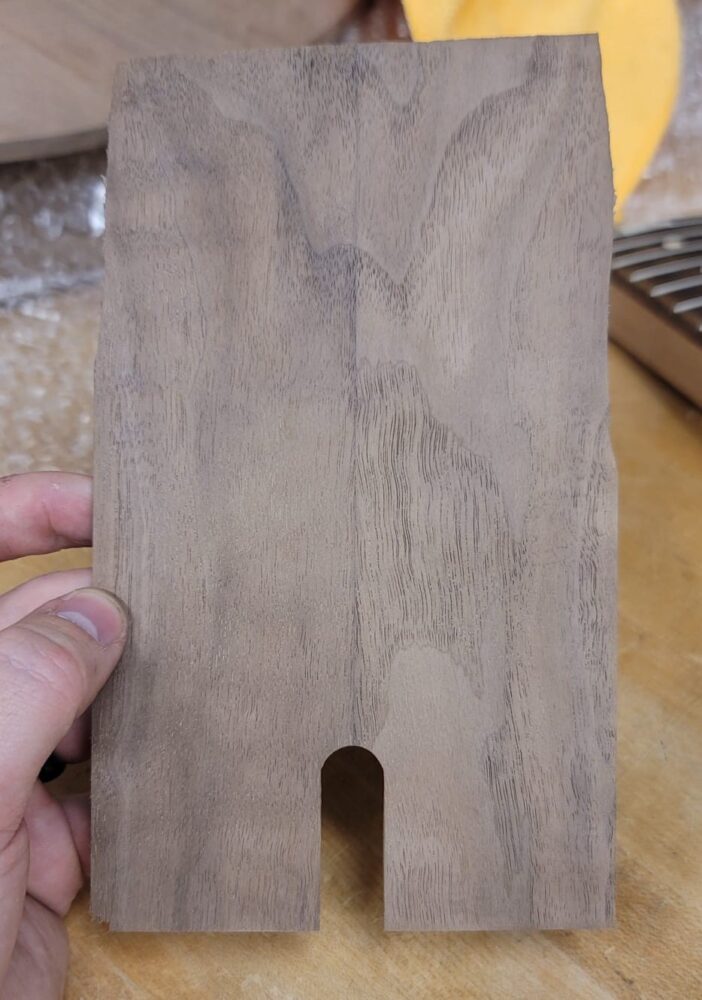
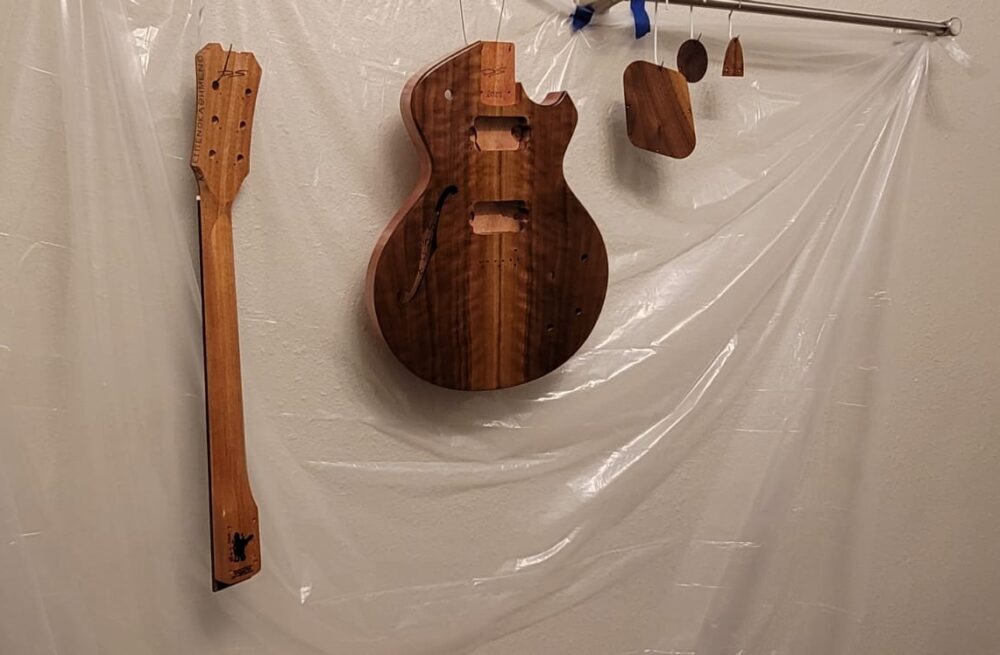
 During this time, I also glued together some bookmatched pieces of scrap walnut – the same walnut from the guitar’s top. From this, I’ll create a thin veneer to glue to the top of the guitar’s headstock so the headstock and body match in grain and tone. You can see the comparison here.
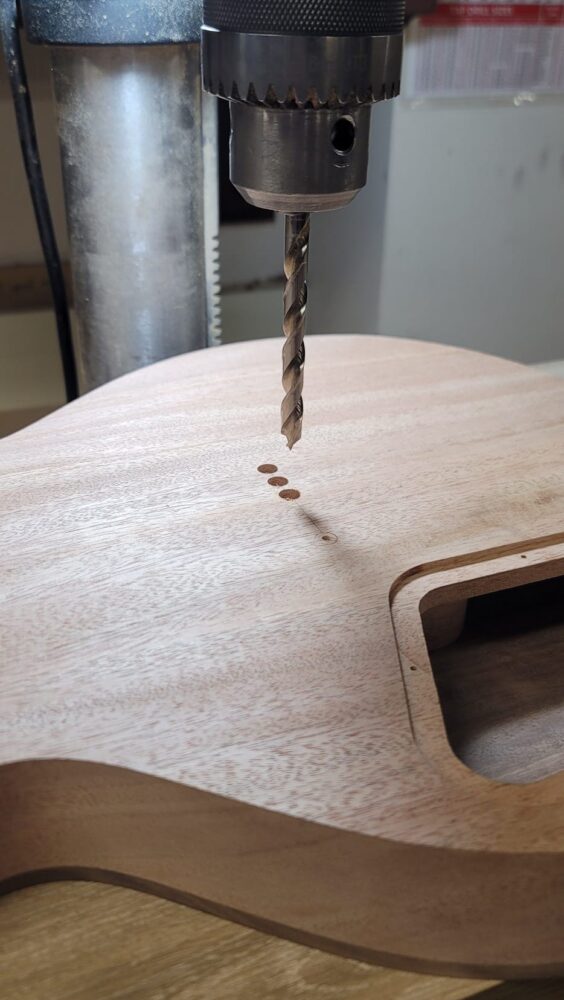 With some (more) help from luthiers on YouTube, I created a “pin jig” from the drill press. A flat piece of scrap wood is placed under the press, and a small pin sticks up from that scrap. The pin is aligned directly below the tip of the drill bit. When I place the guitar face down below the drill press, that pin slips into one of the holes I’ve drilled in the top for the strings. With the guitar in place on the pin, I can be sure I’m drilling a hole directly behind the string hole I’ve already drilled.
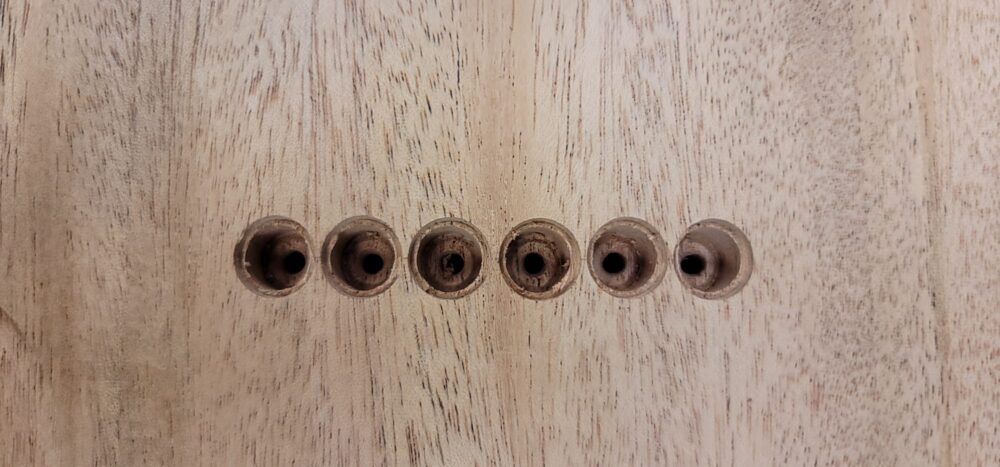
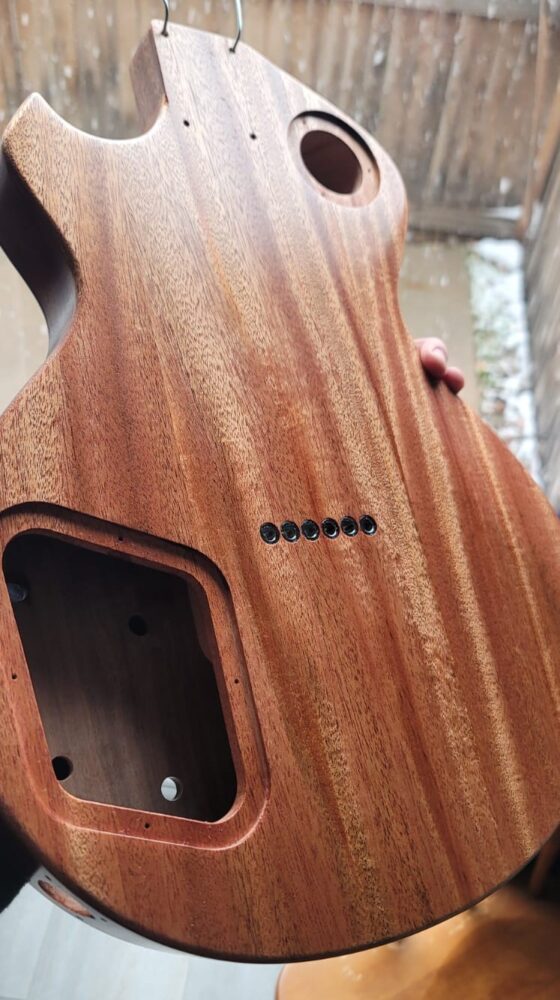
In so doing, I made larger holes in the back of the guitar that meet the smaller hole’s I’d already drilled into the body, creating a perfect through-hole for the strings. Each of these holes also received a shallow recess to accommodate the lip of the ferrules – small metal pieces seated in the back of the guitar that hold the end of the string in place.
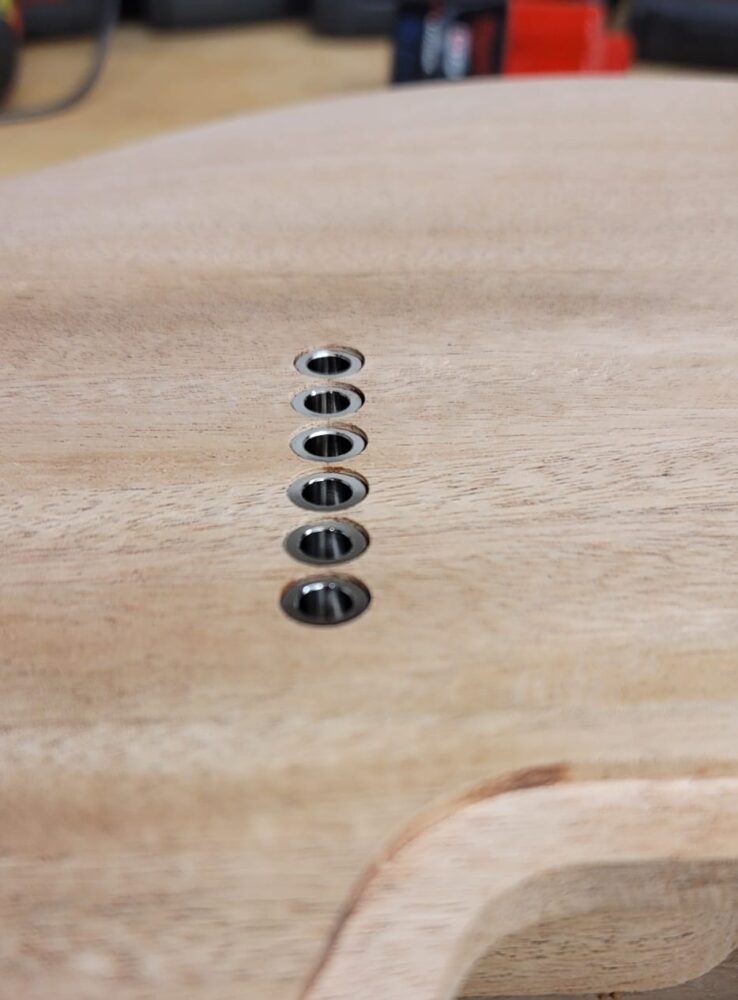 I applied a small amount of super glue in each hole before tapping the ferrules into place, just below the mahogany surface. That pin jig ensured these ferrules were aligned absolutely perfectly. Crisp and clean.
And each of the string holes is completely unobstructed, showing through against the light.
 I then planed down my walnut veneer to under 1/8″, closer to 1/16″ thick. I also cut a slot into the bottom so the neck’s internal truss rod can be adjusted.
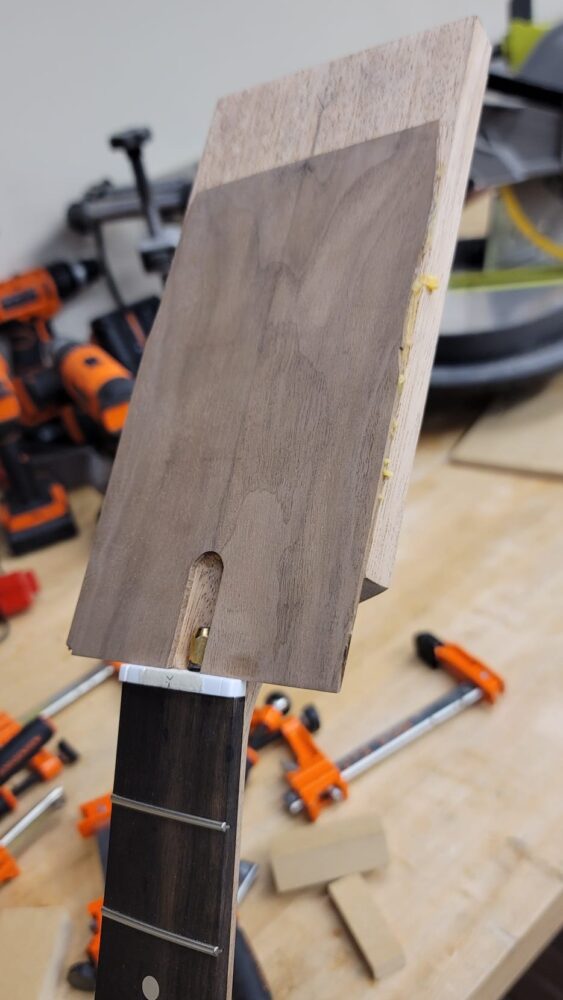
The veneer was then glued to the face of the “paddle” headstock. This was another overnight gluing operation to ensure the bond had properly cured before cutting.
 I did a rough cut of my headstock shape before taping my headstock template to the top. This template was thick enough that it stuck out above the nut, meaning I could simply put it face down on the routing table and route perfect edges without additional support.
 Probably the most difficult routing job of the project, I took my time to make sure the edges were crisp and not burnt by the spinning router blade.
 Since my design had a tight radius in two corners of the headstock, I took another file to the headstock and met up with my template line again.
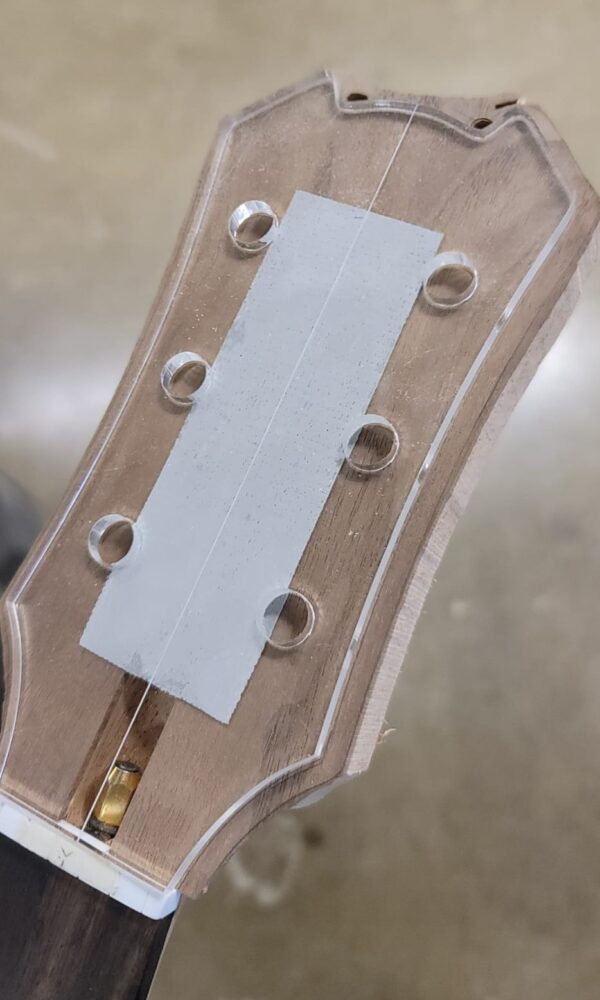
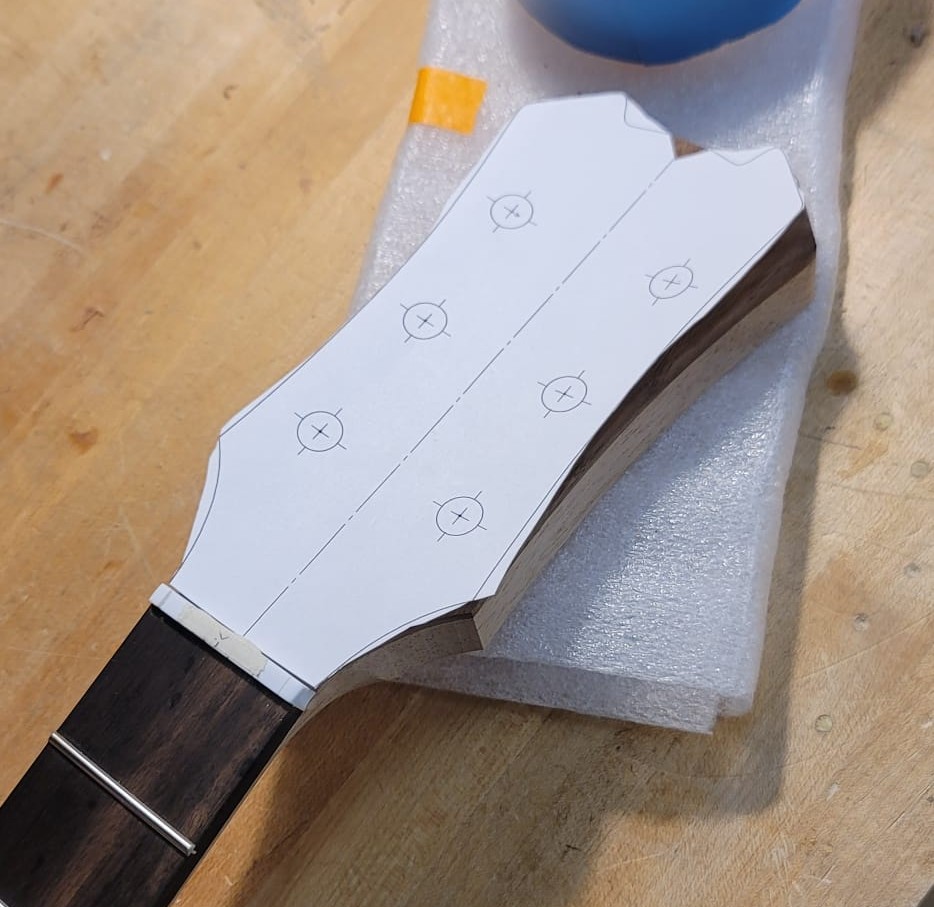 Next, I printed and placed a paper template on the headstock with new, better markers for the tuner holes. I marked them with an awl to make them much easier to find and align under the drill press.
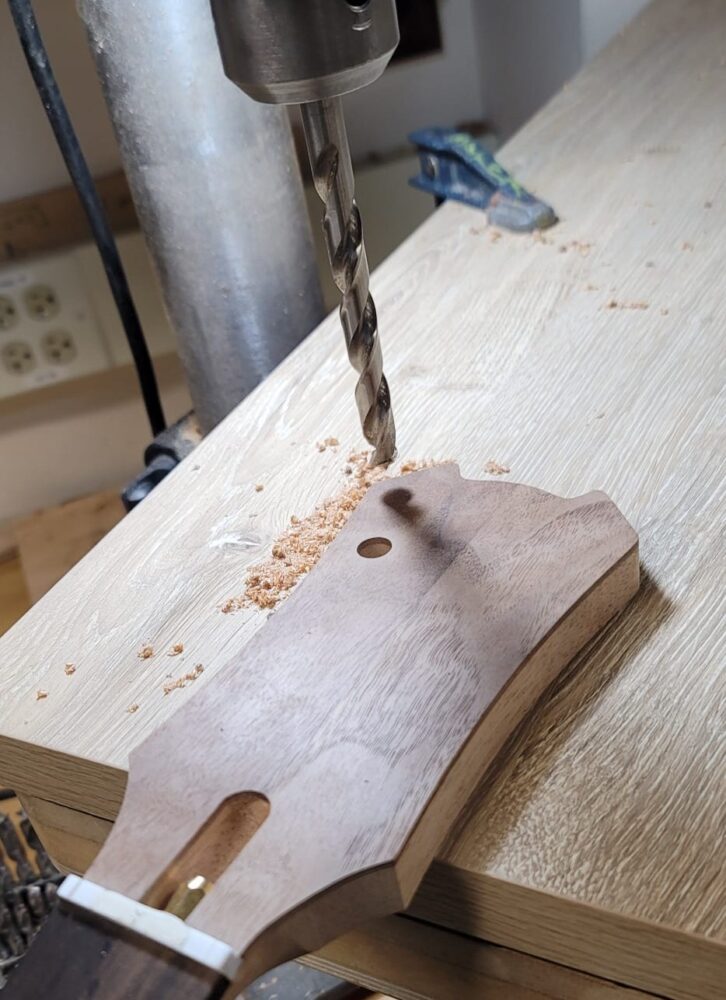 I sized the holes based on my tuners and drilled all six into the headstock.
![]()
I found later that my veneer (though thin) made the headstock too thick for my tuners to reach the whole way through. To remedy this problem, I took special care to countersink each tuner hole with a Forstner bit under the drill press. The recesses are only deep enough to hold the tuners’ washers, but this was plenty of room for the bolts to reach their mating threads again.
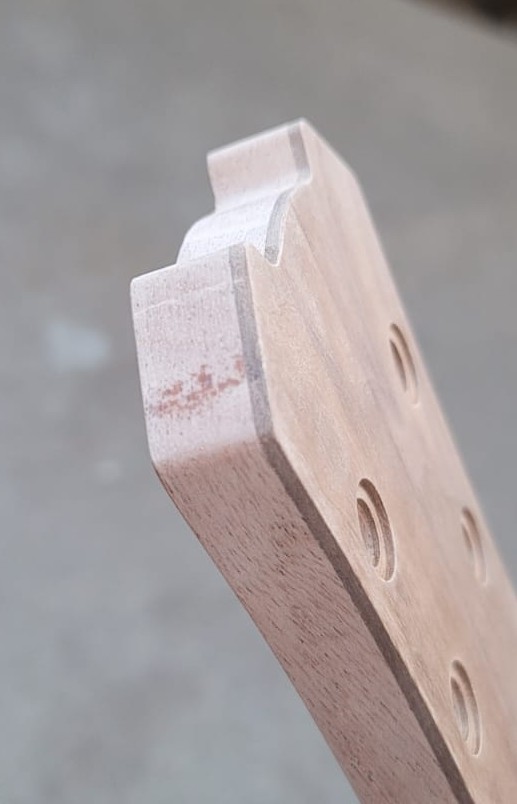
 At this time, I also made a small cover plate with my remaining planed walnut to hide the neck’s truss rod adjustment slot. I aligned the center seam of the cover with the center seam of the headstock and sanded until it was flush against the corian nut when attached. Sans woodburning and sanding, my neck and headstock were complete.
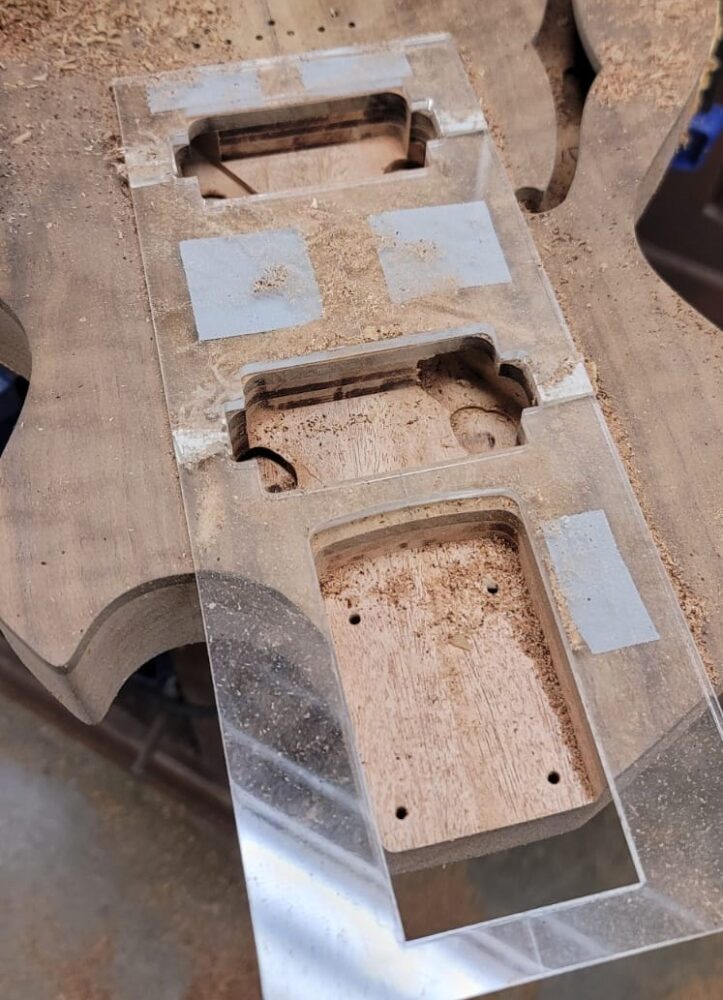 Similar to palm-routing the neck pocket earlier, I was now ready to carve pickup pockets into the guitar. I seated the neck back into its pocket to mark just how closely I could position the highest pickup (neck pickup) to the fretboard. Once marked, I attached the template again and made 13/16″-deep cavities for both pickups. On the “ears” of either pocket, I routed an additional 1/4″ deeper to accommodate the supporting structure of the pickups themselves.
 After this, I drilled a small hole into the guitar’s diagonal internal wire run from a position that would eventually be covered by the bridge. This is to accommodate a small grounding wire that’s important for electrically grounding the bridge, strings, and tuners to the amp through the jack.
 I then drilled holes for the guitar’s 3-way switch and potentiometers through their respective cavities and out the top of the guitar.
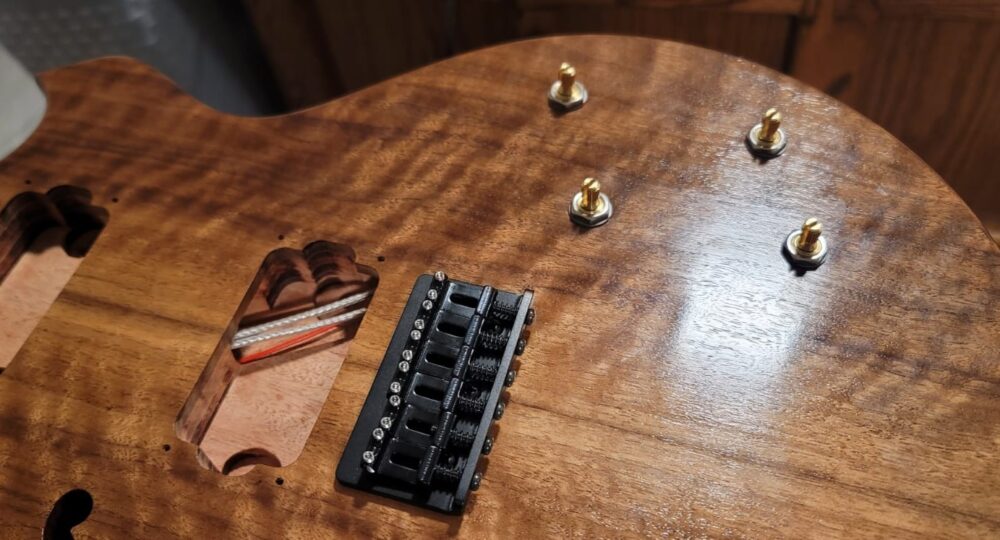
 The result was a guitar body needing only a few more operations, but having the personality of a twin-humbucker, 2-volume-2-tone electric guitar.
 Before drilling one last hole for the output jack, I used a table router to create a 3/16″ fillet around the edges of the guitar’s top, back, and sides.
 This filleted edge creates a cleaner look, but it vastly improves playability by removing sharp edges from the player’s side and arm.
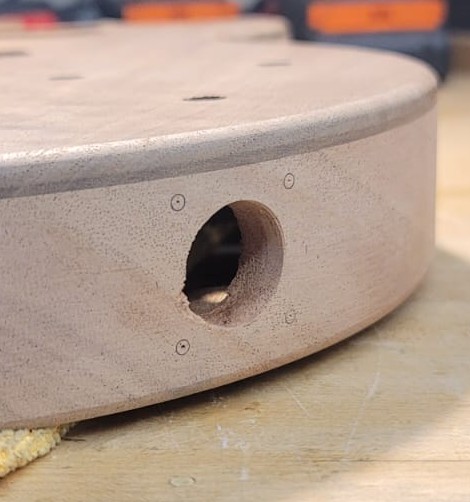 Finally, I clamped the guitar vertically to hand drill a 7/8″ hole in the lower right side for an output jack. This hole leads into the electronics cavity as a straight line between the two tone potentiometers that will eventually occupy the space. I also marked and drilled screw holes with the jack plate I’d be using to ensure it was positioned correctly with its upper edge riding exactly along the edge of the walnut.
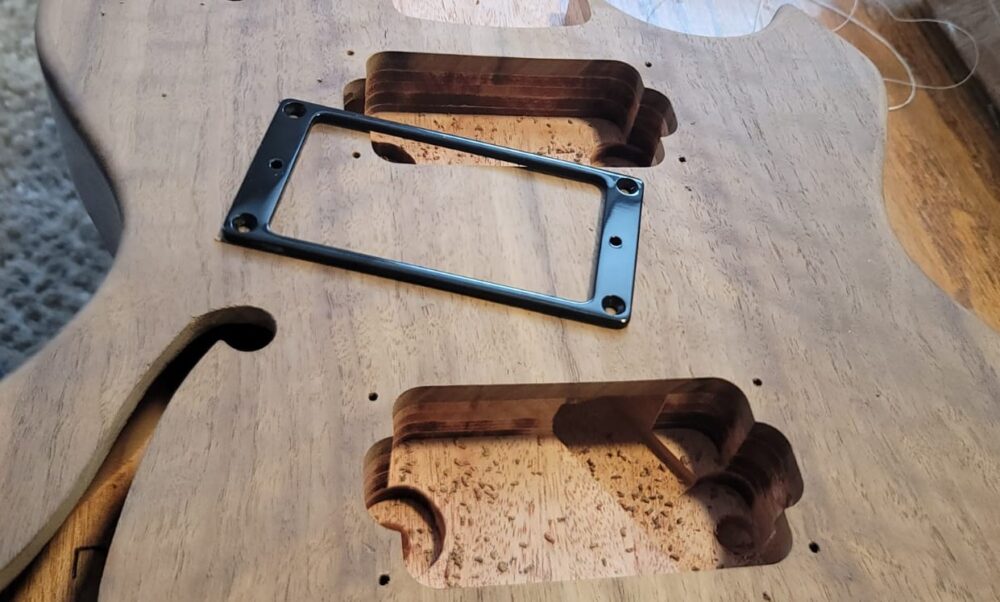 The last holes I needed to drill were those meant for mounting the pickup rings to the face of the guitar that eventually carry the pickups. I did this by reattaching my neck and bridge, running thread between the two outer saddles in the bridge and nut, and aligning the ring with the pickup inside under the threads. This way, I can align the pickup poles under the strings themselves without guessing. I drilled those holes at home and was ready for finish sanding.
 Never have I ever considered sanding enjoyable or therapeutic… until now. To my surprise, four hours of sanding with three different grits of sandpaper was a great use of a Saturday and got me excited to see the guitar with finish applied. It was during this process that I softened the edges of the belly cut that weren’t reachable with the router.
 At this point, I also opted to repair some chipping that the router took from the edge of my headstock. I used scrap mahogany from the paddle head and created sawdust to fill the holes in the chipping. Then I added a small amount of super glue to the sawdust and let it dry. After a few hours, I sanded the area back down to get rid of the excess glue.
 The end result is hardly discernable under the oil finish.
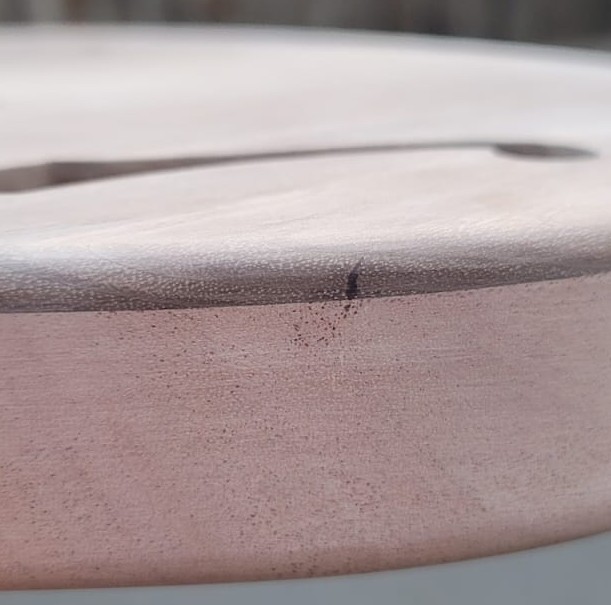 I took care of a chip in the walnut with the same tactic and have a hard time finding evidence of the repair in the final artifact.
 With final sanding complete, my final fabrication step was to woodburning. I decided to add a detail feature around the headstock’s perimeter via ancient Greek characters also from the Bible. This is a hopeful and forward-looking except from Revelation 5:21, reading in English: “And he who was seated on the throne said, ‘Behold, I am making all things new.'” I also woodburned my own signature on the rear of the headstock as opposed to the front.
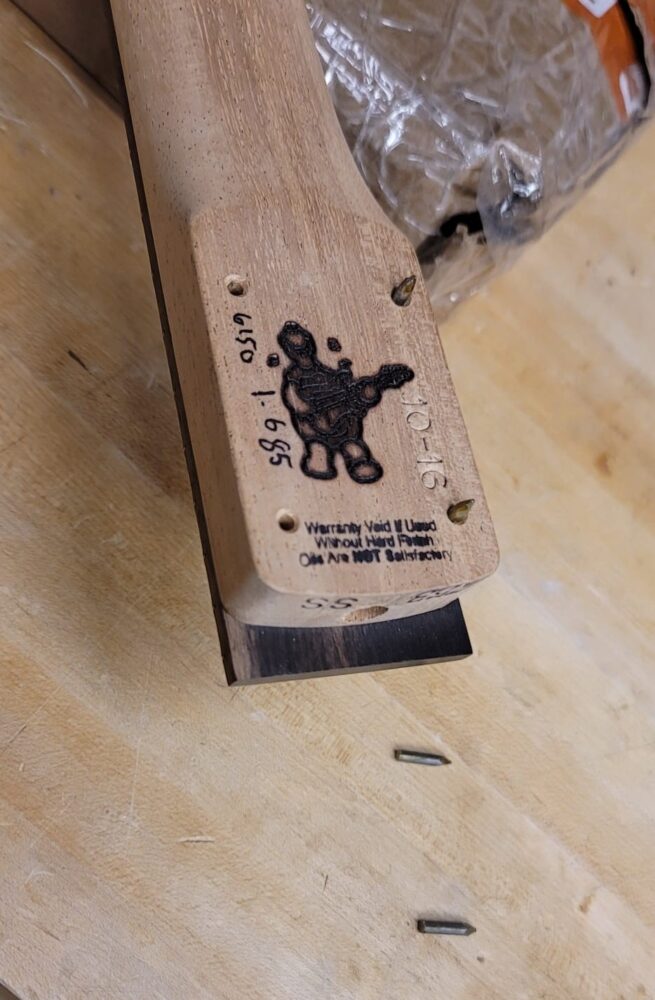
 Lastly, I woodburned my signature onto the guitar’s body inside the neck pocket, which is hidden when the neck is attached.
Finishing with Oil
 Over the next five days, I applied eight extremely thin coats of Tru-Oil gunstock finish with occasion wet sanding in between coats. Tru-Oil is an easy-to-apply wipe-on finish used often in lieu of a lacquer finish when spraying facilities aren’t available. It’s most often used with a grain filler to ensure a smooth finish surface, but I opted to forego any grain filler so that the natural texture of the wood wouldn’t be hidden.
 In the end, eight coats was about half of what I anticipated I’d put on, but I decided not to continue so that an increasingly glossy finish wouldn’t conflict with a lack of grain filling. The more natural – though still shiny – the finished looked, I believed the better.
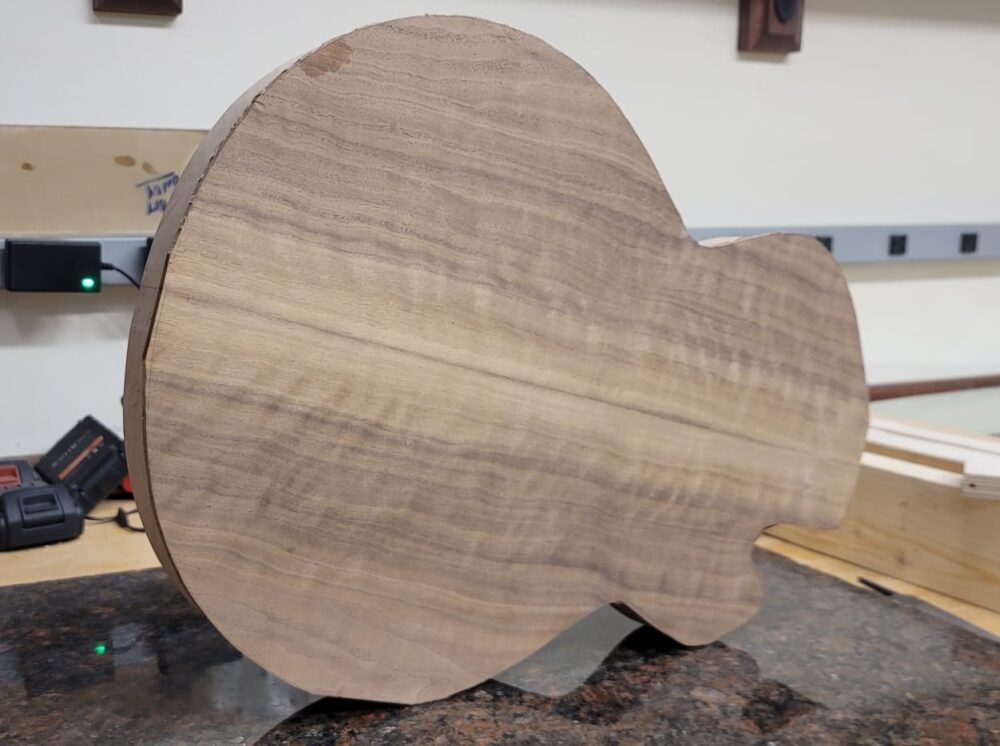
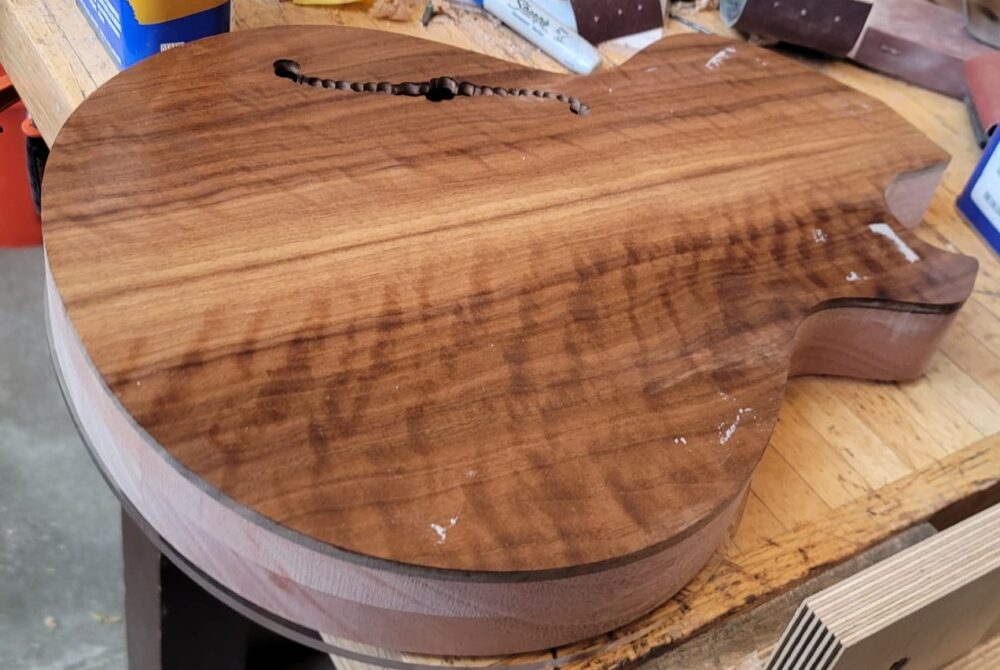
 The oil seeped well into the wood and carries light in and out of the grain beautifully. The mahogany back even lit up more than I’d originally expected – on top of its deep and rich final color.
Electronics
The last thing I had to learn was soldering – a totally new discipline to me. The internal electronics involved connecting two pickups to their own independent volume and tone potentiometers or “pots”. These pots are connected by a small capacitor as the circuit doesn’t need to handle any substantial amount of signal. These pickups, through their pots, run to a 3-way switch at the opposite corner of the guitar. The switch is then connected back to the jack in the edge of the guitar just below the pots. Everything is grounded – including the bridge – to the output jack. I used braided wire for much of this to help with grounding and reduce potential for interference.
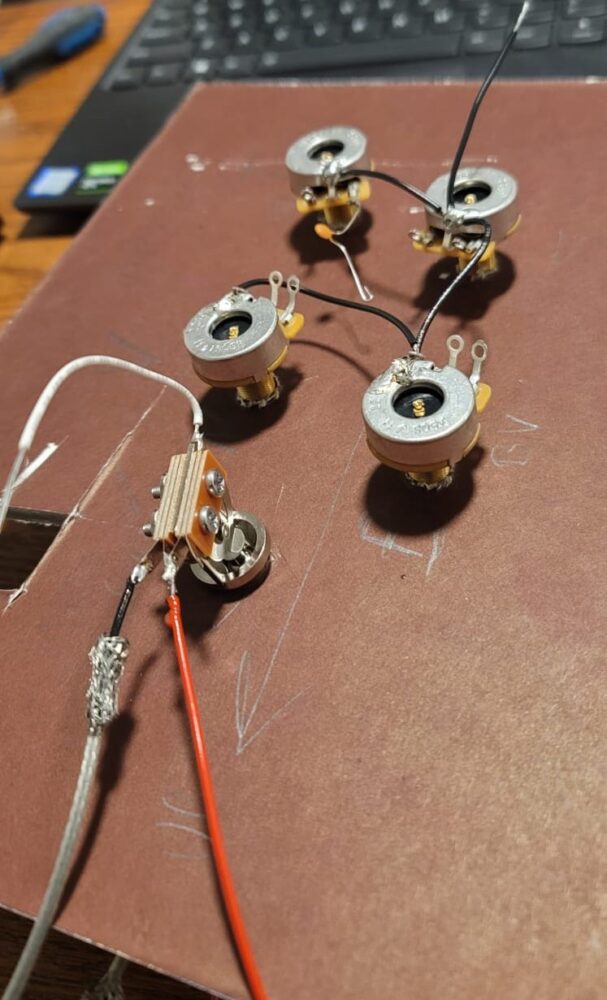 I checked the circuit diagram for a 2-pickup, 2-volume, 2-tone, 3-way switch configuration from multiple sources. Once I had an understanding of it, I sketched the circuit from memory including every place I’d need to solder. I couldn’t risk an error at this stage in the process where my experience level was already most lacking and functionality of the instrument depended on working electronics. After I had some level of confidence, I made a wiring harness – and I made it out of the book cover I cut from my Bookframe Upcycling Project in February!
 I started with the switch as it could be wired entirely before installing, so offering a bit of low-level practice before I had to perform surgery in the pots cavity. From the switch, I ran both the input and output wires back through the diagonal wire cavity through the guitar.
 I wired the pots next with grounding wires and placed them in the cavity.
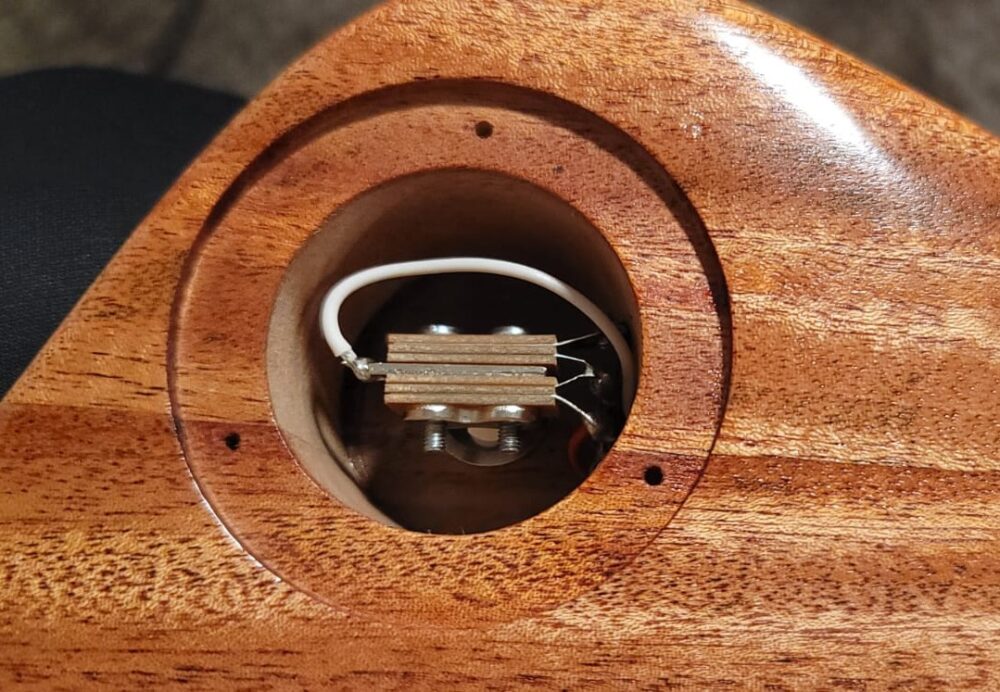
 Once the pots were fastened down tight, I connected the jack to output and ground and attached it in the black jack plate.
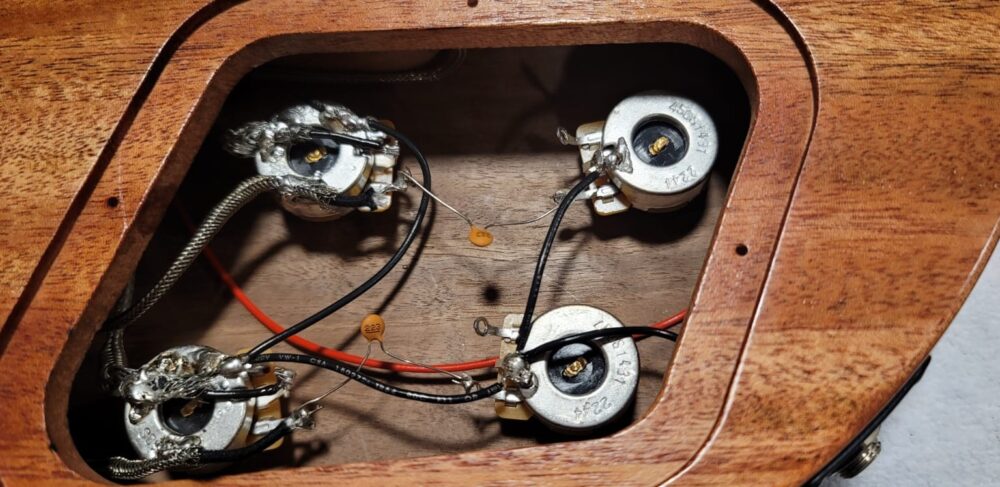 The pickups were the final and most difficult parts to wire. Once I’d placed them into their respective pickup rings and screwed both to the body, I soldered them in place and completed the circuit. It might be ugly, but it will hold.
![]() I still had one last good exercise in problem-solving when I tried to force my knobs onto the pots. It turns out that if you push too hard, you can separate the potentiometer from itself. I had to remove that pot from the body, clamp it back together, reattach it, and hope it worked in the end. Much to my surprise, Warmoth sells smaller knobs than the pots they sell are sized for. Versus buying new ones and waiting, I reamed out the knobs with a drill bit and tried again. This time, they worked and sat snugly on the pots.
I still had one last good exercise in problem-solving when I tried to force my knobs onto the pots. It turns out that if you push too hard, you can separate the potentiometer from itself. I had to remove that pot from the body, clamp it back together, reattach it, and hope it worked in the end. Much to my surprise, Warmoth sells smaller knobs than the pots they sell are sized for. Versus buying new ones and waiting, I reamed out the knobs with a drill bit and tried again. This time, they worked and sat snugly on the pots.
Proving Ground
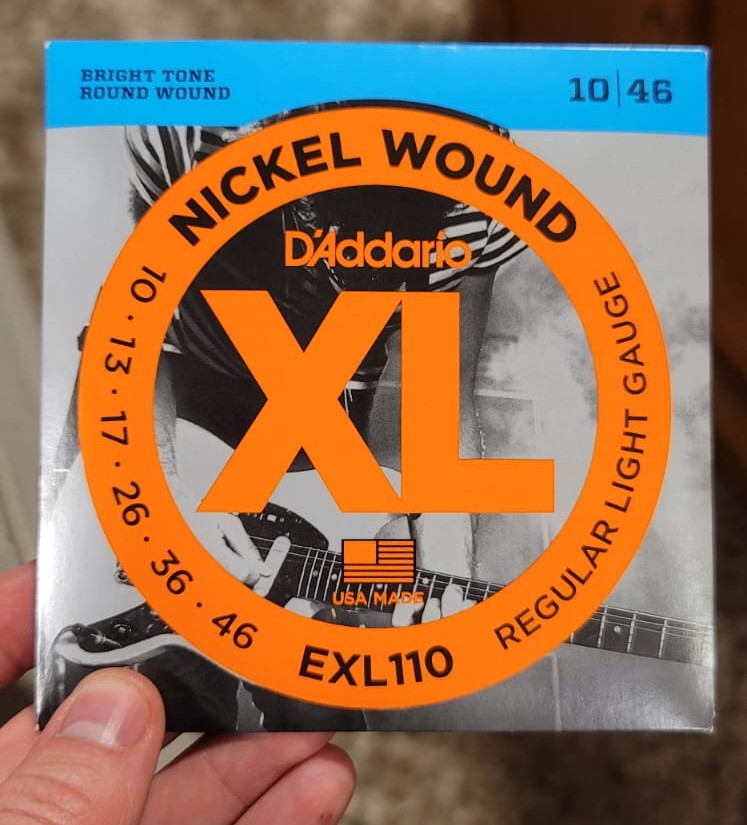 Everything was ready now. I bolted on the neck one last time, screwed in the string tuners, and drilled holes for my strap buttons. I placed them in the standard position for Les Paul models and am using Dunlop Straploks to prevent the strap from slipping off while playing. This is especially necessary because of the angled upper bout of my design near the switch. The last six parts to be put on and tuned were the strings…
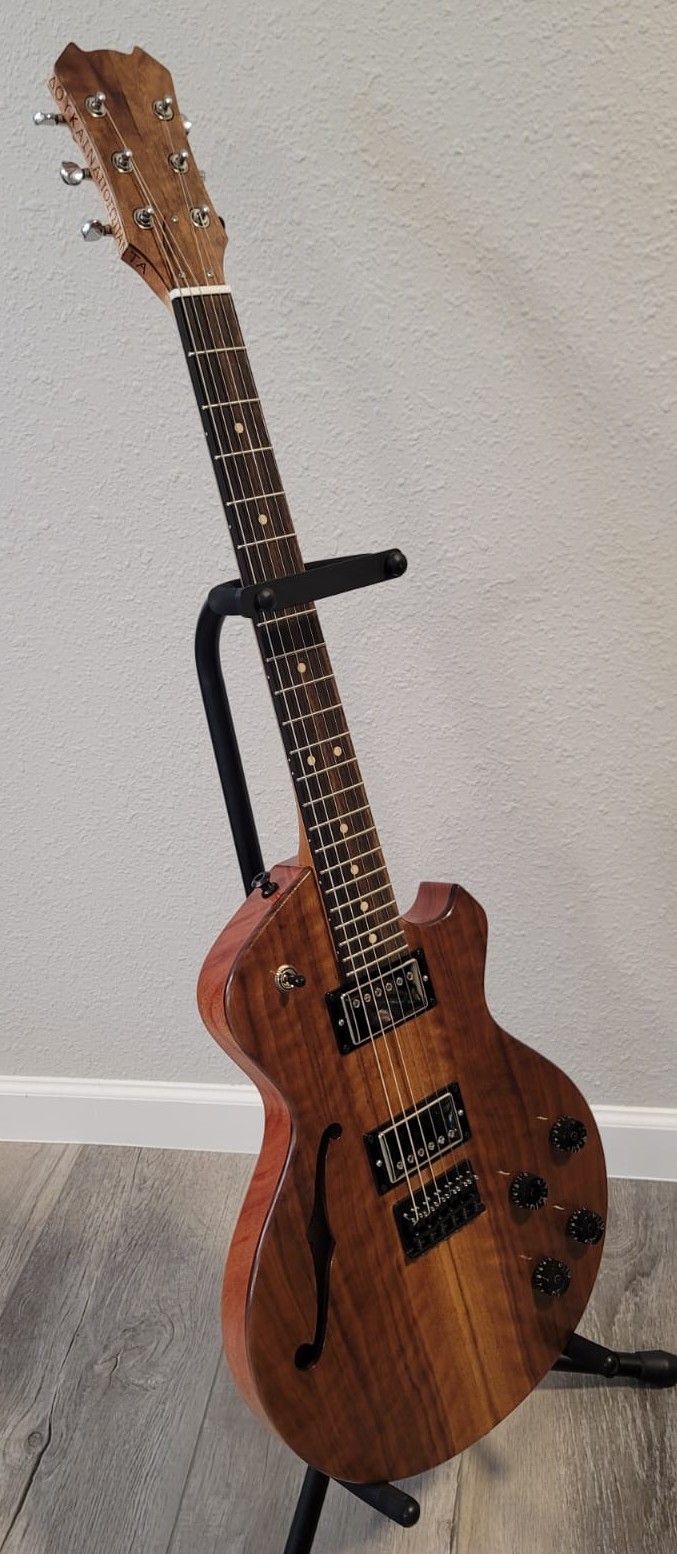
With the jury-rigged amp setup I have, I plugged in the guitar, switched to the neck pickup, powered up the amp, and strummed… and to my utter amazement, it actually worked. So I switched to the neck pickup, strummed, and it let out a rich, warm tone exactly as I’d imagined when I chose a dark tonewood and bluesy guitar attitude at the very beginning of the project. This thing actually works, and I couldn’t be more pleased.

Conclusion
This four-month process was wrought with pivotal design decisions and reevaluations, mistake corrections, trade studies, and hours… hours, and hours. I estimate having spent 78 hours in the shops and otherwise carrying out physical work. My research likely took 36 hours on its own, and I likely spent 12 more hours in various stages of 3D modeling to ensure what I was making was possible and durable. This totals an approximate 126 hours, but I neglected to keep track as I went. And in all that time, never once was I bored…
My vision at the outset was a mixture of foolishly ambitious and underwhelmingly modest. I decided against certain radical features and committed to others I was sure were doable and genuine improvements. By the time work began, I knew I wanted to make an heirloom that my son could enjoy after me – and any other children the Lord may give us. Though small improvements were added as opportunity presented itself (such as woodburning or a belly cut) the picture in my mind at the beginning is very much the picture I’m looking at now – that I’m able to hold and make music with.
I’ve named this guitar Extol after the Hebrew script written behind its sound hole – and as a declaration of its purpose: To praise and extol and honor the King of Heaven. When not singing, I plan for it to be displayed in our home alongside many of our other family heirlooms; they each have a story of ours to tell. In the long run, it’s likely I’ll make another guitar or two when time and resources allow. Guitar or not, this project has blown open the doors of all the other woodworking projects I’m anxious to tackle. But for now, I’m grateful to enjoy the fruits of a labor I wondered if I’d ever have had a chance to put my hands to.
How does an amateur luthier make an electric guitar? Gladly.
Gantt Chart Breakdown of Major Events
3 Comments. Leave new
Yo Seth, Wowowow, this is absolutely incredible. The level of craftsmanship, care, and documentation in this project is on another level. Every step, from wood selection to wiring, reflects a deep respect for the instrument and the process of building it. Truly one of the most impressive builds I’ve seen, great job!
Hello Seth, this is such an impressive project, I love the detailed documentation you had for this post, it was really good to see your process, just curious would you play a song for expo? That would be sick if you do!
Seth, this turned out absolutely amazing! You were so thoughtful with all of your design choices, and I can see the care and hours of hard work in your final piece. Fantastic job!