
As the first part of my final report, I will focus on the product itself and it’s final form. I’m proud of the work I put into it, so that has it’s own space, but I want to present this final product first.
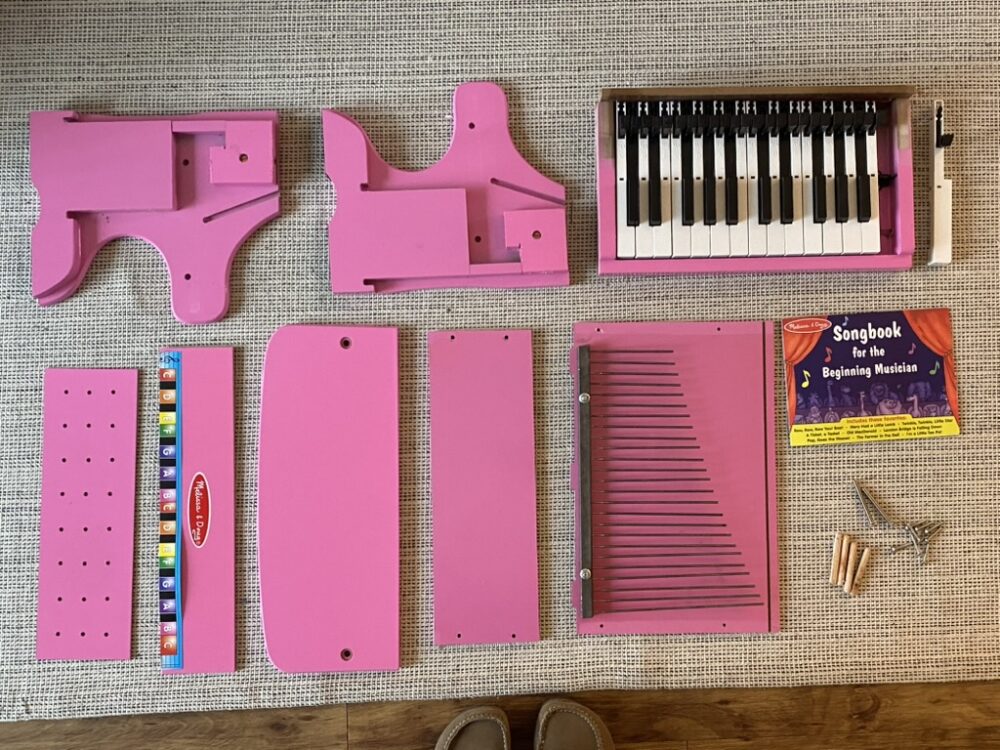
For my main project, I wanted to build a handmade toy piano inspired by the whimsical and analog charm of toy instruments used in Jimmy Fallon’s Classroom Instruments segment, which had deeply influenced me as a kid. As a music producer with a love for quirky, inexpensive instruments like kazoos, kalimbas, and ukuleles, I had always been drawn to the bright, playful sound they created. I was especially inspired by vintage toy pianos from Melissa & Doug and Schoenhut, and I wanted my design to reflect my messy, vintage, Arts and Crafts-inspired aesthetic with visible construction and personal touches, similar to a ladder shelf I had made from my grandparents’ old furniture. Seeing Adam Savage restore a Schoenhut piano helped me understand its inner workings and sparked ideas for how I might craft my own version, possibly improving the sound while learning new skills in woodworking and metalwork.
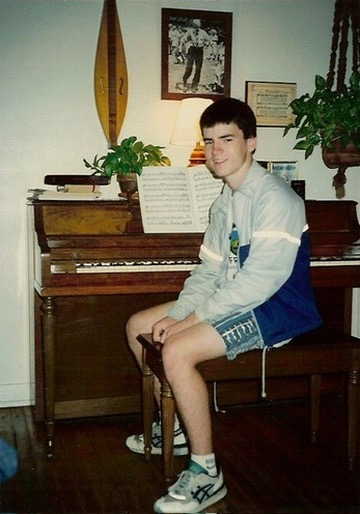
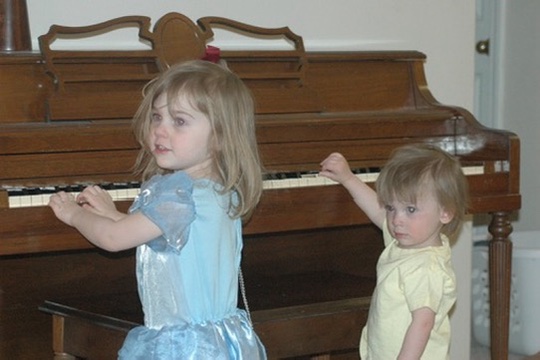
This project went through many iterations and changes in direction. I initially thought I knew exactly what I wanted to create, but my first idea did not align with what I truly wanted to make. After settling on the concept of a toy piano, I began considering a more practical and useful project—a custom instrument rack that I needed. I worked on multiple sketches and aesthetics, showing my interest in the idea, but I realized I had overlooked the requirement for the project to be dynamic. Since I couldn’t find a satisfying way to incorporate that, I set the rack aside to focus on a more suitable dynamic piece. I returned to the toy piano, initially imagining it with a vintage aesthetic inspired by old Schoenhut models and planning to use an antique painting technique in dark turquoise. However, after exploring alternate aesthetics, I discovered I preferred a mid-century modern style and considered changing the design. I also remembered an upright piano from my childhood that had been in my family for generations and decided to base my design on it. I asked my mom for photos and learned it had belonged to my grandmother, which made the connection more meaningful. I planned to use a xylophone-like mechanism with a mallet striking metal to produce sound, rather than the complex mechanics of a full-sized piano. This part posed the biggest challenge, so I intended to run tests and build a scale model of the casing to better understand the process. I created a rough timeline but expected delays and wanted to start as soon as possible.
I knew this project would come with some challenges, so I set five key goals to work toward while also acknowledging five major constraints that shaped what I could realistically achieve.
Specifications:
-
Recognizable replica: I wanted the design to resemble my family’s 1960s piano closely enough that my grandmother would recognize it, making it a meaningful recreation.
-
Mostly seamless assembly: While leaning into a handmade, Arts and Crafts aesthetic, I still aimed for clean construction and solid craftsmanship like the original piano.
-
Unique, aged finish: I planned to match the wood stain to old photos and keep visible scratches and grain to capture the piano’s worn, personal look.
-
An art piece for my home: Beyond functionality, I wanted the piano to look good and feel at home in my space—something I’d be proud to display.
-
Make sound: This was the most ambitious goal. I hoped to create a simple, xylophone-like mechanism that could produce playable tones.
Constraints:
-
Instrument complexity: Unlike ukuleles I’d made before, this piano involved unfamiliar mechanics, making it a steep learning curve.
-
Shop access: I had good tools at home during break, but back in Boulder, limited access to equipment slowed my progress.
-
Time: Making it playable added extra difficulty and pushed the limits of my schedule.
-
Makeshift setup: My Boulder workspace lacked proper tools and surfaces, requiring extra time and effort for basic tasks.
-
Transportation: Getting the piano around—especially on the bus—was awkward but necessary for shop access and the final presentation.
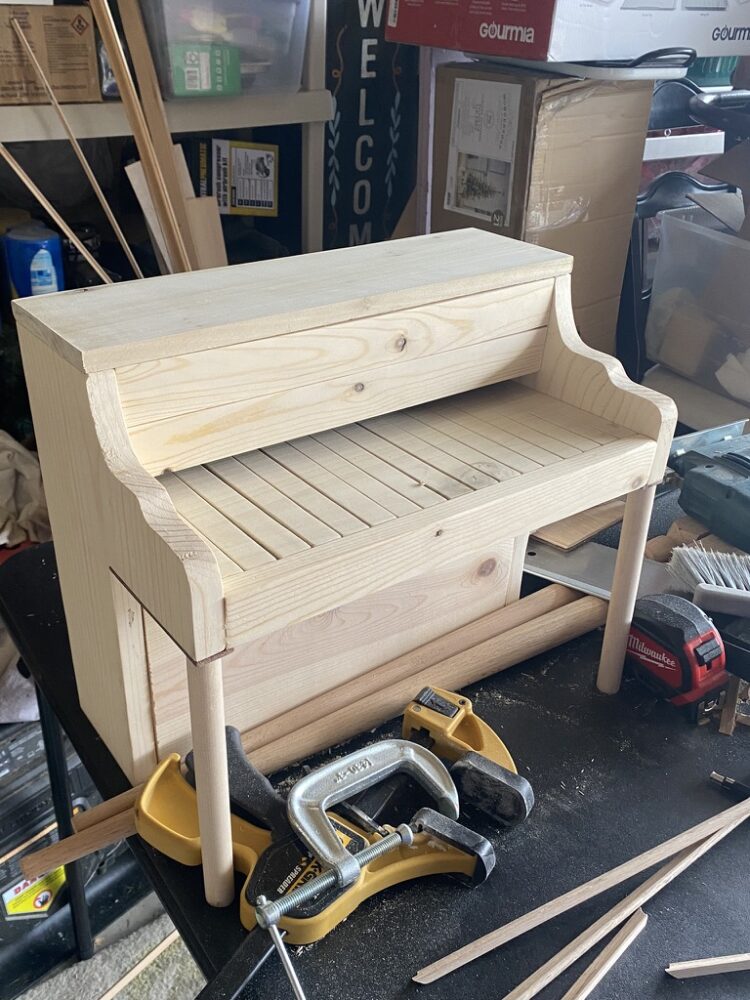
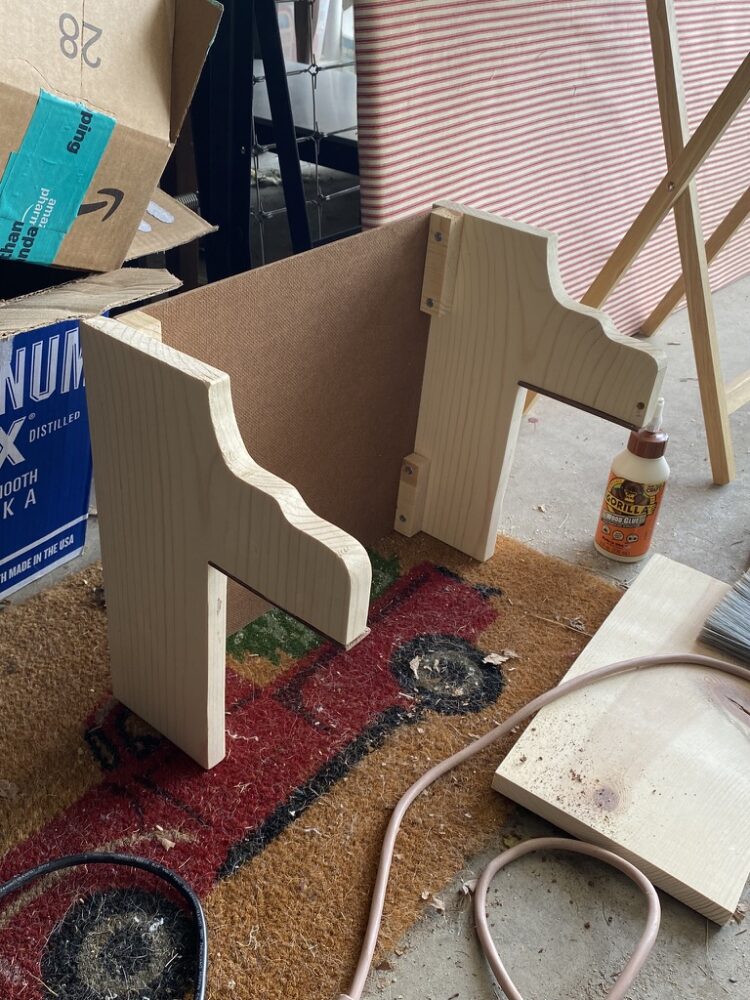
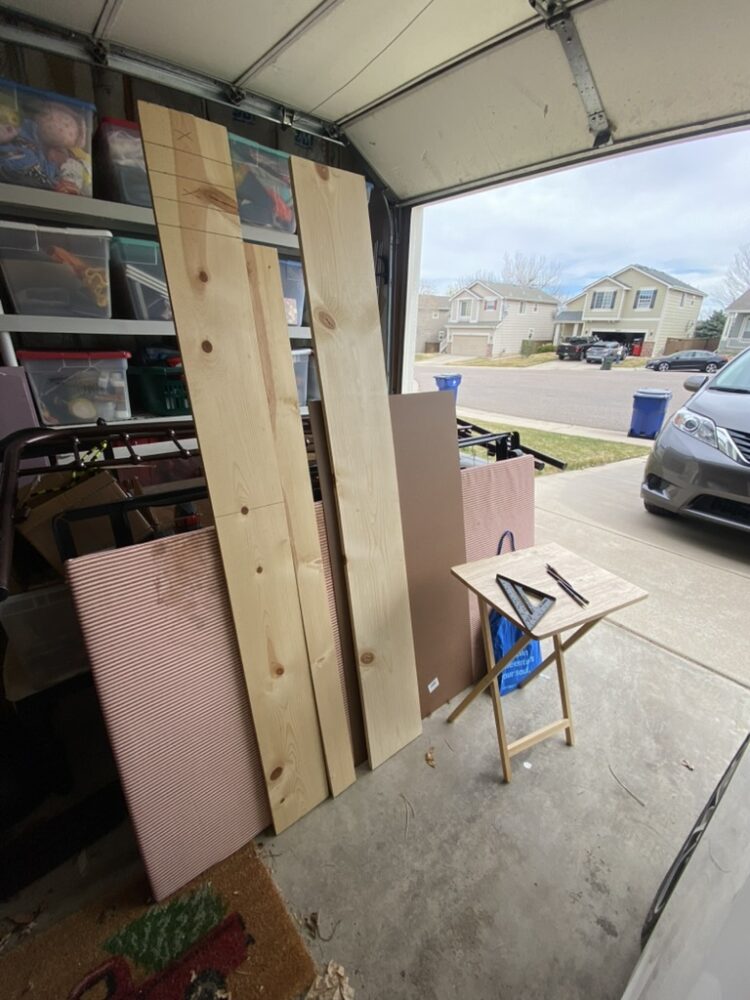
Without getting too much into the fabrication process which I’ll cover in my next post, I’ll just say it was really fun for me. I was able to work in my mom’s garage, using her tools, to get almost everything I needed to do done in a few days. I brought this shell back to boulder which I then stained and finished.

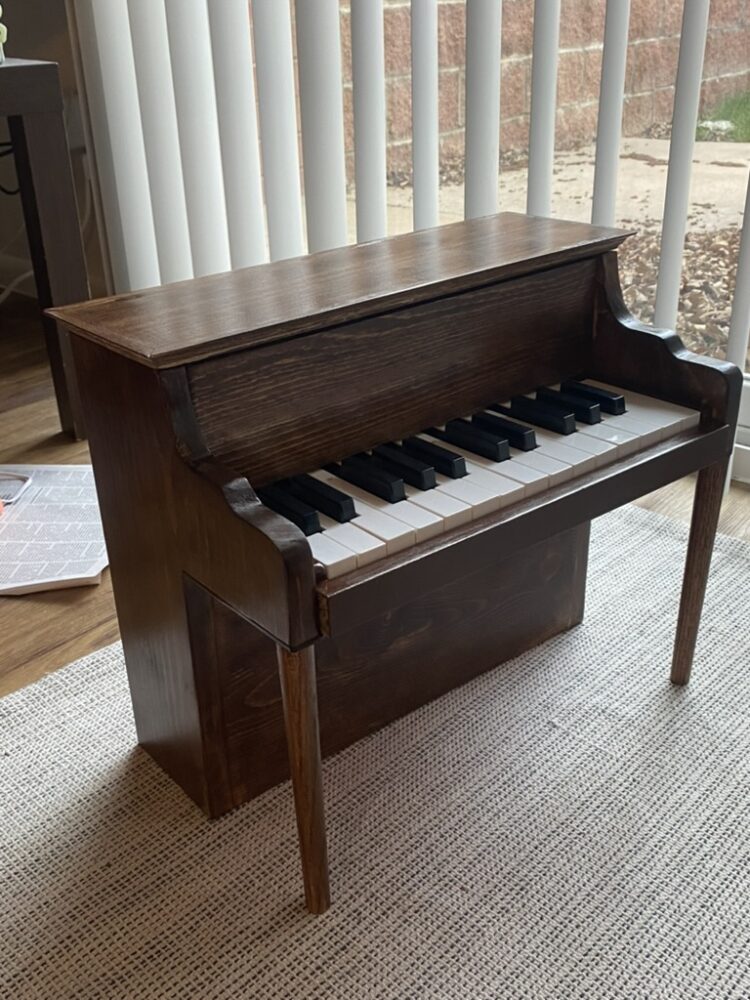
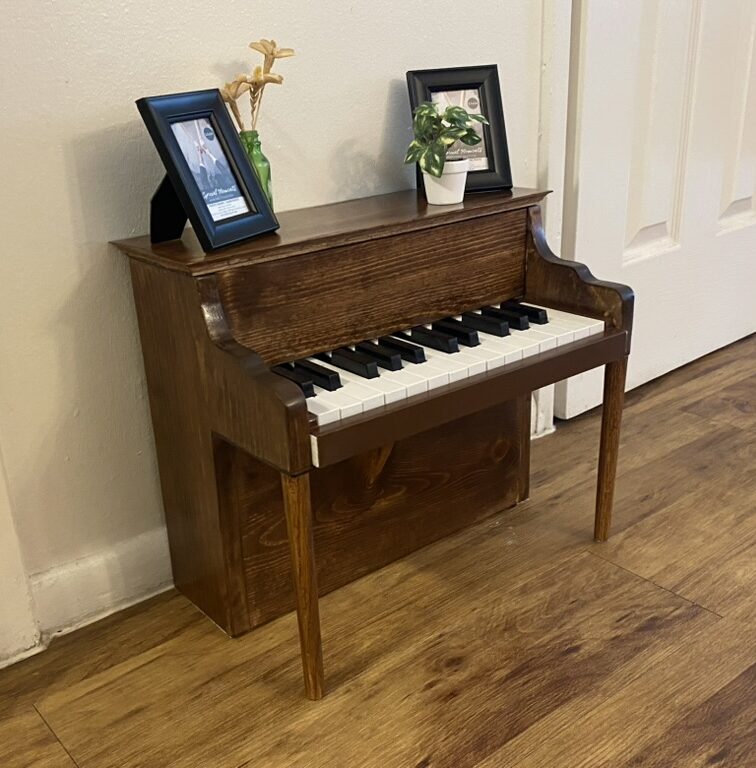
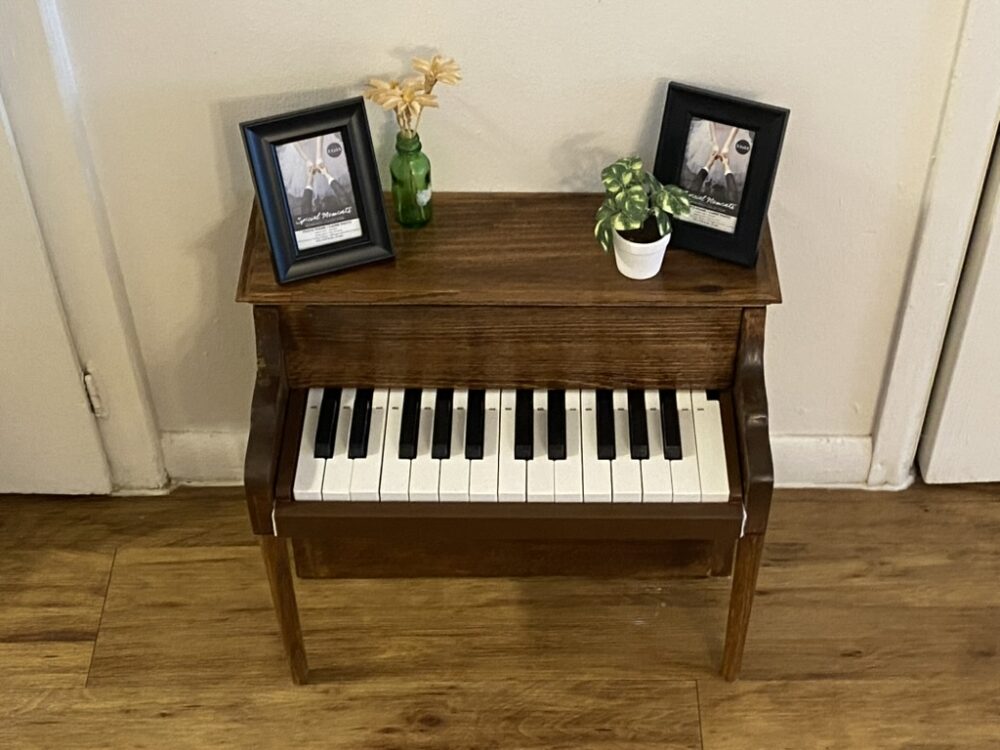
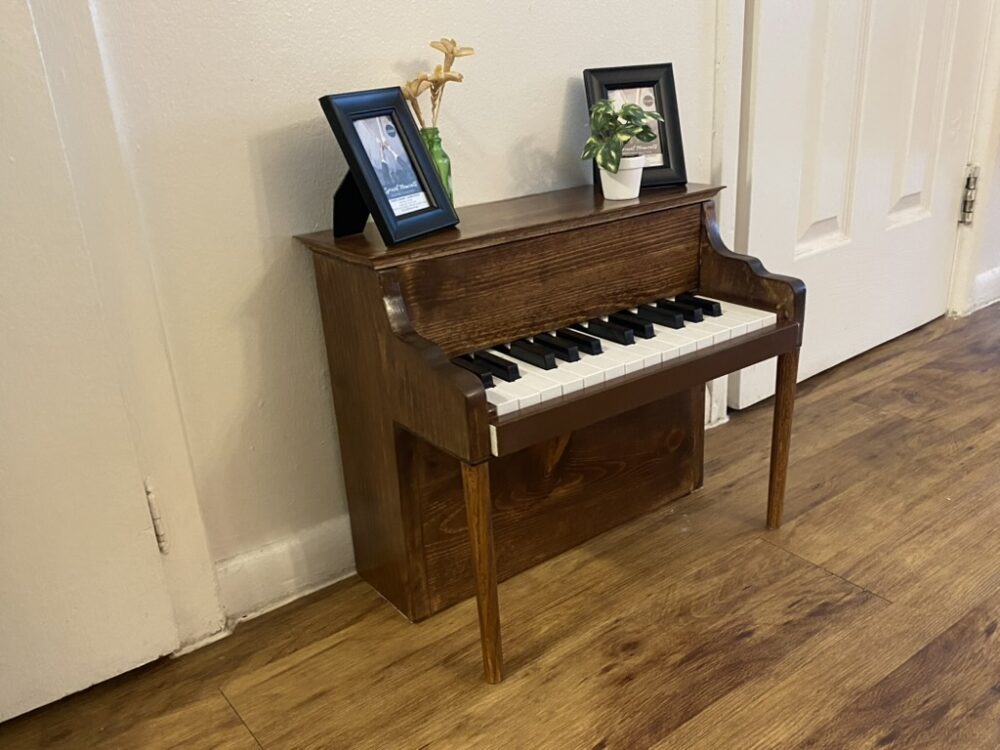
After putting the piano together for the final time, I just looked at it for a while, proud of what I’d made. I got excited to set up my display for the expo, and I started planning how I would stage the piano by adding photo frames and plants, like seen in many of the old photos of the original piano.
After staging and finishing work on the piano, I already started thinking about things I would’ve changed if I had more time, or possibly alter in the future.
Pedals: Like most pianos, our family piano had three pedals. I remember one of them being impossible to push down.
Music Stand: I wanted to add this music stand originally, but I ran out of time to learn how to laser cut. I can play it off, though, since the stand was actually broken for the longest time, so we often left it leaning against the wall so it didn’t fall on us while we played.
Fine-Tune Keys: The piano plays, and for that I’m grateful. However, it still sounds like a cheap toy piano (unsurprisingly). There are many things I could do to make it sound better, like adding some felt padding where the plastic joints move.
Miniature Music Books: My sister and I shared some memories we had of specific books we played with, and the notebooks we brought to practice with Ms. C, our piano teacher.

In the end, I have a fully functional, handmade toy piano replica of a family piano. I’m very pleased with how it looks, so while there are some things I could change, I don’t see it happening soon. I feel like I did exactly what I set out to do at the start of this project, so I’m happy with my final piece.
5 Comments. Leave new
[…] Grandma’s Piano: A Miniature Replica – Final Report Part 1 […]
Hey Zoe! This is such an awesome and unique project! I love to see the inspiration behind the piano and its personal meaning to you. I’m very impressed that it fulfills your aesthetic requirement and still is playable. Looking forward to seeing it in person!
Thank you! I’m super happy that it’s playable in the end. I struggled for a while with that decision. It’s the kind of thing that means more to me than someone I could sell it to or give it to (besides my family, of course). I appreciate the comment!
I am super impressed by how this turned out, especially since so much of it was made via photos without the actual piano. I really like the ideas of adding pedals and a stand. I do think that tuning the piano would be very difficult, but I think you can make it work.
Yeah, it was fun to see how much I could remember about the physical piano. I didn’t often think about it before this project, so I was impressed to see just how much I actually remembered. Luckily, it wouldn’t be too hard to add pedals in the future, so I’ll revisit it later. Thanks for the comment!