
“Featured Image Subject to Change”
Inspiration and Aesthetic:
The inspiration for my project came from a short reflection I had while sitting in my desk chair. During junior year, one of my friends went abroad and lent me a lamp. The lamp had the shape of a gourd and featured ornate designs etched into the clay-like material that made up the base. The lampshade had a vintage, coarse, twilled texture. This lamp provided a familiar and warm orange lighting with a brightness that perfectly complemented the other lamp I had placed in the opposing corner of the room. Alas, the perfect light harmony of the room could not last forever. She returned from abroad and retrieved her lamp, leaving me with an imperfect light balance that had existed for the last year. Finally, this project gave me a reason to fill the corner devoid of light. So, I decided to make a lamp for this project.
While I could have tried to imitate the ornate pottery-style lamp that had previously existed there, I decided I wanted to keep the important elements but change the persona the lamp held. One crucial aspect was the color. The earthy brown of the lamp’s base and the hay-colored lampshade worked extremely well in my room. My desk, nightstand, and dresser are all made of dark brown wood. I have decorated the room with posters, including the album cover from Animals by Pink Floyd, along with other pieces that contribute to the color palette. While the color scheme was great, the look of the lamp itself was something I wanted to change. Instead of the vintage aesthetic—something likely to be seen in someone’s grandma’s house (nothing wrong with that; I loved the lamp)—I wanted it to be more timeless, more sleek.
I spent some time searching the internet to find something that inspired me until I stumbled upon this.
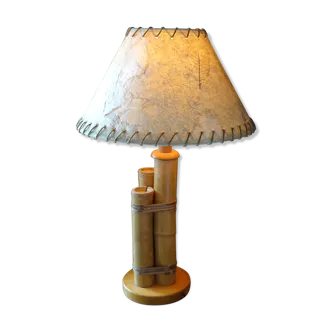
It was perfect. The natural feel, the same colors that the lamp I was lent had. It was a better version of the lamp I enjoyed so thoroughly. So I got to work. Initial searches showed that readily available dried bamboo could not be purchased in the thickness that this lamp seemed to have. I would have to take a slightly different approach to the small cluster. I knew that I would have to source some sort of wood slab to create a base for the bamboo. As I continued the hunt I knew a few things. I wanted the body of the lamp to be made of bamboo poles. I also wanted to create the lamp with colors that would accent my room in the same way that the previous lamp had.
In the back of my mind I knew that I had to fulfill an aesthetic for the project. This part was always on the backburner however. I knew that the nature of my project would fit the same aesthetic as my first project, naturalism. Naturalism seeks to replicate nature as it exists. No exaggerations, no alterations, just enjoying and depicting nature by respecting the beauty it already holds. This felt very natural (no pun intended) since the materials I planned on working with were already natural resources. While there were some alterations to get from bamboo and trees to dried bamboo and wood slabs, I felt it still maintained the integrity of nature. Also, by standing the bamboo poles it would mimic the way they are naturally found, standing up planted in the ground.
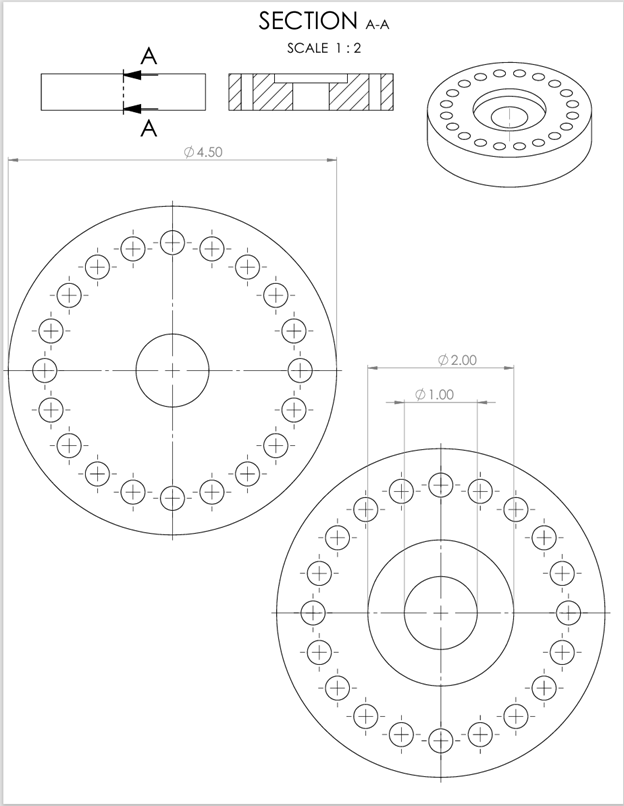
Considerations and Specifications:
I decided as I started this project that it would be useful to talk to the woodshop director at the Idea Forge to make sure I got some second opinions on my design. I scheduled a meeting with Josh and explained to him my concept. Originally, I had planned on featuring three small clusters of bamboo. These small clusters would be placed up against each other to form a gap in the middle where wires and the lightbult mount could be placed. If needed, I planned to create a small adapter that could take go from a lightbulb down to the size of a
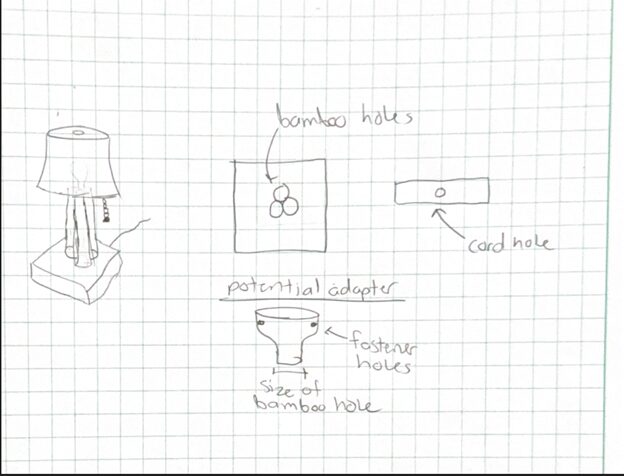
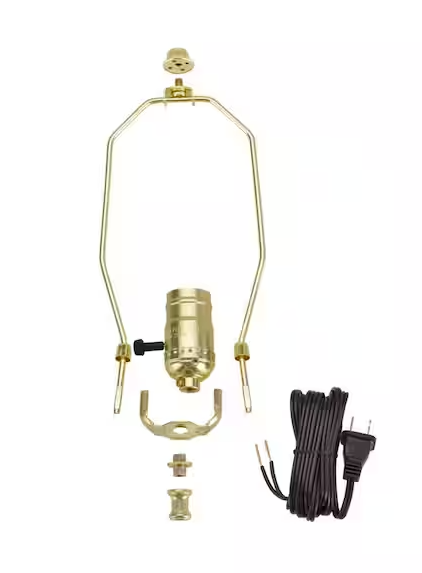
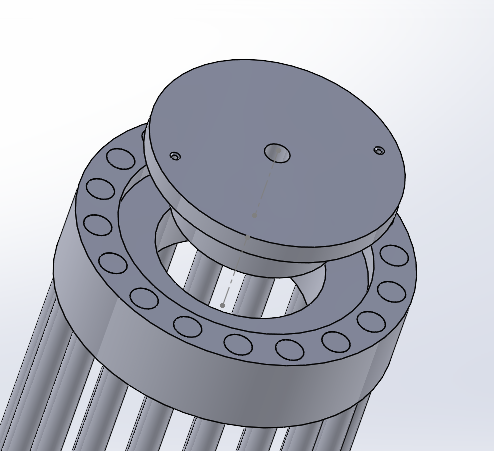
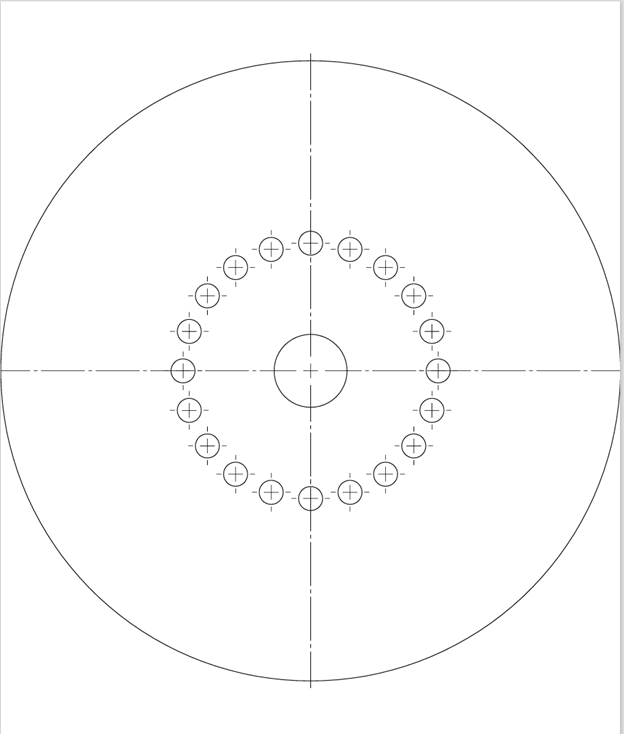
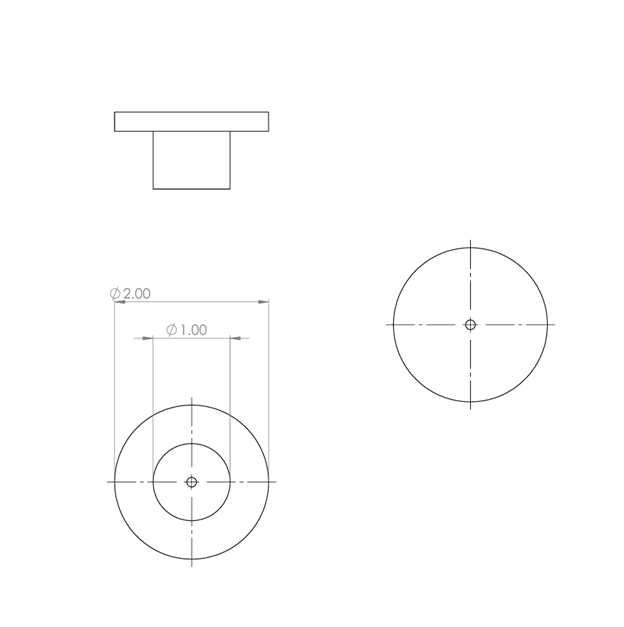
After talking with Josh I realized that this had some shortcomings. The first was that I did not realize there were lamp kits that you could buy to turn almost anything into lamp. This immediately changed my design. The hollow middle section could not support the lightbulb mount. The mount needs a hole to fit a threaded rod that the mount fastens to. To account for this, I designed a top plate that would have small holes the bamboo would press fit into. This top plate would act as both an organizer for the bamboo poles and also to allow for a 3/8″ hole to be drilled to place the threaded rod. Another change was to move away from clusters of bamboo and instead place them in one large ring. To make cording easier, a small removeable center was added to the top plate to allow for easily disassembly and cord threading.
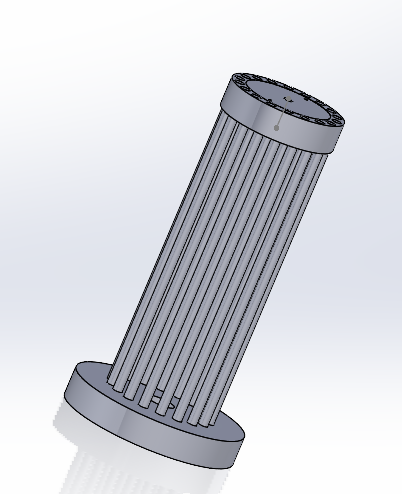
So with these in mind I went home, creating preliminary CAD and created some specifications for my project. The new CAD included the considerations for a removeable cap and oriented holes for the lamp. The new CAD photos are shown below.
As I began thinking about specs, these 5 were what I deemed to be the most important to my success.
- Straightness
While talking with Josh we told me a time when the wooden tables in the Idea Forge all had extreme warping in the corners from humidity changes in the seasons. While it is less important on smaller scale projects it was still something that I would need to consider if I wanted the lamp to last longer than a year. Finishes were discussed and ideas for how to maintain the shape of the project were implemented. The other portion of “straightness” has to do with the bamboo itself. None of the poles I ordered were straight. They were all a little bent or warped. Since they are the body of the lamp there would need to be some form of countermeasure to ensure that they were at least fastened in a way to make the lamp look straight. The solution came in two parts. First, the 4 straightest bamboo poles were taken and cut to be a bit longer than the rest. These would each be placed in a “corner or pole” in the ring. By making the 4 straightest the “pillars” for orienting the lamp, this would make it as straight as possible when glueing the project. The second component was creating a way to hold the lamp straight while the glue finished hardening. Scrap wood was cut taking into account the radii of the bottom and top plate, triangulating them around the lamp with standing weights would allow them to hold the lamp in place while the glue dried.
-
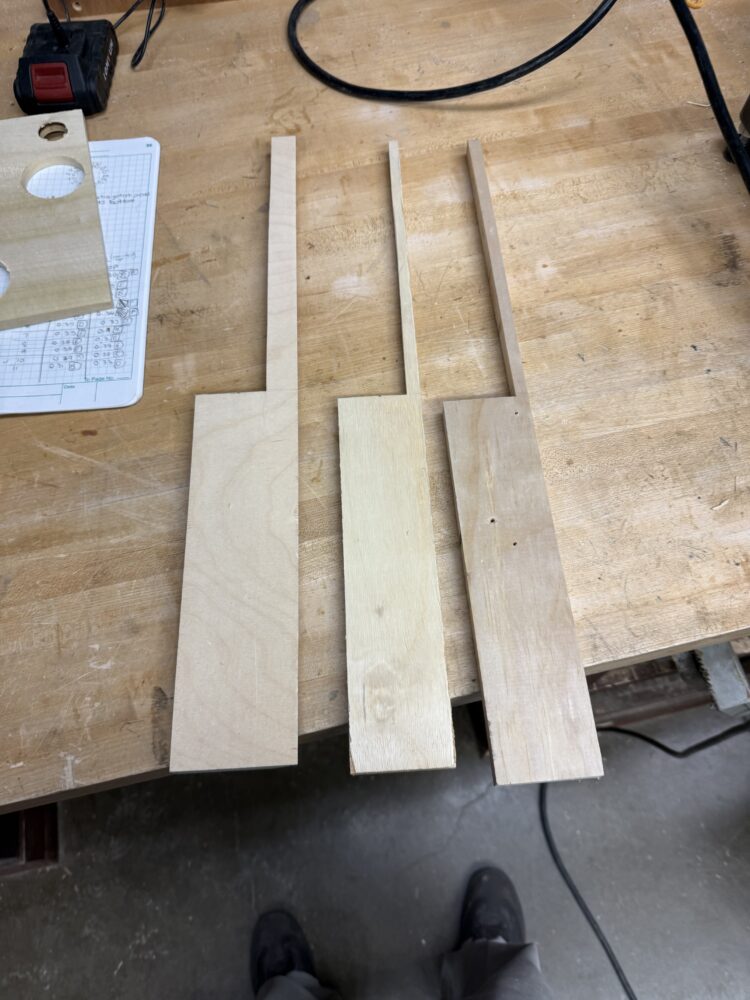
Figure 6: Holding Wood Not the prettiest thing, but the function works.
- Complementary design elements:
- Colors that accent my room
- Invisible cord threading
- Produces light
The rest were smaller elements that were taken care of naturally by my chosen materials, or easily obtained with good design plans. Ultimately, I took what I had planned and got to work. There were a couple parts that I had to plan extremely well before I did anything with the wood. Not all of the bamboo was the same width so I had to do some accounting to find the straightest pieces and measure each individual diameter. Accurately drilling holes for each diameter would help to remove any play that a larger hole might have for glueing. I printed 1-1 birds eye view drawings of each part that were taped onto the slab of wood I got and allow me precise drilling locations without a bunch of measurements.
These three were each printed and used as I worked towards my finished project. They made my life so much easier. By using 1-1 prints and using these to orient and drill my holes it became a simple process of making sure I was using the right drill bits and labeling each hole that corresponded to each bamboo pole. Had I needed to locate every hole and measure each individually I would have had to put in many more hours of painstaking work. Instead I got to continously move forward and create a finished design.
I believe that my materials influenced my aesthetic the most and made it much easier for me to move forward. Most of my focus went into how I would construct the lamp since the materials were the aesthetic themselves. There were some design choices, like the lampshade and type of wood I chose, but ultimately what became important was completing the design. Through my intensive planning and discussions I had a solid plan going into the construction and it was just a matter of putting in the hours to finish the poject.
Sources:
Figure 1:
https://www.selency.nl/c/lighting/table-lamp/bedside-lamp-and-table-lamp?materialTitle=zinc~bronze~rattan%20and%20wicker&sortBy=PRODUCTS_EN_BS2&page=16
Figure 3:
https://www.homedepot.com/p/Aspen-Creative-Corporation-Polished-Brass-Make-A-Lamp-3-Way-Socket-Kit-1-Pack-21011/307273840
4 Comments. Leave new
Hi Brain, I really like this project and am excited to see its final version. The detail work on the backside of this is super impressive, I never knew a project could be so technical. I also like how you built your aesthetic off the first project. Great job and good luck at expo!
Thanks Joe! It turned out to be more a technical battle than I thought. I guess using things that aren’t straight to create something that is can turn out to be quite a challenge. Good thing I have the “brain” for it
This project is an excellent example of combining personal inspiration with practical design. I love how you took the emotional connection from the original lamp and reinterpreted it into something that fits your style and space even better. The way you transitioned from a vintage aesthetic to a more timeless, naturalistic one was well thought-out. I also appreciate how much attention you gave to structural details like straightness, cord management, and bamboo selection — it’s clear you put a lot of care into the build’s visual and functional aspects. Using full-scale CAD printouts for drilling is such a smart move. It feels like every step of your process was deliberate and thoughtful. The final result sounds like it’s not just a lamp, but a meaningful addition to your room that ties everything together. Amazing work!
James thank you for the lovely response. I appreciate that you noticed the time and effort I put into the planning steps. I am excited with how the final turned out?