
Finding the Right Inspiration
Since I enjoy working with 3D printing, I knew early on that I wanted to use this method to bring my kinetic sculpture to life. The next step was finding what kinetic sculpture I wanted to make. My first ideas were to make some sort of marble machine or something that featured an opening and closing flower mechanism. However after searching YouTube for awhile I found a few videos on 3D printed strandbeest and my I decided this would be what I make.
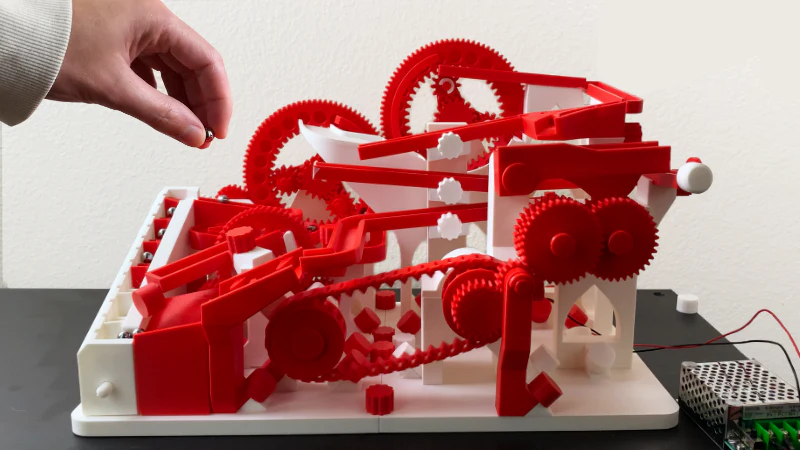
Image 1: 3D printed marble machine as an example
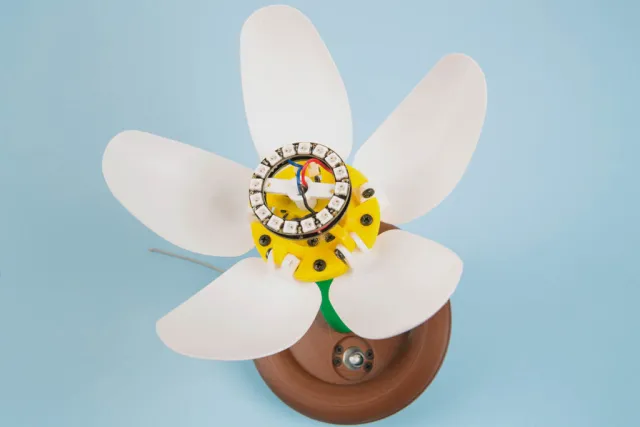 Image 2: 3D articulated flower lamp as an example
My first step was to look for existing 3D-printable models of the Strandbeest on popular 3D printing sites such as Thingiverse, Printables, and Cults3D, which are all popular communities for sharing and downloading 3D models. Sure enough, I found plenty of Strandbeest models in various sizes and styles. However most of them were exactly true to Jansen’s that didn’t have the exposed gears I was looking for. This presented a challenge: while the mechanics were solid, the visual style didn’t match my vision of a steampunk-inspired machine.
What I was really looking for was a model that showcased the inner workings of the Strandbeest. The gears, joints, and linkages all moving together. In steampunk design, these elements are meant to be seen and admired. Exposing them gives the sculpture a sense of complexity and helps viewers connect with the engineering behind the motion.
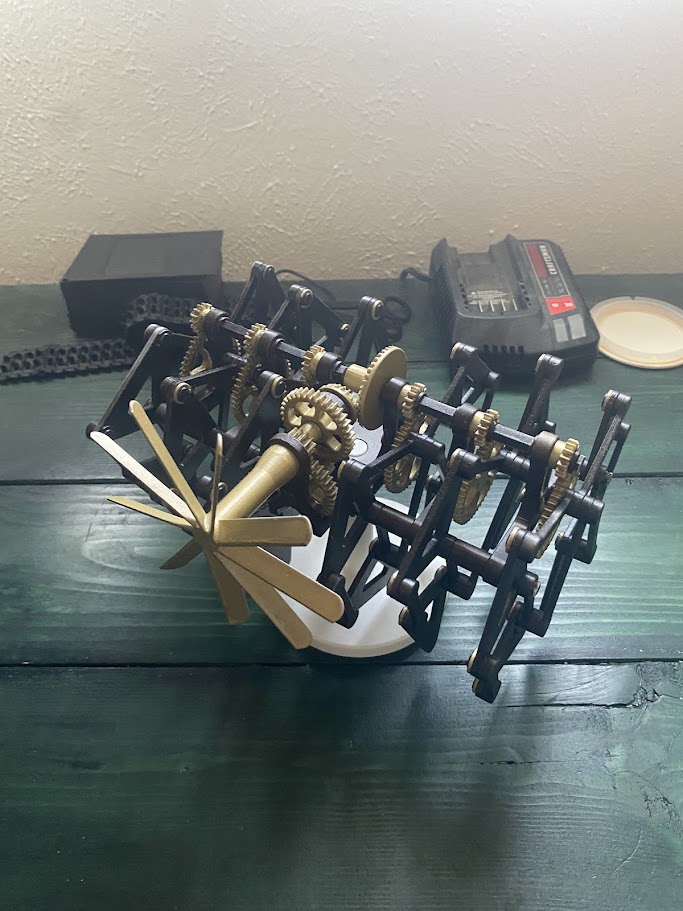
That’s when I remembered a YouTube creator I follow named Engineezy, who shares engineering projects and 3D printed designs on his channel. I recalled that he had built a Strandbeest model a while back that featured visible gears, which was exactly what I was looking for. I went back to his channel and found the videos where he showcased his builds. He had actually created two different sizes: a large version meant for outdoor use and a smaller desktop-sized version that was more manageable for this projects.
After watching both videos, I decided to go with the smaller version. It fit better with my goals for the project. It would be easier to print, assemble, and modify in the space I had available. It also gave me the freedom to focus more on the aesthetic and fine detailing rather than getting caught up in heavy mechanical adjustments. The compact scale meant I didn’t have to worry about the finish effecting the motion.
What made Engineezy’s design stand out wasn’t just the exposed gears—it was the way he laid out the frame to highlight the motion. You can actually watch the crankshaft turn and the legs walk in sync, which was both educational and visually satisfying. It was also clear from the comments and feedback on his videos that many other makers had successfully built their own versions using his files, which gave me confidence that this would be a great place to start for my project.
By choosing this particular model. I could really focus hard on the aesthetic modifying the colors, textures, and even the surface finishes to give it a distinct identity rooted in the steampunk tradition. Rather than a clean plastic model, I wanted something that looked metallic, aged, and full of character, like a forgotten invention rediscovered from a lost era.
Image 3: Engineezy strandbeest design I used as my starting point
My Vision and Project Goals
Since my goal was to make a moving sculpture that looked interesting and worked well. I wanted it to move smoothly and look like something out of a steampunk world.
Here are the key things I wanted my design to include:
-
Visible gears and parts – so people could watch how the machine worked
-
Steampunk style – with brass, copper, and silver tones that make it look like a machine from the past
-
Smooth, repeated motion – so it would be enjoyable to watch when running
-
Small size – so it could sit on a table or shelf as a decorative piece
I imagined this sculpture as something built by an inventor in a different timeline. That idea helped guide my design choices, from the materials to the colors.
Sketches and Design Planning
At the start, I used chatgpt to figure give me some inspiration for color schemes and steampunk images to help me decide how I would color my project to create the steampunk aesthetic. Then I laid these parts out separately in a 3D print slicer software to try and visualize what these schemes would look like with my piece.
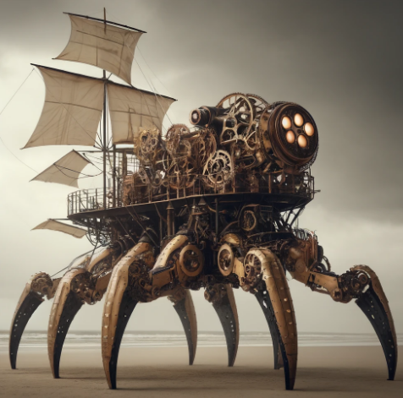
Image 4: Chat GPT image of a steampunk strandbeest used as inspiration
Image 5: Chat GPT image of a color scheme for the steampunk aesthetic
Image 6: Parts laid out in slicing software according to the color scheme
Color and Material Choices
Since I was using a 3D printer, I first thought about printing with metallic-colored filament like brass or copper PLA. But I quickly realized this wasn’t the best option. Metallic PLA is more expensive, doesn’t come in many shades, and often looks too plastic instead of truly metallic.
Instead, I printed the parts using basic PLA and then spray-painted them. This gave me much more control over how the sculpture looked in the end. With paint, I could potentially:
-
Use multiple metal colors for different parts
-
Add aging effects to make it look older
-
Paint each part separately for more detail
- Save money too lol
I picked three main colors for the sculpture:
-
Brass – for the gears and propeller
-
Metallic black – for the joints
-
Brown/rusted – to add a worn, antique look
How the Aesthetic Comes Through
Everything about the final design was meant to support the steampunk look. The exposed gears and linkages are front and center, and the painted finish gives the look of metal and wear.
To me the sculpture looks like it came out of an inventor’s lab from the past. When it moves, the gears and legs move in sync which is really cool to see.. Even when it’s not running as people have came over I have got compliments on and they realize what the aesthetic is right away. This makes me proud because I usually care so much about the functionality first but this time I prioritized the aesthetic.
This focus on function and form is what makes steampunk design so compelling. It’s not about hiding the technology—it’s about celebrating it. I tried to bring that idea into every part of this project.
Image 1: https://3dprinteracademy.com/products/the-magnificent-marble-machine
Image 2: https://makezine.com/projects/3d-print-this-blooming-flower-night-light/
Image 3: Check out engineezy’s website where you can find cool projects that are based in 3D printing https://engineezy.com/collections/all?srsltid=AfmBOoqQ2wFgOiG2SEUNPIfs1DCyC1r7elSexX7HcJkveaGwmraI0jTh
Image 4 & 5: Chat GPT image generation
Image 6: My own image