
Inspirations
For my main project, I re-created a mountain shelf I originally made a few years ago, incorporating additional details that I’ll explain later. I cherished this piece because it aligned perfectly with my personal aesthetic. I’ve always been drawn to wood-based creations, which bring a rustic charm and warmth to any space. As a Colorado native, I aimed to design a mountain shelf that captured the essence of my home by incorporating the natural wood elements I love.
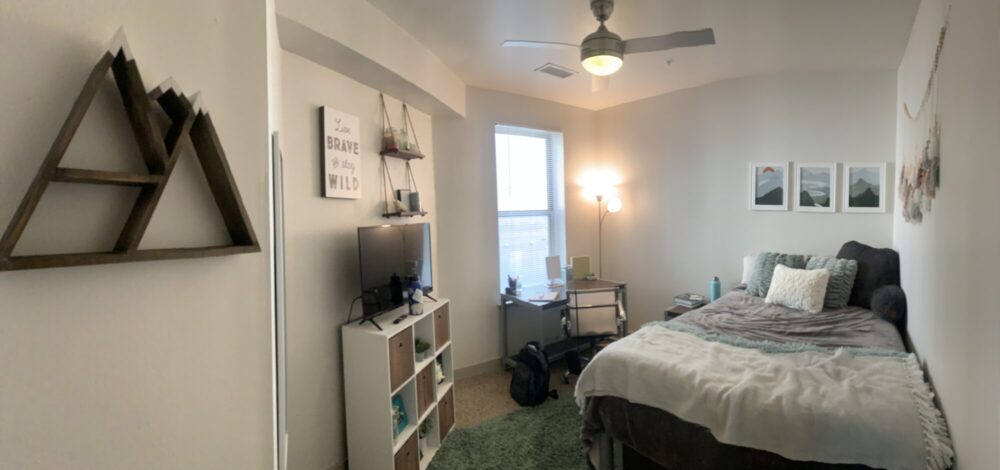
Figure 1 shows one of my college bedrooms and how I decorated the space. I enjoyed blending natural colors like tans, browns, greys, and greens. My personal aesthetic could best be described as a mix of earthy neutrals and rustic modern. The earthy neutrals appeared in my color choices, while the rustic modern elements came through in my choice of furniture and decor—emphasizing natural materials, clean lines, and visually appealing patterns.
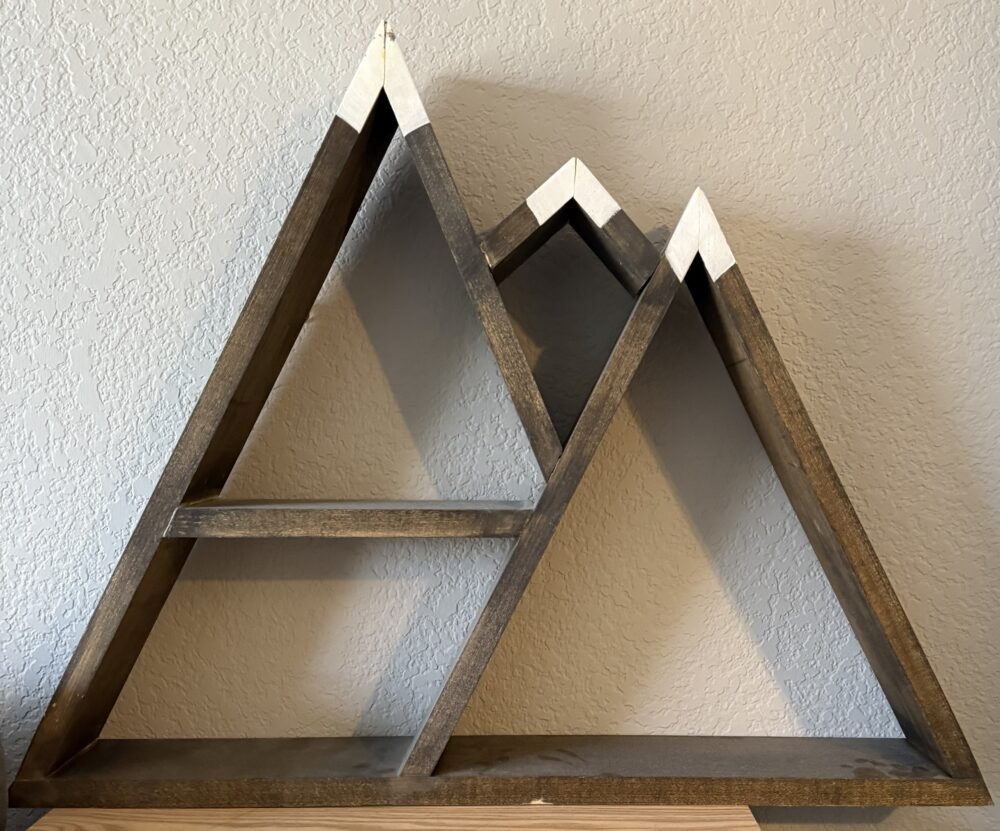
A closer look at my original mountain shelf is shown in Figure 2. For that version, I used 1″x4″ boards, which I reused for this project. Initially, I made the mistake of cutting at very difficult angles, a lesson I learned from and did not repeat. I liked how I had incorporated varying-sized peaks in the original design and carried that detail into the new version. I debated whether to stick with the three-peak structure and ultimately decided to continue with it. I also really liked the original stain color, and since I still had it on hand, I used it again.
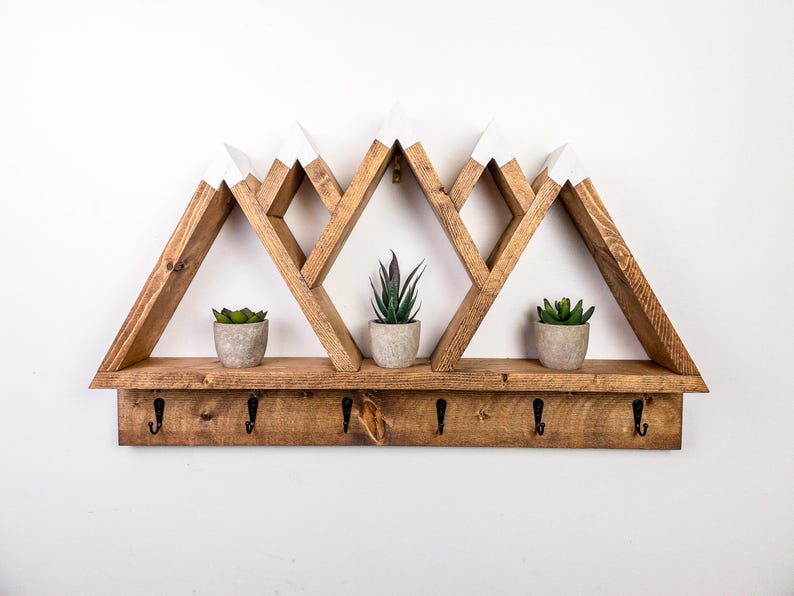
To improve the design, I wanted to incorporate a drawer for storing keys and other small items. At first, I considered using a hinged door instead, but the drawer better satisfied the design I was going for. I also considered adding coat hangers to the design and looked for inspiration on Etsy—one example is shown in Figure 3. However, I decided against including both features and chose the drawer for its cleaner, sleeker look. At the time, I couldn’t find any existing mountain shelves with drawers on the market, so I had no direct visual references for that part of the design.
Aesthetic
This project embodied the Rustic Modern aesthetic:
- Modern design emphasizes simplicity, sleek forms, and structured geometry.
- Rustic design highlights natural materials, warm tones, and a rugged charm.
Project Vision
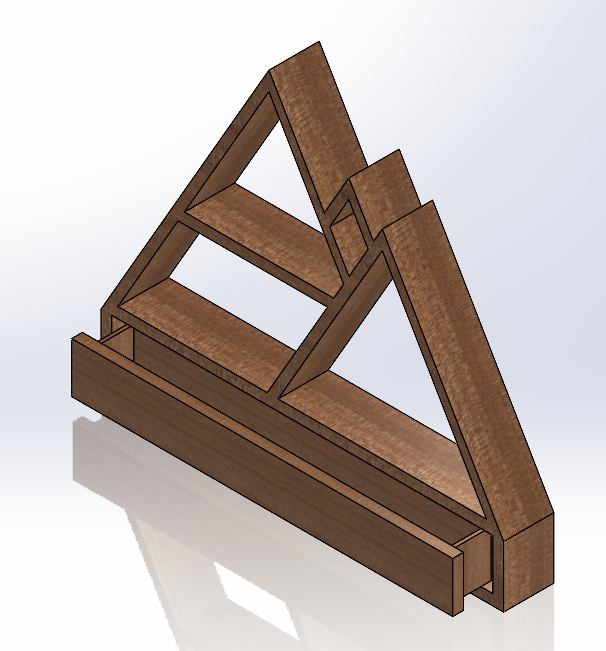
Figure 4 shows the CAD model I created to visualize the final product. I chose to model it in CAD rather than sketching so I could accurately determine the dimensions and cutting angles. Each angle was intentionally designed to be compatible with the miter saw I had access to.
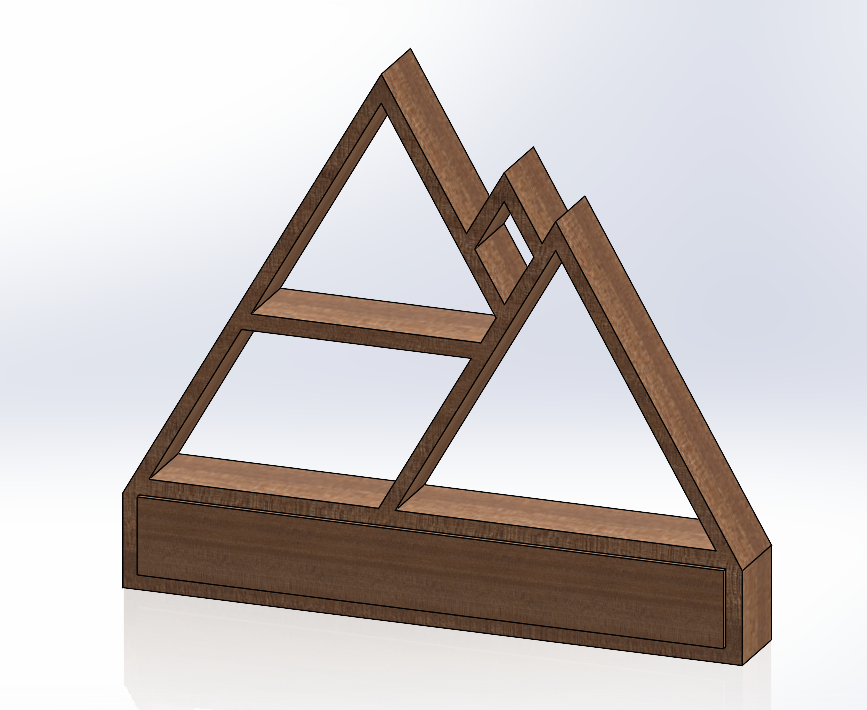
The final design achieved the Rustic Modern aesthetic I envisioned. The stain emphasized the natural wood grain and brought in warm tones. I kept the original three-peak mountain structure because I found the asymmetrical, varied sizes visually compelling. Despite adding a drawer, the overall sleekness of the shelf remained intact. I designed the drawer to blend in seamlessly when closed, keeping the focus on the mountain silhouette. Though I had never built a drawer before, I felt confident that the added woodworking wouldn’t be overly complex.
For materials, I used:
-
1″x4″ wood boards (nominal size: 0.75″x3.5″) – used for the mountain design, outer walls, and drawer face to ensure a uniform stain appearance.
-
1/4″ thick wood sheet – used for the drawer sides and bottom, keeping wall thickness minimal to maximize drawer space.
-
Wooden drawer slides – purchased because I lacked access to tools to create my own, and these could be cut to fit.
-
Brass drawer handle – selected to complement the Rustic Modern aesthetic and add function.
The drawer was designed to be slightly under 2 feet wide, and I chose to mount the slides on the left and right sides rather than underneath to preserve depth. Reducing the width slightly allowed me to maintain a deeper drawer, maximizing its storage potential.
Top 5 Specifications
- Rustic Modern AestheticThe primary goal was to achieve a Rustic Modern look—combining rustic charm with a clean, modern touch. I used Jacobean wood stain to highlight the grain, incorporated crisp mountain peaks, and added a brass handle for contrast.
- Sturdiness
The shelf needed to be durable and stable, whether mounted or placed on a flat surface. This required careful attention to joint strength and balanced design. - Functional Drawer
The drawer was designed to operate smoothly and provide concealed storage for everyday items like keys or notebooks. It added both practicality and refinement. - Professional Apperance
Clean lines, precise construction, and a smooth finish helped ensure that the final product appeared professionally crafted, not homemade. - Weight Capacity
The shelf needed to support a reasonable load without sagging. Reinforced joints and strong materials were crucial to this requirement, especially for the drawer’s functionality.
Top 5 Constraints and Challenges
- Cost of Quality Wood
High-grade wood is expensive, so I opted for a budget-friendly alternative and invested extra effort in sanding and staining to achieve the desired look. - Limited Equipment Access
As a remote student, I only had access to tools at my parents’ house, which restricted what I could do in terms of cutting and assembly. - Time Constraints
Balancing a full-time job and coursework required strong time management. I had to be strategic in planning my build time around other responsibilities. - Limited Drawer-Building Experience
Creating the drawer was the most challenging part due to my lack of prior experience in this area. - Precision Cuts Based on CAD
Translating CAD measurements into precise physical cuts required careful measuring and cutting to maintain the integrity of the design.
In the next part of the final project report, I will discuss how I fabricated my project and show the final product.
References
[1] 5 Peak Mountain Shelf with Hooks – Rustic Decor – Adventure Decor
2 Comments. Leave new
Hello Taylor, I really enjoyed reading your post. I think that your Mountain Shelf perfectly embodies a modern and rustic aesthetic. I specifically appreciate your decision to use stains that brings out the natural grains of the wood and reminds me of a rustic cabin at the turn of the 20th century. I am curious what your fixturing process is to bond these wood planks at specific angles.
Thank you, David! I explain more of my fabrication process in Post 12, but briefly I used construction adhesive first then a nail gun to reinforce the stability of the joints.