

Introduction
For my main project in this class, I am creating a layered laser-cut wooden tree wall art piece that incorporates a dynamic hidden element: a picture frame embedded behind the tree silhouette that is held together by a hinge that can open up. The core of this piece blends natural minimalist design with digital fabrication techniques. It will function both as a striking decorative piece and a subtle, interactive way to display a personal photograph or artwork.
This post outlines my inspiration sources, project vision, aesthetic approach, alternate design explorations, and progress so far, including prototyping, design sketches, and CAD integration. Throughout this process, I aim to fuse form, function, and artistic storytelling using laser cutting and material layering as my primary tools.

Figure 0. Vision Board
What I’m Making
I’m designing a multi-layered laser-cut wood panel with a detailed tree silhouette that visually pops against a dark backdrop. The art piece will be sized for hanging on a wall (approximately 12”x16”) and constructed from stacked wood layers. A removable panel or hinged backing will hide a photo frame behind the tree silhouette, which can be accessed to change images.
This piece is meant to serve as an aesthetic object on its own, while offering a private, personal layer, literally, hidden within the design. It’s meant to surprise the viewer upon closer interaction, giving the object deeper meaning and a dynamic functionality not often found in wall decor.

Inspiration & Source Citations
My primary inspiration comes from a combination of laser-cut nature art and minimalist wall decor with natural materials. One major reference image that shaped my design approach features a tree with layered branches cut from wood, mounted on a black background with dimensional contrast.
I also drew from various Pinterest boards, product designs on Etsy, and examples from makers on Instructables. In particular, these pieces influenced my thinking:
- A black and natural wood 3D tree silhouette in a shadowbox frame [via Etsy].
- Scandinavian-style wall hangings using plywood, clean lines, and negative space.
- Wood layering techniques found in handcrafted ornaments and cake stands using slot-and-tab connections.
In addition, I examined the work of contemporary artists such as Martin Tomsky, whose layered wood illustrations create highly detailed scenes. Tomsky’s ability to convey narrative and texture through stacked laser-cut forms served as a powerful example of the potential of this technique.

Design Vision & Specifications
Form and Function Goals
The function of this piece is twofold:
- To serve as a decorative wall artwork with a focus on material contrast and craftsmanship.
- To subtly house a dynamic photo element, a hidden picture frame accessible by a back panel or hinge.
I want viewers to be drawn in by the detailed surface design, and then surprised by the subtle utility hidden within it. The interaction, revealing the hidden image, is meant to give the piece emotional resonance.
Aesthetic Goals
- Material palette: Natural wood finish (likely Baltic birch), black backing panel, optional use of dark stain.
- Visual style: Clean-lined silhouette, intricate leaf and branch cuts, layered depth.
- Texture and layering: Visible striations in the wood grain to contrast with smooth, painted backgrounds.
- Tone: Warm, organic, calming.
I want this piece to feel balanced and minimal—something that could work in a wide range of spaces, from modern to rustic interiors. It should encourage closer inspection while functioning simply and intuitively.
Alternate Aesthetics
Exploring alternative styles helped push the project beyond a static idea and sparked new possibilities.
1. Cyberpunk Futurism
In this version, the wooden layers are replaced or enhanced with acrylic and metal materials. The tree design becomes angular and circuit-like. Neon LED strips or backlit panels illuminate the piece from behind, giving it a glowing, reactive presence.
- Material changes: Acrylic sheets, RGB lighting, laser-etched lines.
- Visual theme: High-tech, synthetic, digital-nature fusion.
- Ideal setting: Gaming room, tech studio, or modern gallery.
This version would appeal to fans of science fiction and digital art, transforming a natural motif into something edgy and futuristic. It invites exploration into new fabrication materials and interactive lighting.
2. Whimsical Fairytale
This aesthetic flips the script entirely. Instead of minimalism, it embraces decorative charm and storytelling. The tree is accompanied by woodland creatures, flowers, and delicate engraved ornaments. The finish includes pastel paints, hand-painted accents, and possibly fairy lights.
- Material changes: Painted wood, fairy lights, fine engravings.
- Visual theme: Storybook charm, vintage softness.
- Ideal setting: Children’s room, themed cafe, cozy cottage.
This version would transform the functional art into a scene pulled from a fairytale. It would appeal to audiences who love narrative-driven design and soft, immersive aesthetics.
Sketches and CAD
Initial Sketches
My early sketches focused on:
- Tree shape and silhouette options.
- Layering strategy (foreground branches, middle trunk, and back cutout).
- Hidden photo placement and hinge mechanics.
I explored tree designs from different angles, testing how much detail could be effectively rendered at small scales. Some sketches also explored the effect of negative space versus filled regions.
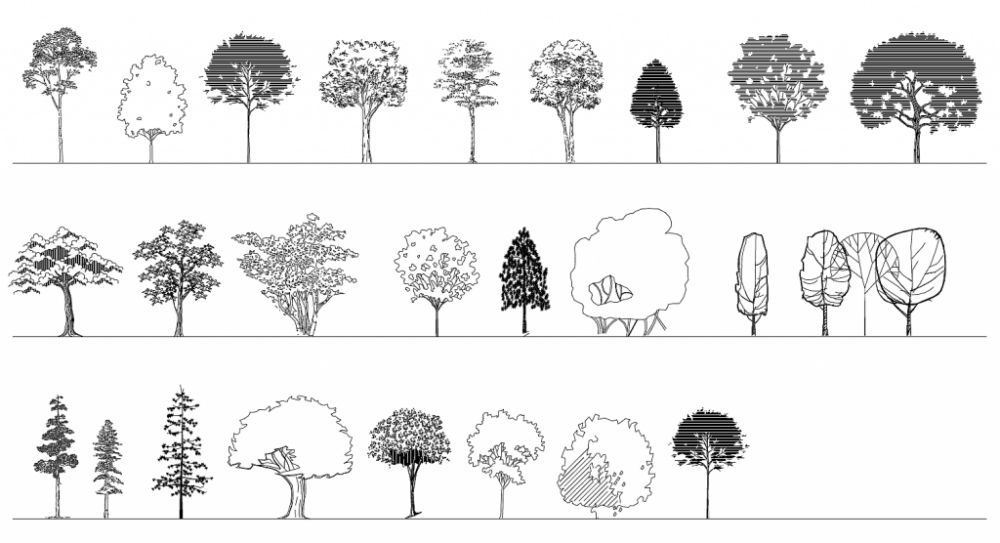
Figure 3. Tree Inspirations
CAD Development
I’m using SolidWorks to design the 3D layout of the layered pieces and plan tolerances for assembly. I’ve also used CorelDRAW to prepare 2D vector drawings for laser cutting. Fusion 360 was briefly used to simulate how the hinge mechanism would operate within a frame.
The CAD files help ensure:
- Alignment of interlocking parts.
- Correct spacing for visual depth.
- Hinge compatibility on the rear side.
I also simulated how light would interact with the different layers, helping me identify which parts needed additional spacing or thinner wood for effective shadowing.
Fabrication Progress
Materials Collected
- 3mm and 6mm birch plywood sheets (scrap and new).
- Wood stain and paintbrushes.
- A set of mini brass hinges.
- Optional: Glass/acrylic panel for photo protection.
- Neodymium magnets to potentially hold the back panel in place without visible hardware.

Laser Cutting Tests
I’ve already conducted test cuts for:
- Leaf detail tolerances.
- Burn control and cleanup for edge charring.
- Layer stacking to evaluate spacing and fit.
These tests allowed me to make subtle adjustments to line thicknesses, ensuring cleaner cuts and reduced warping.
Assembly & Mockup
I will first assemble a scaled-down prototype using cardboard and scrap wood to validate:
- The hinge mechanism.
- Panel visibility from the front.
- Whether the photo is well-hidden but easy to access.
I also would use tape and hot glue to quickly test layer spacing and to mock up how the tree shape appears in profile.
Timeline and Next Steps
| Week | Tasks |
| Week 1 | Final CAD files and stencil refinements |
| Week 2 | Full-scale laser cuts and assembly |
| Week 3 | Painting, staining, and hinge installation |
| Week 4 | Testing final fit and documenting for final presentation |
If I find the time, I also plan to photograph the process in a time-lapse for a behind-the-scenes video to accompany the final submission. This will help tell the story of the project’s evolution and story.
Challenges & Adjustments
- Laser charring: Adjusted speed/power settings and plan to sand/finish edges.
- Layer alignment: Considering adding locator pins to ensure exact stacking.
- Hinge fit: Needed to test multiple placements to avoid visible bulges from the front.
- Tolerances: Making sure photo size and frame border don’t interfere with tree cutout.
- Weight: Considering backing reinforcement so the piece doesn’t bow or warp over time.
These small iterations have helped me adapt and improve both the design and user experience of the final piece.
Background Story
This project also carries a personal significance beyond the classroom. I plan to gift the final piece to one of the scholarship foundations that has supported my academic journey over the past few years. This foundation owns a beautiful home in Lake Tahoe, a peaceful setting surrounded by nature, making it the perfect backdrop for a piece like this.
The tree, a symbol of growth, knowledge, and rooted support, reflects the relationship between a student and the people who believe in them. Behind the laser-cut branches, I plan to place a photograph of the scholars supported by the foundation, including myself, behind a hinged wooden panel. The idea is that, at first glance, it appears to be just an art piece. But upon closer interaction, the hidden image reveals a deeper, emotional story, one of gratitude, transformation, and legacy.
This extra narrative layer has shaped many of my design choices: the warm tone of the wood, the clean and timeless style, and the intimate size that invites viewers to come closer. It’s not just a decorative item, it’s a thank-you, a tribute, and a gesture of appreciation made tangible.
Conclusion
This layered wall art piece merges natural materials, clean design, and a touch of interactivity. It’s a reflection of my interest in combining aesthetic storytelling with functional fabrication, all while exploring different design possibilities along the way.
Through this design, I aim to offer a sense of calm, curiosity, and connection, whether someone appreciates the beauty of the tree or discovers the hidden photograph tucked behind it. The journey of prototyping, iterating, and imagining alternatives has already taught me about design versatility, digital-to-physical translation, and storytelling through form.
As I move into final fabrication, I’m excited to see this idea materialize, and to bring a little more beauty and mystery into everyday space.
4 Comments. Leave new
Hi Airyl, this piece is beautiful both visually and conceptually—I love the subtle interactivity and personal meaning behind the hidden frame. The layered wood approach feels timeless, but your use of laser-cutting and hinge mechanics adds such a clever twist. Have you considered engraving a small quote or date inside the hidden panel to add even more intimacy when it’s opened? Also curious—do you plan on incorporating any sort of texture or finish variation across the layers to emphasize the tree’s depth even further?
Hello Matt,
Thanks for the comment, I will actually be planning on adding a small quote to make it more intimate, and yes I will be adding a stain!
Your project concept is incredibly thoughtful and beautifully executed—it’s clear that a lot of care went into blending form, function, and personal storytelling. I especially appreciate how you’re using layering and material contrast not just for visual appeal, but to support a deeper emotional narrative. One strength is your exploration of alternate aesthetics, which shows you’ve thought expansively about the design potential. Could you elaborate more on how the hinge mechanism is concealed or integrated into the design so it doesn’t distract from the clean aesthetic? I’m excited to see how the final piece turns out, especially with the added personal meaning behind it.
Hello Nita,
To elaborate more on the hinges, I will add it to the sides that would make it a little hidden, if you want to see how it looks, feel free to stop by at expo!