

The progress on my neon-inspired 3D printed LED sign is coming along nicely! I decided to start working on a sign that displays my gamer tag, “TheGreasyPotato”. I began by creating a prototype to get a sense of what the full-size sign might look like. For this prototype, I designed the letters to fit within the constraints of my printer’s build size. This approach gave me a good idea of the final appearance without needing to individually design each letter at full scale.
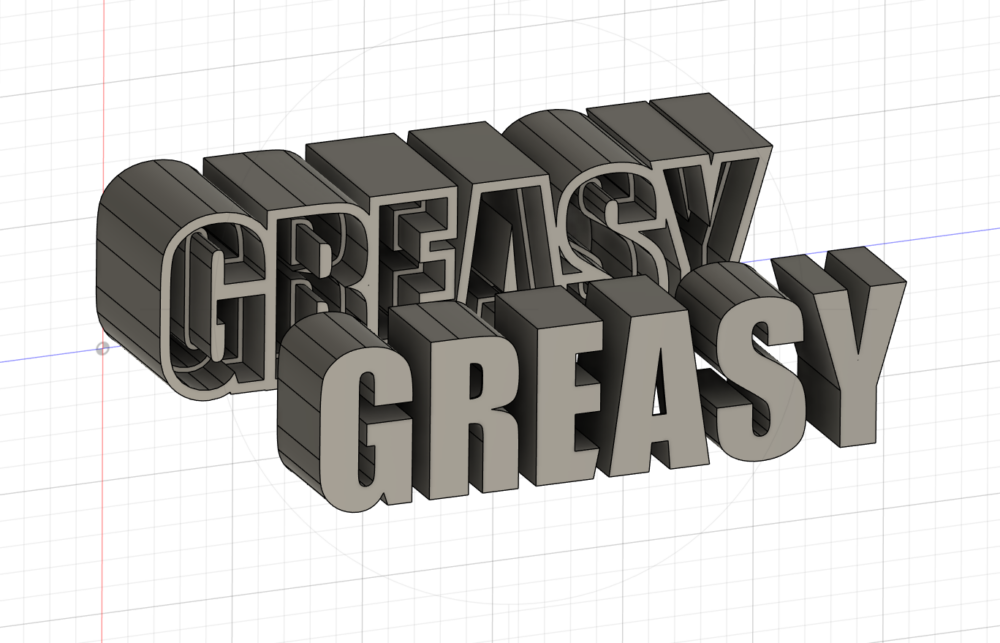
CAD model of my design.
I followed a simple YouTube tutorial (https://www.youtube.com/watch?v=10IDgu_E75I) to achieve this look. Essentially, the design includes a dark background “housing” to hold the LED lights, while white PLA is used for the “caps” to diffuse the light.
As with most 3D printing projects, there’s always some troubleshooting involved. Before I even got started on the CAD model, I had to prep and calibrate my printer properly. One of the first challenges I encountered was leveling the bed, which took a bit of time to get just right. Once that was sorted out, I began designing the model using the dimensions of the printer bed.
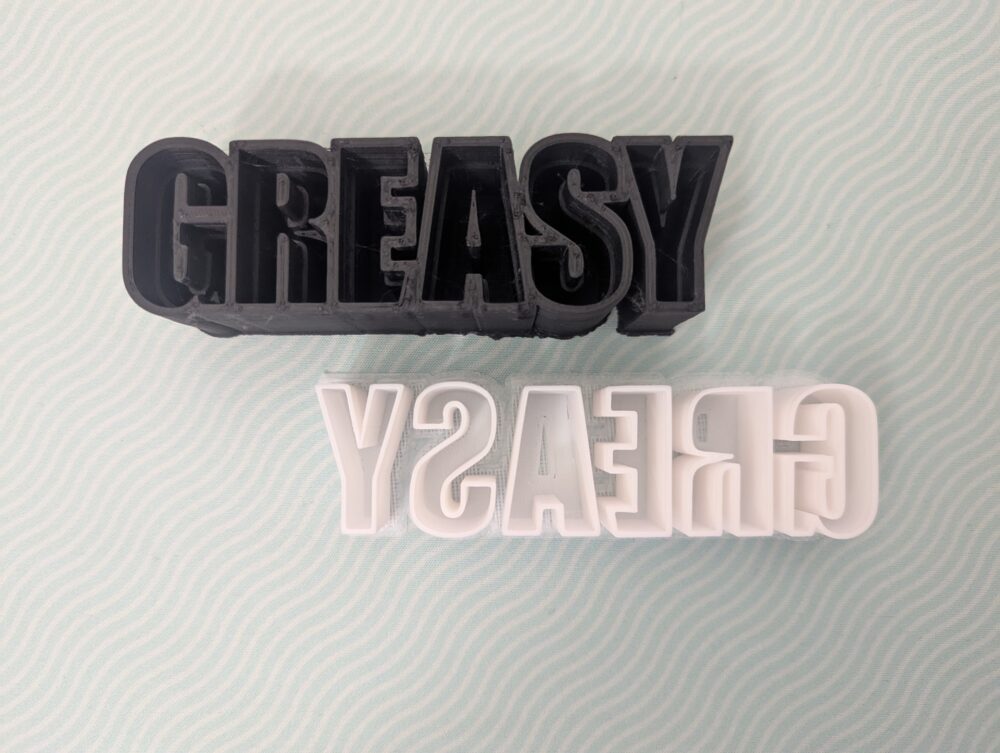
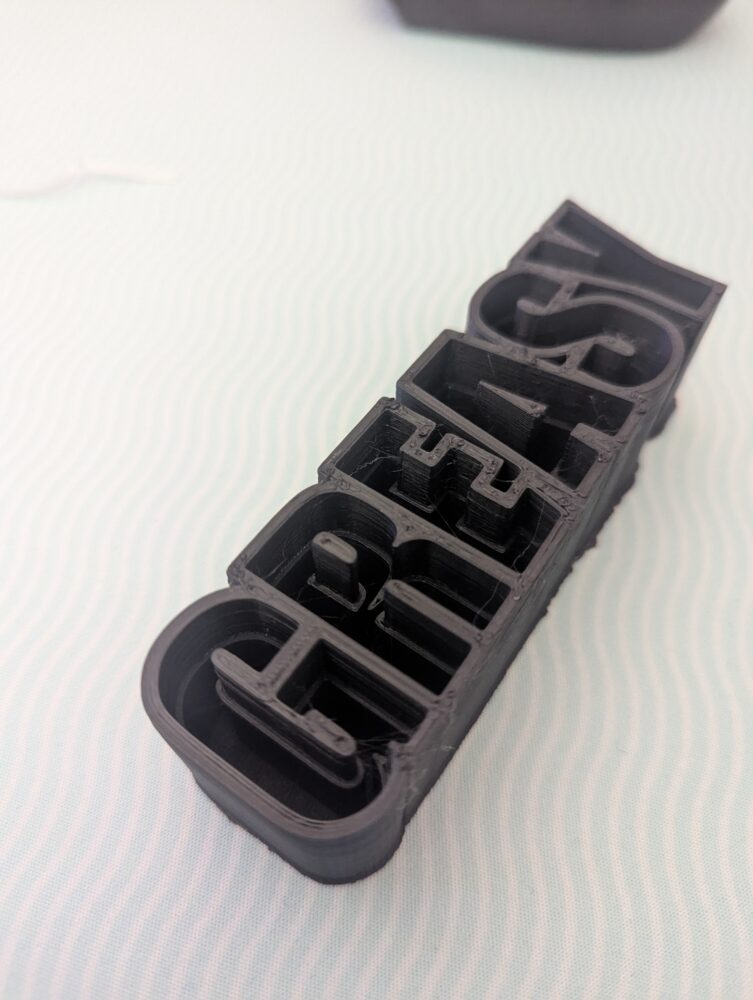
After finalizing the housing and caps, I sent the model through my slicer software and started printing. The housing printed successfully, though I did try to include small holes for fairy lights to pass through. Because the prototype was so small, those holes didn’t show up in the print. I’ll fix that in the larger version, where I’ll have more space to work with.
The caps required some design tweaks. The first version didn’t fit properly into the housing, mainly because the tolerances were too tight given the small scale of the prototype. I adjusted the CAD model to allow for more clearance, and that solved the issue. I also printed the first iteration of the caps with a raft to prevent PLA warping—but this turned out to be unnecessary and made the caps harder to clean up, so I’ll skip the raft next time.

Now that the prototype is mostly successful, I’m ready to move forward with printing the rest of the letters. I’ll continue experimenting with the smaller prototypes to finalize word placement and overall design before scaling everything up. Excited to see how it all comes together!
2 Comments. Leave new
Hello Jamie,
I like how you used a small-scale prototype to test both the visual design and the fit of your parts before committing to the full build. It shows a clear workflow and good use of iteration. I’m curious how you plan to route the fairy lights through the full-size version—will they run in one continuous line behind all the letters or are you planning to wire each letter individually? Knowing that could help determine how much internal space you need and where the openings should be placed.
Hi Ariana,
Thanks for your comment! I plan to route the LED lights as one continuous strip to avoid needing to splice the wires. The bigger sign should help with the holes I plan on putting in the design. This should make a seamless look for the lights and be easier to install.