
This week I made some good progress by actually starting the CAD model, which involved sketching out the outer wall layout I wanted, analyzing the size/scaling I wanted to achieve, an adding some aesthetic flourishes I wanted. The following screenshot displays the main part of my CAD model. There is still much I need to do, but I now have the foundation that makes it easier for me to add things to it.
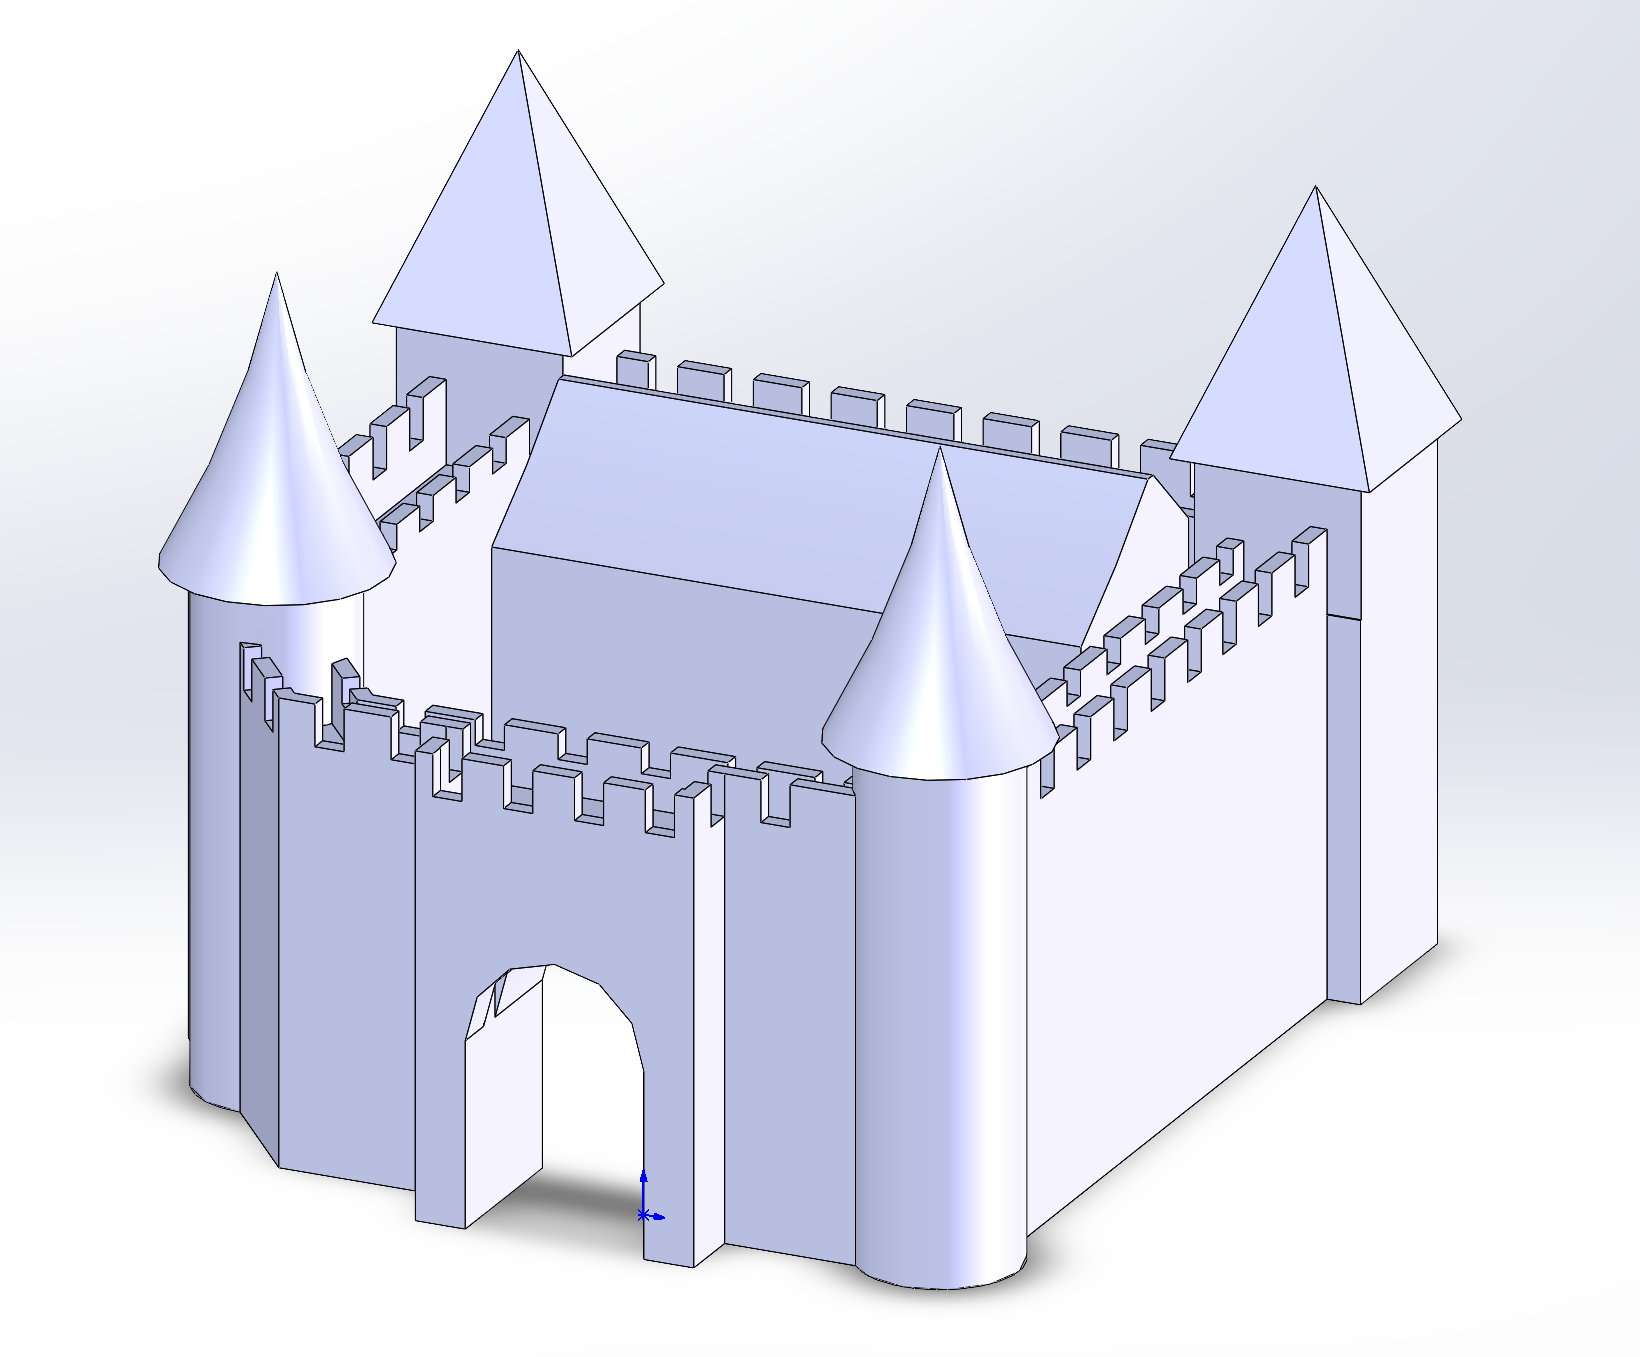
As you can see, I have a general 2D layout that I have committed to, along with the four towers/pillars that I have decided on. I also played around with making the back wall with the two prismatic towers one singular piece that extends across the entire width, but I found that I preferred the look where the ramparts were consist around the entire wall, so I have stuck with the design you see. I also worked to make the square extrusions surrounding the ramparts (called crenellations as I have learned) consistent, and like the look I have settled on here.
I have also been working on the crank I will use to lift the drawbridge (yet to be designed in CAD), and the crank is based on looking at real cranks used in this application and making it as simple as I can to make 3D printing easier. As shown in my previous post, I have a small steel chain that I will use for this application. Shown below is the CAD assembly of my crank.
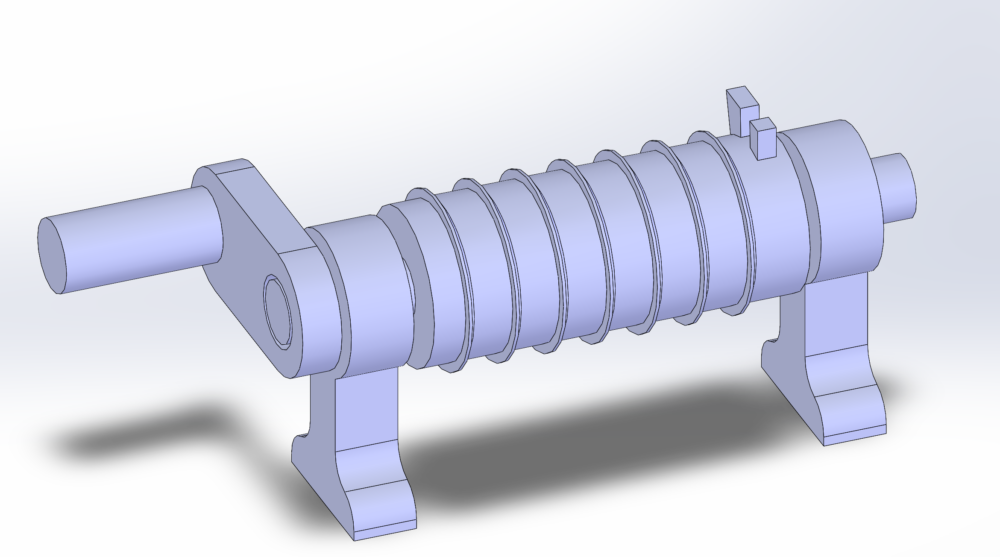
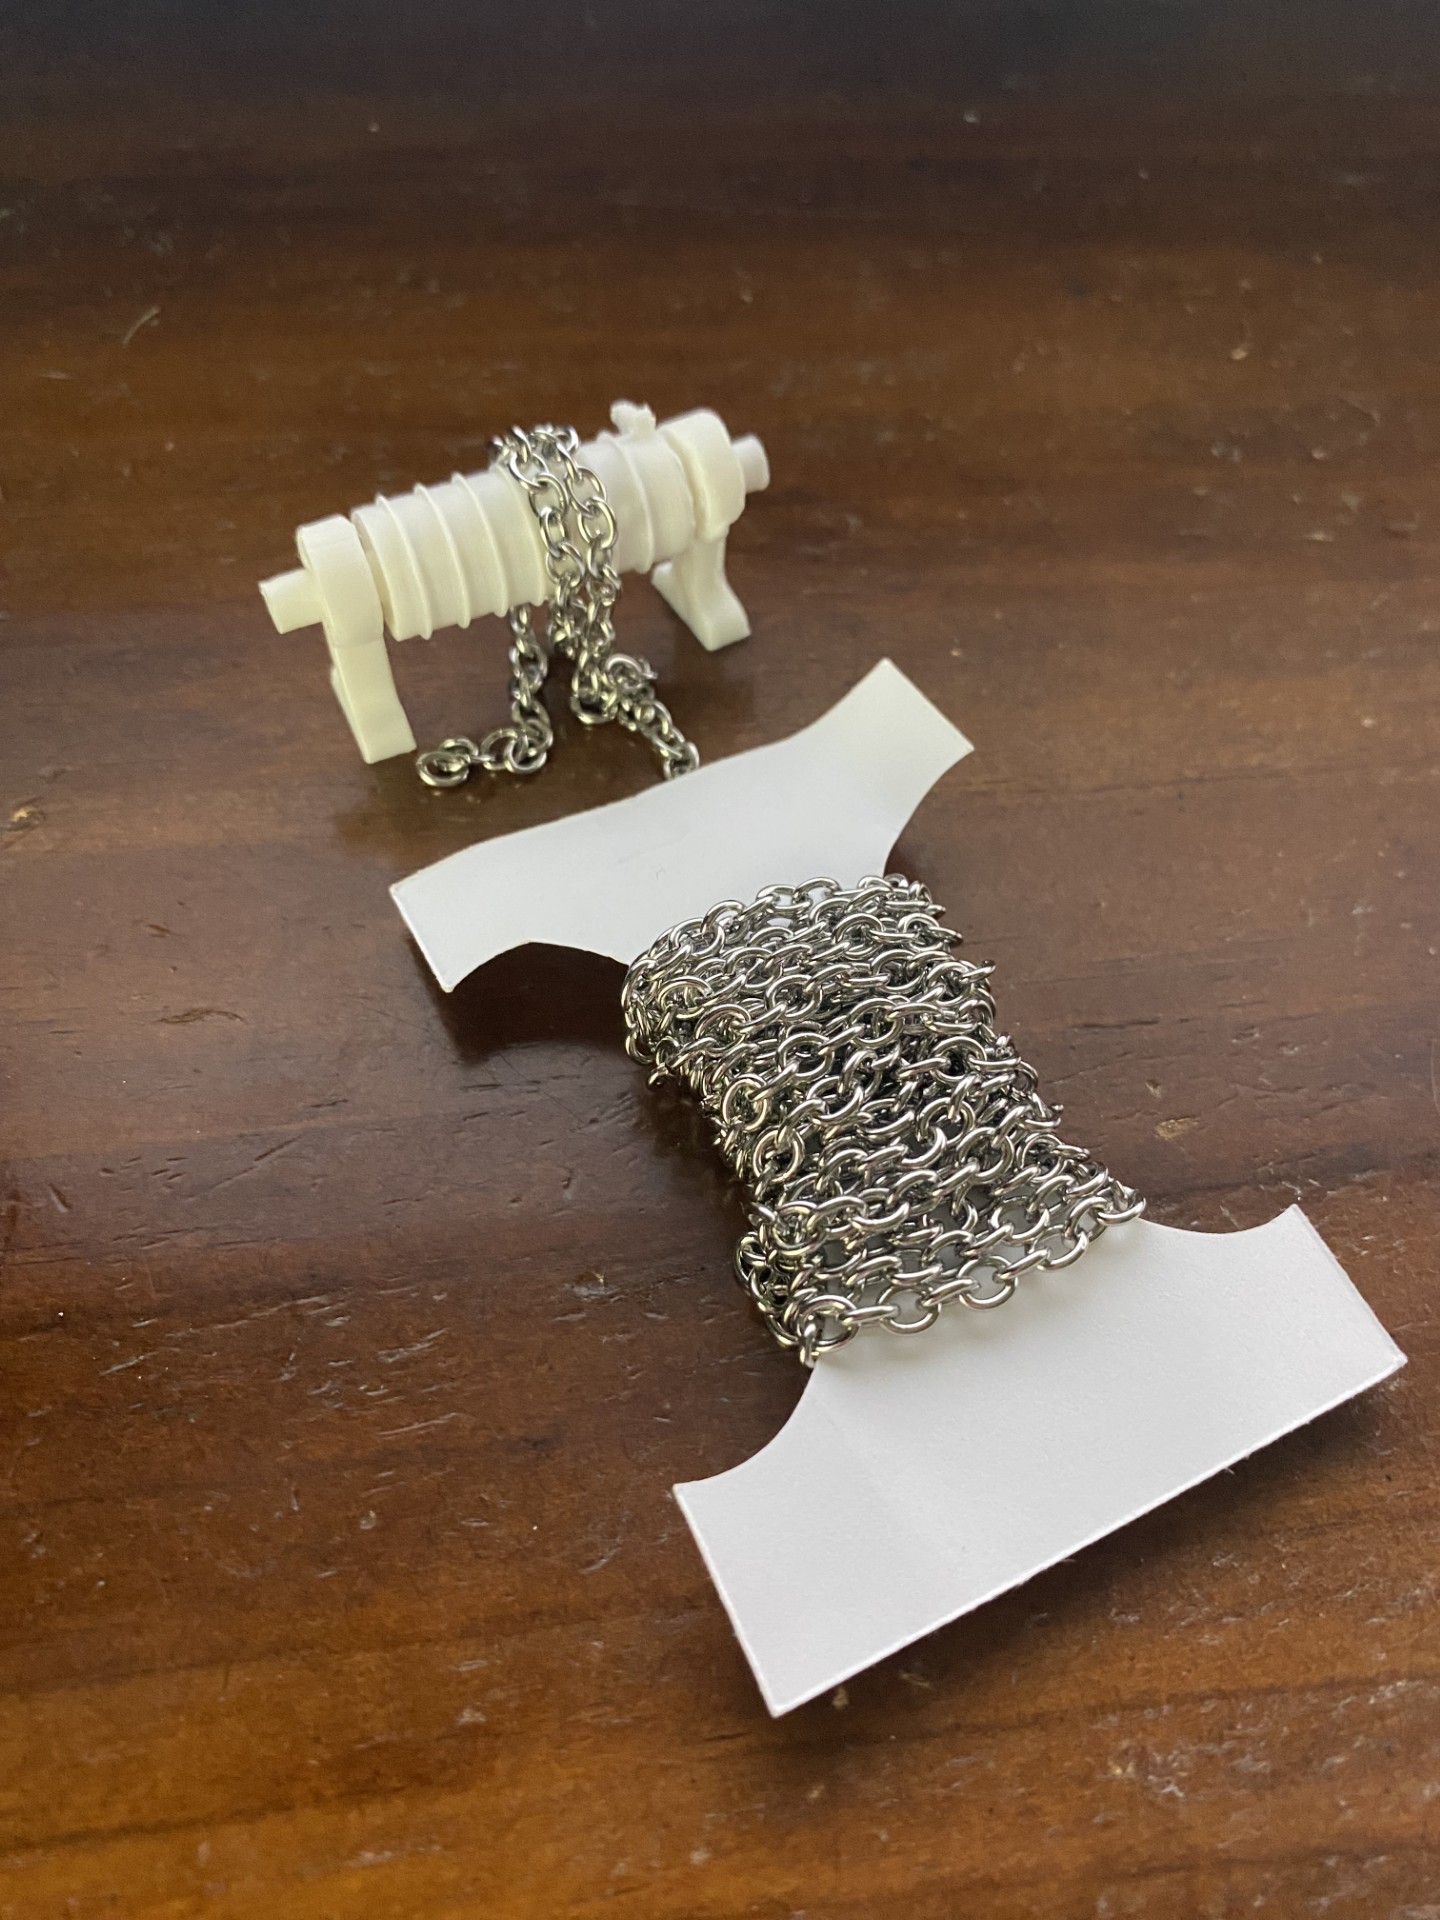
It is made of three major components, being the central rolling pin-esque piece, the two holders on either side, and an operable crank. My plan is to glue the holders to a base after the main pin has been set inside, therefore making sure that all components are secured. Then the handle will be glued on the outside of one end. You can see that the main pin has some circular extrusions running concentrically around it to add some friction and prevent the chain from sliding around as much. There are also two pins coming up from the surface of the rolling pin, where the chain link on the end of the chain will attach, and then I will glue another small piece of plastic over it to secure that in place, and then when turning the crank the chain will maintain its attachment. I have already begun printing these components to test the sizing and printability, and after a few different iterations of each part, mostly playing with the size and spacing of the small chain attachment pins to make sure they print well, I have arrived at the following.
The next steps will be to finish the crank, but also there is much work to be done in regards to the main structure. I will need to decide what I want on the interior, such as stables, small houses, a larger castle structure, stairs, etc. I also need to add brick patterns to the outer walls and add other flourishes like windows. Finally, I need to add the front gate along with the drawbridge itself. And then, of course, I will need to print and paint it!
2 Comments. Leave new
This project is really cool! The crank is a really interesting idea that you tuned to be super simple for this problem, nicely done.
Hi Keith, I really like how you’re balancing functionality with aesthetics, your attention to authentic architectural details like crenellations and your thought process behind the rampart design give the model a lot of character. The crank mechanism is also looking really clever, especially your solution for keeping the chain in place. One question I had was about the future interior additions, do you plan to make the internal structures modular or fixed in place? That might affect how you print or paint the final model. Excited to see how it all comes together!