
I would say I am about halfway done with my project so far and I hope it was the harder half with greener pastures ahead. In this post I will describe the process I have been through to get to this point.
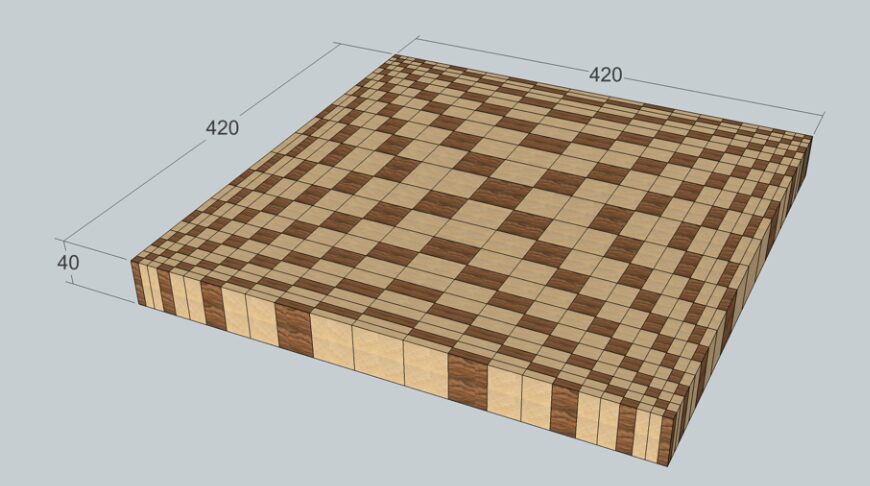
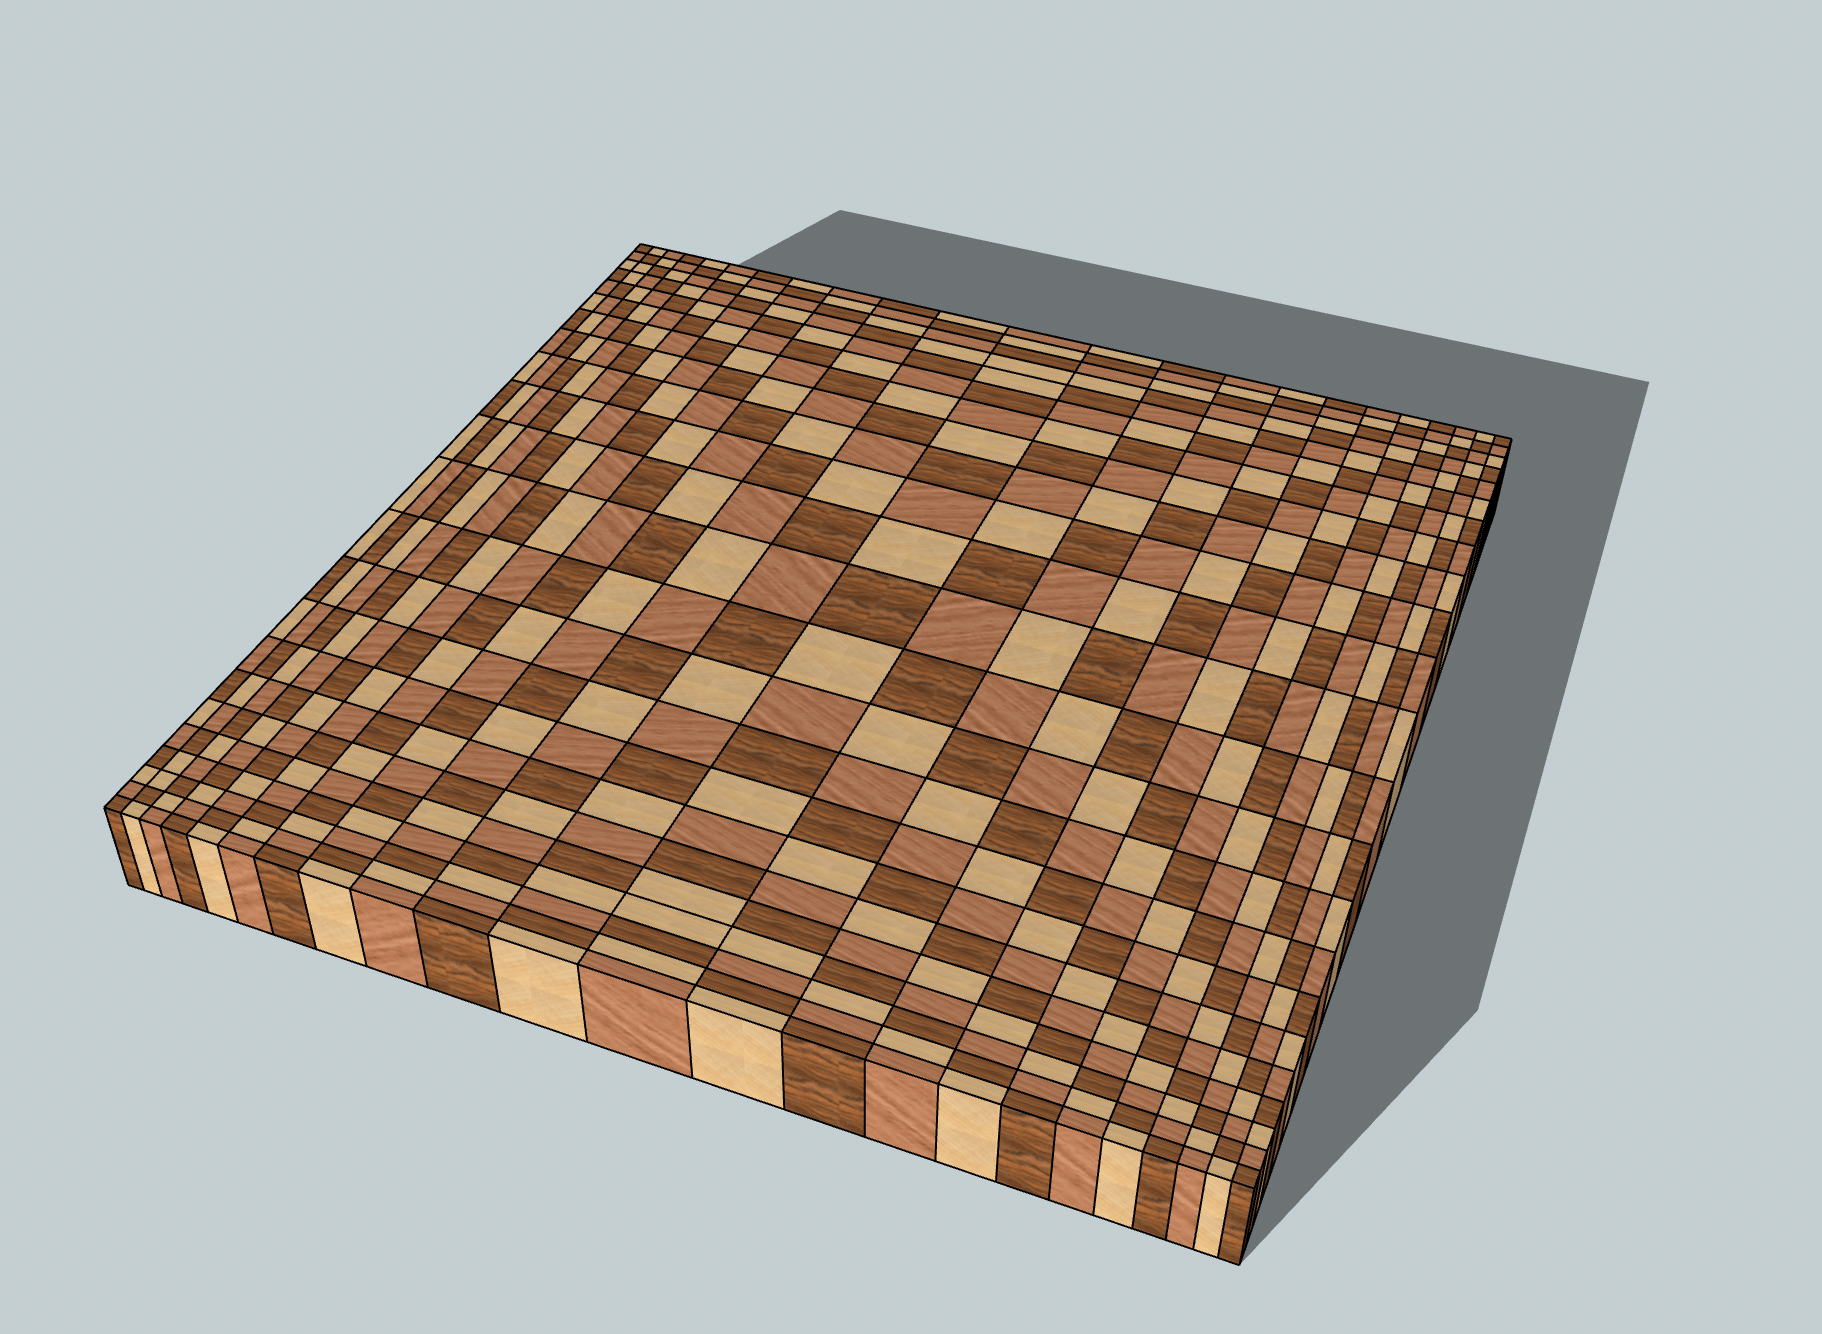
To start, over spring break I did research on how to make the board I want and ended up buying a plan to follow. The plan is from MTMwood and came with pdf instructions and a sketchup model of the board. I modified the board to have 3 different types of wood because I think it looks much cooler, and I wanted some originality. Below is the before and after my additions to the sketchup model.
After buying the model for $9, I did more research on where to get hardwood in Denver (where I reside over break.) My dad said he has heard of a place called Paxton hardwoods that may be what I am looking for. The exact type of wood didn’t really matter to me as long as it was hardwood and a light, medium, and dark piece like the model above. My dad and I settled on 1” thick wood, the plan said to get 2” thick but I missed that in my initial skim. I am actually glad I got 1” because it was cheaper and made me not able to do end grain. This is good because I didn’t realize how complex end grain is and wouldn’t have access to the tools needed in the scope for this project. I got European Beech for the lightest wood, Spell Ribbon Stripe for the medium, and walnut for the darkest wood. The total came out to $76 which was a student discount from $112, an amazing deal. I highly recommend Paxton Hardwood in Denver.
After gathering all my wood, a couple days later I went to the BTU to make the first cuts. From another youtube video of someone making an illusion cutting board, they recommended using a grr-ripper push block for the small cuts you have to make. I got the MICROJIG Grr-Ripper2 on amazon for $30. I had to make 23 cuts on each slab of wood with different widths ranging from 8mm to 40mm, these were all 1’ in length. I cut the width 1.5mm over to then be planed down to exact width later. This left me with 69 pieces of 1’ long wood.
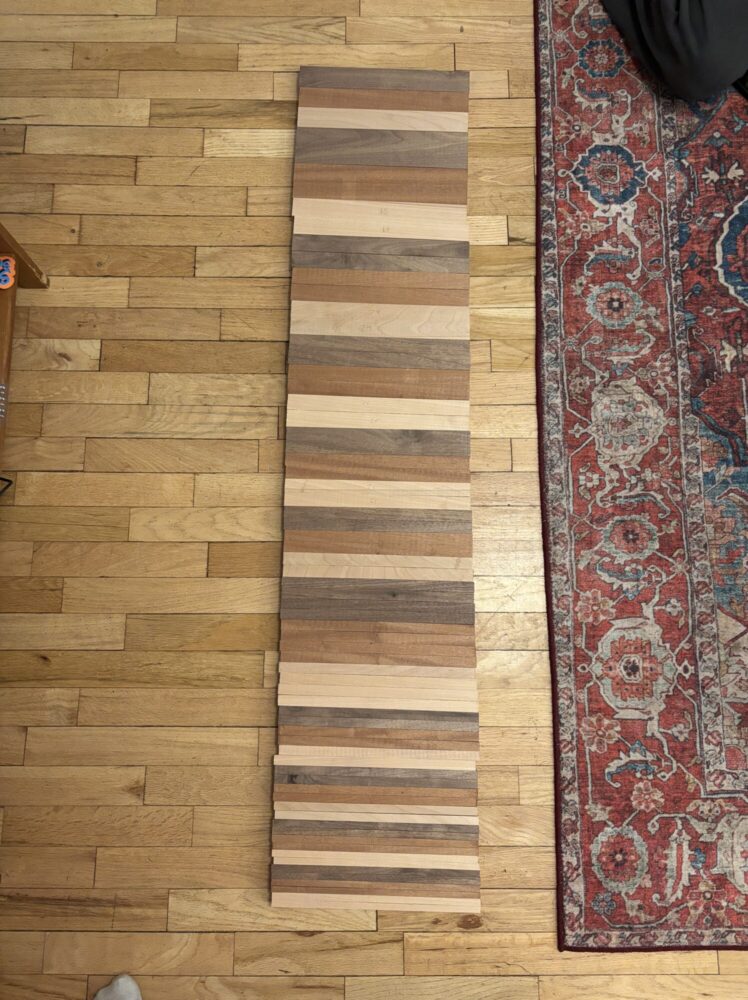
Next step is using a planer to plane the wood. Let me just say, this was a massive pain in the ass. For a more in depth story, look at my last post. In short, I was physically in the room with 2 planers that I couldn’t use until finally the 3rd planer was in the garage of someone I met on facebook and I paid him in beer. This mysterious man was Dustin, he is an amazing dude and great teacher. He runs a full time woodshop out of his garage, and let me use his planer with a lot of help and advice that I would not have received anywhere else. He also helped me organize the wood afterwards instead of me just throwing it in my bag. The point of the planer is the wood doesn’t need to be an exact width, but all the pieces of the same cut width need to be exactly the same(whatever it may be) for the illusion to be on point. For example I have 6 pieces that are 8mm and they were planed all at the same time so they are the same width which is ~8mm. That sounds confusing but hopefully you get the point. I spent $30 on beer for Dustin, worth it. Check out his woodworking website if you need some cool furniture: https://panelboardshop.com/
That is all I have done so far. Tomorrow I will glue the first 3 panels together with food safe titebond III glue (provided by my dad) which will then be cut again at various widths to come together to make the final illusion. This time for cutting, I will be using a thin rip jig (amazon, $27) (Recommended by Dustin) so I can make the cuts the exact length and not have to use the planer again.
My total cost so far for the project is $172 but a lot of what I bought will have much further use. The only thing left to buy is a mineral oil and beeswax finish, so hopefully I can keep the project under $200. Oh and also I think I will be able to make 2 if not 3 cutting boards out of the panels I have so in my mind that is very worth it. Thanks for reading, see you next time.
4 Comments. Leave new
Hey Joe, I’ve kept up with the progress of this project both in the BTU and on the blog posts and I’m super excited to see the final product! It must have been frustrating having to deal with the lack of planars throughout Boulder (or the lack of usability). Can’t wait to see!
Hi Joe! Great Progress post! I think it is really cool how you found someone so awesome to help you. Is all this wood going to make your cutting board huge? Or are you not planning on using it all? I think if you have left over wood cuts, you should make your one cutting board into a set! Maybe all different sizes too. Great work, excited to see the rest of your posts!
I saw this in the BTU and was wondering what it would be turned into, now I know ! I’ve seen these geometric boards on instragram but this might be the nicest design I’ve seen. Nice work so far, can I ask how you plan to finish the board ?
Thanks for the comment, I am going to finish the board in mineral oil first and then a mixture of 1-4 beeswax to mineral oil. This best practice for food safety.