
For my project I am creating a lamp made of wood and dried bamboo. The bamboo is used to create a circular body for the lamp. The materials are part of my desired naturalism aesthetic. By using naturally found materials, I felt a natural earthy feel with woody colors, browns, and beiges would naturally present themselves. This week/last week I did some intial woodworking and finished up my CAD design.
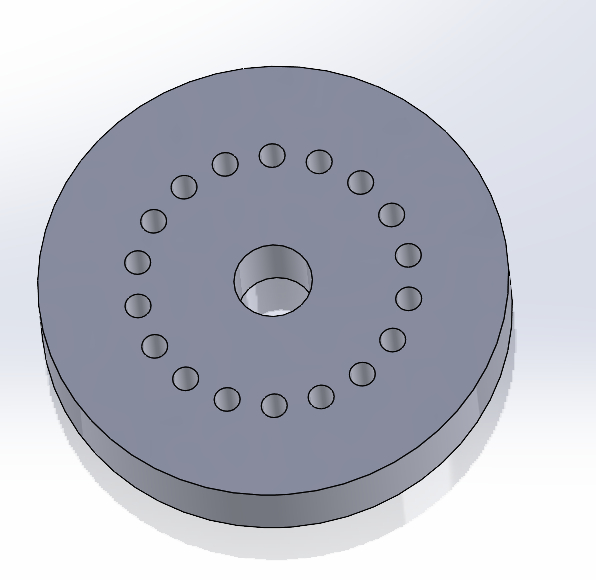
The CAD design will be used a direct reference for when I am drilling and measuring out my base and top pieces of wood. For reference, the base is a slab of wood with drilled holes. The bamboo sticks will be placed into the through holesIn the middle of the base plate is a hole large enough to thread the light wiring. The wire will feed through the base plate and snake under the bottom of the lamp. The bottom side of the bottom plate will have stacked felt furniture pads that give enough clearance between the bottom of the lamp so the wire can feed through into an outlet.
I spent a lot of time thinking about how I can create this project that will allow myself to adjust it later. While in a meeting with the woodshop manager Josh it came to my attention that the changes in humidity (during seasonal changes) can greatly affect wooden structures. This was highlighted by an example of how wooden tables in the idea forge used to warp at the corners during higher humidity seasons. Because of this, the idea forge added a new coating of finish that kept it from warping. While I do not necessarily have time to do this on my project I felt there needed to be adequate thought put towards how I could adjust my lamp should a similar situation happen to the lamp.
I created a two part top plate that allows for a removeable center piece. This will allow me to deconstruct the lamp and adjust anything that I need to.
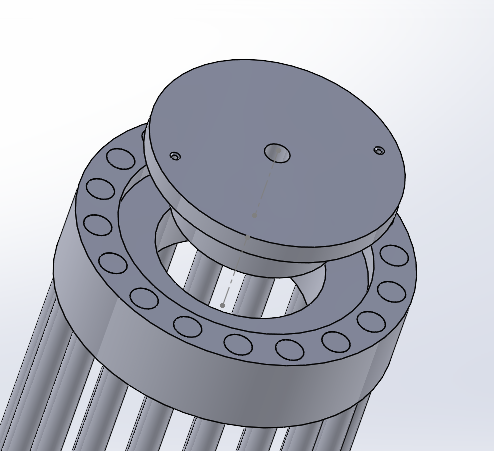
With each bamboo pole being glued into slotted holes I still may run into problems due to wood warping, but the capability for small adjustments may grant me just enough leeway to fix it.
In my 3D model I do not include the light and cabling for the lamp. This is because I purchased a DIY lamp kit that includes the mounting portion of the lamp.
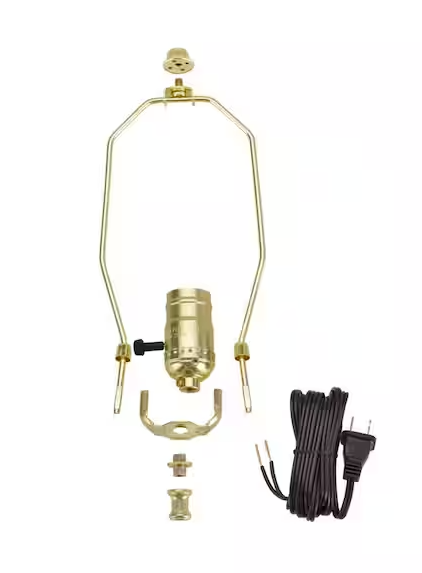
I came to find out that the lamp kit did not include a wing nut, even though it shows it as advertised in the image. I will need to do more research to see how necessary this component is and if I will need to buy a new kit that includes one, or if I can buy it singularly.
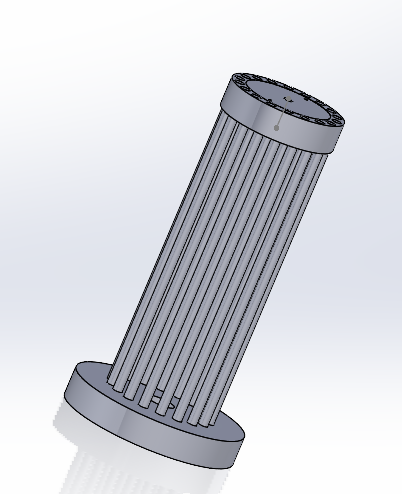
My 3D model does include accurate measurements and real sized features that I will use in my final product. As a small step forward I did cut each of the bamboo to the 12in size that I will use. As the week continues I hope to get into the woodshop again to start drilling some holes.
References:
Figure 3:
https://www.homedepot.com/p/Aspen-Creative-Corporation-Polished-Brass-Make-A-Lamp-3-Way-Socket-Kit-1-Pack-21011/307273840
4 Comments. Leave new
Great project! And great addition of the removable cap to allow you to make adjustments as-needed. Truth be told, if you get warping, you may be able to simply adjust how the lamp shade sits over the lamp to make those small changes imperceptible to anyone who sees it. I made a mistake in my project and made a critical component slightly crooked. However, if someone looks at it *assuming* it’s straight, their brain might automatically correct the mistake through their perception. Just a thought.
That is a good point. Hopefully it looks alright even if it gets a little warped.
I think this is going to be really cool when you are done with it. What is the general size of it? Where are you getting your bamboo?
The base plate is 8.5 inches in diameter and the bamboo poles were cut to 12 in tall. With the lamp shape it should be around 1.5 ft tall. I sourced the bamboo from amazon