
This week I made major progress on my pocket watch conversion project, especially with machining the case and beginning the fine-tuning of the movement itself. After some trial and error, I’m finally seeing things come together.
Machining the Case
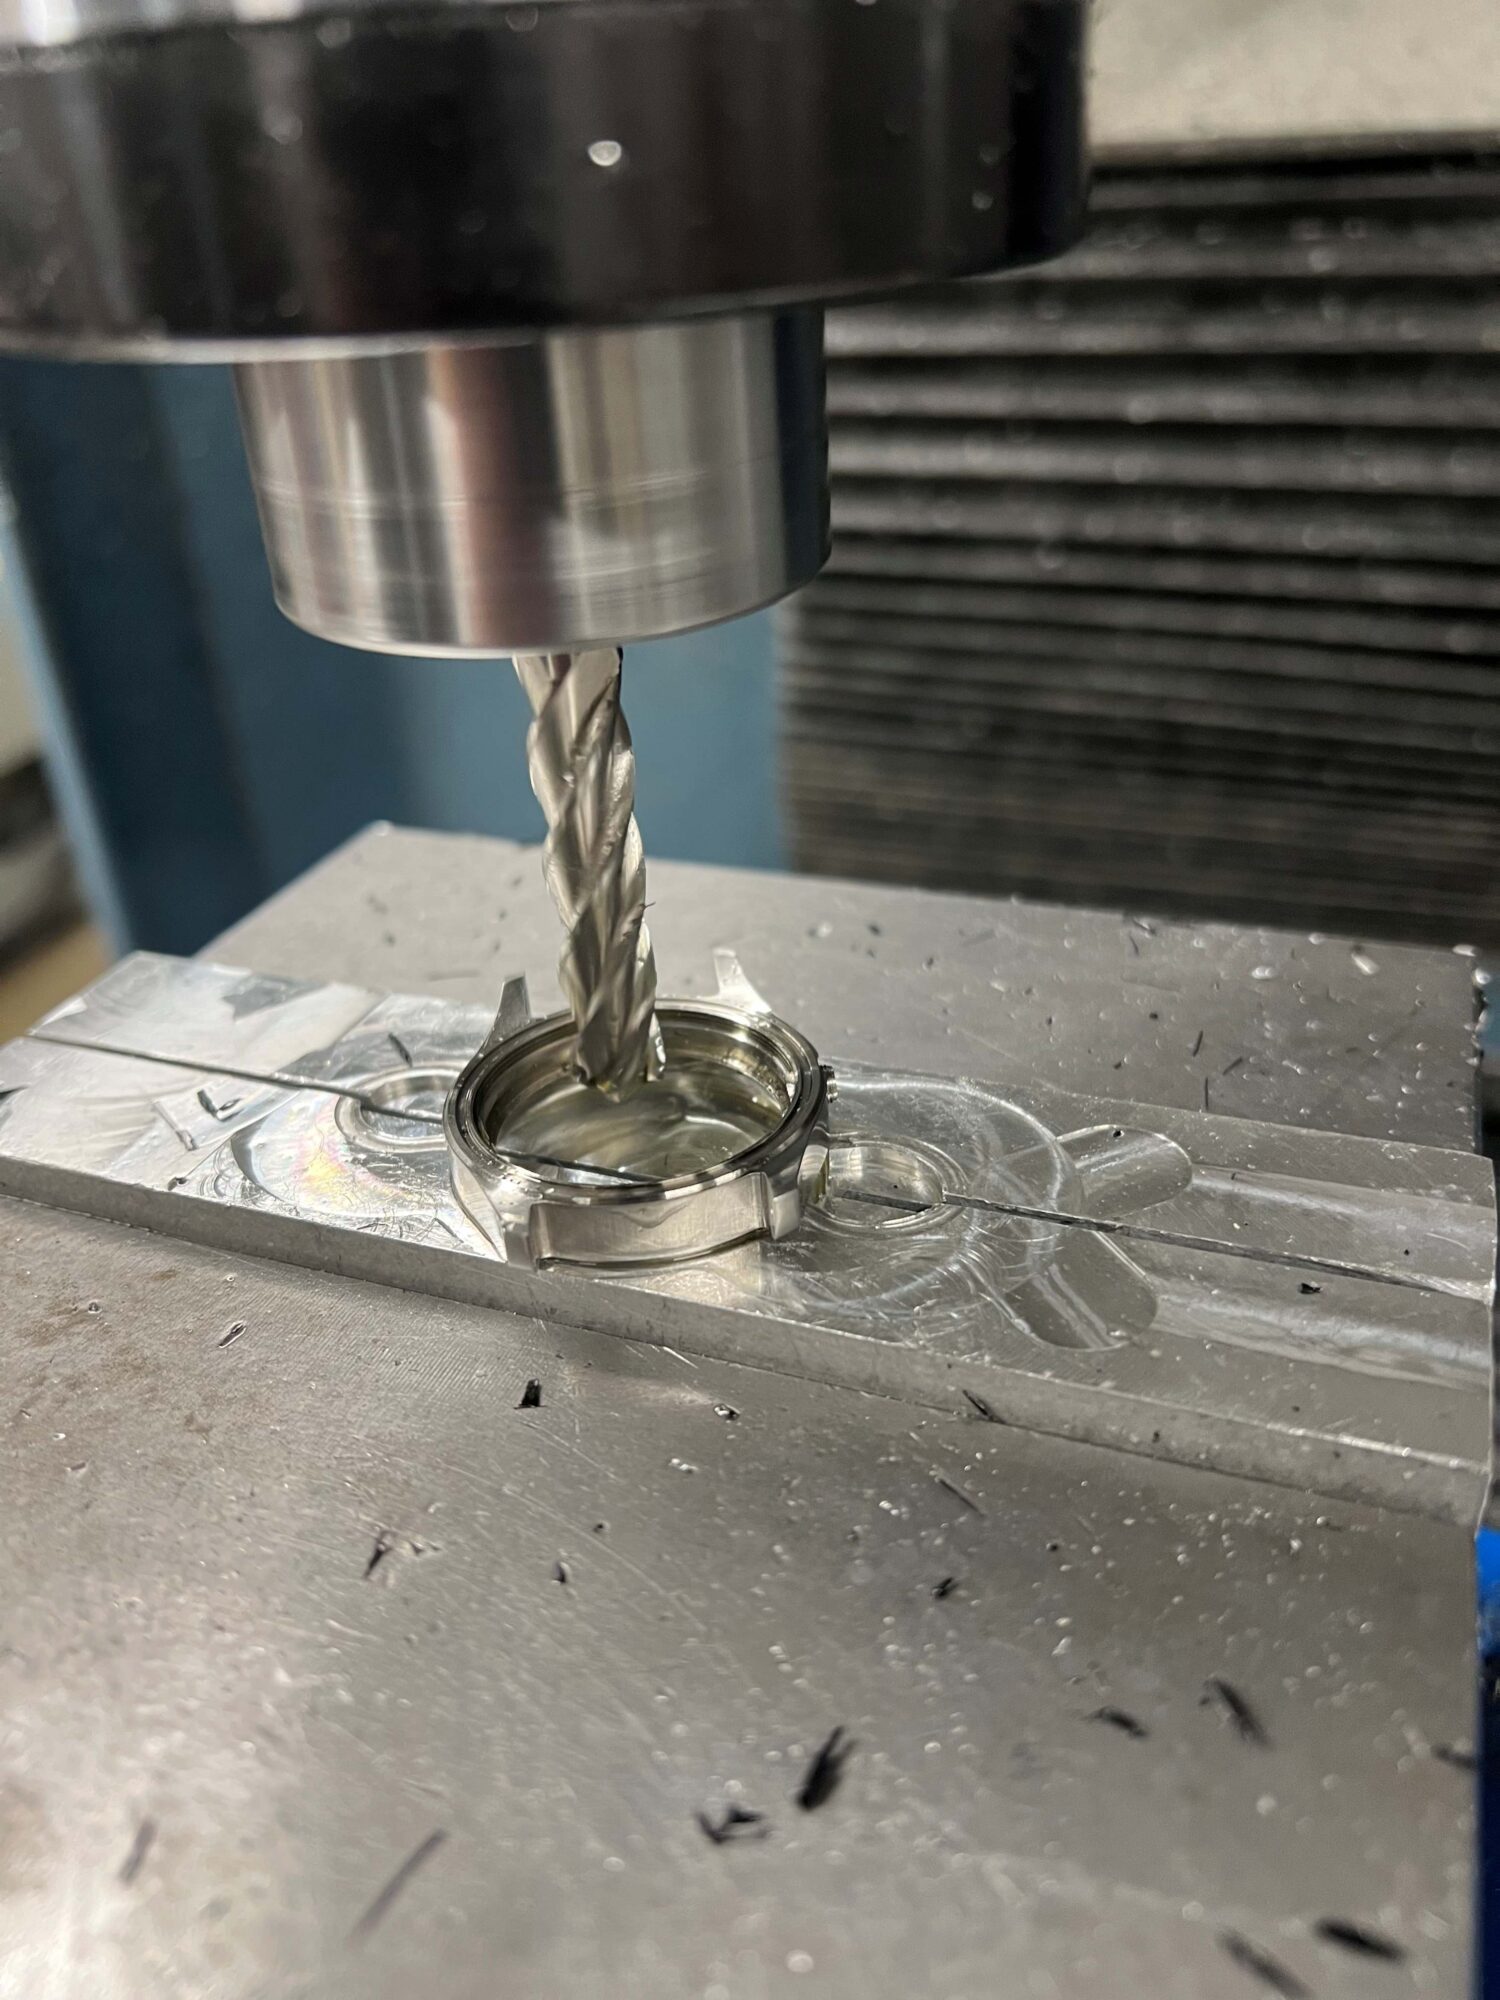
I finished machining the watch case to fit the Waltham Grade 165 movement. This involved making a set of custom soft jaws for the mill, something I had never done before. I milled out a cylindrical cut into a pair of aluminum blanks, which allowed me to grip the outside edge of the bezel securely without damaging it. With the case held in place, I carefully milled out the inner diameter to accept the movement.
That said, the learning curve was steep. I accidentally ruined the first of two case blanks by cutting into the inner lip where the dial was supposed to rest. I also damaged the first caseback when it came loose in the soft jaws mid-operation. Thankfully, I had purchased two cases, so I had a backup.
The second attempt went better. I tightened the soft jaws more securely, so much so that they slightly distorted the caseback, making it just a little ovular. Despite this, the machining worked, and I now have a case that properly fits the Waltham movement.
Addressing the Winding Mechanism
After machining, I turned my attention back to the movement. Unfortunately, I discovered I had lost a few screws when I originally serviced it. To solve this, I ordered a donor movement to cannibalize parts from. It hasn’t arrived yet, so I’m currently waiting on that to move forward.
Movement Regulation and Beat Adjustment
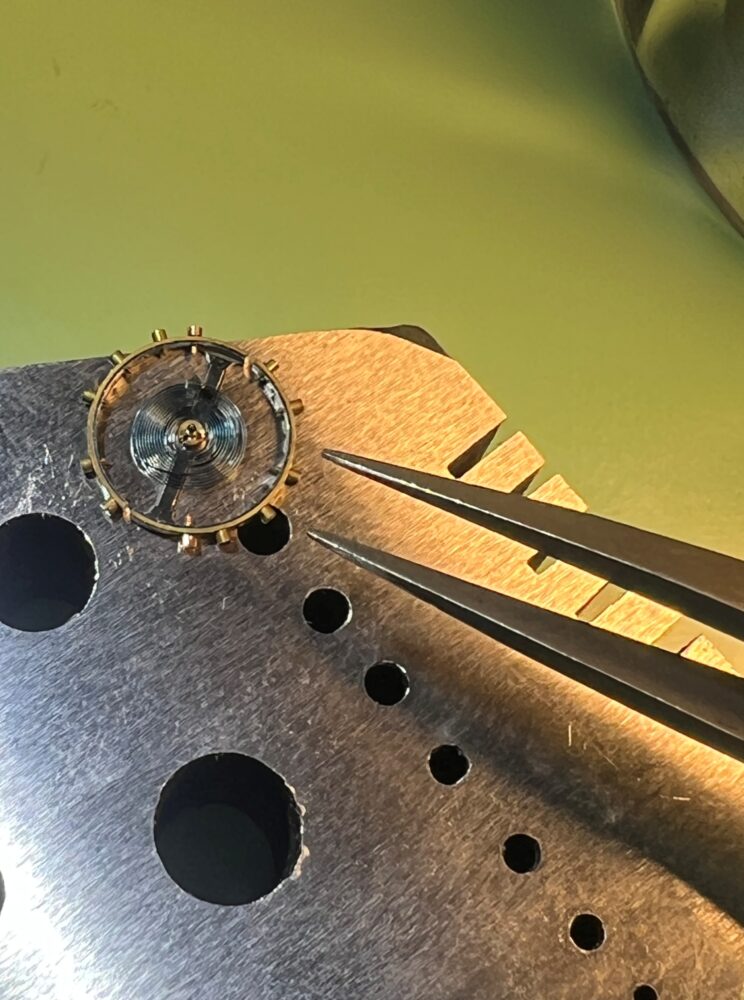
While waiting for the donor movement, I started working on regulating the movement I already have. First, I had to clock the hair
spring to reduce the beat error. This took about a dozen careful adjustments, but I eventually got the beat error down to under 1 millisecond.
Next, I adjusted the timing screws on the balance wheel for rough regulation and then fine-tuned the rate using the adjustment lever. I was pleasantly surprised by how accurate the watch was in the horizontal position, especially considering it’s more than 100 years old.
However, accuracy in the vertical positions was a different story. On the timegrapher, the movement showed variances of up to 200 seconds per day depending on its position. I traced this issue back to an unpoised balance wheel. Poising refers to ensuring that the balance wheel is evenly weighted around its circumference so that it performs consistently regardless of orientation.
To fix this, I sourced a vintage poising tool from eBay, which should help me balance the wheel properly once it arrives.
Looking Ahead
Next week, I plan to extract the screws from the donor movement, reassemble the winding mechanism, and begin final assembly into the case. Once the poising tool arrives, I’ll take another stab at reducing the positional variance to improve the watch’s overall accuracy. With the major machining work complete, the focus now is on dialing in the mechanical performance and fit.
This project is really starting to feel real, and each part that arrives or fits correctly gets me a step closer to the finished piece.
2 Comments. Leave new
This is a really cool idea! That is such a bummer you ruined the first two blanks. I have spent hours machining parts on the mill just for a small mistake to ruin them. Good luck on the rest of your project!
Hi Robert, I am so impressed with your project! It seems like you have put a lot of precision into your design, and it is great to see that it’s all coming together. Is everything on time with your shipping for this project?