
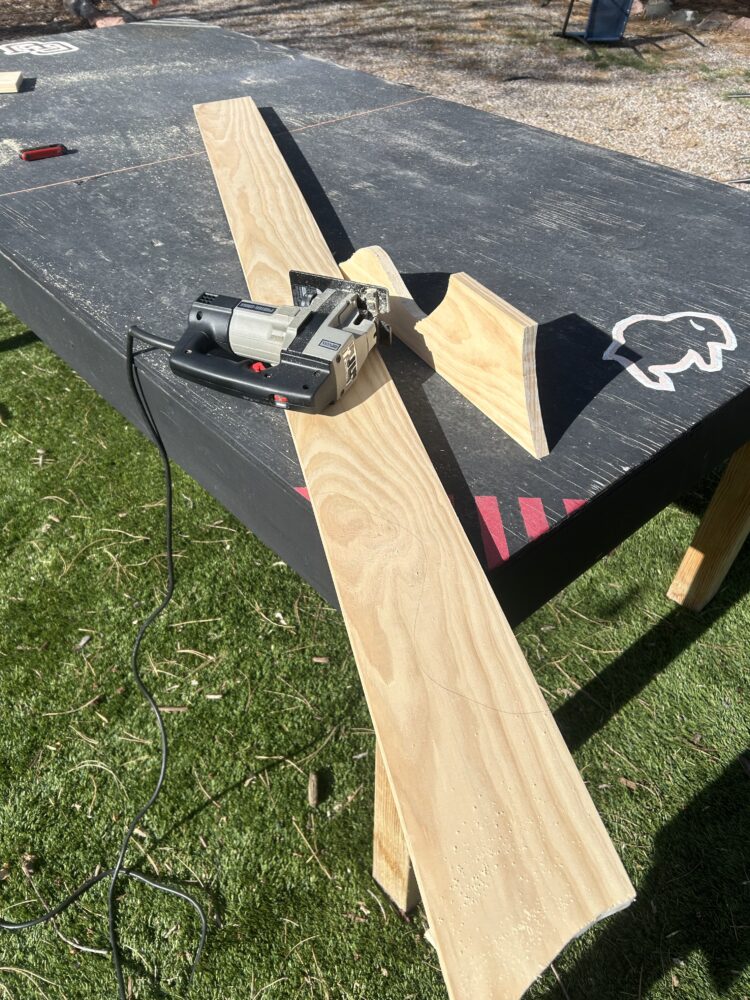
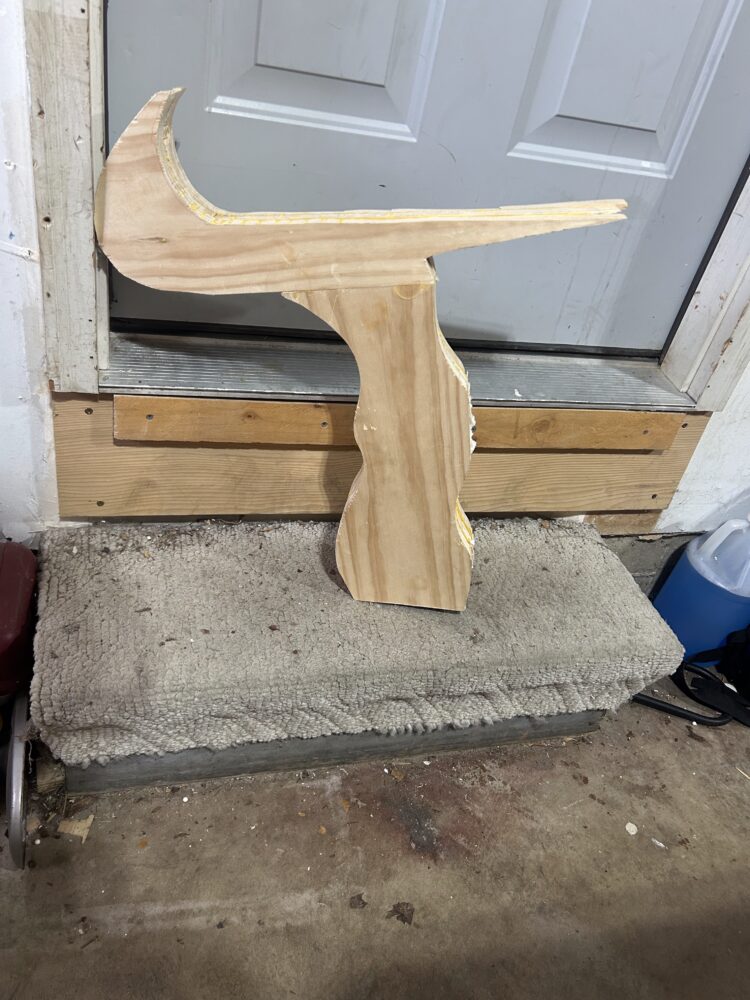
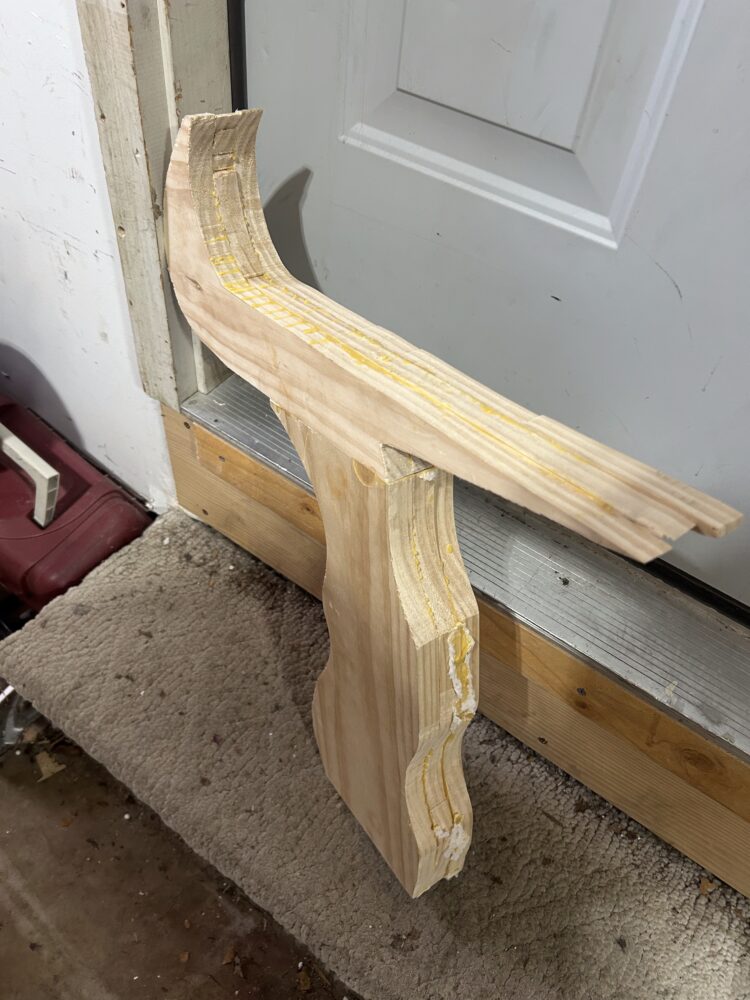
So far, I’ve made good progress on my magnetic shoe display. First, to get a template of my stand to cut out, I drew the size and general shape on a poster board and cut it out with a utility knife; then, after buying a 1×8″ pine board and a 1×6″ board, I broke the stand into 3 sections, the Nike logo, the neck, and the base. I mapped out the 3 sections onto the boards and cut out one.
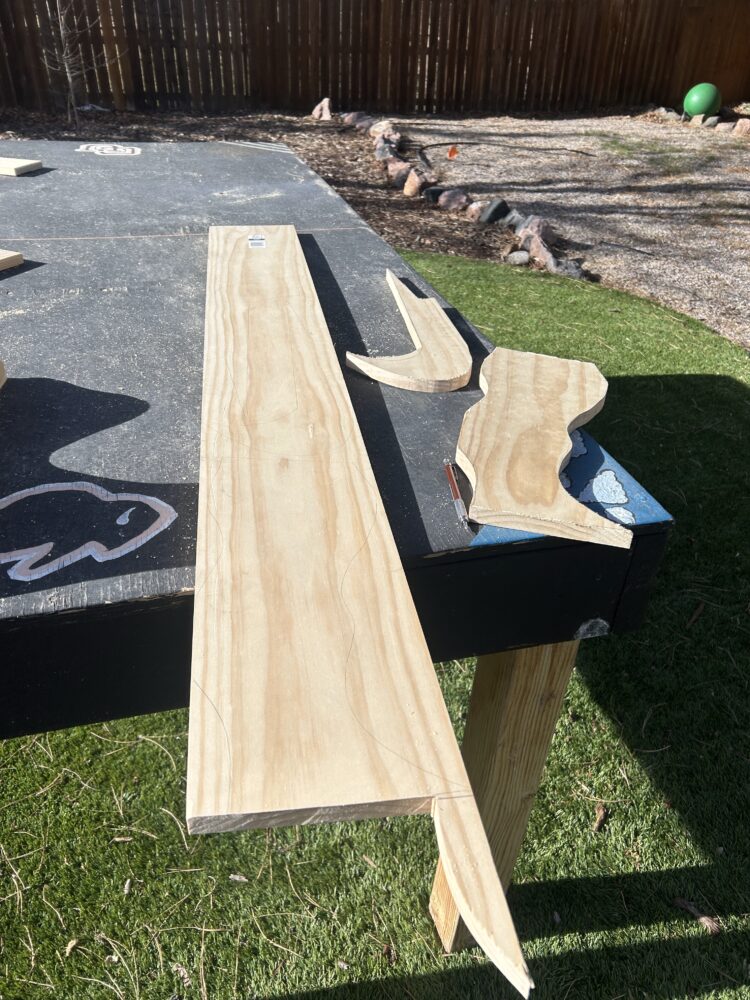
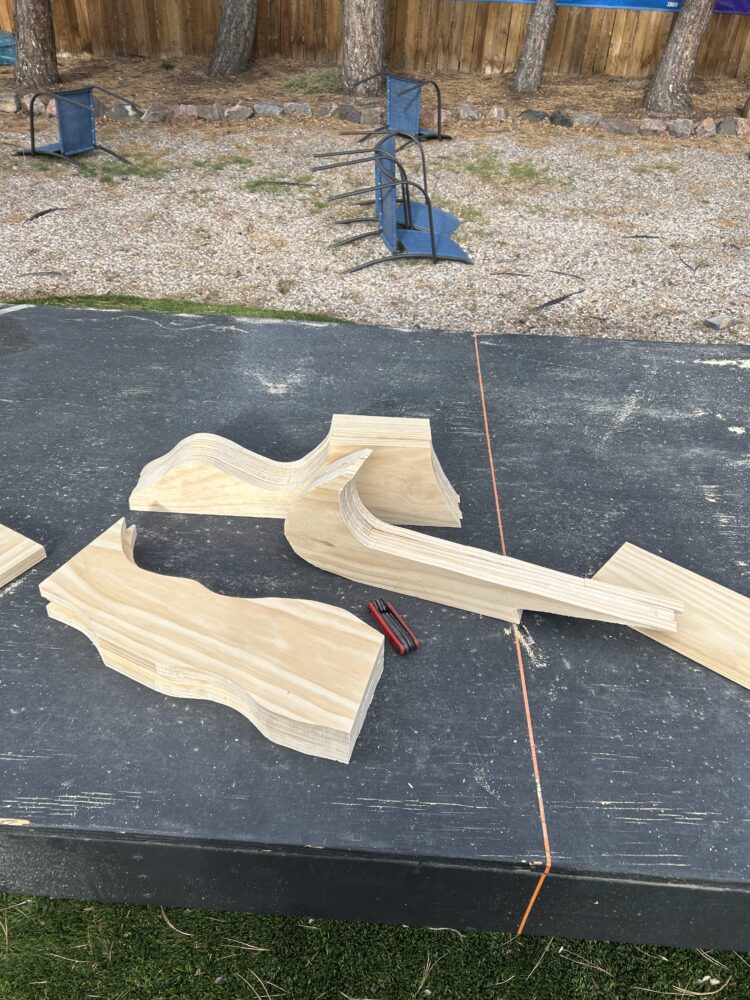
I cut out four on the base templates and three on the neck and Nike logo. I wanted a tapering effect from the base to the neck and top of the stand. I want to add small pieces to the neck where it gets wider to give it another layer of depth.
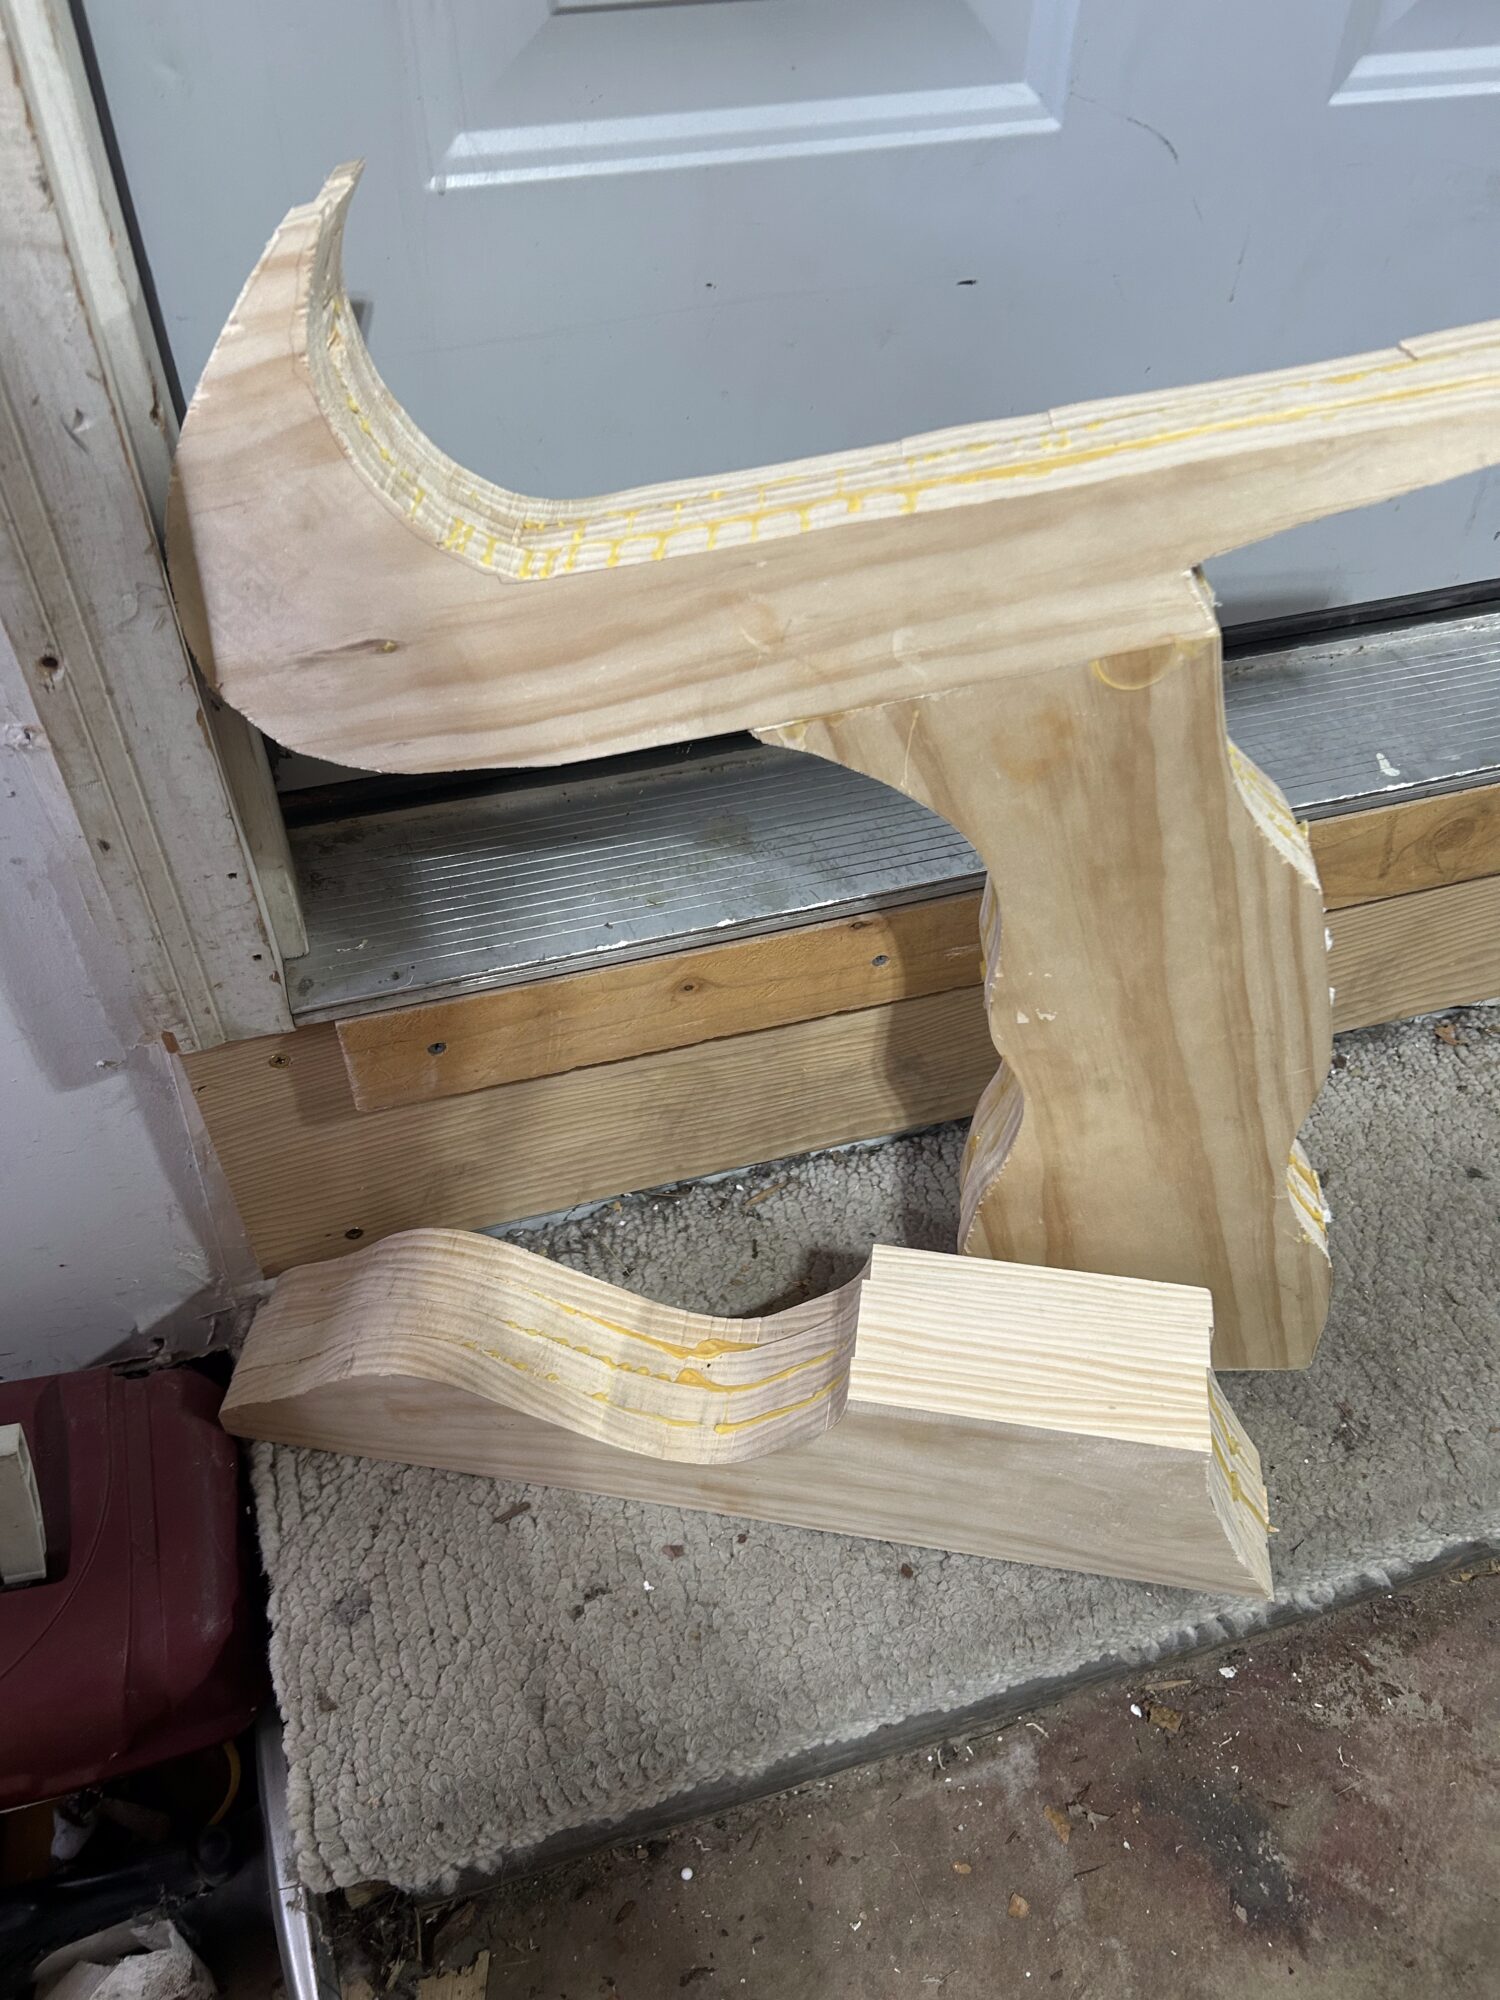
Once I cut out one of each section, I would use those to trace the next cut onto the wood to try and keep them as consistent as possible; however, my skills with the jigsaw aren’t as precise as I’d like. After cutting out all of the pieces, I glued them together using basic clamps and scrap pieces of plywood to apply even pressure.
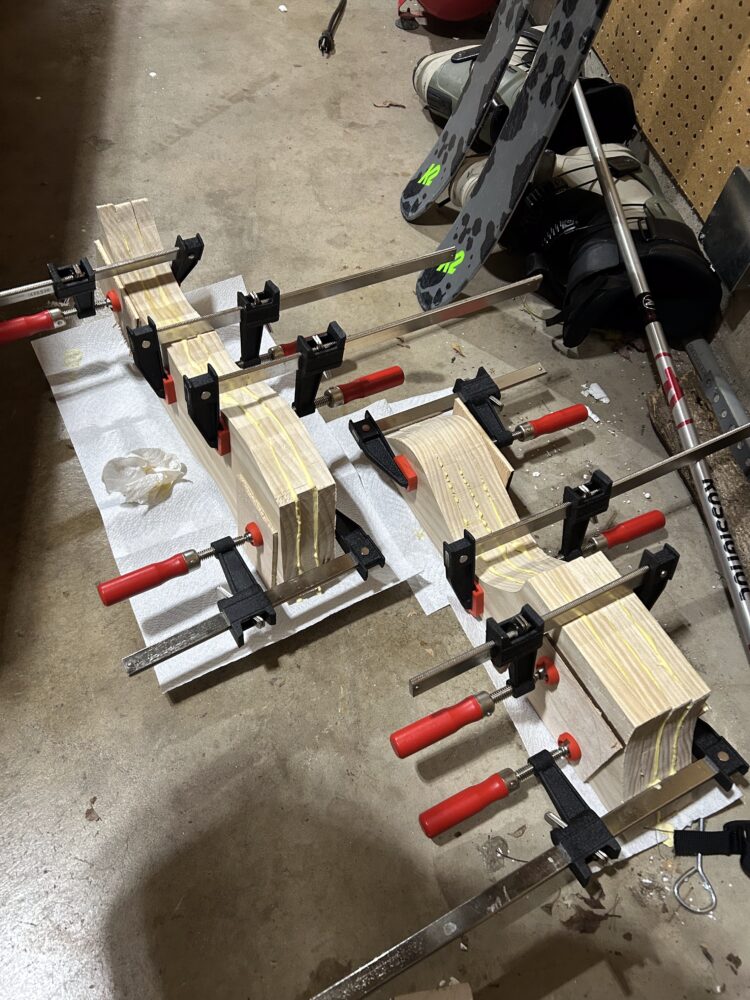
The gluing didn’t align perfectly, and the “attachment” points for each section to connect weren’t as smooth as I’d hoped, so I had to sand to level them as much as possible. They don’t sit exactly flush, leaving a gap when I glued them. I plan to fill this with wood putty after I carve it. So far, I’ve glued the neck and logo sections, but I need to flatten and sand the lower section before gluing it, and I need a larger clamp to glue the entire stand. Once I do that, I can start carving with my angle grinder and get the stand to the proper shape. As you can see, there are a lot of imperfections and misalignments between the layers and even the section, but I imagine those will fade once I start carving. Seeing the final product in its rougher stages is hard, but I’m chugging through.
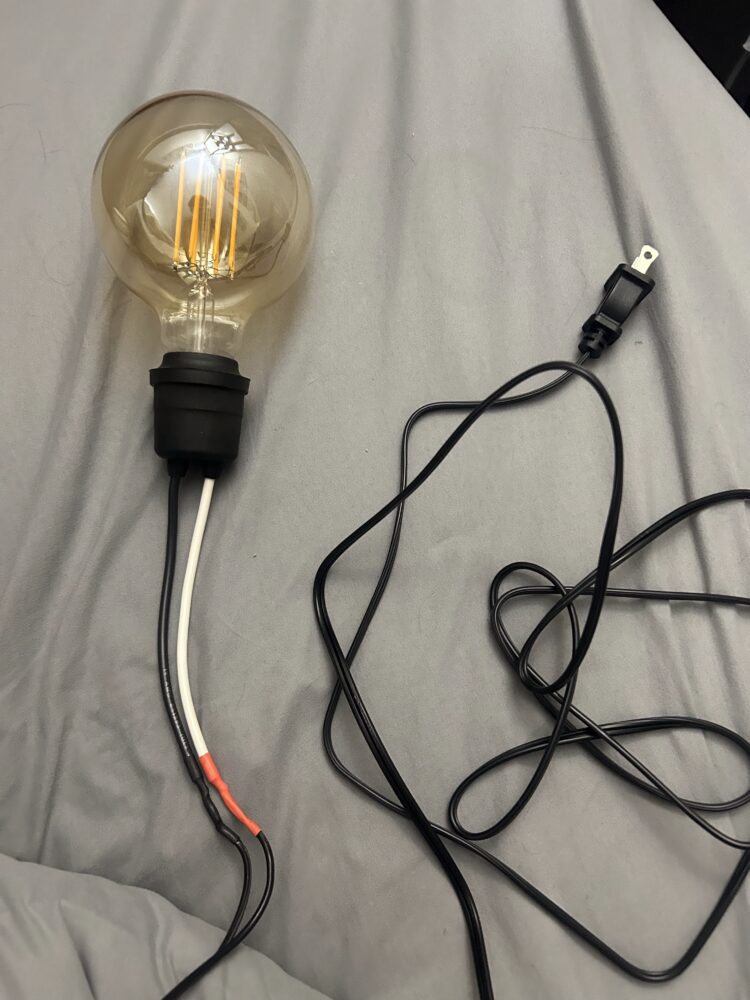
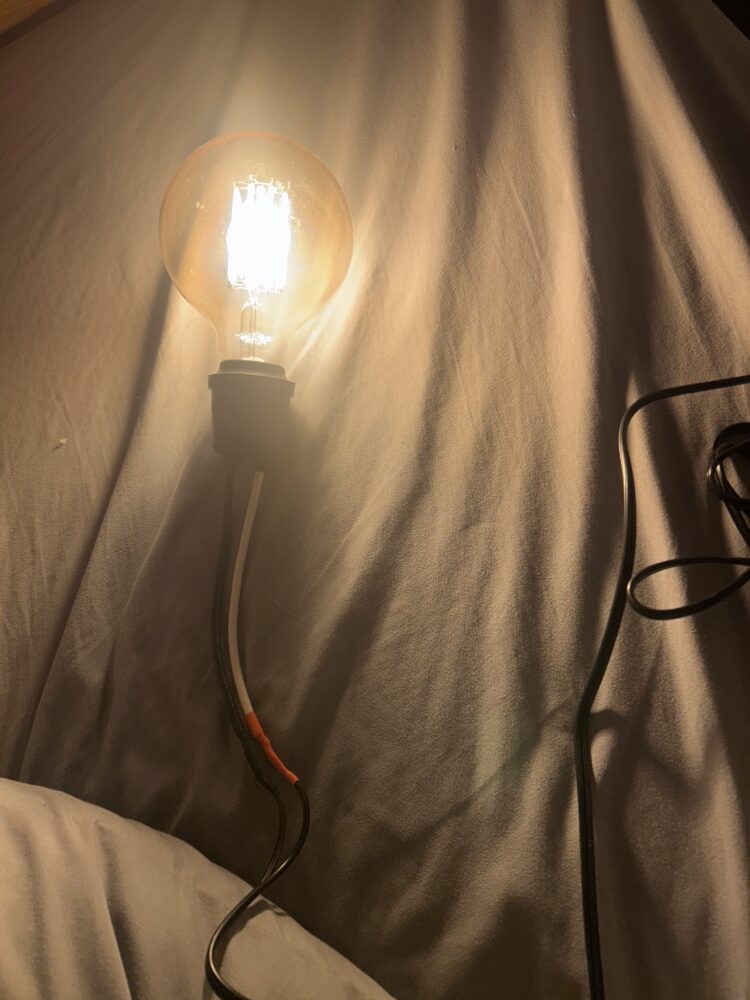
Besides the wood base, I have progressed in the magnet and lighting. After buying 5 different magnets, I’m finally happy with the strength of the 800lb fishing magnet. I also have steel balls that go in the heel of the shoe, and after testing, they can hold it firm through the shoe with a small gap. The lighting was easier than I expected. I just bought a light bulb socket and a wall outlet plug, soldered them together, and they work perfectly. Once I carve and stain the stand, I will drill a hole in the base and route a slot for the cable to come out the back and plug into the wall.
So far, I’m happy with my progress. The next step is to glue the base to the neck and start carving. I have no real plan with the carving, see how the shape works as I go.
 Sparkle in Progress!
2 Comments. Leave new
I remember seeing your post when it was just sketches, so seeing your progress is wonderful! I really like all of the choices you’ve made in form and lighting. I can’t wait to see how it looks all together. I am very interested in what you will carve. Do you plan to just sand it to a more organic shape or do you plan to chisel some different designs? I’d be interested to see any and all of those explorations.
Hey James, your magnetic shoe display is looking awesome so far! I really like how you’ve broken the process down step by step—it makes your build super easy to follow, and it’s cool to see the combination of woodworking, magnetism, and lighting coming together. The layering and tapering effect sound like they’ll give the stand a strong visual impact, especially once carved and stained.
One thing I was curious about: how do you plan to balance the shoe visually and structurally on the stand so it doesn’t look like it’s just “hanging” there? Also, are you thinking of doing any design or engraving work on the neck or base to add to the aesthetic, or are you keeping it smooth and minimalist?
Excited to see how the carving turns out—the imperfections you mentioned will probably add some great character once it’s shaped!