

I’ve completed the most significant portions of my project, and I’m excited to share the progress so far. For this project, I’m creating a mountain shelf with a drawer that captures a Rustic Modern aesthetic.
Project Summary to Date:
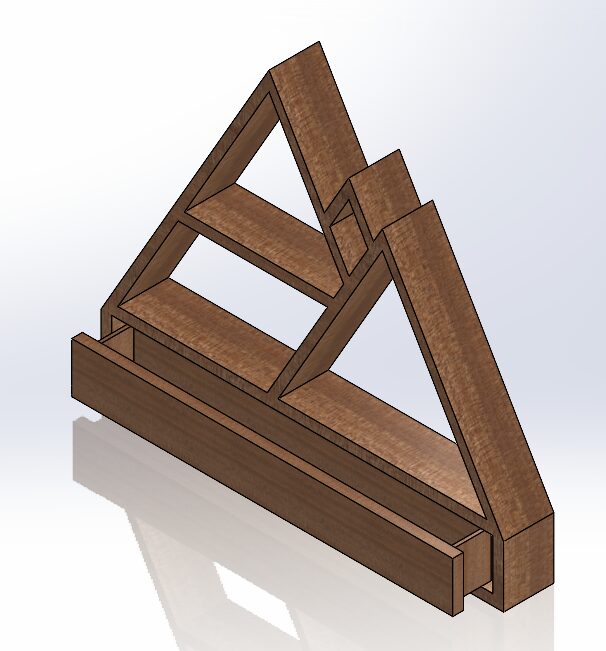
Step 1: CAD Modeling and Design Planning
To avoid the challenges I faced during my first mountain shelf build, I started this time by creating a detailed CAD model. Previously, inconsistent angled cuts made both the cutting and assembly processes unnecessarily difficult. This time, I standardized all angled cuts to 30 degrees for simplicity and precision. I also aligned all dimensions to a 1/16″ scale, making it easier to measure accurately with a tape measure.
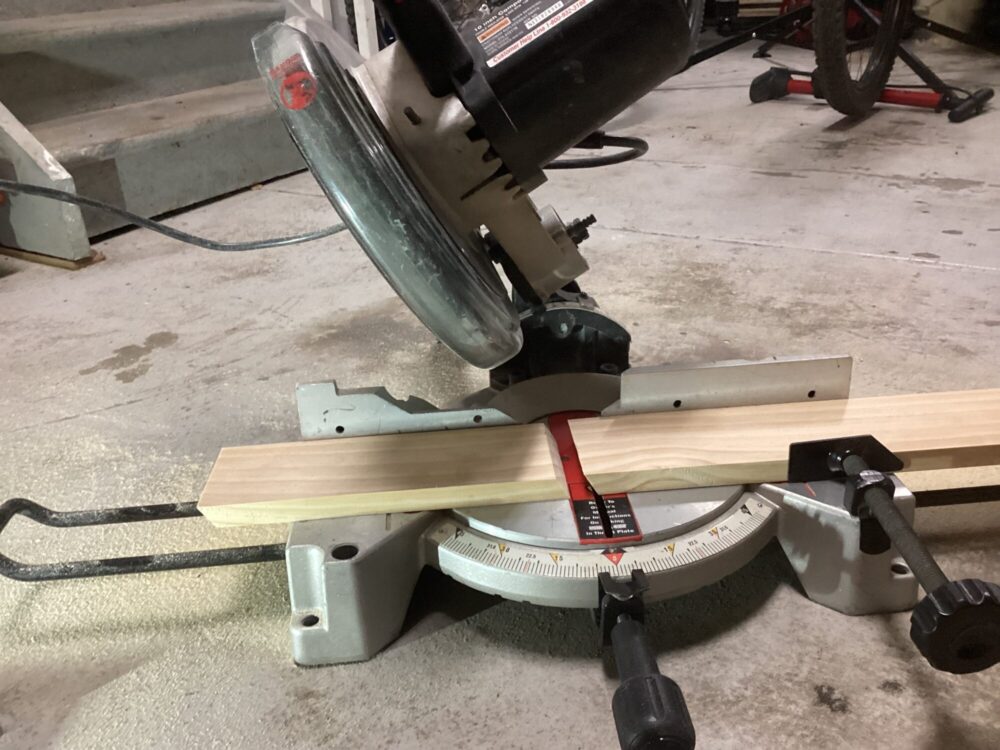
Step 2: Cutting the 1″ x 4″ Boards
I used a miter saw to make all cuts at either 0 or 30 degrees. Three key shapes—trapezoids, parallelograms, and rectangles—were cut to form the mountain outline, drawer frame, and drawer face.
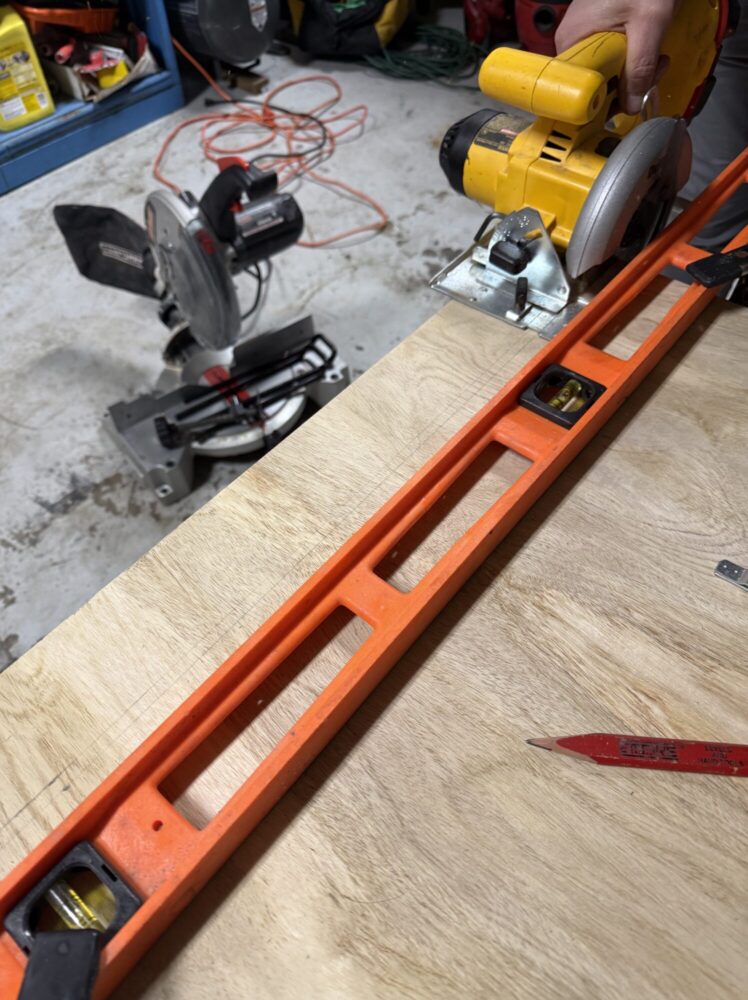
Step 3: Cutting the 1/4″ Plywood
Using a jigsaw, I cut 1/4″ thick plywood for the drawer’s sides, bottom, and back.
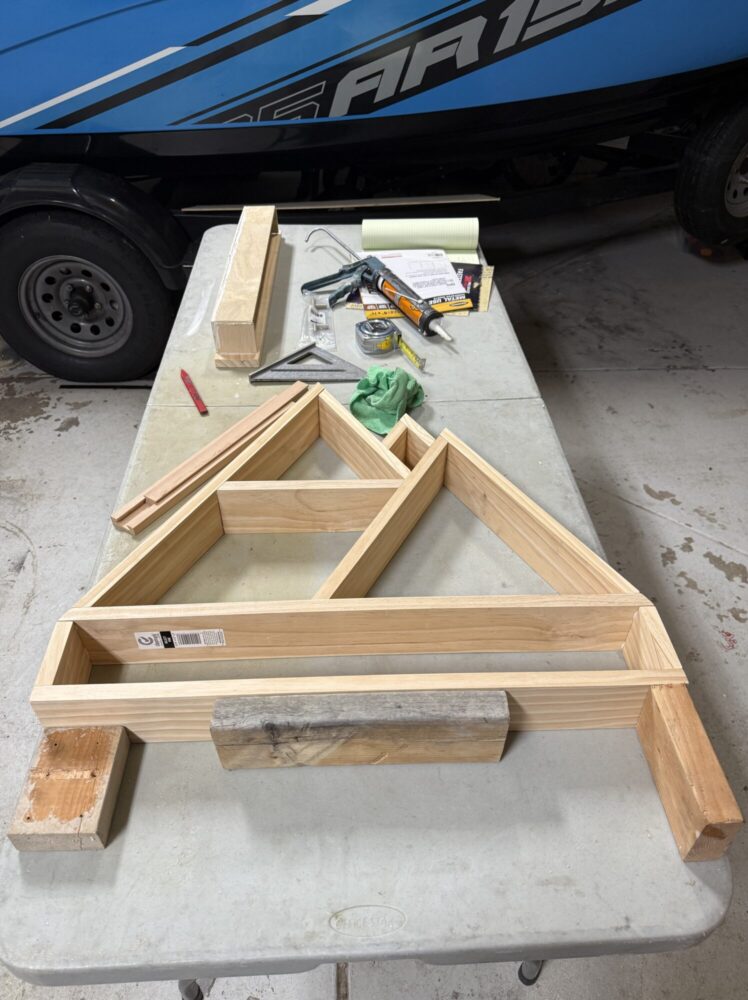
Step 4: Assembling with Adhesive
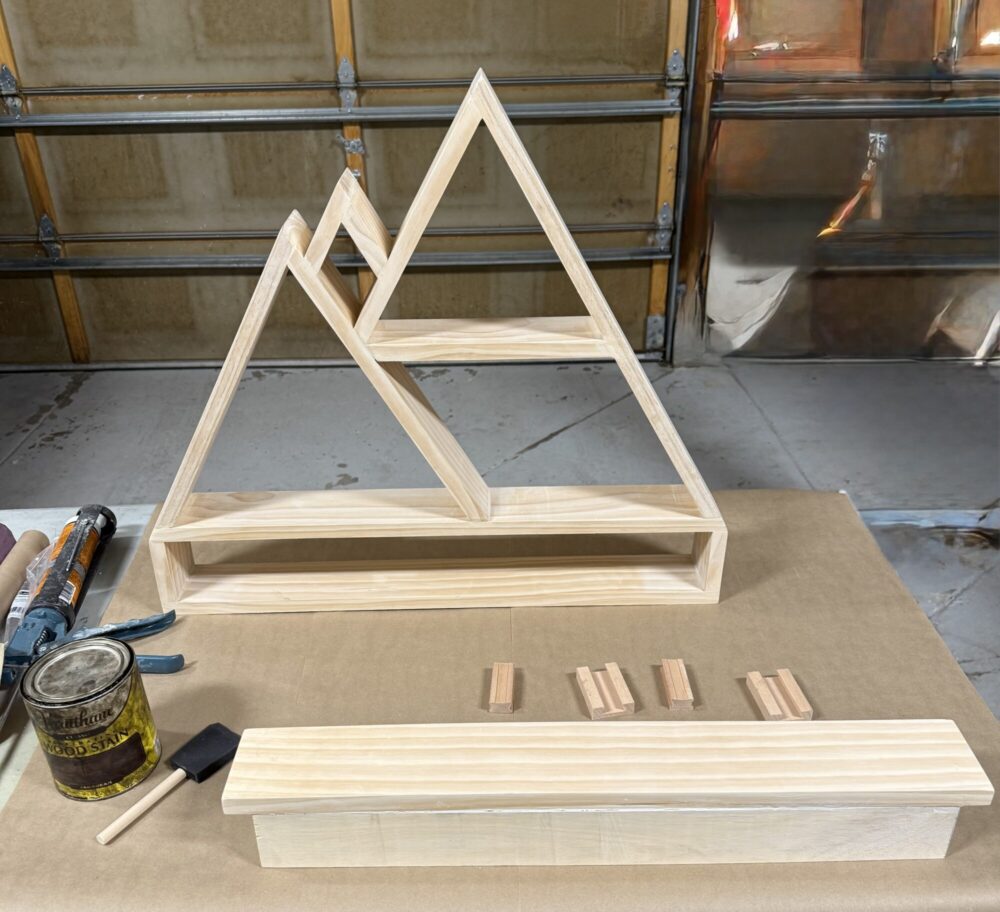
To assemble the drawer and shelf, I used construction adhesive on all joints. The fast tack time—about 30 seconds—made it easy to position each piece precisely. Figure 4 shows the drawer at the top and the shelf base at the bottom. I paid special attention to the tightness of the joints at the base, using extra wood supports while the glue set.
Step 5: Reinforcing with Nails
To ensure the shelf can support weight, I reinforced all joints using a nail gun, applying two nails or staples per joint. This required precision to avoid misfires, especially at tricky angles.
Step 6: Filling Holes and Seams
I used wood filler to cover all nail holes and to smooth out the joints. This helped create a clean, seamless appearance.

Step 7: Preparing Drawer Rails
Since I didn’t have the tools to make drawer rails from scratch, I purchased pre-made wooden ones online. They came in a standard length, which I trimmed down to fit the drawer using basic hand tools.

Step 8: Sanding the Piece
Before staining, I sanded the entire piece with 220- and 400-grit sandpaper, resulting in a smooth, professional finish.
I’ve already completed the staining process, but I’m saving that for the final reveal. So far, the build has gone even more smoothly than my first attempt. Up next, I’ll complete the drawer installation by attaching the rails and adding a handle to the front. I also plan to paint white peaks onto the mountains to finish off the Rustic Modern look.
2 Comments. Leave new
Hi Taylor, wow, your project is turning out great! I really like the simplicity of your design, while also creating this cool imagery of the mountains. Your craftmanship is also incredible! I’m excited to see the finished look. One thing I’m curious about is if you have an idea of what you want to put on the shelves/in the drawer. Do you have a plan for that already?
Thank you Eric! I don’t plan on putting any items on the physical shelves since I like the simplicity of the mountain design. However, I plan to put my keys, wallet, and any miscellaneous items in the drawer!