

There has been some finalization and progress throughout the past week for the fabrication of the AMG GT RC car. Both the electronics and body modifications have had substantial updates.
The lighting has had a great ease of life design update that makes everything a lot simpler. Initially, I was a little unsure as to how exactly the rear taillights would work. My initial idea was to remove the taillight inserts that the taillights had to have the LED shine straight through. This worked flawlessly on the headlights, however, the glow of the LED wasn’t working regarding the aesthetic. So, I instead modified the taillight inserts with the lowest infill I could, two walls of 3D printing, and it actually worked. The only other issue I encountered with the LEDs has been mounting them to the taillight. The taillight goes in through the outside of the body, and the LEDs are too large to fit through the opening. However, I managed to figure out a procedure to get the taillights through the inside. With that plan, I am able to permanently mount the LEDS to the taillights, using hot glue.
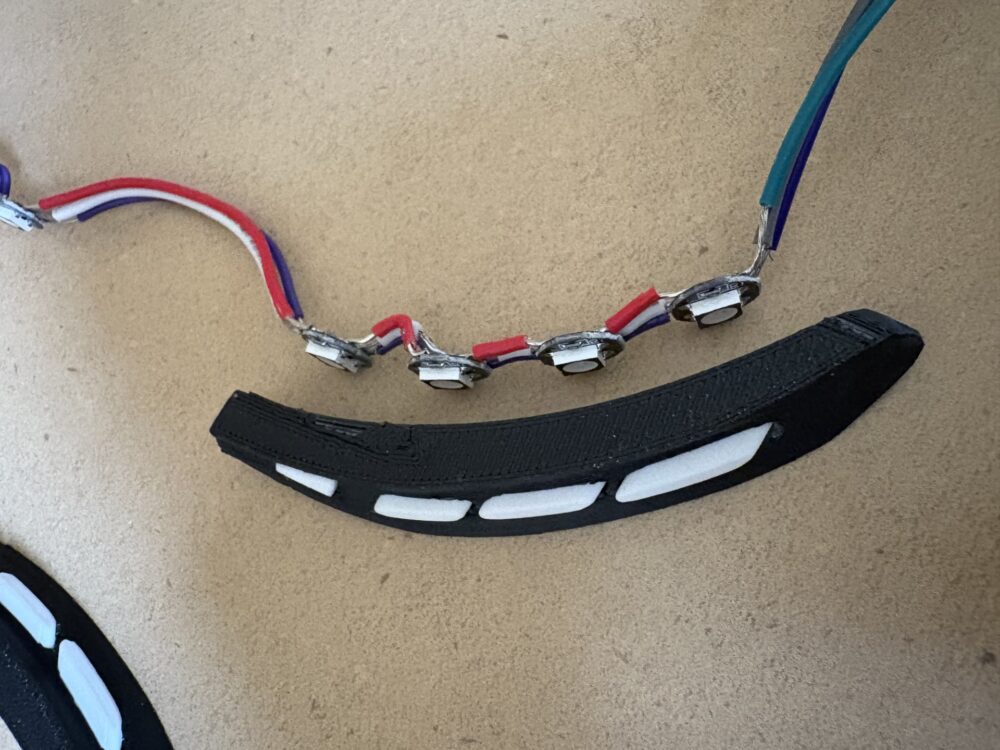
Taillight with LEDs.
To actually control the LEDs, I dove into the documentation of Adafruit’s Neo Pixel RGB LED. The great thing about these LEDs are that they all use the same signal wire and power wires, allowing for less wiring. If this weren’t the case, there would be a rat’s nest under the car’s body. Using a small Arduino (I specifically used DFRobot’s Beetle arduino board), I was able to create a lighting sequence.
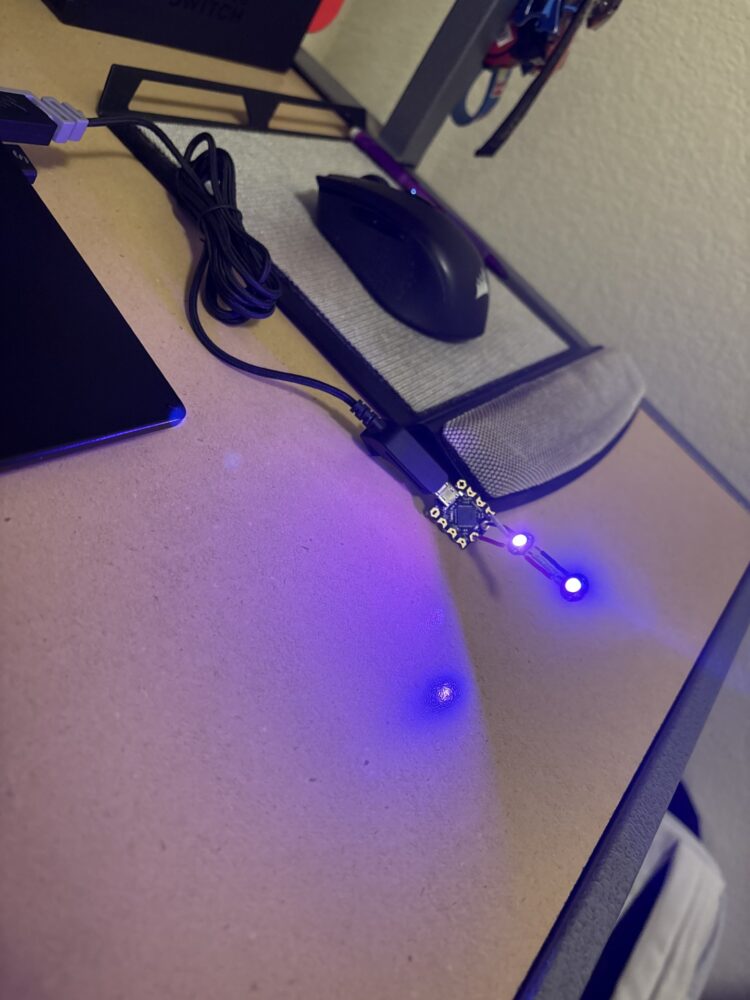
Simple pattern sequence through two LEDS using Arduino.
Once I had a good understanding of the controls and how the lighting would work, I created a wiring harness for all the LEDs. The process of creating this wiring took about half a day. With every LED connected, I encountered a few issues. For one, the front headlight’s wire run was a few millimeters too short, which made the headlights not fit into their location. Additionally, the Arduino was hastily connected to the LEDs with the wiring not making a great connection. However, I still wanted to see if this concept would work. I uploaded a program to the Arduino to color all the LEDs, and it worked.
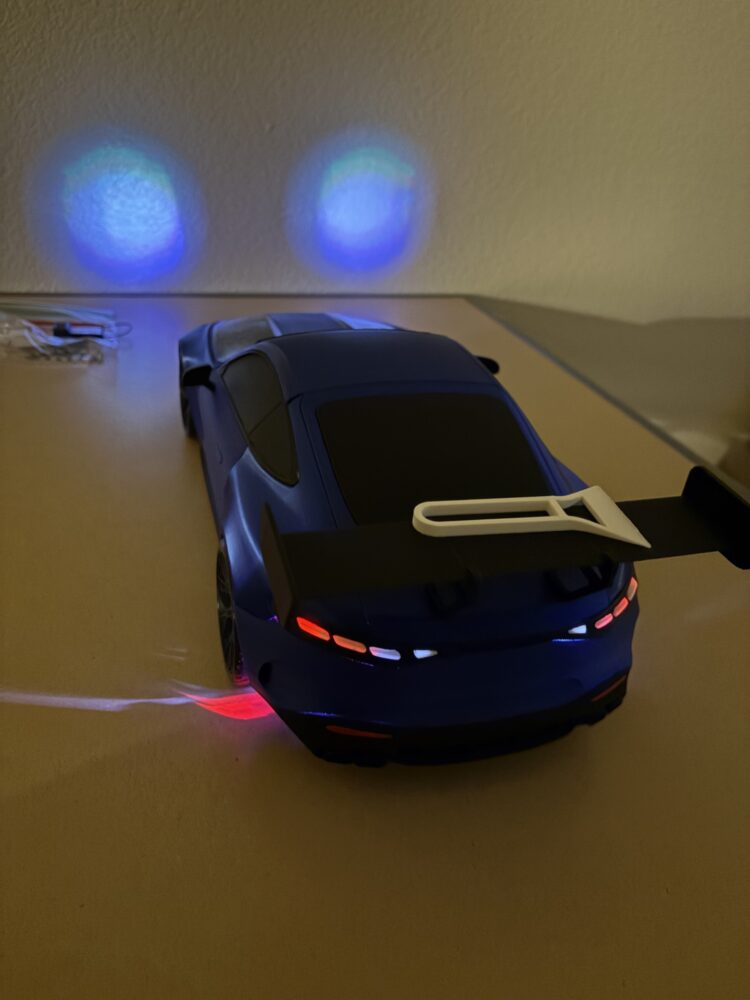
Test fit of lighting with desired lighting glow.
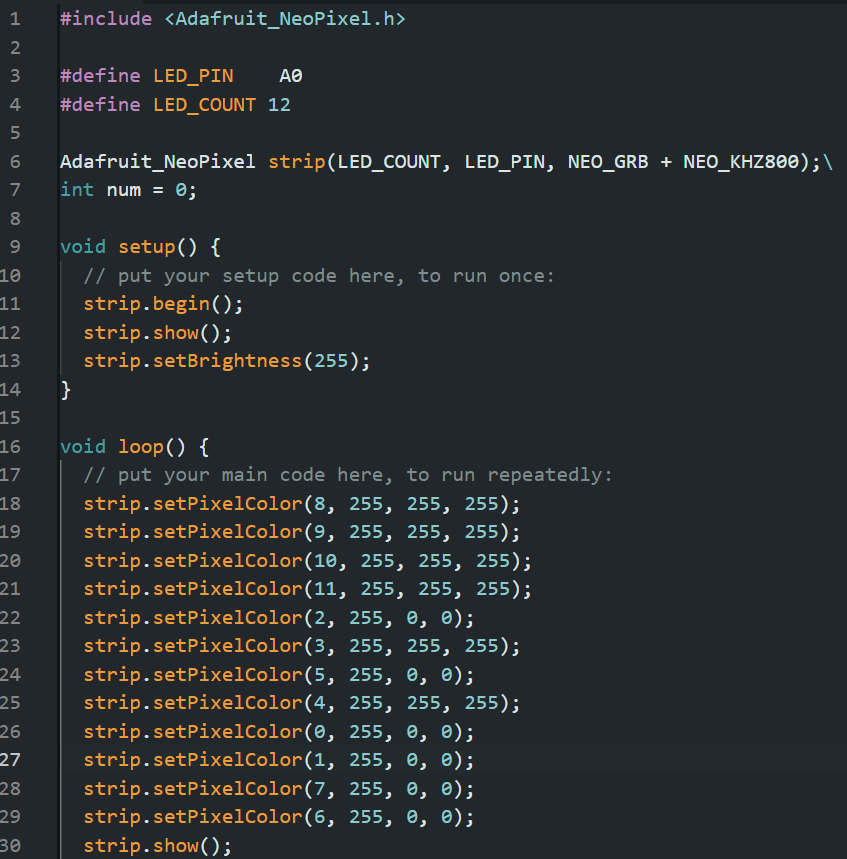
Arduino Code showing each individual LEDs being colored.
With a successful test of the lighting, I went back to the Idea Forge and modified the wiring harness to be more user friendly. I added connecters between the Arduino, the headlight/taillight harness, and an additional connector to get the cyberpunk lighting added in the future. The lighting is almost complete, I just have to create another harness for the remaining LEDs.
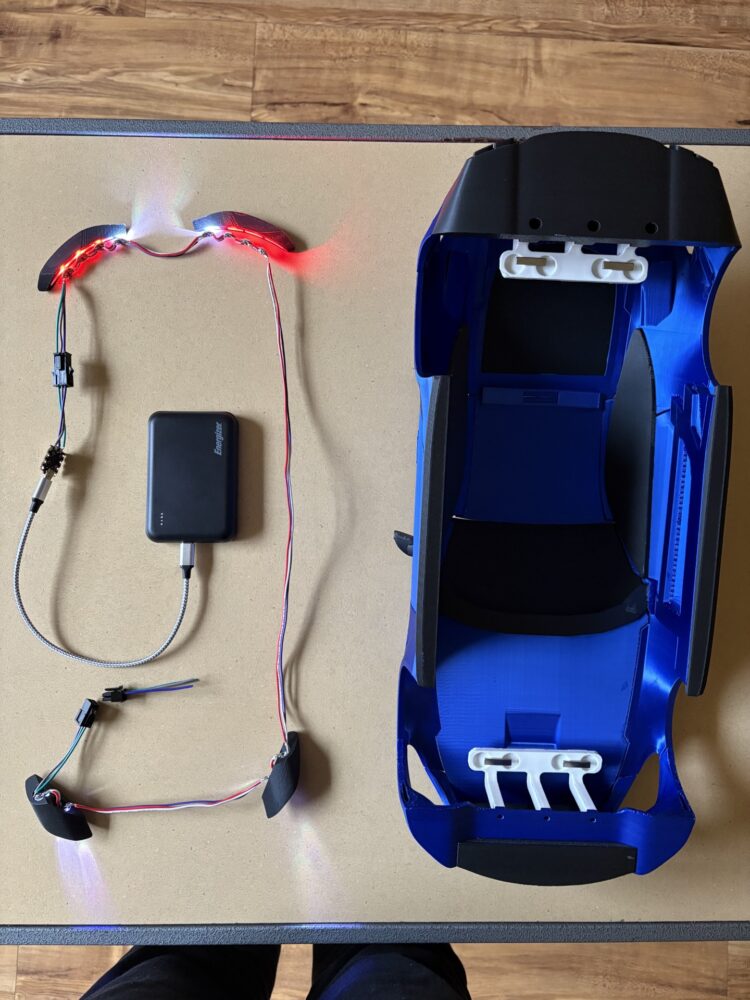
Wiring harness next to the body.

Closer look of wiring. Connectors can be added to expand the LEDs controlled.
The remaining tasks with the body of the car is continuing and finalizing the body kit. I made progress this week with modeling a fender styling. Using blender, I contoured it to the fender itself, and then additionally added a feature to exaggerate the vent located at the fender. While the model looks great on the computer, I am still unsure if it fits the aesthetic. I need to finish out the remaining components of the body to truly evaluate how well they add to the aesthetic.
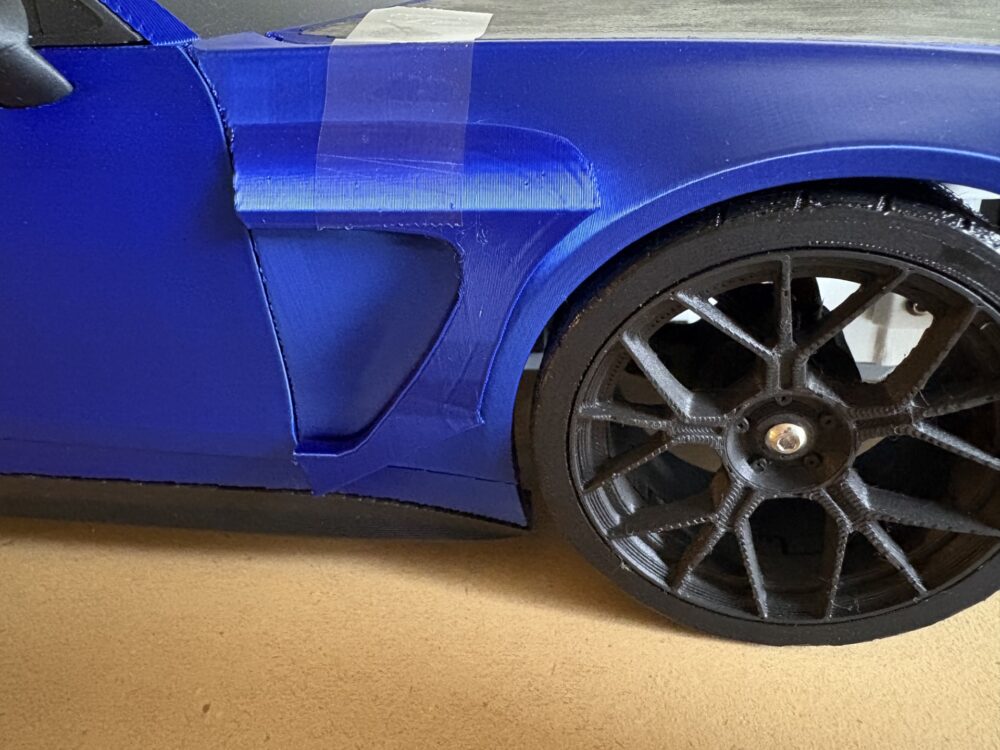
Fender Element taped on to body.
2 Comments. Leave new
I like that you’ve written about your tests, problems, and solutions. It makes me feel like I’m following along with the process as it progresses in steps. Additionally, I think the exaggerated fender would fit the cyberpunk aesthetic because it feels like a subtle but techy detail.
In the “Test fit of lighting with desired lighting glow” image, there seems to be light coming from the bottom of the back of the car, and I was wondering if that was intentional?
Thanks for the rely. The test fit of lighting was just to see how well my concept would work. As it turned out, the glow of those LEDs ended up coming through the bottom of the car. I did not intend to do this, and am currently thinking of ways to block out those specific LEDs. I do plan on adding lights to the bottom of the car, but I want to control those separately from the taillights.