

Since the last post, I have made a lot of progress towards the fabrication of the light AMG GT RC Car. I have the main body complete, along with the chassis. I am currently working on the electronics and modeling the custom styling options for the body.
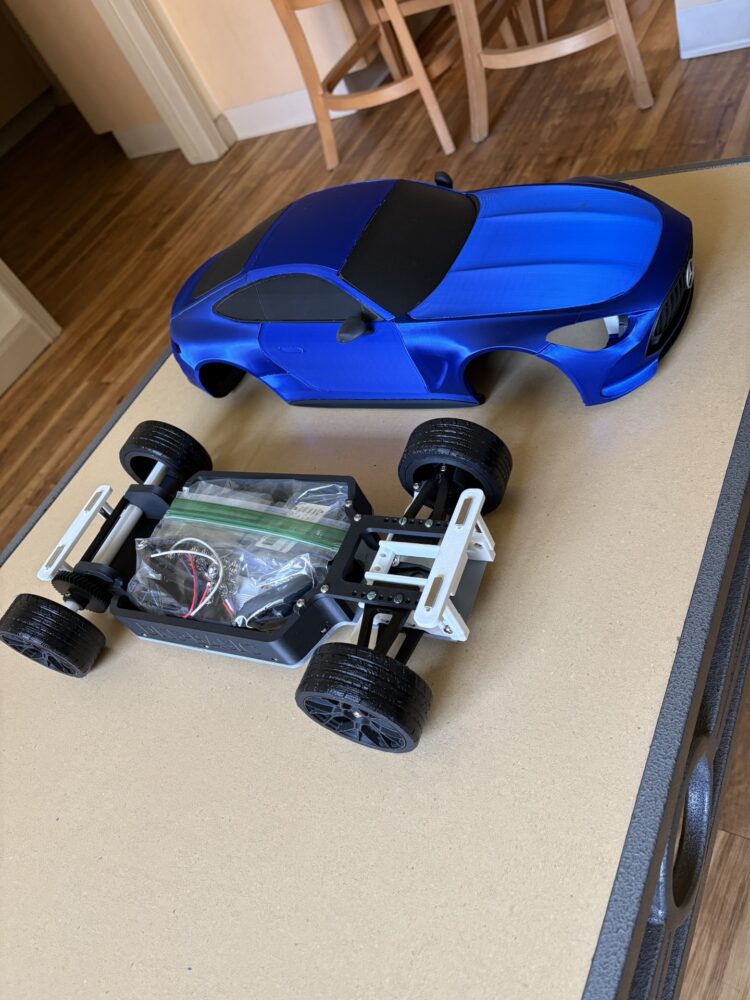
AMG GT basic body and chassis completed, ready for modifications.

Current progress of RC car.
As I get closer to finishing this project, understanding what is left to reach the finish line is necessary. To access completion, a list of specifications detail exactly how the final product will be.
- Light Cyberpunk. The cyberpunk aesthetic can vary, and is mostly associated with neon lights and complex systems. While the aesthetic is interesting, the full cyberpunk aesthetic is not what I envision for this project. Instead, I want to borrow some aspects of cyberpunk, such as the lights, contrast, and some geometric forms. Not all the features of cyberpunk, but a select few, thus the light naming.
- Actual Lights. Apart from the lighting I want to incorporate from the cyberpunk aesthetic, I also want to add traditional lights like a normal car. Headlights, taillights, and the accent lighting for the aesthetic should all be easily controllable, allowing for the aesthetic to be adjustable in color. To do this, I am using Adafruit’s Neo pixel RGB LED. These LEDs allow for the control using a single signal wire, and specific patterns can also be programmed.
- Striking Contrast. With the cyberpunk lighting, I want to achieve an aesthetically appealing color contrast that fits the cyberpunk theme. My main inspiration for such a contrast is Spiderman Across the Spiderverse’s portals, which feature a dark background color accented with magenta’s and oranges.
- Dynamic yet Elegant. The AMG GT car model I chose is known to be elegant and luxurious. I wanted to reimagine the car in a different tone, while still maintaining the sense of elegance. To accomplish this, I am using the existing body lines of the car model and modifying them to be more in line with cyberpunk.
- Driving. The main goal outside of the aesthetic is driving this car. I am terrible at flying RC airplanes, so having something to learn controlling a radio control vehicle with less degrees of freedom should help. However, this is a low priority goal due to the aesthetic focus of the project.
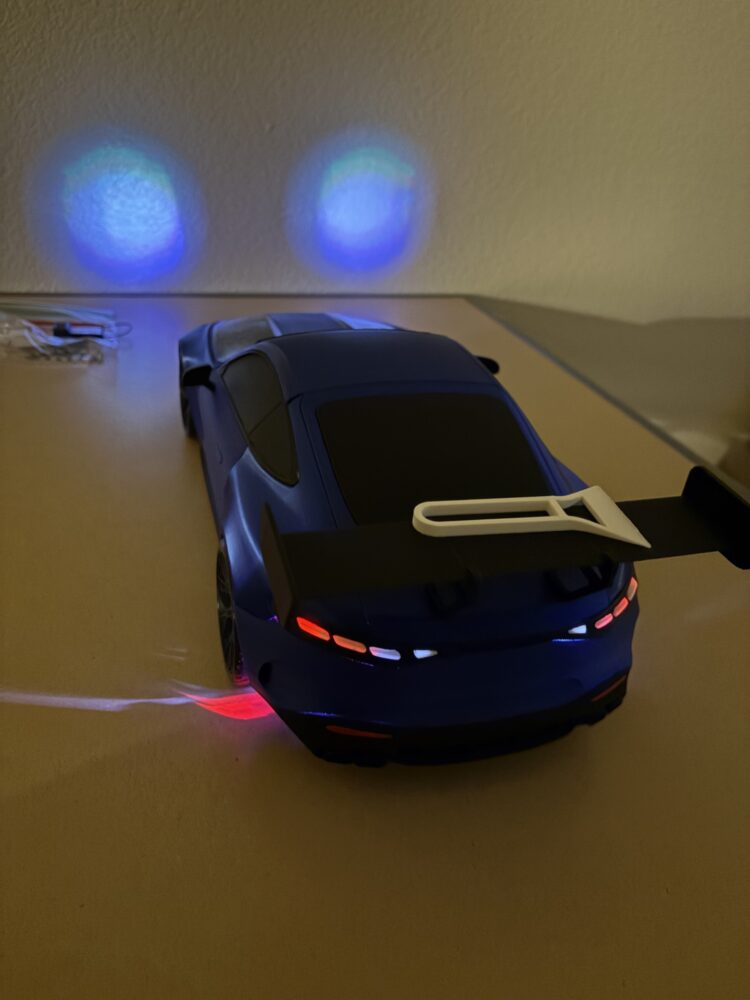
Initial wiring and programming completed for headlights and taillights.
There have also been many issues, constraining progress of this project or hindering the implementation of something.
- Mesh Modeling. One of the main issues I encountered when I embarked on this project was the modification of existing 3D models. The existing models I used came in STL format, which is close to impossible to modify in SolidWorks. I still needed to do modifications to bring my vision to life. Thus, I started using Blender to modify the existing models. The only problem with this is I have very little knowledge of Blender, but will slowly get the hang of it.
- Electronics Power. Another issue that I came upon was powering the LEDs I planned on using for the aesthetic. I had originally planned on using the battery the driving motor used, but I would drain it much faster with the amount of LEDs I am using. To combat this, I am using a power bank to power the LEDs and their controller.
- Electronics Integration. Integrating the electronics has come with its challenges. For one, the main body had to be modified to fit the LEDs, and to fit the power bank. Additionally, the wiring is slowly becoming a rat’s nest.
- Limited Materials. One thing I did not realize was going to be a challenge was the use of many different 3D filaments for this project. To reduce the amount of money I spent on different colors and materials, I used CU Boulder’s ITTL’s 3D printers for the parts I could not easily print with what I already had. Additionally, without the main driving motor, I have reached about $130 already. If I plan on actually making this car drive, I will have to get creative on driving it or wait until I get my next paycheck.
- Troubleshoot Time. The overall issue I have experienced throughout the project has been spending too much time troubleshooting issues that came up. For example, the wiring of the headlights and taillights alone has taken me about 20 hours, and I still have to fix some of the lengths to fit into the body. I did account for it in my initial schedule, and should hopefully be done on time.
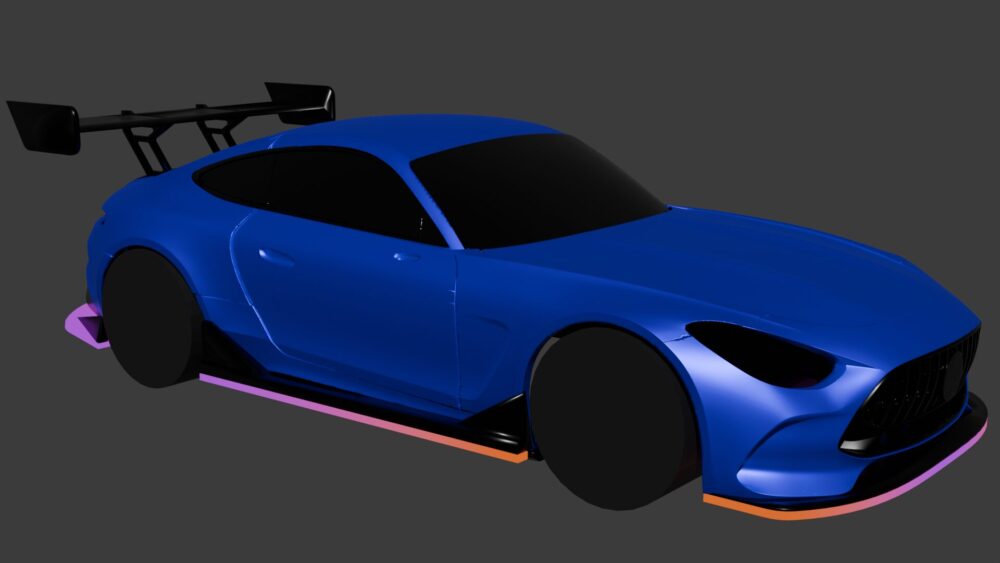
Rendering of AMG GT body I am modifying, with visual of cyberpunk lighting and custom rear wing.
2 Comments. Leave new
Overall, really cool project. Are you planning to 3D print all the parts? I’d imagine RC rubber tires might give better grip, maybe paired with your 3D printed rims. The tail lights turned out great. I’d be interested to see more photos of the mechanism that makes them glow like that.
Thanks for replying! I have currently 3D printed most of the components. I actually 3D printed the tires out of 95A TPU, which is a little stiffer than normal rubber, but still works great for a tire (stiffness is good for tire performance in racing). When I took that picture, the electronics was still a work in progress, but I recently reworked it to be a little more convenient and fix the issues it had. It is a simple harness that connects a lot of addressable RGB LEDs, all controlled using a small Arduino microcontroller. Will post a picture of these electronics finalized in my new post.