
Introduction
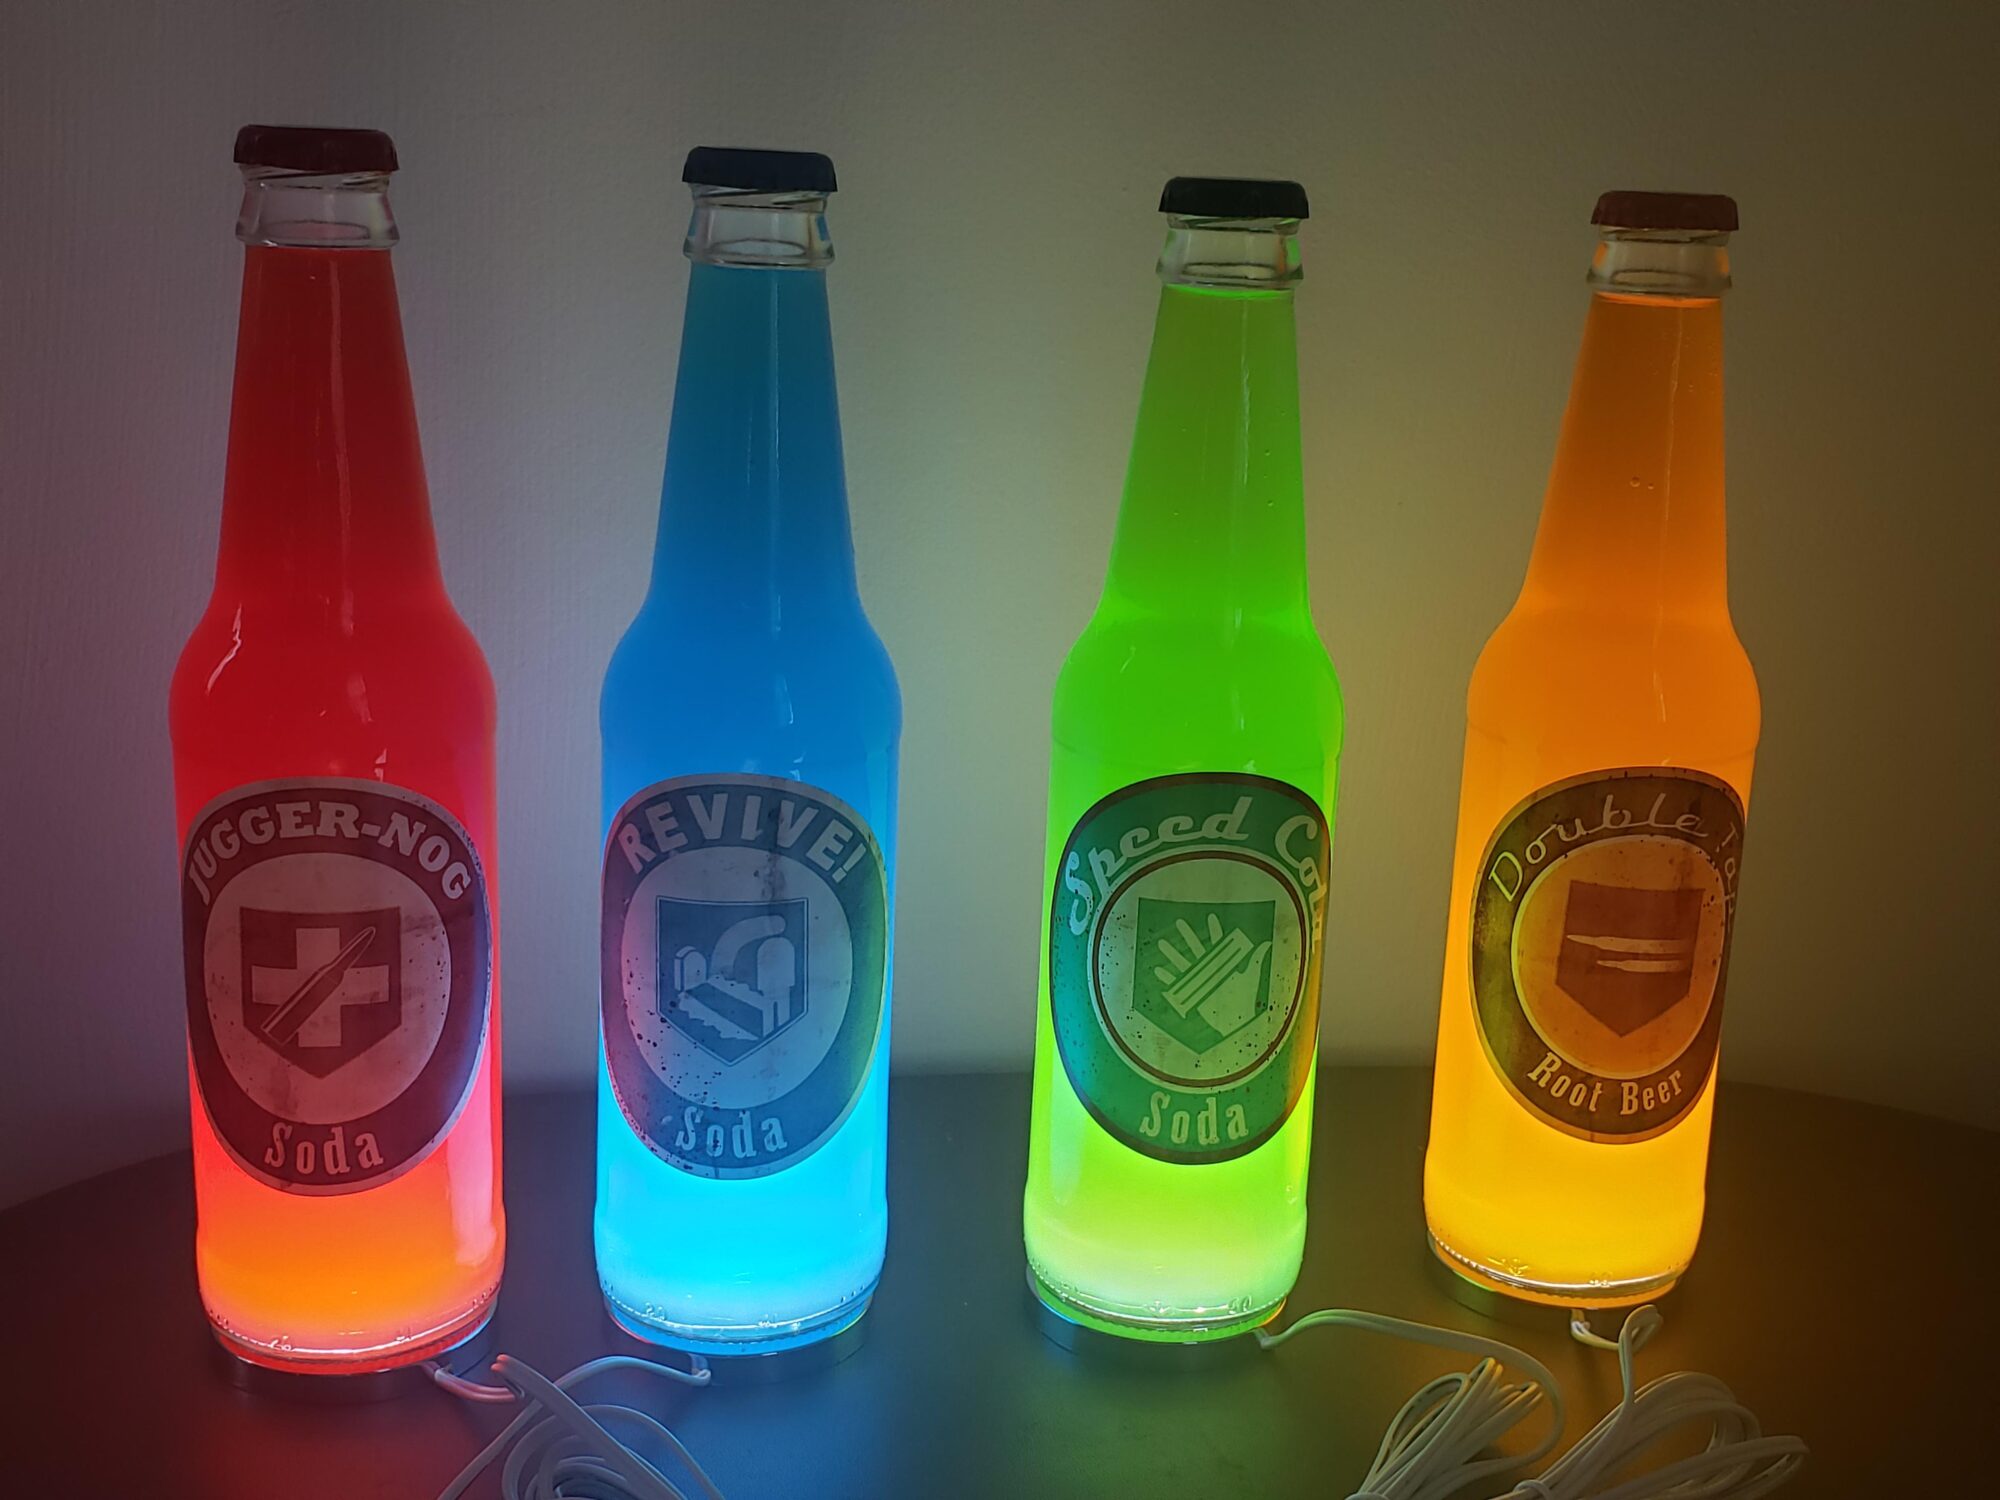
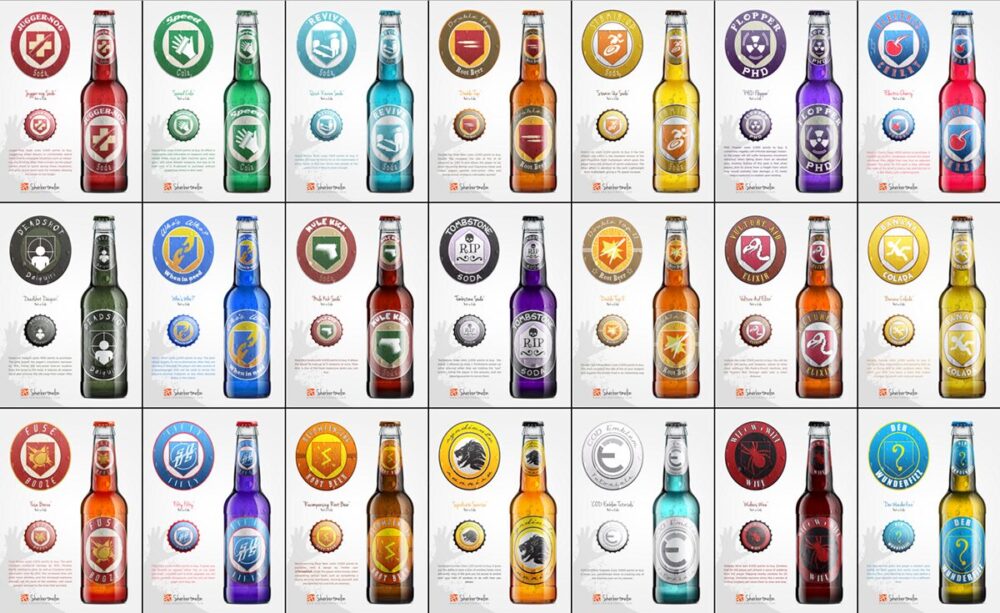
Bringing together nostalgia, craftsmanship, and interactive design, the Cozy Cabin Perk-a-Cola Bottle Display is a unique project that integrates aesthetics with electronics to create an immersive showcase. Inspired by the Perk-a-Cola bottles from Call of Duty: Zombies, this shelf not only serves as a visually striking display but also incorporates dynamic lighting and audio elements to enhance the thematic experience. The goal is to create a rustic yet high-tech installation that blends seamlessly with the cozy cabin aesthetic, reminiscent of the wooded environments and loading screens from the game.
This essay will explore the design process, material choices, integration of electronics, and assembly of 3D-printed elements to achieve the desired aesthetic and functionality. A great example of my idea is my featured image.
Concept Development
The inspiration for this project stems from a previous project where I made Perk-a-Cola bottles when I was in middle school. While these were a great collectible, they were left collecting dust without a proper way to display them. Recognizing this, I set out to design a custom shelf that would not only display the bottles but also enhance their presence through interactive illumination and sound using my skills as an engineer.
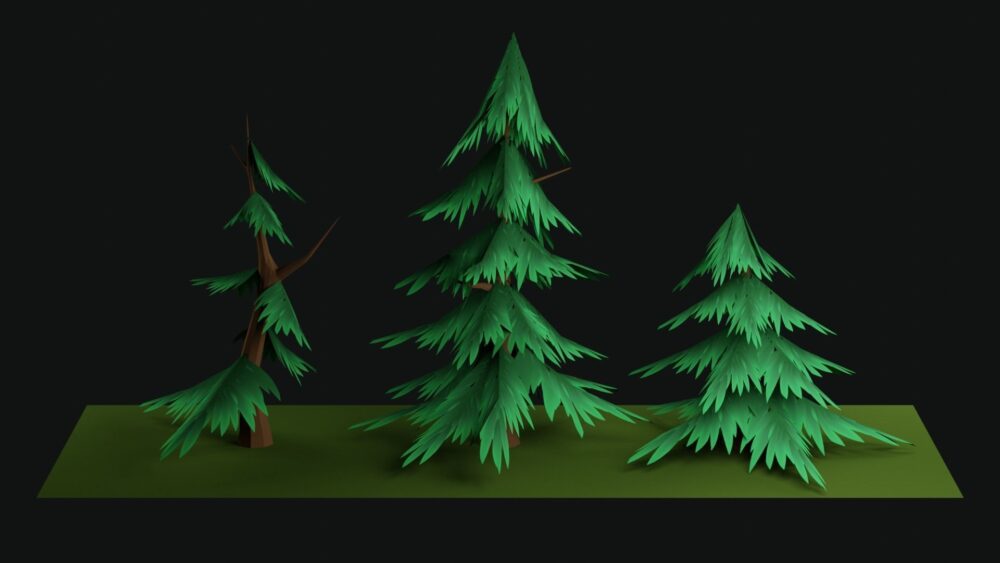
Each bottle slot will be embedded with an LED bar that turns on when a bottle is placed. Just underneath the bottle will be an end switch sending a signal to an Arduino to light up the area with springs to release the end switch when the bottle is removed. Furthermore, removing a bottle will trigger the corresponding theme song, reinforcing the nostalgic connection to the game. To tie in the cozy cabin aesthetic, the design will incorporate wood textures, pine trees, and warm lighting, echoing the forested ambiance of the Call of Duty: Zombies environment.
Design of the Shelf
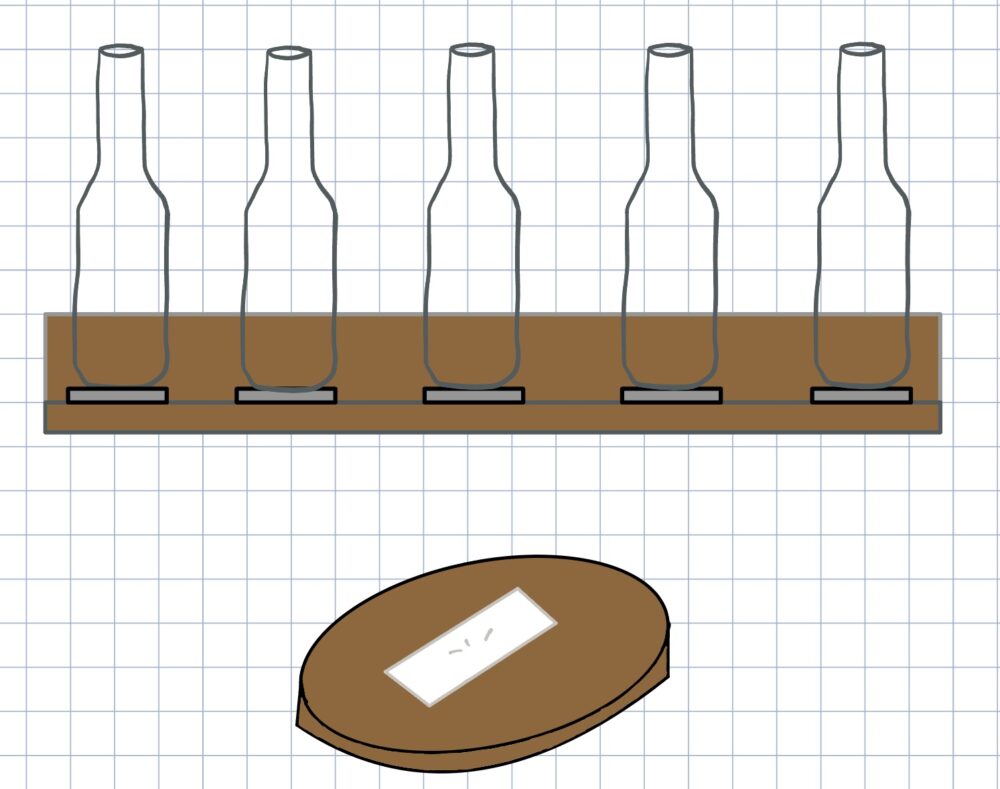
The display shelf will be approximately 2 feet in length, designed to hold five Perk-a-Cola bottles. Each bottle will have a designated spot, marked by its respective logo engraved or printed in front of the placement area. The overall structure will be crafted to resemble a rustic wooden cabin shelf, blending natural materials with modern technology. All the while, the electronics will be hidden away behind the scenes.
Material Selection
To achieve the cozy cabin aesthetic, wood is the primary texture of choice as I will be 3D printing all custom components. The ideal selection for this project includes:
- Brown 3D filament with different tones painted on to break of the colors
- Matte black metal accents: Used for small details to provide contrast and durability.
- Faux moss and miniature pine trees: Small embellishments to reinforce the forest theme.
A dark walnut or cedar stain will be applied to the wooden textured components to enhance the aged, cabin-like appearance. The use of faux moss will add the perfect contrast with a new color, texture, and perspective to the piece.
Structural Design
The shelf will feature:
- A back panel with engraved wooden details, including silhouettes of pine trees to reflect the loading screen aesthetic from COD: Zombies.
- Recessed slots for the bottles with LED integration with the right tolerance to hit the end switch when collapsed and not when the bottle is taken off
- Hidden wiring channels for a clean, seamless look.
- 3D-printed decorative elements, such as stylized perk logos or different elements from the game.
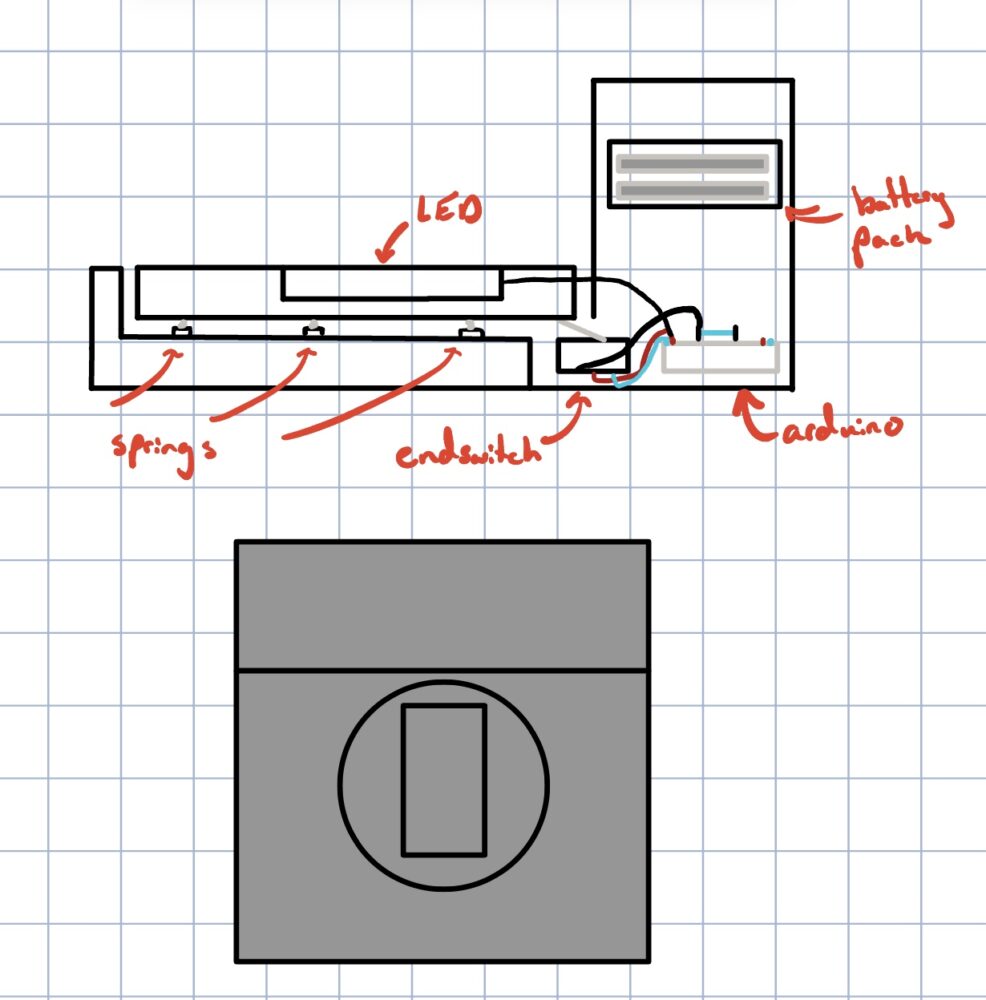
The structure will be mounted on a wall or standalone on a tabletop, depending on space constraints and personal preference. A battery pack will be installed on to the back of the shelf using two lithium-ion batteries and an Arduino Nano will be used as the controller of the inputs and outputs.
Electronics Integration
The interactive elements of the display are what make it a functional and immersive piece beyond just aesthetics. These components include LED lighting, end switches, and a sound module.
LED Lighting System
Each bottle slot will feature an LED ring or strip lighting that turns on when the bottle is placed. The LEDs will be controlled via pressure-sensitive end switches, ensuring that they activate upon placement. Along with this, the end switch can act as an input to both LED and song activations as it gets pressed and un-pressed making the Arduino code a lot easier to visualize and write.
Sound Activation
To play the corresponding theme song when a bottle is removed, a microcontroller (such as an Arduino Nano) will be programmed to detect when an end switch is disengaged. This will trigger the playback of an audio file corresponding to that bottle’s Perk-a-Cola song. The key considerations for this include:
- Ensuring only one song plays at a time to avoid overlapping sounds.
- Programming the correct delay and fade-out effect for smooth transitions.
- Integrating a small speaker system, either built into the shelf or hidden behind the back panel.
3D Printing small Elements
To further enhance the display, several 3D-printed components will be incorporated, including:
- Custom perk logos: These will be printed in high-resolution resin and affixed to the front of each bottle slot and colored accordingly.
- Miniature log textures: These add to the rustic aesthetic and provide an extra layer of detail. I want to make the shelf look natural in a decorative setting and having a bland flat face to every side would look unfinished and lazy. Adding pine trees to the background could also add to this.
- Bracket covers and mounting aids: To hide screws and enhance the overall finish of the shelf I may add brackets to the back. More importantly this could add some metal to the overall design and could be something I explore more when putting my finishing touches on the project.
The color and finish of these prints will be carefully considered, using either wood filament or post-processing techniques such as sanding, painting, and weathering to ensure they match the organic, worn-in look of a cozy cabin.
Assembly Process
Step 1: 3D printing the design
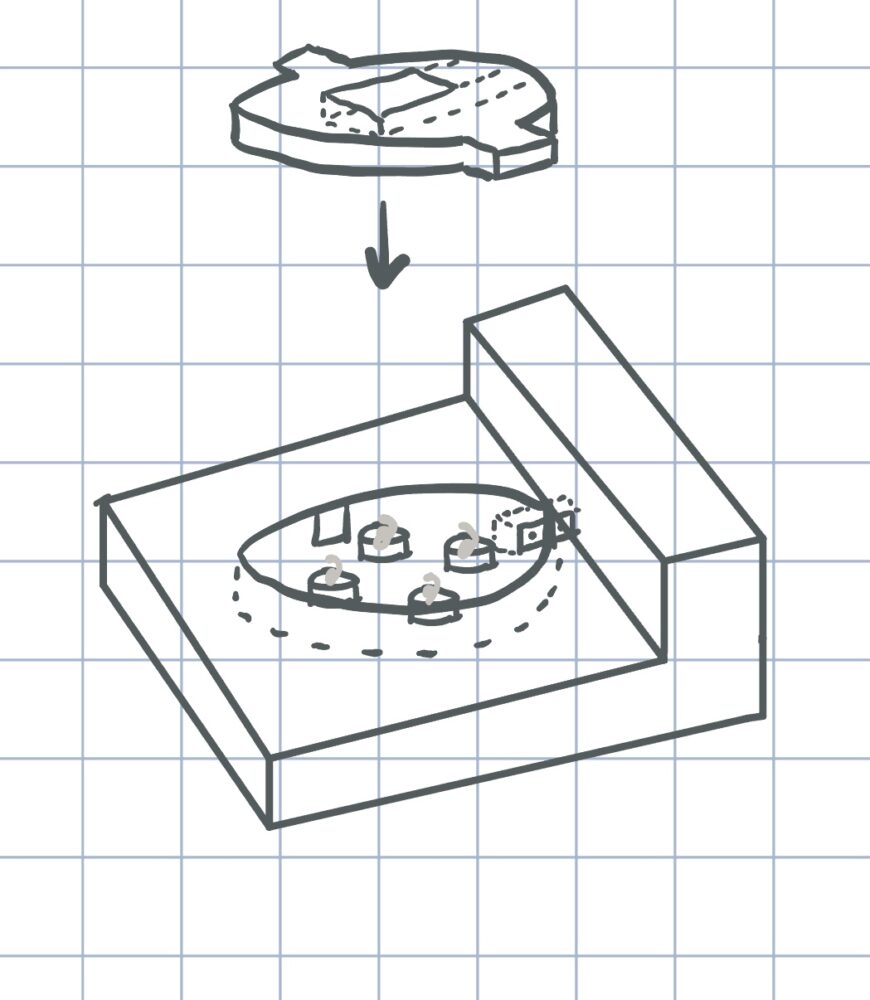
The first step involves designing and printing the shelf to be the right tolerance. The coasters where the bottles go should move in only one direction, the springs should push the coaster above the end switch along a rail, and the LED should look integrated into the overall design and not stick it’s wires out.
Step 2: Wiring and Electronics Installation
Before full assembly, the LED strips, switches, and wiring will be positioned. Channels will be extrude cut into the back panel to allow for hidden cable management, maintaining a clean aesthetic. The microcontroller and audio module will also be programmed and tested at this stage. I will make a single bottle holder for the purpose of testing the overall system and spring integration, so the tolerances are correct.
Step 3: Integrating 3D-Printed Components
After ensuring all electronics function correctly, the 3D-printed logos and decorative elements will be attached using adhesives, depending on weight and placement I want to make the logos/decorative elements as detailed as possible and printing them along with the overall shelf would take away from my ability to do so.
Step 4: Final Assembly and Testing
The panels will be assembled, ensuring all components fit securely. The LED lighting and sound triggers will be tested, making adjustments as needed to fine-tune the responsiveness and timing. The most important aspect is to not make a box that just makes a ton of noise for no reason. I want to work hard on the code in order to only allow the first song to play and have an idea of what the system will do for every user input. This may be one of the most challenging parts of the build. Adding a power button/switch will help with resetting the system and will make the piece look more professional.
Step 5: Mounting and Final Touches
Finally, the display will be mounted on a wall or placed on a sturdy surface. Additional decorations such as miniature pine trees and faux moss will be strategically placed to complete the cozy cabin aesthetic. This could include 3D printing a bunch of different types of 2D trees and using some adhesive to secure them to the back of the project. Another idea would be to cut out holes for the trees to sit in on top of the shelf.
Rough timeline:
Week of 3/17: Finalize vision and create a BOM
Week of 3/24: Order everything (LEDs, end switches, speaker)
Week of 3/31: Begin CADing around received parts and putting electronics together
Week of 4/7: Integrate electronics into display case design and add decorative pieces
Conclusion
The Cozy Cabin Perk-a-Cola Bottle Display merges gaming nostalgia with handcrafted rustic design, creating an interactive and visually appealing piece. The thoughtful integration of woodwork, electronics, and 3D-printed details ensures that the display is not just a shelf but an immersive experience, engaging both sight and sound. The final product will be a testament to both creativity and technical skill, embodying the spirit of Call of Duty: Zombies while fitting seamlessly into a warm, cabin-inspired environment.
Through this project, the balance between technology and craftsmanship is exemplified, proving that functional design can also be deeply artistic and meaningful.
2 Comments. Leave new
Your project is a cool fusion of nostalgia, craftsmanship, and interactive design, and I like how to reference your inspiration to COD. The way you’ve integrated lighting and sound activation makes the display more than just a shelf. Have you considered adding subtle weathering effects or distressed textures to the 3D-printed parts to further enhance the aesthetic you are going for? I’m excited to see how the final assembly comes together.
I love this idea, I was really into COD zombies growing up, and still play from time to time. As soon as I saw this, I had to read more. When I see how well this turns out, I may need to build one myself. I have used the speakers with Arduino once, and they were not great. I would recommend looking into other options to make sure the speaker does the theme songs justice.