
Epoxy River Table
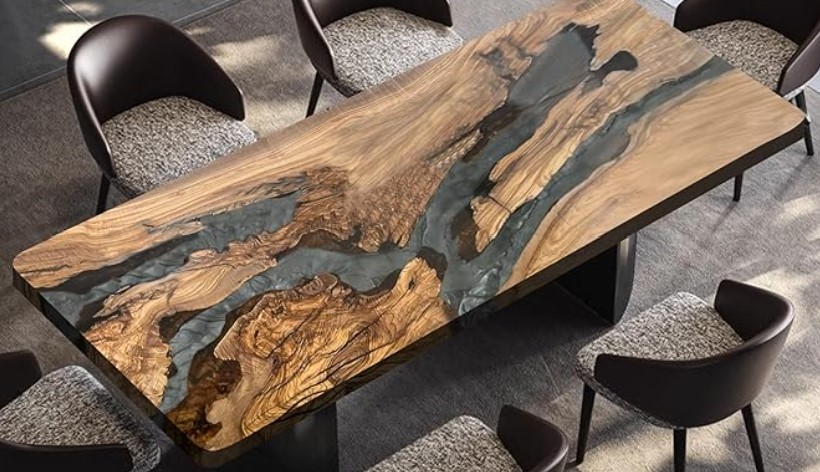
 The inspiration for my piece came from my love for nature and always wanting to construct this table from scratch. There wasn’t much stray away from this idea from the beginning and I was pretty set with getting this project done. It will be a coffee table that has a dynamic piece with a removable. drawer. I wanted to keep it simple and really focus on the woodgrains and character of the wood as it’s focal point. I’m not really straying to far away from the original design that many people have done already, I’m just recreating it and learning a lot through the process with the interaction between wood, epoxy, and design.
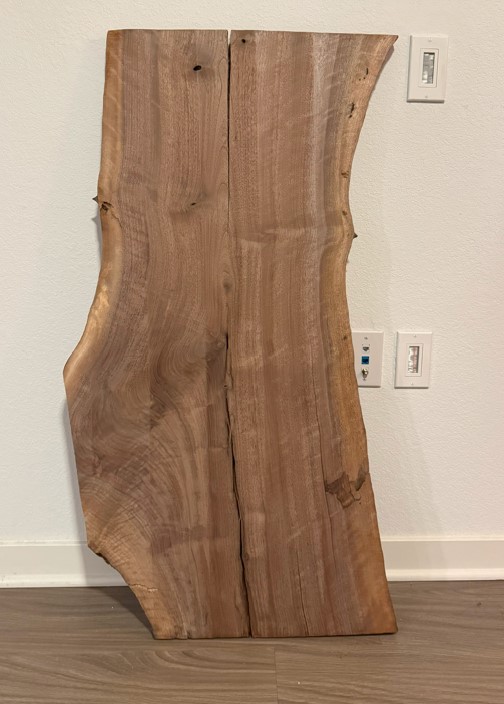
I’ve already purchased my piece of wood that I will be using which is black walnut. I chose this piece of wood because it came at a decent cost for the size I wanted and gave me the darker tone I was looking for. The main specifications that I defined for this project is the materials used, length, width, and height of the coffee table, molding/prepping specifications, the finish I want, bring the nature aspect into the living room, and for it to be minimalistic in function.
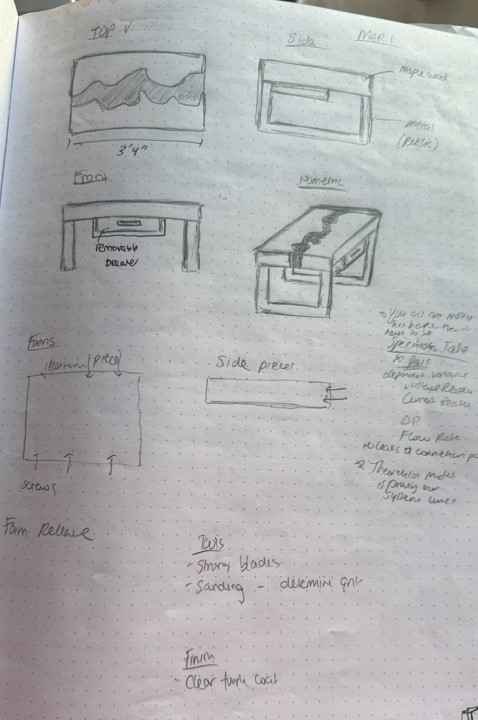
 The dimensions for the coffee table will be 1.25″ thick, 1’7″ wide, and 3’6″ long based on the black walnut I purchased. The form will be fit to these dimensions measured from the inside. In preparation for the piece, I will need to gather mold release, mineral spirits to remove the sap from the wood, melamine for the form, sand paper in different grit size for both the wood and epoxy, epoxy with black pigment, and clamps to hold down the two pieces of wood due to the rising during the pour. The biggest learning curve for me will be the preparation, pour, and finish of the table and I will be watching a lot of youtube videos as well as asking for advice from wood/epoxy experts.
For the final design plan, once the table is finished to the correct sand paper grit, there will be legs that will be fastened to the bottom to include the frame for the removable drawer. I will purchase the legs from Temu and I’m still determining what I want to the do with the frame for the drawer.
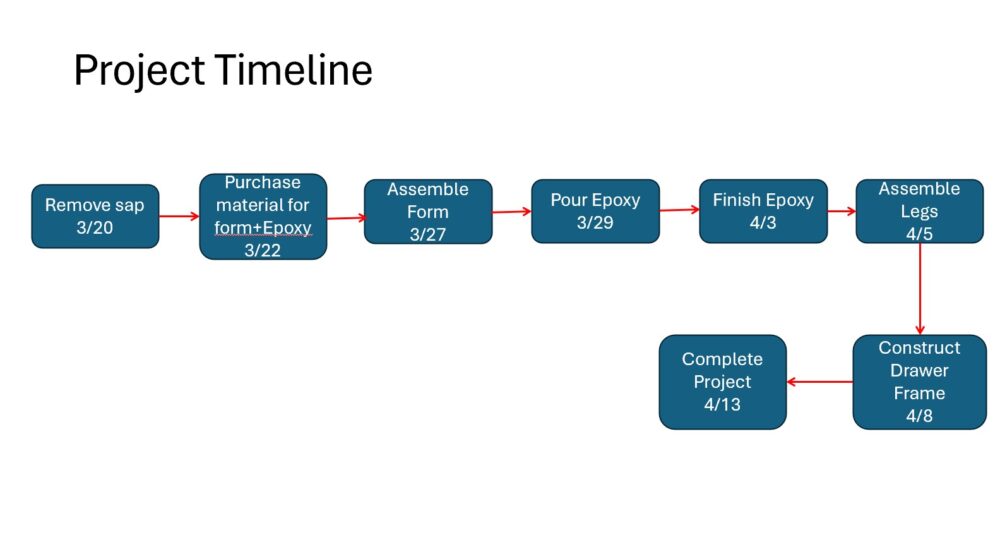
The time line for my project has already started and I’ve sanded down a side of the black walnut but from here mineral spirits will be used to remove the sap:
The process of this project will come down to a lot of research for preparing materials for the epoxy pour as there it heats up once it is mixed and will make the wood float. Bubbles usually form once the epoxy is poured so I will have to keep that in mind as well as I do the pour and is the main skill that I will have to learn.
I will fabricate this table by using power tools to cut the wood, a large sized planner to help with getting the piece finished once the epoxy is poured, fastening the legs the table, and constructing a frame to hold the removable drawer in place. The power tools I will be using are orbital sanders, band saws, tables saws, drills, clamps, a square, and marking tools.
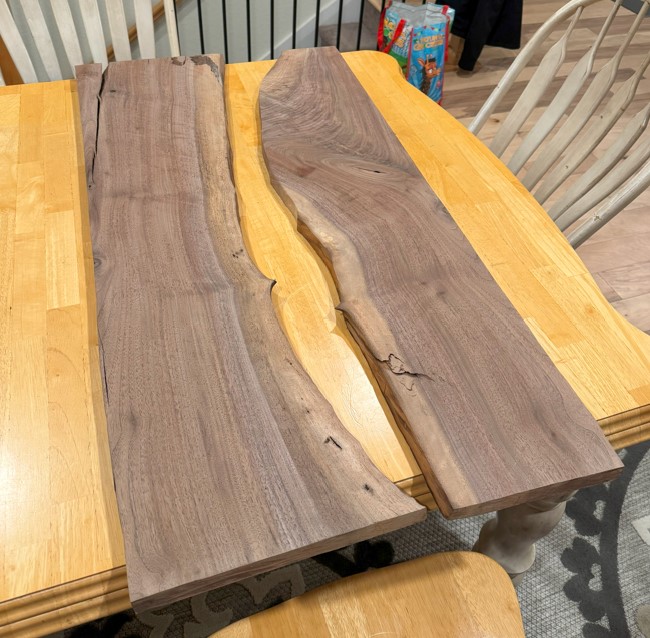
 The first step is complete with cutting the wood in half so that the live edges are now at the center. The following step is cutting it to the correct dimensions and then sanding it with a low grit in order to get the dirt out of the pours. Mineral spirits will be used to remove the sap in the wood so it doesn’t interact with the epoxy once it pours. This is a very important step due to bubbles that can occur for the finished pour in order to get a clean finish. Once the initial sanding is done, the form will be made out of melamine and cut into the 5 pieces where the are 4 edges and one large back piece. This form well be lathered in mold release for the black walnut to be easily removed once the pour is done. Next the pieces will be place into the form and then clamped down so that it doesn’t rise. 2 deep pours will be done for the center and have a black pigment for the center. This will allow for the wood to really pop and show it’s characteristics. It will set for a few days until it is cured to be finished in a planner to get excess epoxy off and ready for the finish pour of epoxy on the top. This will be the last step for the table. The finishing steps will be fastening the leg into the table with bolts and nuts. The frame will be installed for the removable drawer and then be complete.
As the project continues, I’m sure that there will be mishaps along the way in which I will mitigate by getting advice from more experience wood workers and those who have done epoxy river tables in the past.
Cites:
4 Comments. Leave new
Super fun project idea! You could even inlay objects into the pour if they could be visible
Thank you for the suggestion!
This is a great concept for the main project! I’ve seen similar tables trending on social media, but I’ve never had the opportunity to make one myself. Out of curiosity, how much did that piece of wood cost? I know larger pieces like that can be quite expensive.
Thank you! It cost roughly around $240 and was around what I was looking for for this project. The epoxy is almost around the same cost depending on how much I need. Just something to consider if you plan on tackling this project in the future?