
The overall goal for my final project is to create a piece of usable furniture that meshes well with both my personal aesthetic and existing furniture. At the current moment, my space is lacking a high-quality entertainment center, and I think this project is a great opportunity for me to help refine my space, gain some additional experience with woodworking and concrete finishing, and add some additional features like integrated HDMI and power outlets.
My first ideas for the final project were centered around a Scandinavian modern aesthetic, as it would match the majority of the furniture in my home very well. The heavy usage of light wood grain, clean lines and colors, and simplistic function aligns well with my personal aesthetic, and could help to make manufacturing easier.

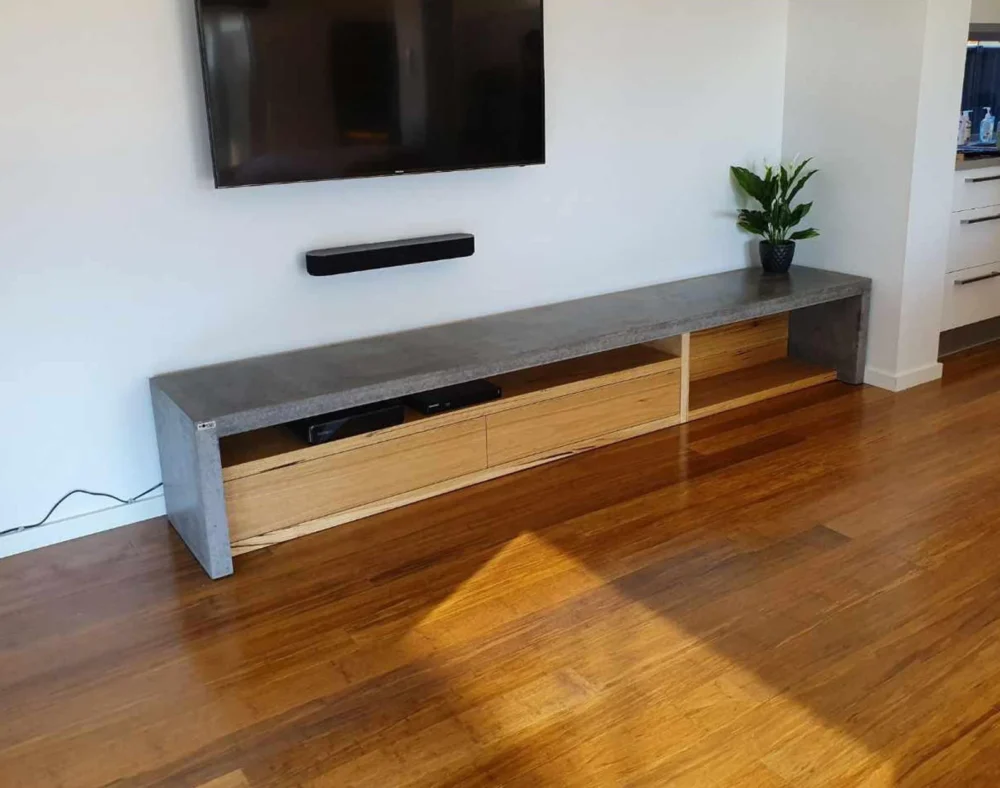
In the previous post, I wasn’t entirely sure if I wanted to make a TV stand or end tables, but I now believe the TV stand would better fit the scope of this final project, and have a more significant impact on the feel of my living room. Additionally, after creating sketches of my design with the inclusion of Brutalist elements, I decided to incorporate a concrete waterfall shell over the design. This helps to add some contrast to the piece while still remaining modern. Because the Scandinavian modern aesthetic typically highlights the use of natural materials, the incorporation of concrete would shift the design to follow a more industrial modern aesthetic. The images below show the inspiration behind the incorporation of concrete as a featured material, and the original sketch I had for incorporating this into the design of my TV stand.
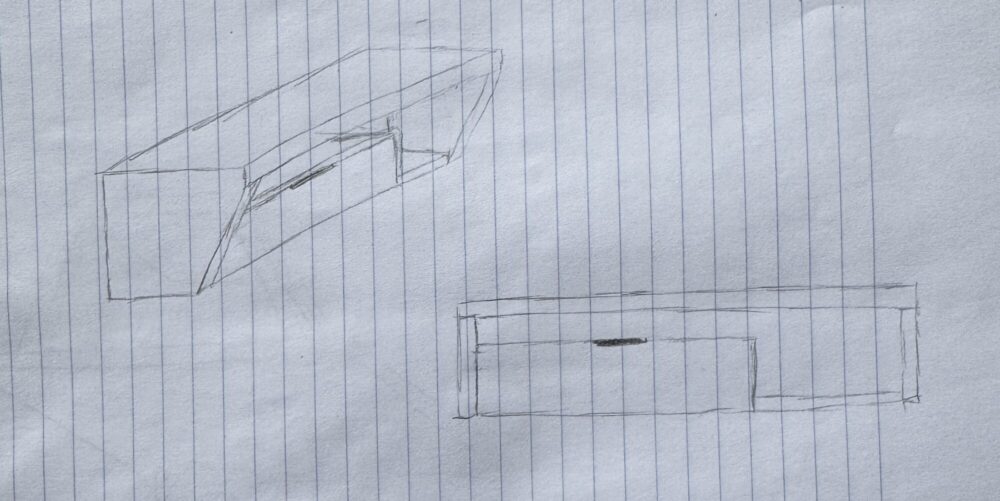
The first iteration of the TV stand design.
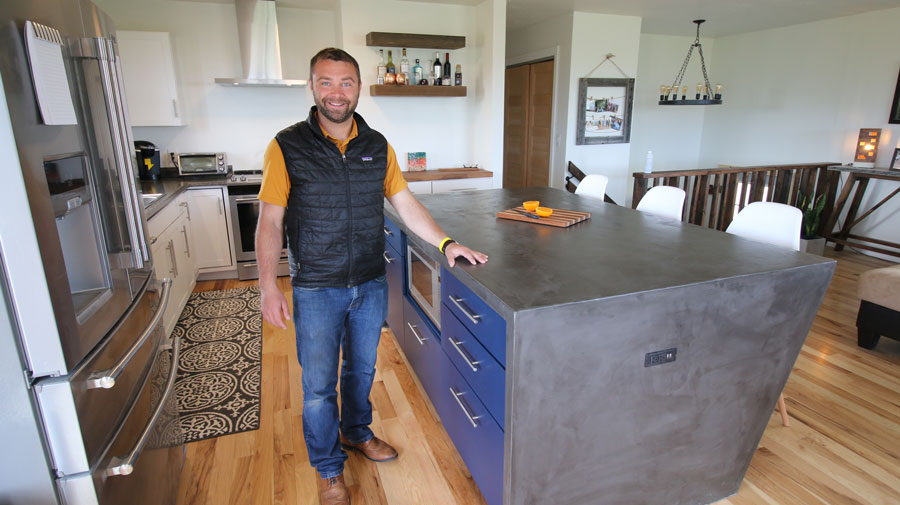
From what research I did and my personal experience pouring concrete, I decided that making the waterfall shell for the TV stand out of solid concrete would be too heavy, messy, and expensive. This, combined with the knowledge that this structure would likely see very light loads pushed me toward using a concrete overlay, or topping. Through this, I found a series of videos and blogs published by DIY Pete centered around creating a custom kitchen island with concrete waterfall countertops. Due to the size of the countertop, Pete decided to use a concrete overlay to get the desired aesthetic without the need for reinforcement. The process outlined in the article includes creating a plywood form, taping the seams with fiberglass concrete tape, applying a concrete adhesive, applying concrete microtopping (rough and smooth layers, with the incorporation of charcoal dust for color), and finally sanding and sealing the surfaces [3]. The linked article provides a great explanation of all of these processes. In addition to this, his island design incorporated an angled overhang to create an integrated bar. While this doesn’t apply to my project, I decided to incorporate this feature into my design, as I liked the aesthetic it brought.
The next step I took was looking into drawer construction. Some quick research suggested that drawer boxes can be made easily using pocket holes, and the bottom board can be cut to size and slid into channels cut using a router. I have a router table at home, and have been looking for an excuse to use my pocket screw jig, so the process of creating the drawer box should be fairly straightforward. I decided on having a white front facia for the drawer during this process as well. This could be interchangeable in the future, but with my current furniture, the white pop will help to modernize the piece. This facia has a window in the center that functions as both a drawer handle and an added visual feature.
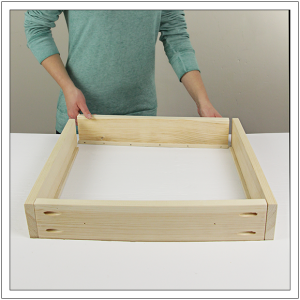
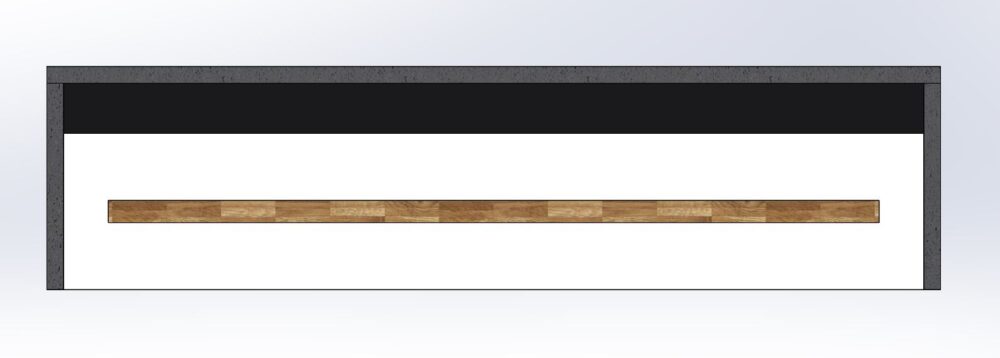
A front view of the drawer facia design.
The drawer slides I choose will likely be side mounted, as I am more familiar with them. I did some research on bottom mounted drawer slides, but found they had a lower weight capacity, and the hidden slides wouldn’t be of much use as the design has a front facia for the drawer.
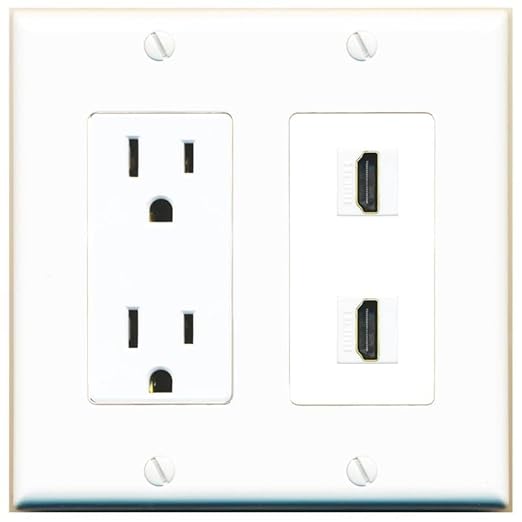
Another element I wanted to incorporate into the table was an integrated power strip as well as HDMI ports. While this isn’t the most useful for more permanent connections, it will help to greatly simplify the process of connecting a laptop, console, or other device that isn’t permanently homed in the TV stand. This also allowed me the opportunity to add some more materials into the design, as it would be very easy to pop on a brushed nickel or steel faceplate to add to the industrial side of the industrial modern aesthetic.
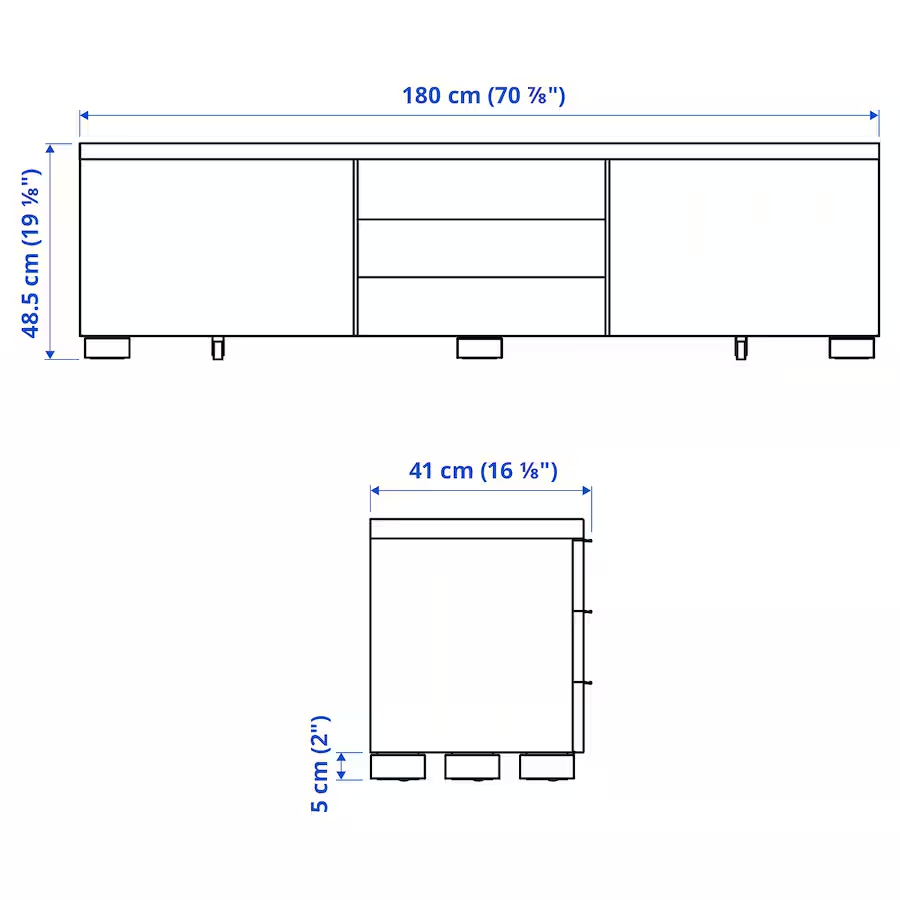
I then benchmarked the size of existing TV stands. A lot of my friends have IKEA television stands, and they publish their dimensions, so I was able to get a really quick and easy spacial understanding of the dimensions I wanted the artifact to be. Both my living room and bedroom TVs are 65”, so I wanted to make the TV stand at least 70” wide. I also preferred the lower height of some of the more modern TV stands in the IKEA catalogue, so I settled with a height of 20”. The depth didn’t matter as much to me, but I decided on a 18” depth, as it would allow for a usable amount of drawer depth, even with the overhang of the concrete shell and the thickness of the front facia.
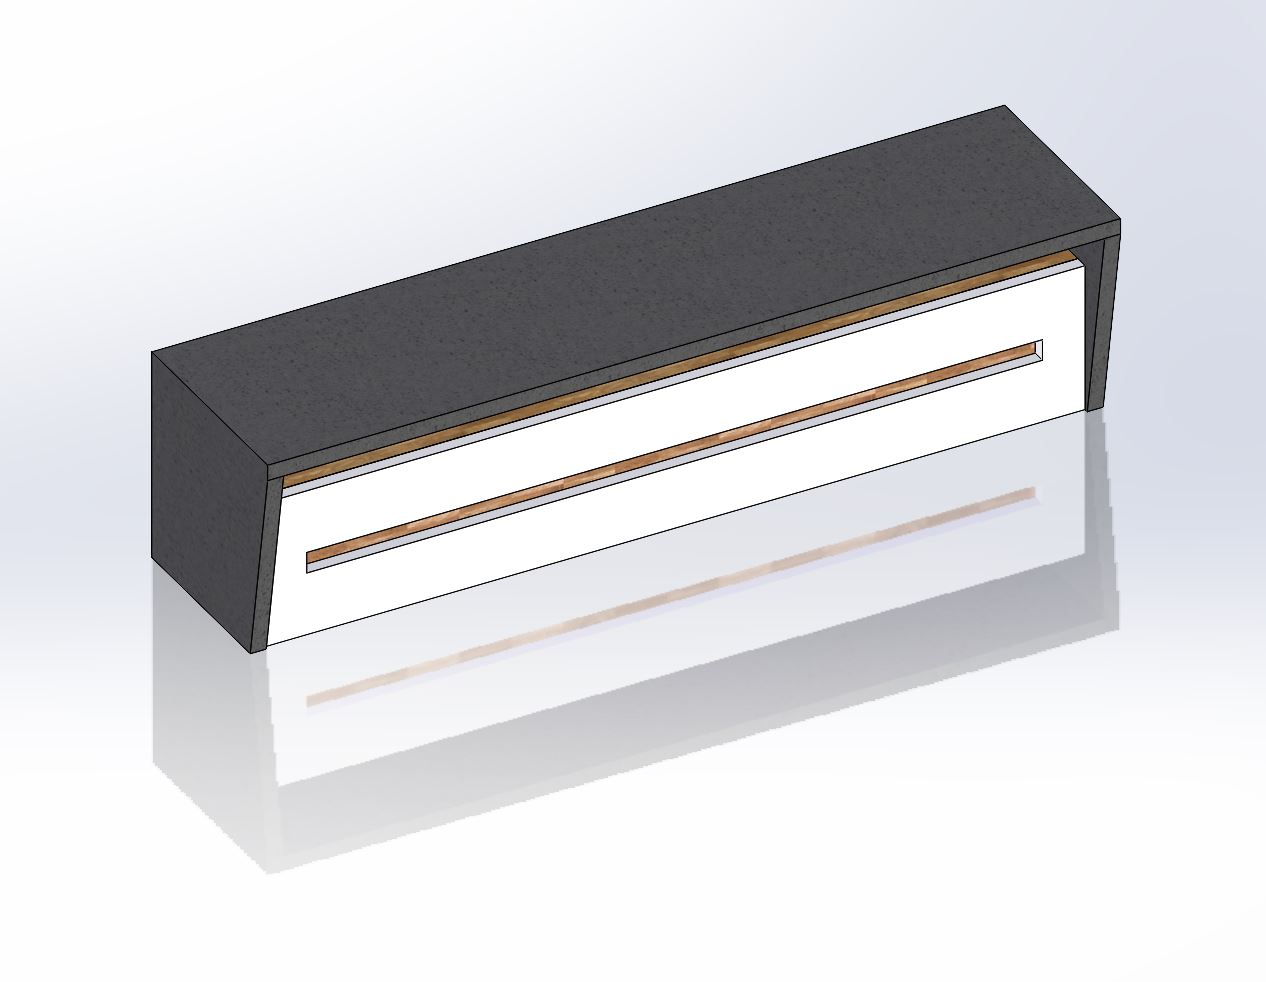
After a general plan for the construction was created, I started modeling the overall design in SolidWorks. In its current form, the model doesn’t include sub-assembly joints and fasteners, but these will likely be included once final detail drawings are created leading up to the manufacturing process. While the current iteration of the model isn’t a detailed plan for assembly, it does provide a great proportional representation of the design, as well as overall dimensions.
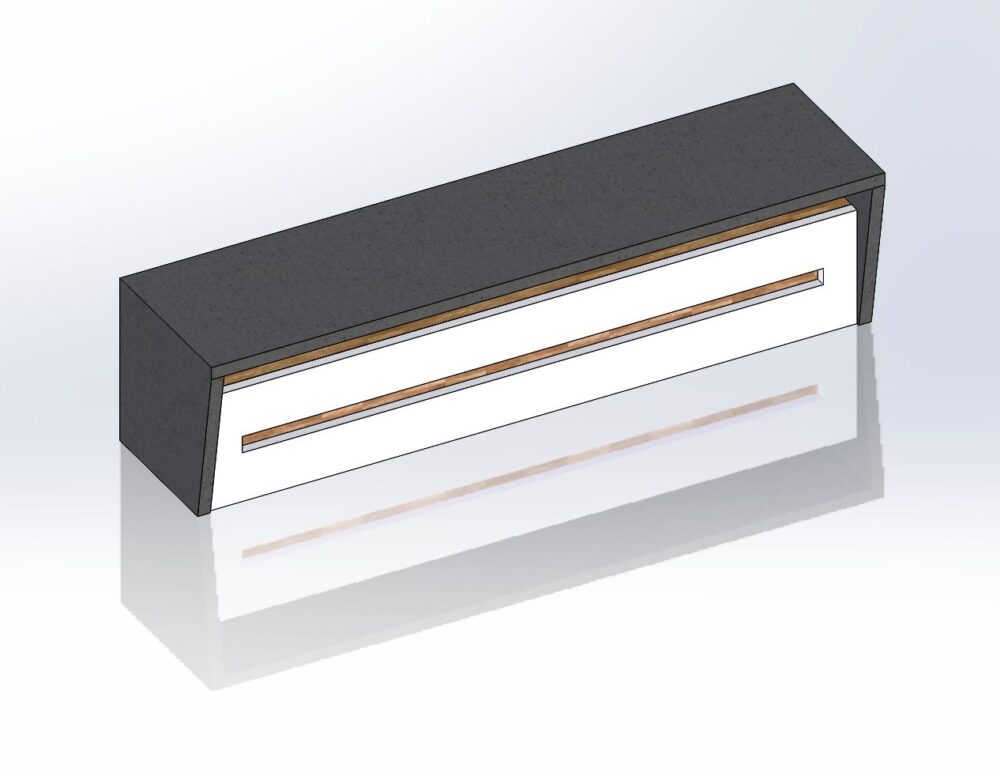
Current state of the assembly in SolidWorks.
The rough overall timeline for the design/manufacturing process is as follows:
3/15-16: Finalize model and purchase all lumber, hardwood, and plywood needed for the construction of the frame.
3/16-22: Construct drawers and frame. Spec and order/purchase all additional necessary items, such as drawer hardware, quickset, varnish, and concrete microtopping.
3/31-4/5: Apply concrete finish, attach drawer using drawer slides.
All remaining time: Sand, seal and paint all concrete/wood. Add finishing touches like integrated HDMI ports and outlets.
This schedule is frontloaded, and will allow me time to deal with external delays or solve any unforeseen issues with the design in its current state. I have a fair amount of experience with woodworking, and have done some rough concrete work in the past, so I am fairly confident that I can complete this project with minimal additional time needed for skill acquisition/experimentation.
[1] https://www.stocktonheritage.com/shop/minimalist-end-table-mid-century-modern-end-table-scandinavian-side-table-minimalist-nightstand
[2] https://www.etsy.com/listing/704744462/3m-modern-hardwood-and-concrete-tv-unit
[3] https://www.diypete.com/diy-waterfall-concrete-kitchen-island/
[4] https://build-basic.com/build-a-basic-diy-drawer/
[5] https://www.amazon.com/RiteAV-Power-Outlet-Decora-Plate/dp/B00I14XHKC/ref=asc_df_B00I14XHKC?mcid=7dec13d91e843285bf0141c01a14dd2c&hvocijid=16289315953206420838-B00I14XHKC-&hvexpln=73&tag=hyprod-20&linkCode=df0&hvadid=721245378154&hvpos=&hvnetw=g&hvrand=16289315953206420838&hvpone=&hvptwo=&hvqmt=&hvdev=c&hvdvcmdl=&hvlocint=&hvlocphy=9194567&hvtargid=pla-2281435177858&psc=1
[6] https://www.ikea.com/us/en/p/besta-burs-tv-unit-high-gloss-white-90566027/

4 Comments. Leave new
I love your design. I think that the sharp ninety-degree angles will allow you to really fit into the Scandinavian /utilitarian aesthetic. I look forward to seeing your final design.
Thanks Ben!
I really liked how simple these corners allowed the construction process to be, and were a key reason why I picked the aesthetic I did.
Jacob – your design fits beautifully with your chosen style of Scandinavian/industrial modern. I like how you problem-solved with your concert idea and chose to do a concrete overlay. I am really looking forward to seeing your final product! Do you have an idea yet of how you will seal and paint the concrete and wood?
Hi Taylor,
Thanks for the comment! Unfortunately I didn’t end up doing the concrete micro topping overlay, but I was just going to use a thick PU varnish coating to seal the concrete and maybe even give it a semi-gloss finish. As for the wood, I ended up using a water based Semi-gloss PU varnish, but do wish that I used a bit of stain beneath it, to give a more finished look.