
Brainstorming
When brainstorming ideas for my final main project, I wanted to create something that would serve a functional purpose in my day-to-day life, similar to my upcycle project. I often encounter various issues that bother me throughout my daily routine, and I realized that a simple item could help either fix these problems or make the process a lot easier. Once again, I faced an issue that hits close to my personal life: something I frequently use for writing scripts, such as this report, is a microphone. Currently, the microphone comes with its own mini tripod stand, which is useful for quick situations during video or voice calls. However, it tends to pick up small vibrations from the table caused by clicking my mouse or drawing on my tablet, making it audible for others to hear what I’m doing. With this in mind, I wanted my main project to address these minor inconveniences, leading me to consider creating my own microphone setup. I was inspired by a YouTuber named Matt from the channel DIY Perks, who not only created his own microphone but also invented a boom arm system that negated vibrations due to the microphone array being held up by the boom arm. While it would have been great to attempt that type of project, I realized that due to budget, time constraints, and the knowledge required for such an endeavor, I wouldn’t be able to accomplish it within the project’s timeline. Instead, I decided to focus on developing something that would achieve a similar goal, ultimately landing on the idea of creating my own microphone boom arm for my current microphone setup. Below is an image of the current situation I am working with:
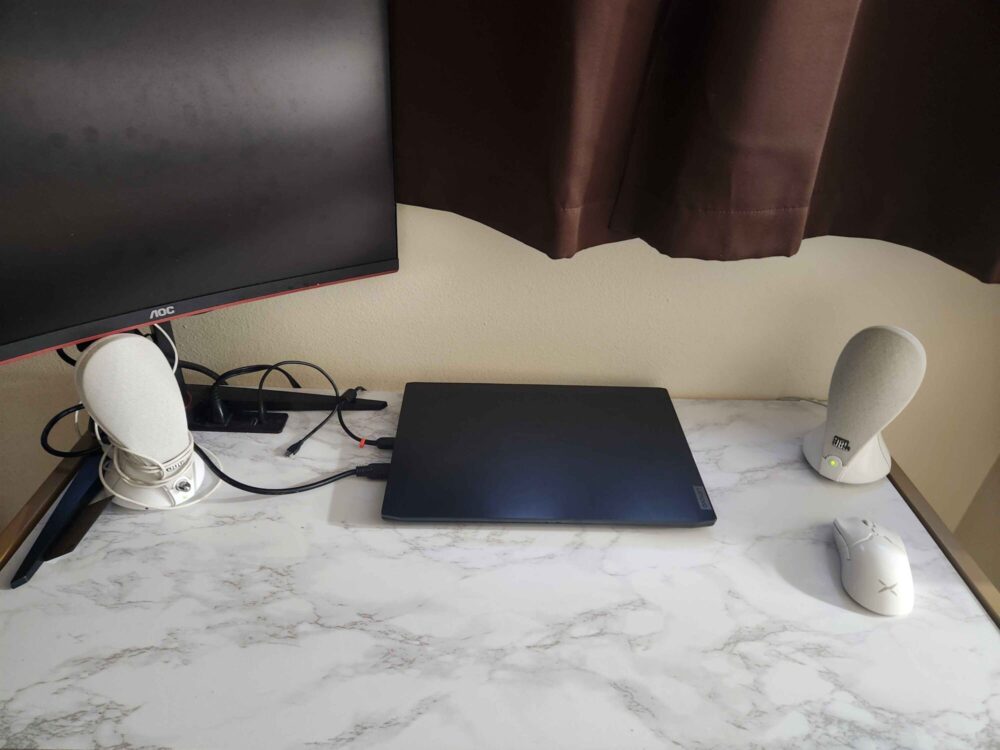
Current Desk Setup
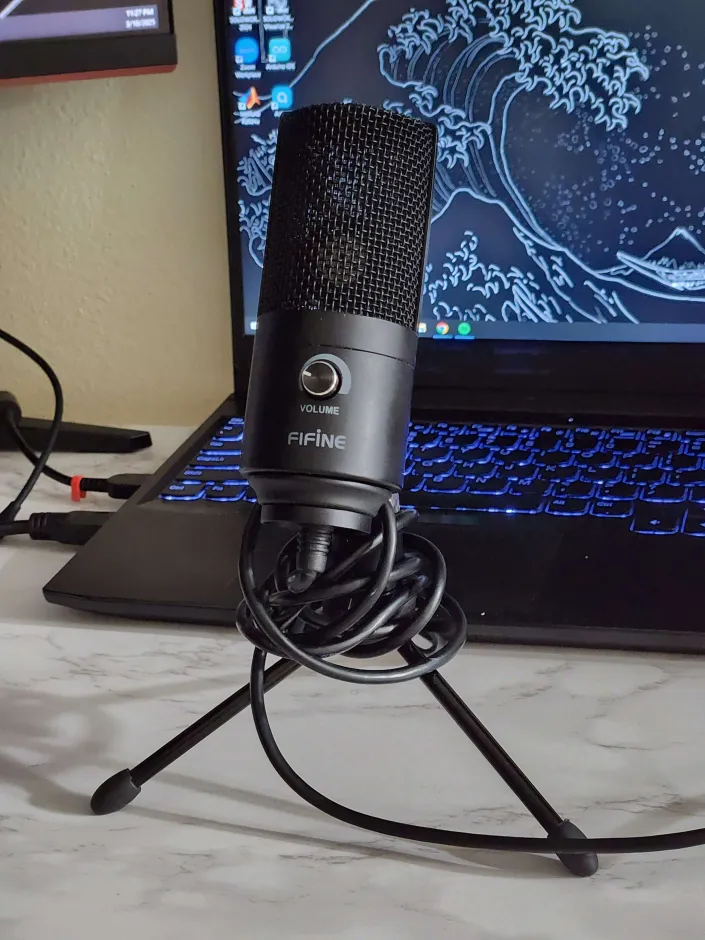
Current Microphone
Project Concept inspirations and Aesthetic Choice
My project involves me creating my own microphone boom arm that is similar to that of the low profile ones that exists currently on the market but negating and adding on certain features that would benefit me and the anesthetic that I tried to go with when it comes to my own room setup. currently my room setup both within my apartment and my actual room back home in Aurora happens to fit within a minimalist aesthetic meaning that I don’t like much clutter or items to stand out enough as I tend to prefer the quality of pieces rather than the way they happen to stand out in comparison to surroundings so for example much of the clothing and bedding that I have within each of my rooms happen to have neutral colors or gray colors scales so they won’t stand out in comparison to one another. this makes it so that items that I have don’t stand out and so much of that my outfits tend to not be that out there this allows me to easily combine bits and pieces of outfits together and Furniture together as white Gray and black color pieces all tend to fit within the same genre of meshing together perfectly as neutral colors happen to have a minimalist aesthetic by not standing out in comparison to one another. now following along that same aesthetic I want to have my boom arm not stand out in comparison to the rest of my desk though I do understand that the boom arm in general is going to have to stick out to be able to reach the correct positioning to be able to pick up my voice correctly without picking up the vibrations of my typing or clicking of the mouse on the table. So Below is a current model of a low profile boom arm that’s currently on the market.
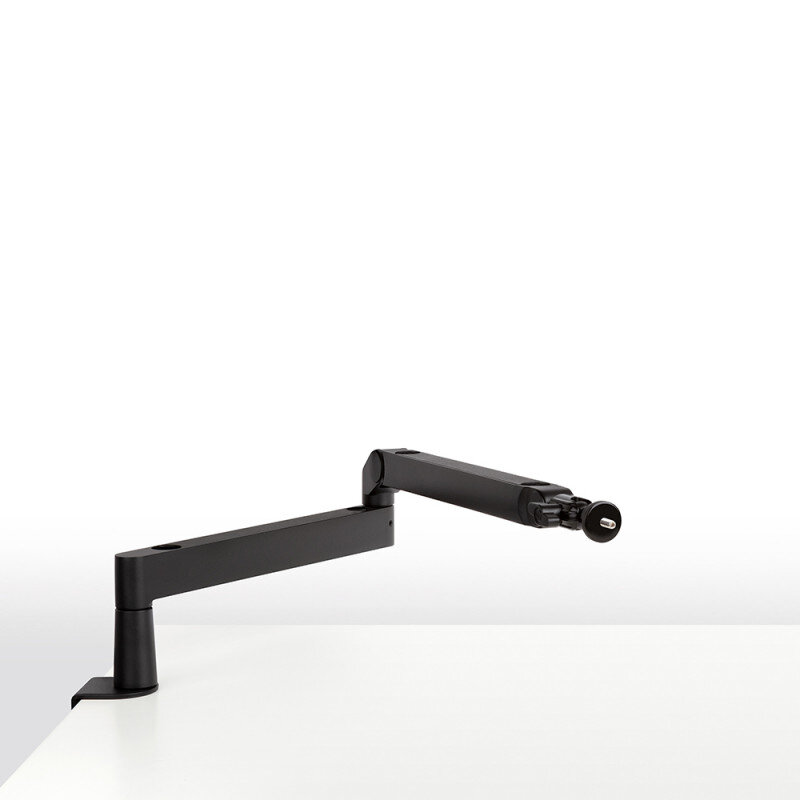
Low profile boom arm
low profile ones tend to have a mainly two mechanism arm switch which is a lot simpler than what a lot of Boom arms tend to have which happens to be rotating pieces of both arms allowing for the boom arm to reach gray their length or higher Heights in comparison to where it happens to be mounted on the table it’s going to be very convenient for some setups but for a minimalist aesthetic that tries to not make the boom arm stick out that far from the table it’s something that I wouldn’t be aiming for in my design. in fact my design is going to try to lower the amount of pieces needed to be able to attach the microphone onto the boom arm setup along with it accommodating my smaller with desk as I currently have a set of where buying a traditional boom arm would make it hilariously stand out in comparison to the rest of my desk which happens to be quite cramped in space in relation to other deaths and table setups that I’ve seen.
As for the color scheme of the boom arm that I’m going to make it it’s probably going to be printed out of a certain color material but in order to fit my aesthetic better I feel that painting it a cream color or a white color or more correctly match my aesthetic in fact possibly adding bits of graphite come and make a marble look that my table that’s the go for will also add on to that minimalist aesthetic that I’m trying to go for as ultimately I’m just trying to make this what would be a standout feature on my desk blend in with the rest of my setup.
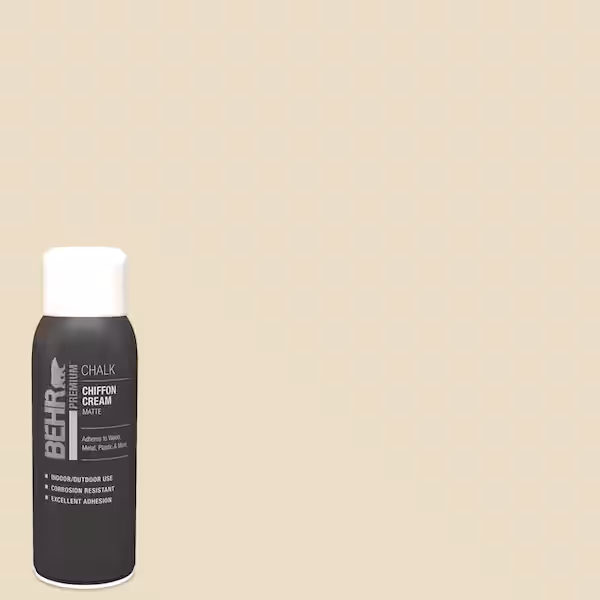
Image of obtained Spray Paint
Initial concept and Potential Fabrication Process
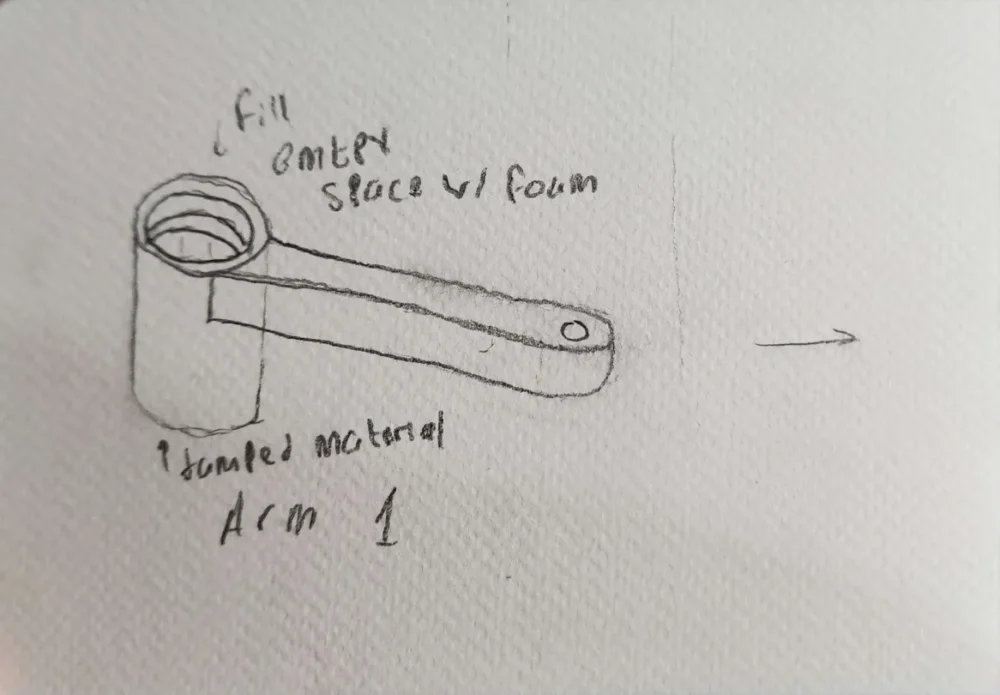
Below is some sketches of the amount of components that I think I’m going to need in order to make the boom arm that I need for my current setup that currently is going to involve that being the arm clamp that happens to attach to the table like most setups happen to have currently and the singular long arm that is going to read from the entire width of the table due to the fact that my table probably not needing that long of an arm for this low profile setup to reach the correct position to pick up my voice, if not one arm possibly making it to smaller arms significantly making this boom arm much smaller than what is on the market below is a couple sketches of how I believe these components are to fit together if it comes down to each version setup.
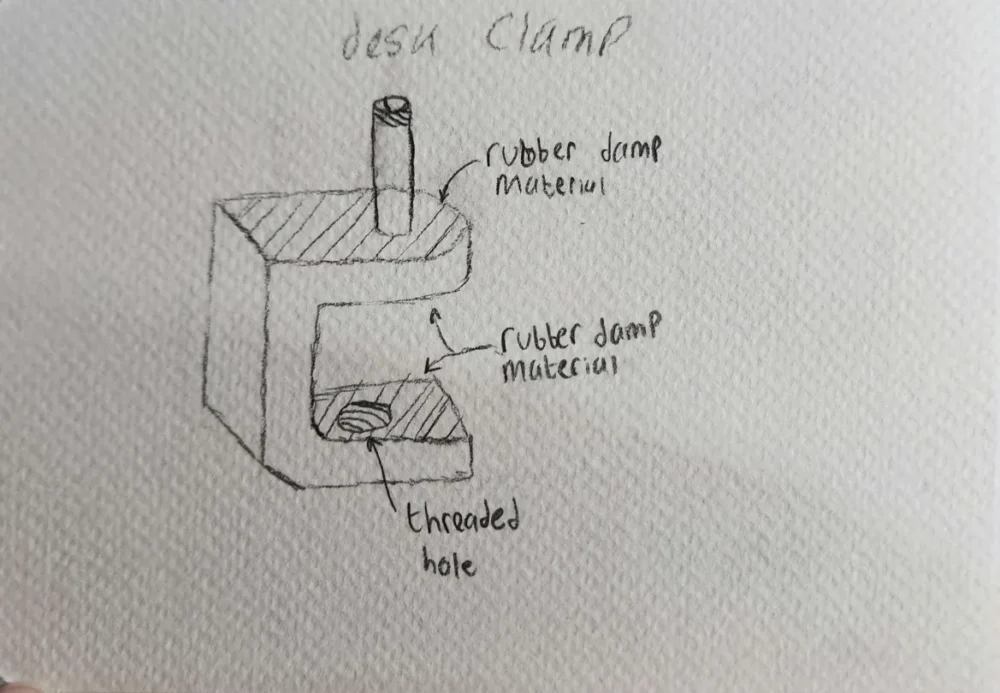
Sketch of Table Clamp
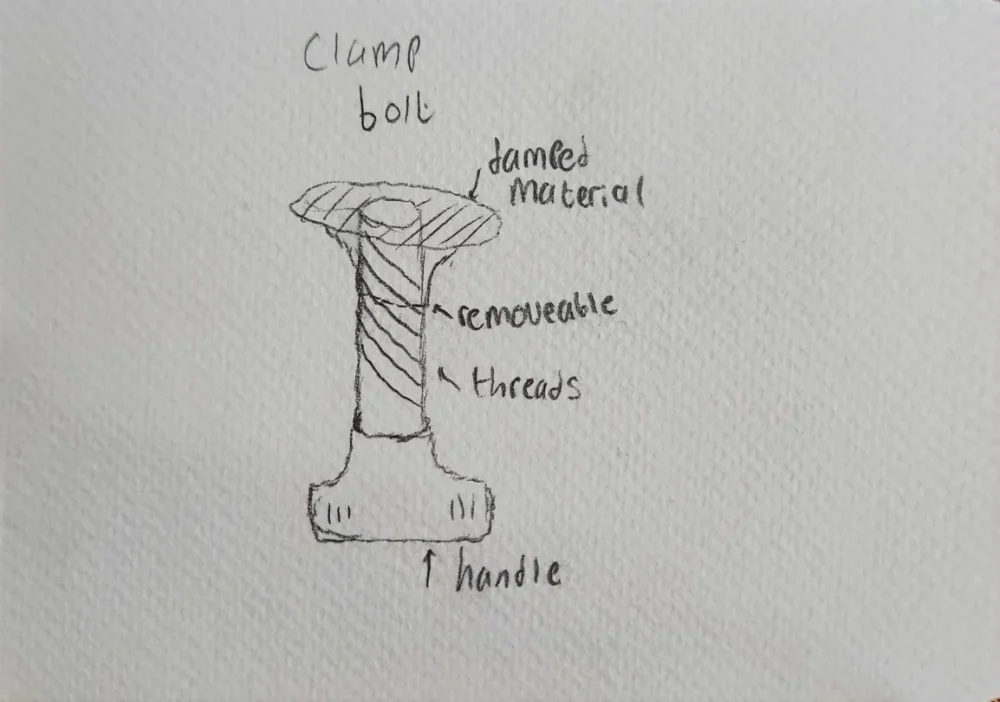
Tightening Bolt Design
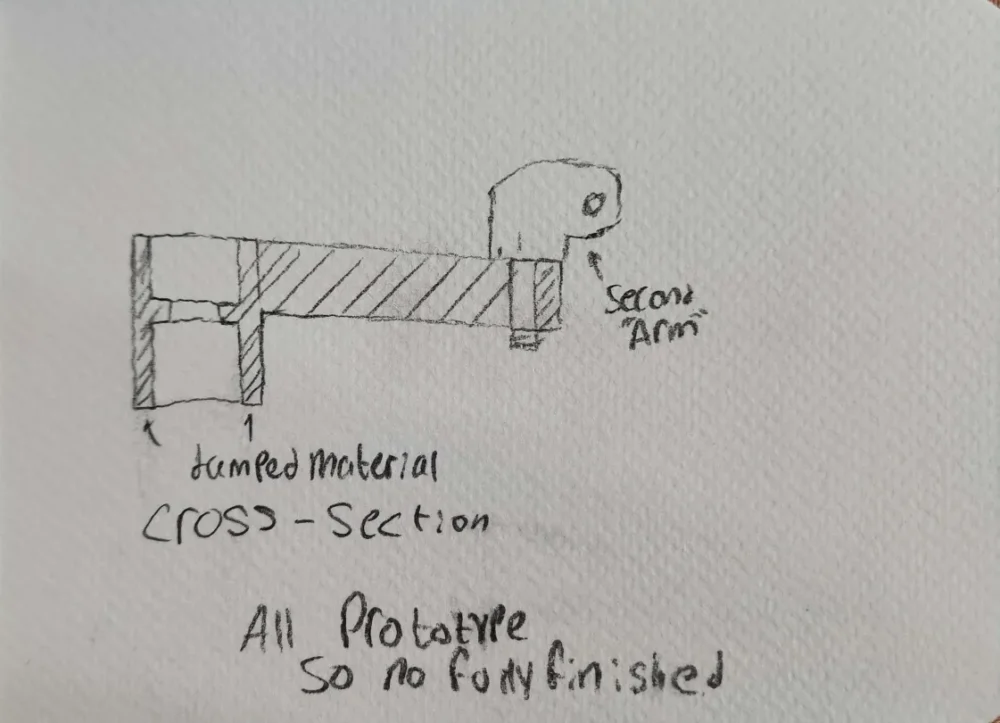
Sketch of Boom arm with cross-section view
As for a further concept of design, I have already created some crowd models of the components that I believe will work for this project. I am using SolidWorks for the software to design these models; however, the printing and sizing of them are still to be determined. The order and inspection of those parts will be completed within the next few days. Below is a CAD of some of the components that I have already made.
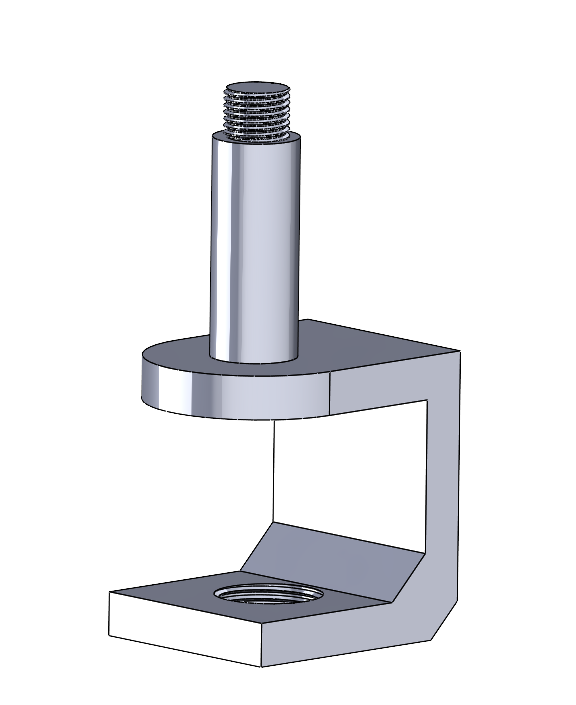
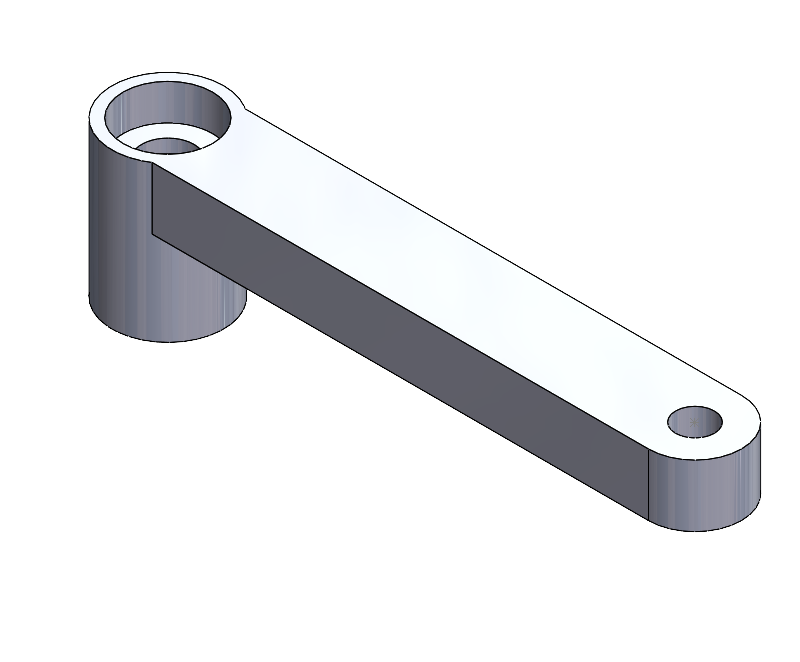
CAD model of table mount and first arm
Regarding the process flow, I believe that the following process flow diagram below outlines my thoughts for moving forward with my project. In short, the process flow diagram will involve the fact that I have already designed a couple of prototypes, which I have sent off to ITLL for high-quality printing using the Markforged 3D printer. This printer uses Onyx material, which is significantly stronger than traditional PLA printed parts and offers a much sturdier build that should support the weight of my microphone, which is made of metal and has some heft to it. Additionally, these parts are designed to be threaded so that a traditional 5/8 inch hex bolt can be used to assemble most of the build I envision for the entire boom arm.
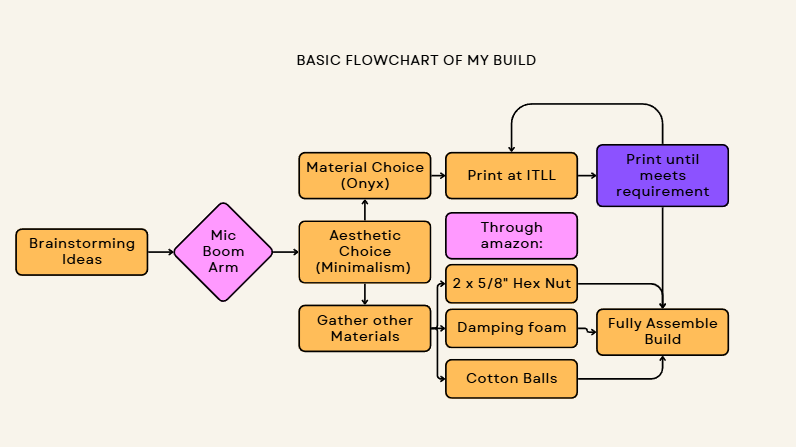
These parts will be printed in black since Onyx does not come in other color options, although there is a choice of a secondary material, fiberglass. Whether I will need the secondary material is yet to be determined, as preliminary testing of the first build has yet to be conducted.
After that, I will need to add a few extra components that will contribute to the minimalist aesthetic I am aiming for. Specifically, I am considering how to conceal the USB cable attached to the microphone. I want to avoid a cluttered look in my setup. To achieve this, I am thinking of creating a hole through which I can thread the USB wire until it reaches the setup at the end (my laptop usb port). If that is not feasible, I may design the boom arm with potential clips on the side to secure the wire along the body of the boom arm, keeping it neatly tucked away and out of sight. However, I am concerned that the color scheme of my current microphone may clash with the design of the boom arm I am envisioning. Once I confirm that the boom arm meets my preferences, I will spray paint it and add extra detailing to match the marble look of my table, aiming for a more minimalist aesthetic with neutral tones of gray and white. I currently do not have the correct spray paint, so it will be an off-white color, but I believe it will still fit within the balance of the minimalist aesthetic I am striving for with more neutral tones.
Hopefully, I will be able to fully develop this project to meet my needs. If it turns out to be a functional product—not just barely functional, but truly usable by others—I might consider giving it to someone who could benefit from it more, such as one of my siblings. He is a gamer and would likely get better use out of a microphone boom arm if I am successful in creating it. This desire to give back ties back to a favor he did for me a few years ago when he built a skateboard for me out of necessity for transportation. I feel a strong urge to repay him in some way that aligns with his hobbies.
Sources of Images:
https://audioeffetti.com/en/category/pro-audio/accessories-for-audio-pro/elgato-10aan9901-studio-grade-boom-arm-for-microphone-p30144
https://www.homedepot.com/p/BEHR-PREMIUM-12-oz-SP-103-Chiffon-Cream-Matte-Interior-Exterior-Chalk-Aerosol-Spray-Paint-75144/319367975
2 Comments. Leave new
This looks like a great and challenging project, Daniel! The Onyx material you are using should work great for this application. I have used that filament quite often and it really is a powerful material. If you are concerned about the color, you could always buy sheets of stick-on material to cover the 3D printed parts. Excited to see this come together!
I think this is an amazing idea. The flow chart was also incredibly helpful. Are you fine with it just folding to the side? IF not there might be a cool way to have it fold down behind the desk with a ball joint