
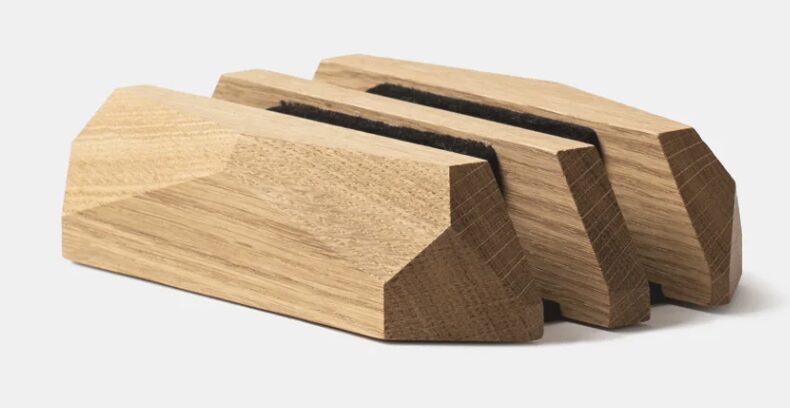
For my final project, I wanted to create something both practical and personal—an object I use daily and can easily bring home when I move in May. Since I spend so much time at my desk, a functional yet aesthetically refined accessory made sense. After having done a lot of research for desk accessories, I came back to a though I had over a year ago, where I found a vertical PC stand from Oakywood. A high-end desk accessory company. I own two computers, and I’ve never liked having them take up space on my desk. A vertical stand would not only improve organization but also enhance the overall workspace aesthetic.
Aesthetic Direction:
For this project, I’m embracing a rustic minimalist aesthetic with elements of wabi-sabi, a Japanese design philosophy that finds beauty in simplicity, natural materials, and imperfection. I admire how wabi-sabi values organic textures, muted tones, and an appreciation for time-worn surfaces, which aligns with my vision of creating something intentional yet natural. I’ve always been drawn to the contrast between raw materials and precise geometry, where wood brings warmth, and clean lines give the piece a refined presence.
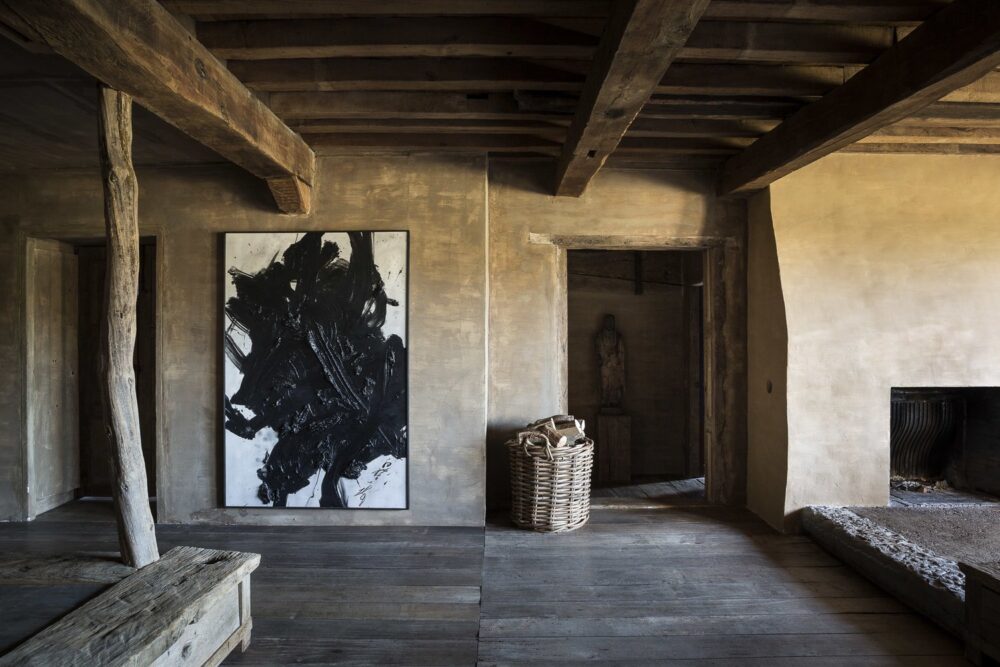
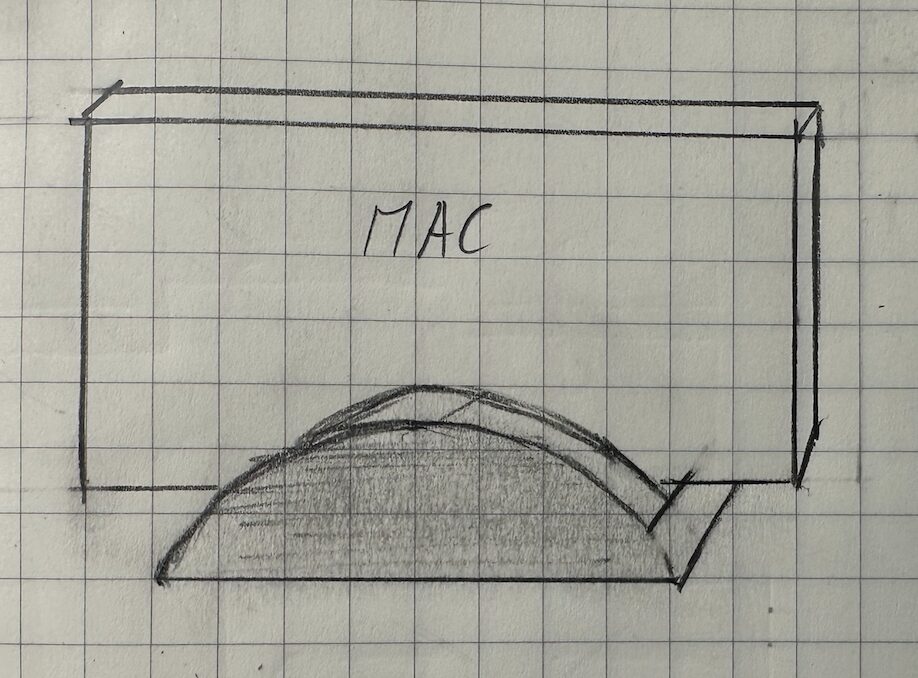
To match this aesthetic, I plan to let the wood’s natural grain, knots, and imperfections remain visible, rather than hiding them under a polished finish. These organic details reinforce the idea that materials should be appreciated for their inherent character. At the same time, I’m incorporating subtle, intentional design elements—such as edge curvatures that match my MacBook’s radii—to create a seamless connection between the stand and the devices it holds. The goal is to craft an object that feels like a natural extension of my workspace, rather than just another functional tool.
Materials and Construction:
To achieve the balance between organic texture and precision, I plan to use a CNC mill for my final build. This will allow me to create sharp, clean edges while preserving the wood’s natural character. The contrast between machined surfaces and raw elements will be key—where some parts are crisp and refined, while others showcase the natural wear of the material.
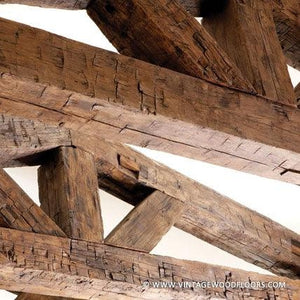
I’m aiming to source wood from local carpenters near Boulder, ideally finding an offcut that already carries a rich grain, knots, or small imperfections. I want to incorporate visible cracks and woodworm holes where possible, emphasizing wabi-sabi’s embrace of natural irregularities. Figure 3 highlights the kind of aged wood I’m hoping to use.
At the same time, I want to ensure the piece is durable and practical. The side panels will be hollowed out from the inside, to allow for better airflow.
Functionality & Key Features:
Alternate Aesthetics:
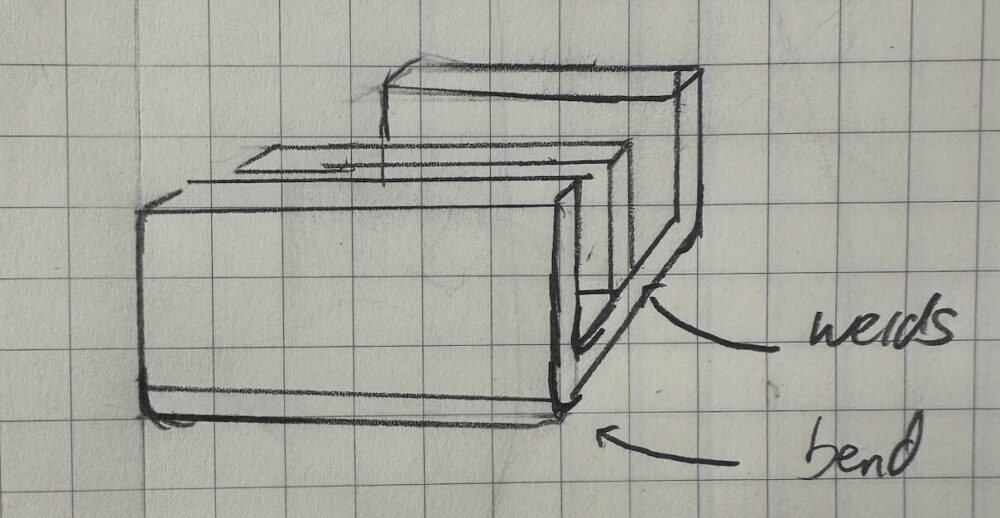
While my final design follows a rustic minimalist aesthetic with elements of Wabi-Sabi, I explored several alternative directions before committing to this approach. One alternative was industrial minimalism, where the stand would be crafted from untreated steel, allowing it to develop a natural patina over time. This aesthetic aligns with Wabi-Sabi’s appreciation for aging, but in a colder, more mechanical way. The design would be geometric and unpolished, with visible weld marks and raw edges, prioritizing material resilience and engineered simplicity over warmth. This version would fit well in a workspace featuring concrete, glass, and dark metals, creating a high-contrast, industrial feel. However, while I appreciate the rawness of this aesthetic, it lacked the warmth and organic balance I wanted to incorporate into my workspace. I also struggled coming up with a good way of integrating a sliding mechanism to change the width of the stand without strongly impacting the aesthetic of the device. Another issue with using metal is that it is highly heat conductive and would potentially cause overheating issues.
Another alternative was a Scandinavian modernist approach, which shares many qualities with my final aesthetic but leans toward a lighter, softer execution. This design would use a pale wood, featuring rounded corners and a smooth, polished finish to create a refined, inviting look. While this aesthetic emphasizes function and simplicity, it lacks the raw, aged character that defines rustic minimalism and Wabi-Sabi. To bring it closer to my final vision, I considered using a more rugged, barn-like wood, with visible grain, knots, and imperfections to add depth and authenticity. In the end, I decided to blend elements from both alternatives—incorporating the structured, geometric feel of industrial minimalism while maintaining the warmth and natural beauty of the Scandinavian modernist approach. This balance ensures that my final design is both functional and visually grounded, aligning with my goal of creating a piece that feels intentional, timeless, and well-crafted.
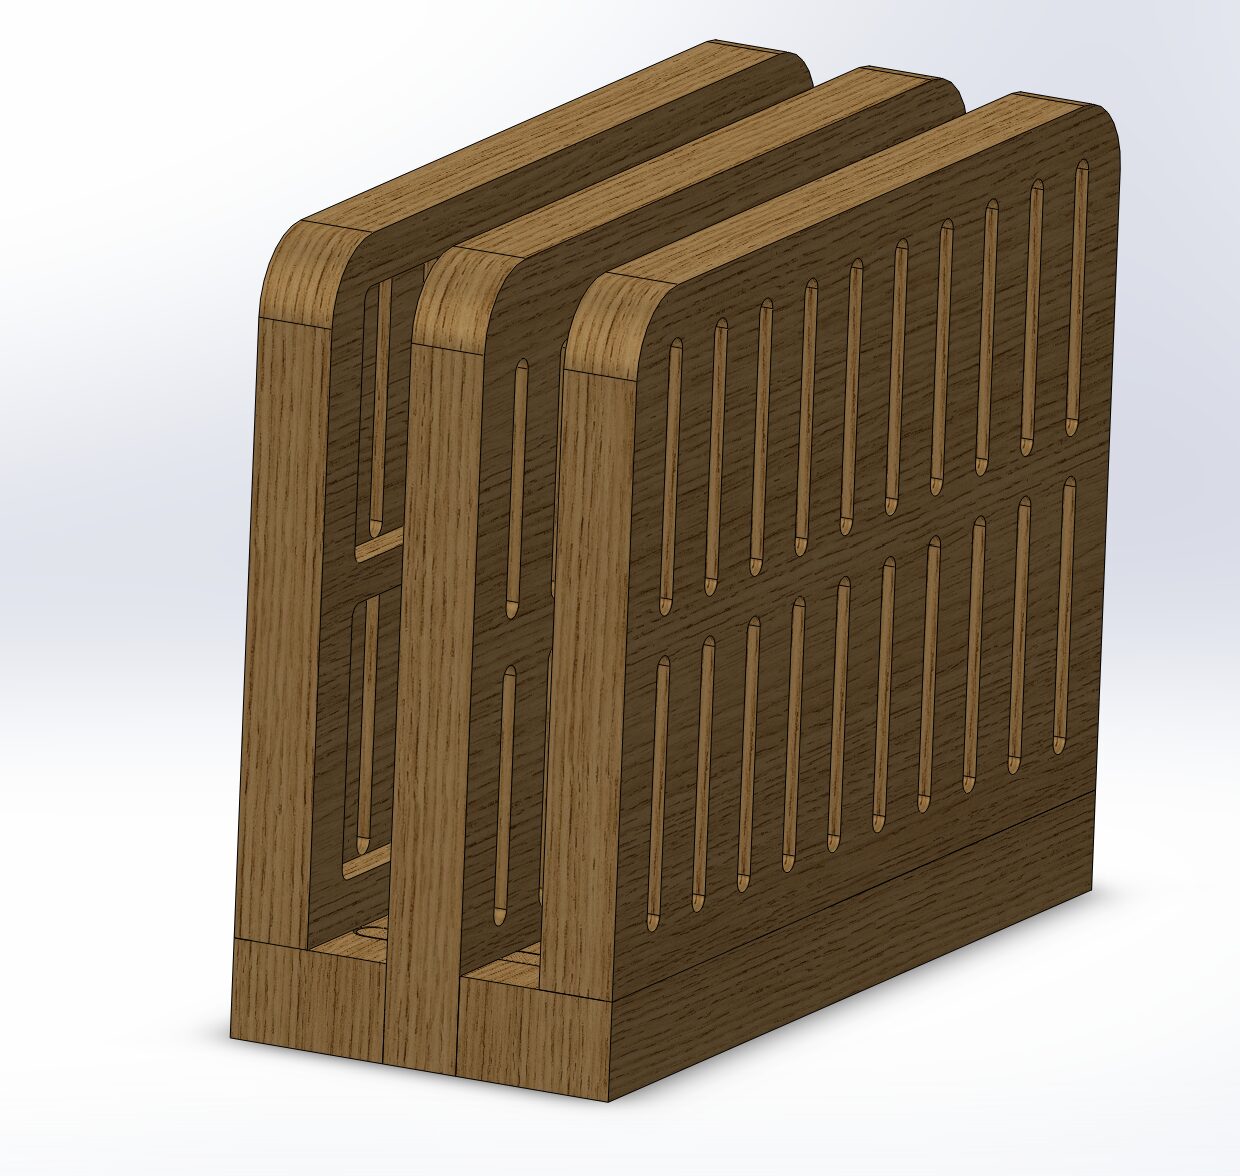
CAD Model:
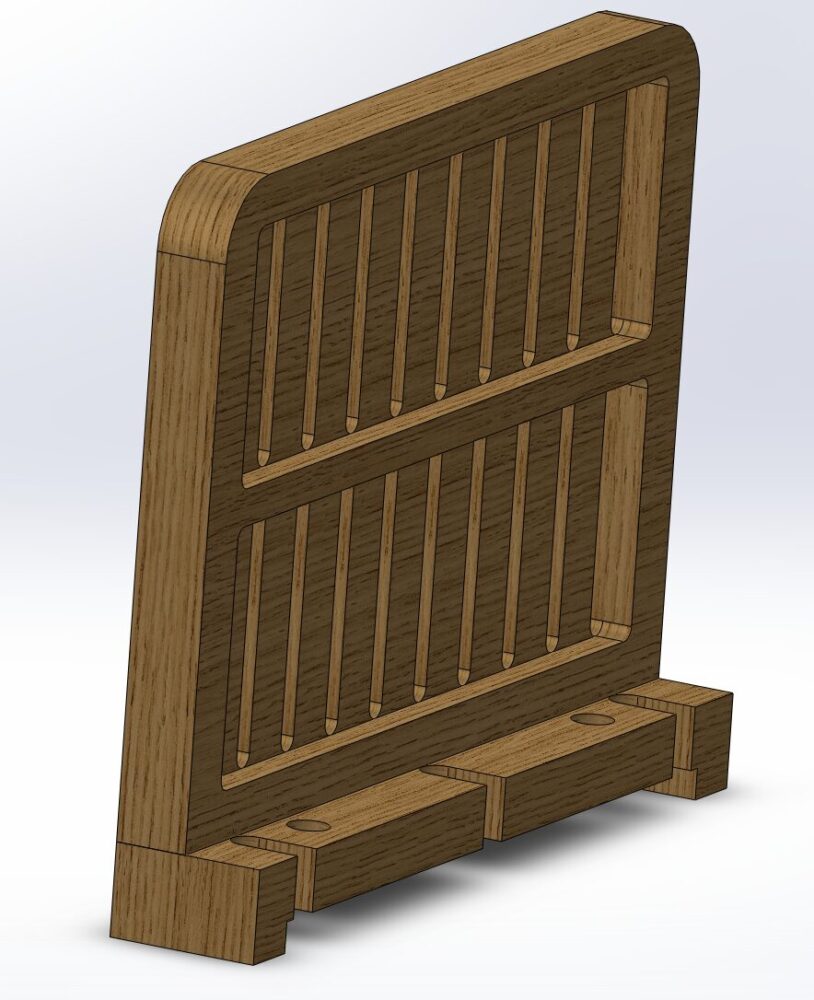
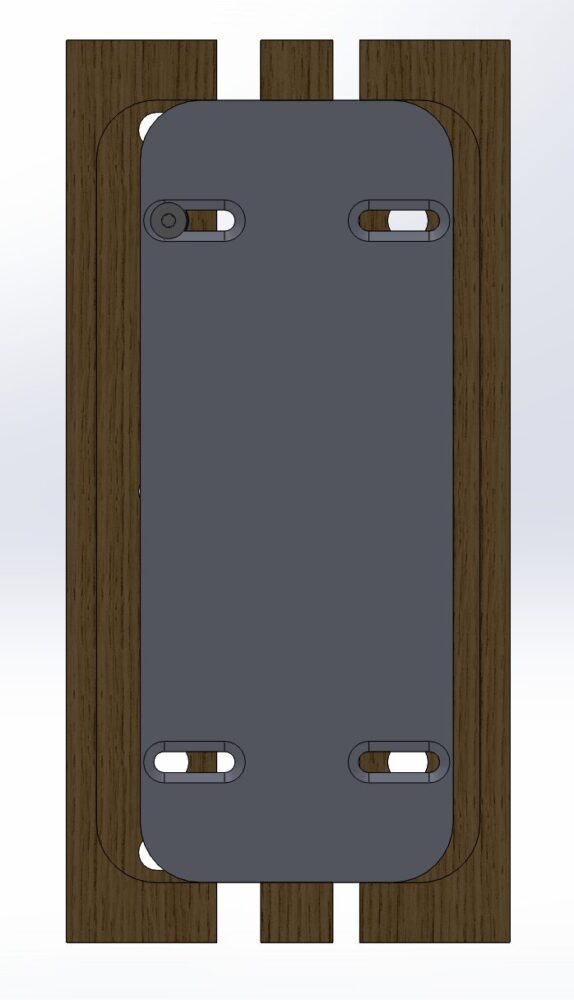
Since I plan to manufacture the final product using a CNC mill, I’ve created a full CAD model to refine the design before fabrication. The stand consists of three primary components: the base plate with sliding grooves, the wooden side panels, and the center divider that separates the two devices. Each component plays a key role in ensuring the stand remains stable, adjustable, and visually cohesive.
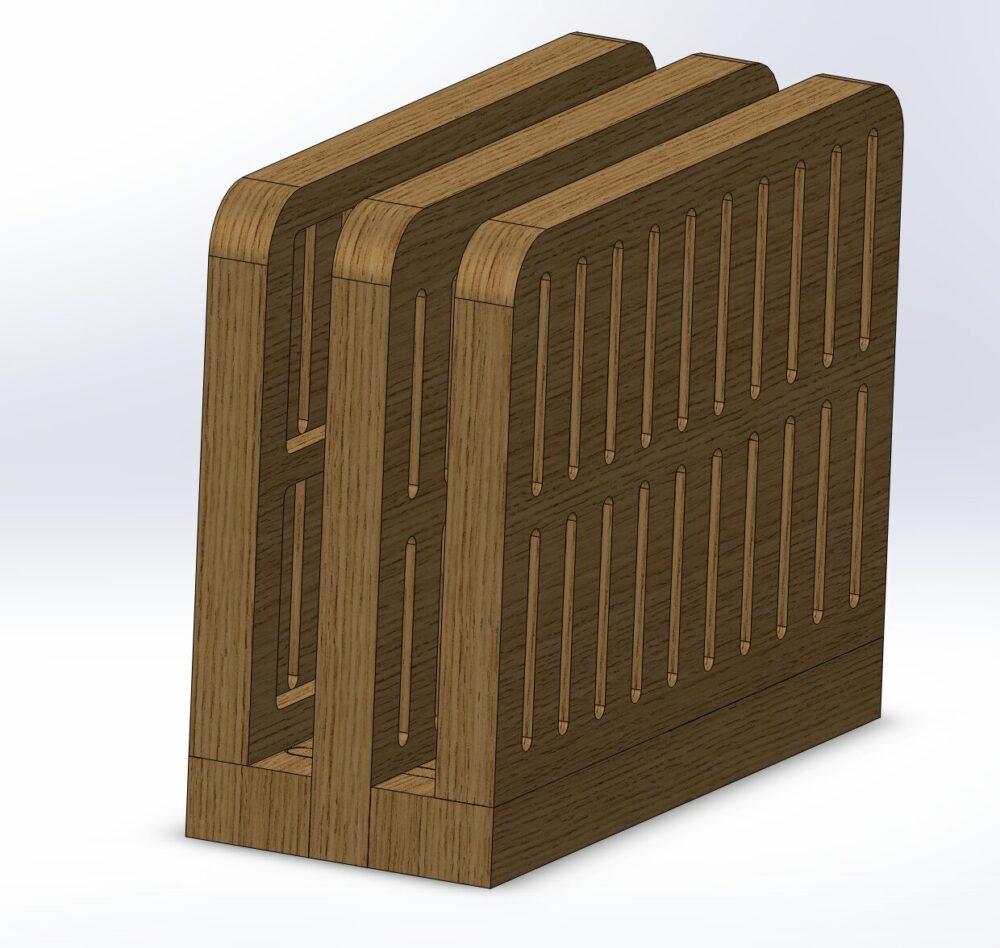
I’ve been continuously refining the CAD model, making adjustments to improve both aesthetics and functionality. One major improvement has been the integration of venting slits and hollowed-out pockets, allowing for better airflow while keeping the structure lightweight. Initially, the stand was bulkier, but by thinning out the design and optimizing material placement, I’ve managed to maintain stability while reducing unnecessary mass. Another key refinement was adjusting the slot location to ensure the laptops sit securely without compromising the clean, minimal aesthetic.
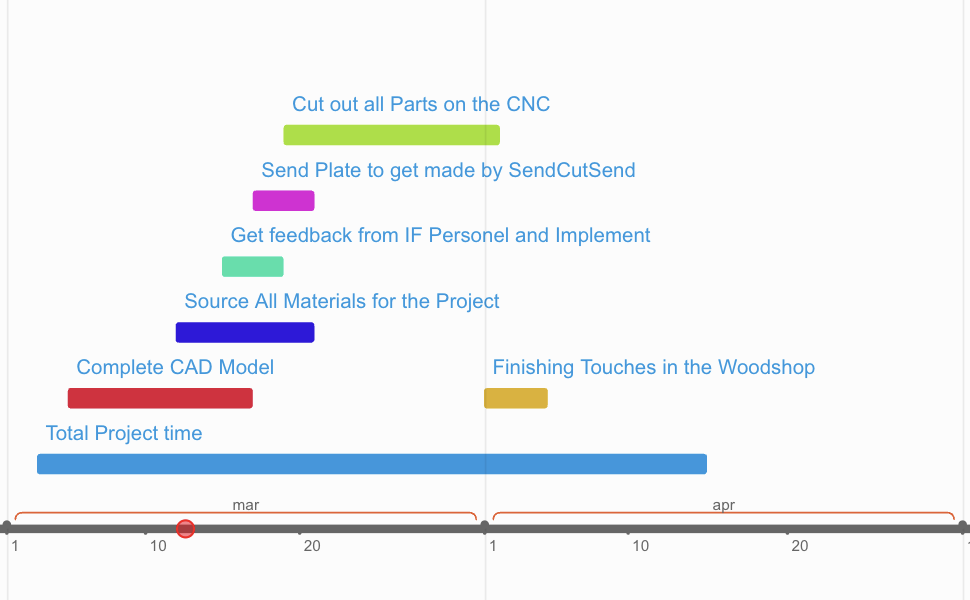
Fabrication Process:
References
- House of Forme. (n.d.). The Art of Wabi-Sabi. Retrieved from https://www.houseofforme.com/mood/the-art-of-wabi-sabi
- Vintage Wood Floors. (n.d.). Solid Wood Beams. Retrieved from https://vintagewoodfloors.com/products/solid-wood-beams
- Time Graphics. (n.d.). Timeline Editor. Retrieved from https://time.graphics/editor
- Oakywood. (n.d.). Dual Laptop Dock. Retrieved from https://oakywood.shop/products/dual-vertical-laptop-stand
- ChatGPT. (2025). Writing aid and content refinement. OpenAI.
1 Comment. Leave new
I like your incorporating wabi-sabi elements while ensuring the stand remains practical for daily use. Have you considered integrating cable management or designated slots for charging cables? Since the laptops will be stored vertically, it might help keep the workspace even more organized and prevent cables from bending awkwardly.