
Introduction: Bringing Classic Hollywood to Life
For my main project, I am creating a vintage-inspired clapperboard that captures the essence of classic Hollywood. The project is deeply rooted in my appreciation for film history and aesthetics, drawing inspiration from mid-century movie production tools. The goal is to craft a functional yet nostalgic artifact, blending the practicality of a modern clapperboard with the charm of aged, hand-painted wooden props.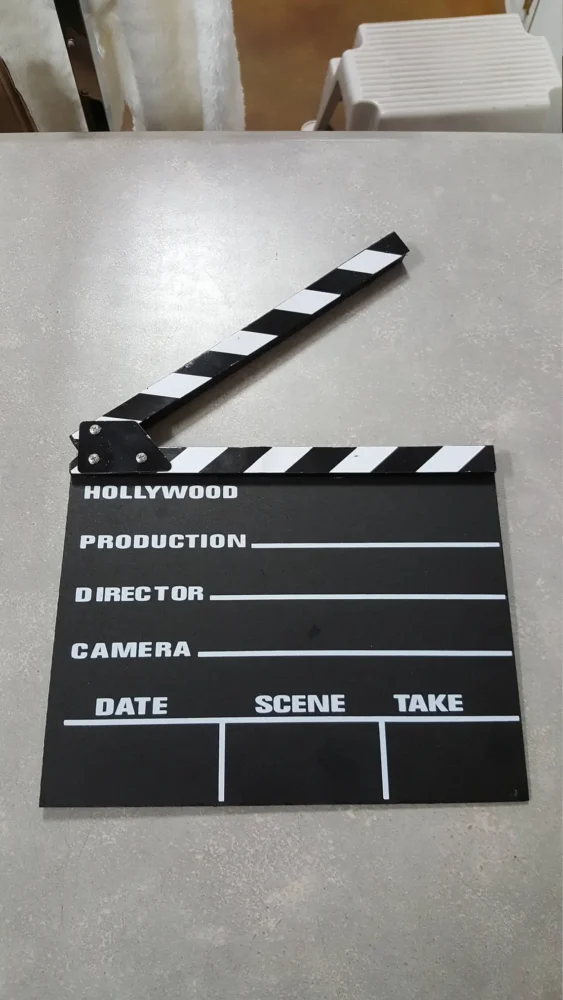
Inspirations and Design Influences
Classic Hollywood Clapperboards
Clapperboards have a long history in filmmaking, evolving from simple wooden boards with chalk inscriptions to modern digital versions. I am particularly inspired by the clapperboards used in the Golden Age of Hollywood, which were hand-painted, slightly worn, and had a distinctive character due to their imperfections. The works of directors like Alfred Hitchcock and Billy Wilder often featured behind-the-scenes shots with these charmingly simple yet essential tools.
To achieve historical accuracy, I researched classic film sets and behind-the-scenes production photos. Many early clapperboards featured unique handwritten lettering styles, sometimes influenced by the art department’s personal touches. This individuality inspired me to ensure my design does not look mass-produced but rather like a well-worn tool that has been on multiple sets.
Material Aesthetic and Wear
My project also takes cues from the aesthetics of well-worn, practical objects. I admire the natural patina that forms on frequently used tools, a philosophy echoed in Japanese Wabi-Sabi and mid-century industrial design. This preference aligns with my broader aesthetic tastes, which lean towards casual, lived-in, and functional designs.
To create an authentic aged effect, I researched traditional distressing methods used in prop-making and furniture restoration. Techniques such as dry brushing, layered staining, and strategic sanding will be incorporated to give the clapperboard a natural patina.
Existing Designs and Adaptations
While modern clapperboards use acrylic for easy erasability, I am opting for wood to achieve an authentic vintage feel. I have referenced film museum artifacts, props from period films, and practical guides on sign painting techniques from the early 20th century to guide my hand-lettering approach.
To further develop the hand-painted lettering, I experimented with various brush types and paint consistencies. By comparing enamel paint versus acrylic, I determined which medium provides the most authentic vintage effect. The process of testing different techniques has helped refine my final approach.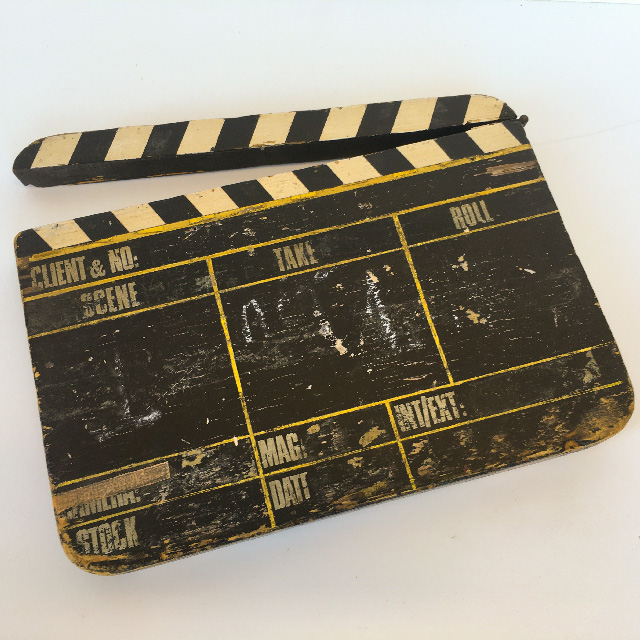
Artistic Vision and Specifications
Functionality and Form
- Material: Primarily wood, with metal hinges for durability.
- Size: Approximately 12 inches wide by 10 inches tall, similar to standard film clapperboards.
- Typography: Hand-painted letters using traditional sign-painting techniques.
- Clapper Mechanism: A hinged wooden top piece that snaps shut, mimicking the function of traditional clapperboards.
- Aging Techniques: Deliberate distressing to make it appear well-used, employing sanding, staining, and strategic paint wear.
Alternative Aesthetics Considered
- Minimalist, Clean Look: A sleek, modern acrylic design was considered but felt too sterile for the vintage aesthetic I am aiming for.
- Hyper-Distressed Industrial: I thought about making it look extremely worn and rusted, but decided on a subtler approach that suggests use without looking abandoned.
- Art Deco-Inspired: An early concept involved incorporating Art Deco embellishments, but I ultimately leaned towards a simpler, workhorse aesthetic that feels more authentic to mid-century Hollywood.

Sketching and CAD Design
My initial sketches explored proportions, text placement, and hinge mechanisms. I finalized a design that maintains historical accuracy while allowing for practical use in contemporary settings. CAD drawings were used to refine dimensions, ensuring the clapper hinge aligns properly.
Beyond CAD, I created physical scale mock-ups to test proportions and ergonomics. These quick prototypes allowed me to refine the hinge alignment and the placement of text before committing to the final materials.
Fabrication Process and Timeline
Timeline Overview
| Stage | Date | Tasks |
|---|---|---|
| Research & Sketching | Week 1 | Gather references, create initial sketches |
| Material Selection & Sourcing | Week 2 | Purchase wood, paint, and hinges |
| Prototyping | Week 3 | Test hinge mechanism, experiment with paint techniques |
| Fabrication | Week 4-5 | Cut wood, assemble pieces, paint lettering |
| Finishing Touches | Week 6 | Sand edges, apply aging techniques |
| Final Documentation | Week 7 | Photograph final piece, write-up reflection |
Step-by-Step Fabrication Process
- Material Preparation
- Cut wooden boards to size.
- Sand and smooth edges for a well-worn feel.
- Test stain options to achieve a subtle aged effect.
- Creating the Clapper Mechanism
- Attach metal hinges to ensure a satisfying snap.
- Test different hinge placements for optimal functionality.
- Consider different hinge tension levels to create a distinct sound.
- Hand-Painting the Text
- Lightly sketch out text using a pencil and ruler.
- Use enamel or acrylic paint with a fine brush for a vintage sign-painting look.
- Allow paint to dry and gently sand for a slightly worn effect.
- Experiment with different aging effects using diluted paint washes.
- Distressing and Aging
- Sand edges and corners to simulate wear.
- Apply diluted stain or watered-down paint for an aged appearance.
- Use a dry brush technique to create subtle imperfections.
- Experiment with subtle dents and scratches to mimic natural wear.
- Final Assembly and Testing
- Attach all pieces securely.
- Test the clapper function to ensure a sharp, clear snap.
- Photograph and document final results.

Conclusion and Next Steps
As of now, I have completed material sourcing and initial prototyping. My next focus is on refining the clapper hinge mechanism and finalizing my lettering style. I also plan to refine my aging techniques to ensure an authentic, time-worn look. Through this project, I aim to create not just a functional film tool but a nostalgic artifact that embodies my love for classic Hollywood aesthetics.
Additionally, I will conduct a final round of testing to ensure durability and usability. By refining these details, I hope to create a piece that not only serves as a functional tool but also tells a story of craftsmanship and film history.
Citations
- https://www.gettyimages.com/photos/hollywood-clapboard
- https://craftsmanship.net/the-new-sign-painters/
- https://antiquesatlas.com/antique/vintage_movie_clapper_board/as889a280
- https://www.youtube.com/playlist?list=PL-Kcxu8vEwi_LSR-zLZh9F6W8JCPwC5ed
- https://tintoyarcade.com/products/Hollywood-Movie-Studio-Clapboard-1920.html
1 Comment. Leave new
I really like the decision to use wood for this project. It has a very different feel and sound from acrylic and I think that will make it stand out a lot more. I also really like the idea of aging the material to make it seem used without actually wearing it out. Do you think that any of the aging processes would potentially interfere with the hinge?