
In recent weeks, I’ve embarked on an exciting project to redefine skateboard design by merging the laid-back vibes of surf culture with the robust character of old school skate decks. This design journey is not only about building a skateboard but also about crafting a piece that resonates with both the aesthetics of surfing and the heritage of skateboarding.
The project started with a clear vision: to capture the essence of surf culture in the deck’s silhouette while maintaining the rugged and geometric appeal of old school skateboarding shapes. My initial concept heavily leaned toward surf aesthetics in a more pintail-oriented shape inspired by the fluid lines and elongated forms of surfboards. However, as the design evolved, I think I have found a compelling balance by incorporating elements typical of classic skate decks.
I am deciding to introduce a subtle waist to the deck’s profile, reminiscent of the shaping near the tail of renowned designs like the Moose Old School deck. This feature not only enhances the board’s visual appeal but also improves its handling and performance for urban transportation, bridging the gap between surf style and skate functionality. The wider tail gives much better footing for popping onto curbs and rotating about the rear trucks when entering tight corners. A shape similar to the one seen below will also still give lots of footing at the front of the deck where the rider would normally be placing most of their weight.

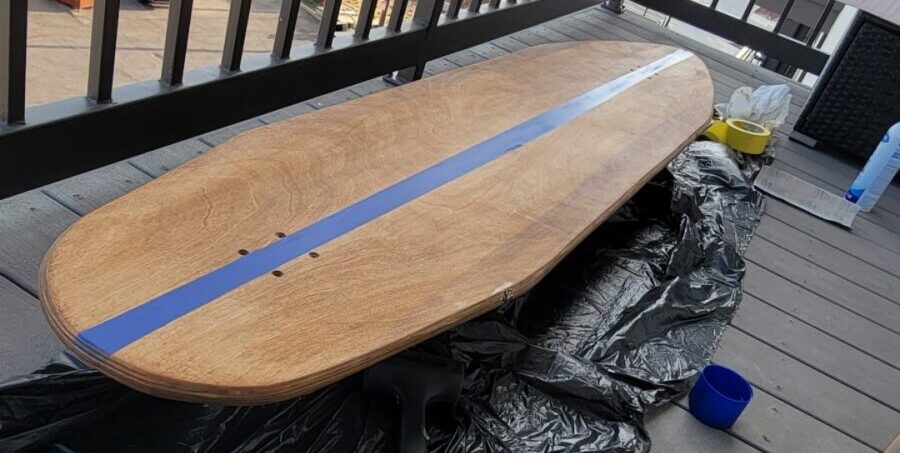
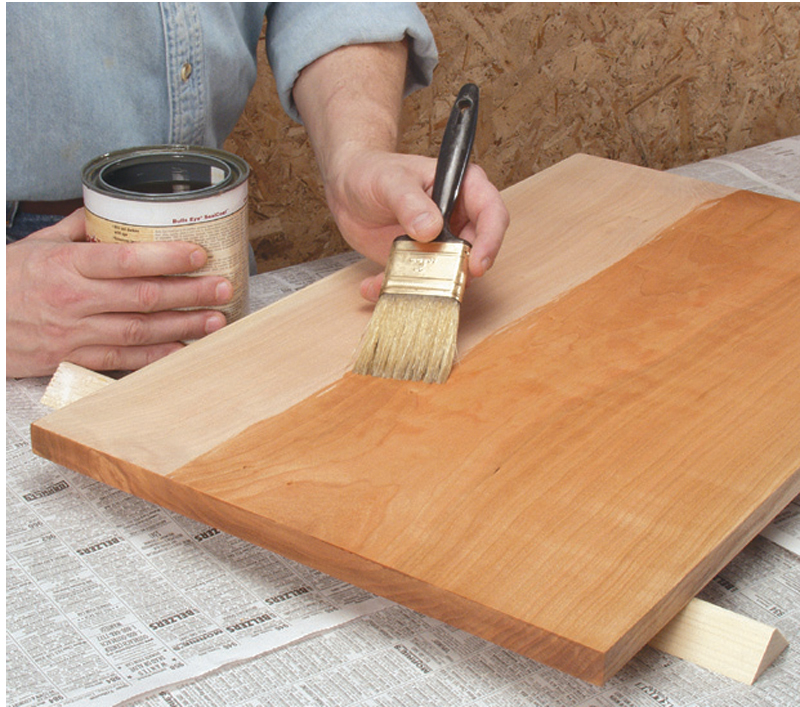
Selecting the right materials and colors has been a pivotal part of this project. I will use a cherry wood veneer from Woodcraft for the exterior layers of the deck to bring warm, inviting tones that echo the sun-soaked surf culture. The cherry wood’s natural reddish-orange hues provide a complementary contrast against the cool, pastel cyan of the center pinstripe—or potentially a double pinstripe. I think I will be able to make this decision with more confidence when the board is in a more complete form. While I talk about it at a greater length later, I want to emphasize that my finish should play into the natural colorings of the cherry veneer, and it is highly unlikely that I will use any stain, but that decision is reserved for when I can test the exact urethane and cherry for the project.

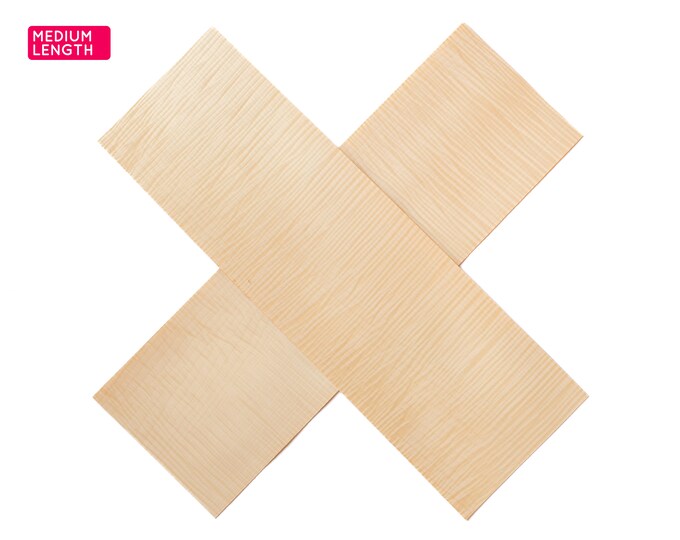
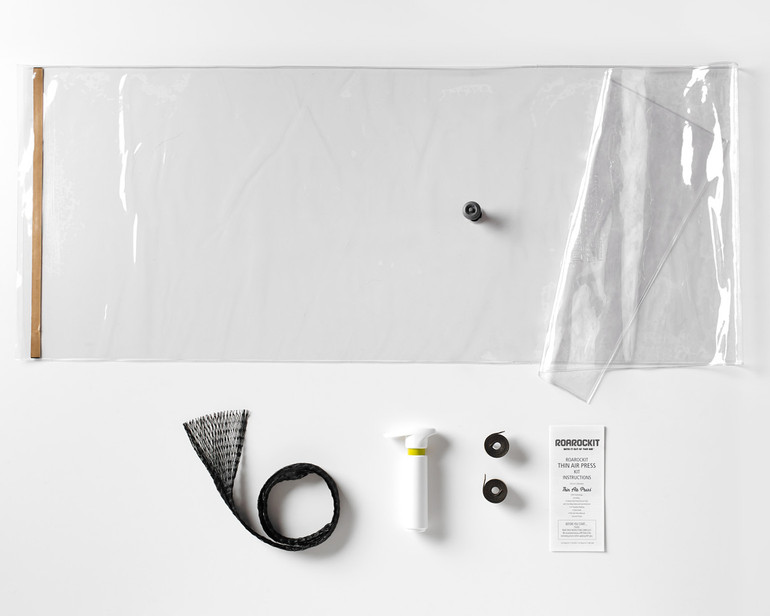
For the materials of the board, I sourced a pack of seven sheets of rock maple veneer from ROAROCKIT, who have a reputation for good quality. Quality was a repeated issue I found when sourcing from Woodcraft and their similarly sized and priced rock maple sheets. The arrangement of the sheets in my kit with two face layers, two cross-bands, and three core layers is designed to maximize the deck’s strength and stiffness. The cross-band layers are especially crucial as they help maintain the integrity of the deck by alternating the grain patterns, which counters warping when gluing and cracking under hard use. I have seen a lot of conflicting literature about whether the cross-band layers should be alternated into the core layers or placed above the core and beneath the face layers. I believe that more research is needed to make that determination.
[image 4]
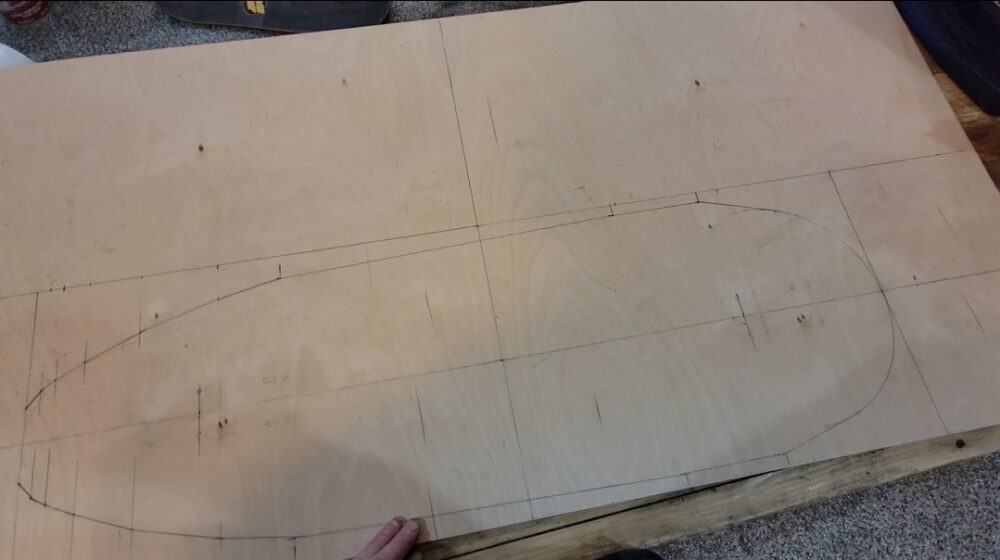
The manufacturing process begins with lots of front-end planning and preparation. The first step involves tracing the deck shape onto the top veneer, followed by a careful cutting process using a jigsaw. This stage requires a patience when following the template to allow extra space for any potential tear-out in the wood, ensuring the final shape is flawless. Because the curves are not always in line with the grain when cutting, using a very fast reciprocating speed and fine teeth will prevent the majority of the damage. I can also attempt to tape the line that I cut but I have had mixed results with that process.
[Image 5]
Preparing for the layup involves another critical component: the mold. I will cut a convex mold from an insulation foam slab purchased at Home Depot, tailored to give the deck its curvature in both concavity and kicks. This mold is not only a shaping tool but also a foundational element that supports the entire vacuum bagging process to aid in even gluing pressure. I am not entirely positive on what will work best to cut the foam. My first thought is a metal blade of some sort but I anticipate chunking of the foam and a potentially poor surface finish. A good alternative would be to use a heated wire to melt through the foam. As with some of the other processes, I will need to experiment and do more research to find a meaningful conclusion.
Consultations with experts in composites from the CU Boulder Racing Team Aerodynamics division have been instrumental. They helped refine a vacuum bagging technique, which involves sealing the layered veneers along with the mold in a custom-cut bag equipped with a one-way valve. This setup is necessary for removing air and applying uniform pressure during the curing process. I find some amusement thinking that I am using the atmosphere as one big clamp! A thorough application of about half a gallon of wood glue using a foam or rubber roller between each layer precedes the bagging, followed by a 24-48 hour curing period under vacuum. I have fears about the deck releasing from the mold at this stage, but I am confident that most of these fears can be mitigated with mold release agents provided by the team.
[image 6]
After curing, the deck should be ready for its final touches. Using a combination of a router and a belt sander at the Idea Forge, I will shape the deck to its final form. I am again worried about blowout from the router and may choose to invest in an edge scraper or just be vigilant in using the tooling. The equipment at the wood shop will allow for detailed contouring and smoothing and preparing the deck for the drilling of truck-mounting holes. As I write this, I realize that I have great fears about tear-out ruining the deck at every stage. I think that I will take a great amount of time in the coming days to reflect on these processes to ensure the highest quality final product.
For protection and aesthetics, the deck will be finished with two to three layers of spar urethane after which hardening epoxy can be applied along the edges to resist damage and razor tail, a phenomenon in which the tail of a deck is ground to a razors edge by the pavement over time. I will also apply the hardening epoxy to the mounting holes to help prevent screws sinking into the core. Once these coatings cure, I’ll paint the pinstripe, followed by an additional urethane topcoat. This multi-step finishing process not only enhances the board’s durability but also its visual appeal with glossy edges and underside.
This project is a deep dive into the fusion of cultural aesthetics and functional design in skateboarding. Each step, from the initial concept to the final finishes, reflects an exploration of quality and creativity. The blend of surf-inspired elements with the geometric shaping of old school skate culture will hopefully result in a deck that is not only visually appealing but also durable and fun to ride.
[1] Moose Old School Skateboard Deck 10″ x 30″ Natural
[2] Pale Cyan Color | ArtyClick
[3] Tips for Finishing Cherry | Popular Woodworking
[5] My own Image
5 Comments. Leave new
Hi Tyler, Really cool project! I did a very similar project a couple of years ago where I built my own longboard. I would recommend making a two-sided mold; I underestimated how much it takes to properly clamp the wood together without causing creases. I’m looking forward to seeing how it turns out!
Hi Tyler, this is a really cool project and I am excited to see how it comes out. It was interesting learning about the curing technique and I may look into this further for projects I might embark on in the future. I like your approach to your design with making sure to do everything the right way and to focus on the quality of your board. Are you going to add any features to the bottom of the board or are you planning on just highlighting the nature wood grain? Also, for my project, I may be using veneers as well so do you have any tips for working with them? Thanks for sharing and I’m excited to see the final result!
There is something in my brain that says it would be fun to do some woodburning on the bottom of the deck, but I need to do some deep thought on if this would match the aesthetic, very great suggestion! I have found that all veneers are slightly different, and I get the best results by following the guidelines on the packaging or finding a YouTube video where someone uses your product.
It is a little scary knowing that the board can be ruined at any stage of the manufacturing process. I do like how you are considering the risk of each process. The way you are making this board is something I have never seen before and I’m excited to see how it turns out. Have you looked into how each woodworking process you plan on doing may have a method of preventing tear out? You might have to use a sacrificial board or something of that nature.
I think I finally found a solution! I laser cut all of the veneers such that no sawing, and therefore tear out, took place! I will still need to be careful in the sanding process, but I think this will be much more manageable.