

Call it a bucket list item.
I once spent a week with a luthier, learning how to build acoustic guitars with him and his two apprentices in southern Alabama. I slept on an air mattress next to a very old Brazilian piano awaiting its turn at refurbishment. Wilder still, the shop was in what used to be a train station; the tracks outside were still in service – and faithful to wake us every midnight. A week’s not nearly long enough to build an instrument. If it was, the nagging desire to do so may have left me years ago.
Lutherie (1) – the making of stringed instruments (and in this case guitars) – takes time and equipment. The former is hard to justify with work and a family, and the latter means major investments over years building out an at-home workshop. But what if time in the workshop is also class time? And what if the workshop includes all of CU’s campus resources?
This idea grew from a guitar-shaped cutting board, to a solid-body telecaster form, to a full-blown electric guitar. Given the access to equipment and the immense learning opportunity, this major project is the perfect chance to finally try my hand at lutherie. My project is an original electric guitar design emphasizing the guitar body and headstock with a commercially-procured neck (too much risk to playability otherwise). I’ll also be wiring my own electronics, either time-permitting within the semester or carried to completion in the summer.
Electric guitars are extremely modern instruments – emerging in the 1950’s – relative to other stringed instruments like violins, cellos, or even the guitar itself. I find, however, those older instruments are remarkably beautiful in their forms and features, heavily dictated by acoustics. My aim is to bring this “Traditional Lutherie” aesthetic to my electric guitar by:
- Incorporating traditional and acoustically motivated shapes as well as iconic features like the F-Hole.
- Rely on warm wooden tones that do all they can to enhance the natural and superior beauty of wood grains. The attention is drawn to the wood and workmanship, and necessary non-wooden parts like pickups, bridge, tuning knobs, etc. are made to blend smoothly with the former rather than grabbing the attention themselves.
- Use a clear finishing technique that enhances wood grain and tone and does not cover with paints or vibrant colors.
- Apply less finish on the neck so the player – on top of visually – can feel the grain as the instrument is played.
- Use a subtle but original shape for the headstock that doesn’t draw attention away from the guitar’s body.
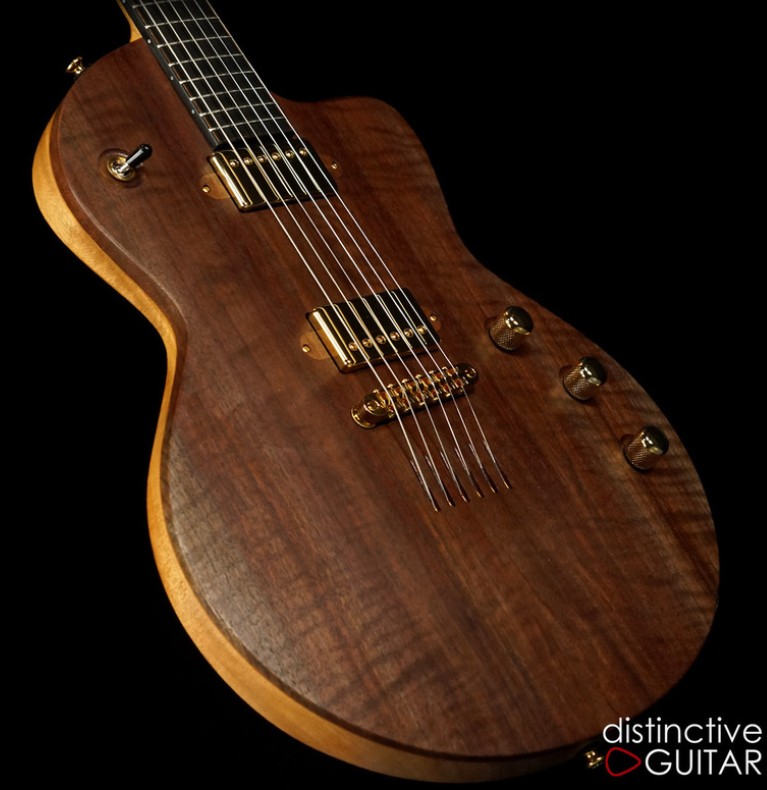
This is, of course, a major undertaking requiring me to dust off my woodworking skills, acquire a lot of new woodworking and lutherie skills, research the lutherie discipline and methods, learn how to wire and solder electronics, and so much more I don’t yet know that I don’t know. I opted to start as early as last December, as soon as this brainchild became a feasible option. Two guitars in particular emerged as primary inspirations for the aesthetic I am aiming to replicate: The Lowden GL-10 (2) (Left) and Gibson Les Paul Special Semi-Hollow (3) (Below).

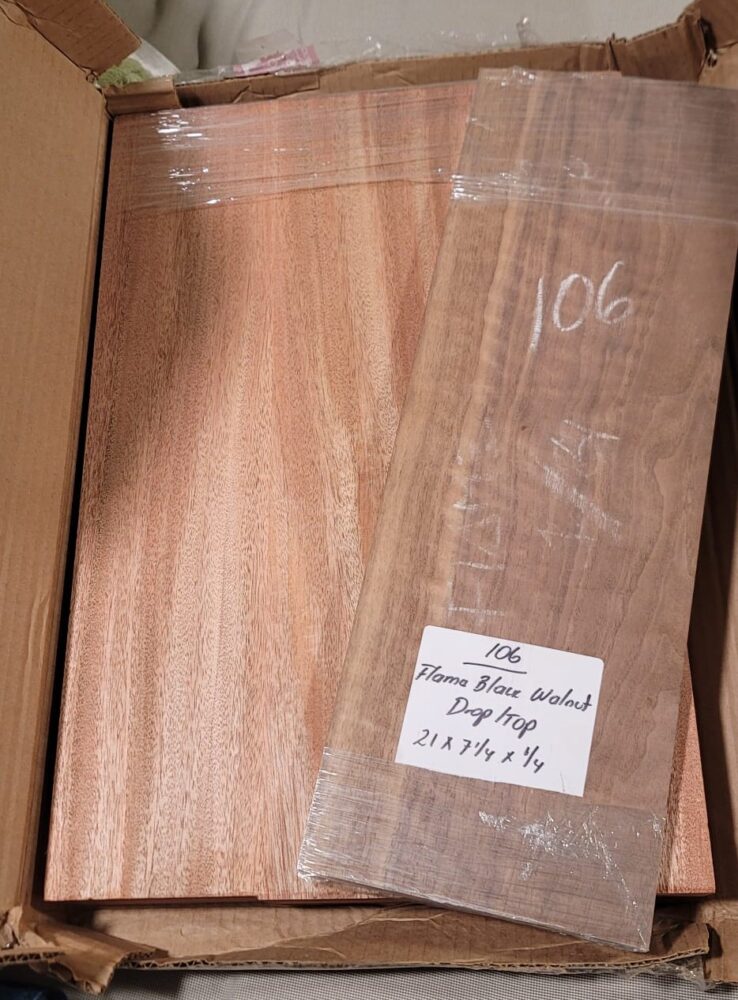
 I researched through the end of 2024 into 2025 when I found the best way to visualize what this guitar might be was through 3D modeling. I created an outline of my original guitar body style and found ways to make it a semi-hollow design with potential for some acoustic resonance. I then committed to the endeavor by making the project’s first purchase: An African mahogany guitar body blank and 1/4″ drop top boards made of bookmatched flamed black walnut.
The extensiveness of this project makes it difficult to accurately project a timeline for fabrication. This is exaggerated by needing to wait for very unique parts orders and selecting an oil finish option that could require more than a dozen coats over multiple weeks and more time to properly set. My full intention is to carry this into the summer if the full product is impossible to finish before the semester’s design expo. At the very least, I’ll have all parts (body, neck, and headstock) built and ready for finishing prior to hardware installation and the final addition of pickups/electronics. The aesthetic, however, will be fully realized even at this pre-completion stage.
In the interest of planning predictable tasks (barring holdups along the way, which have already appeared because of very dry Colorado air unevenly drying very delicate wood), I’ve created a timeline of events capturing those tasks already accomplished and those still to be completed with TBD due dates.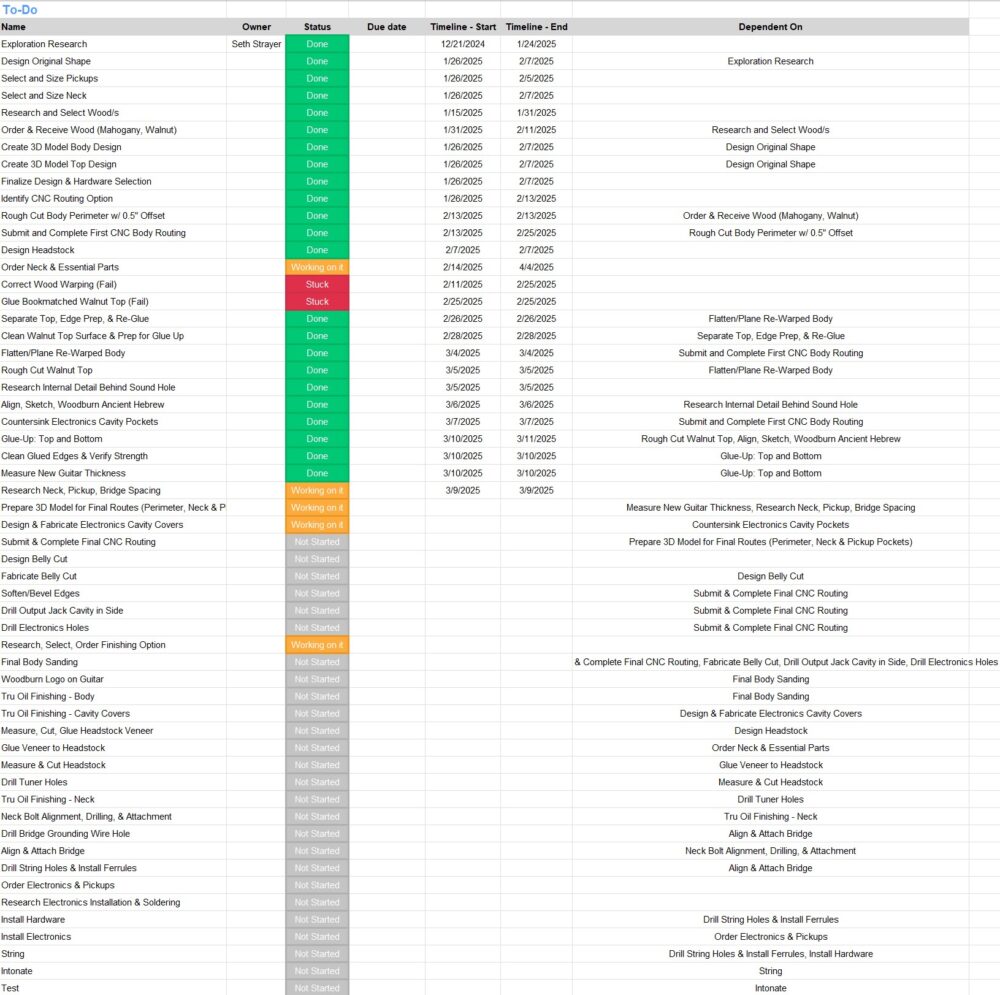
I’ve also made a Gantt chart covering those tasks completed thus far.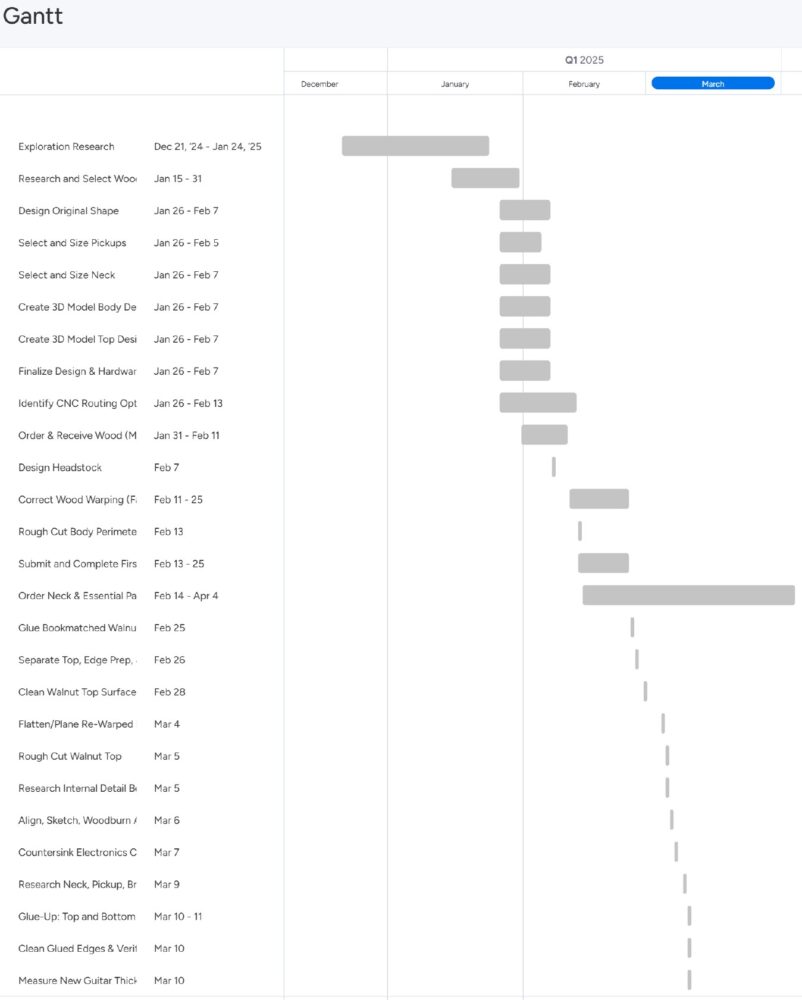
Significant steps have already been completed from design research all the way to gluing the body together in preparation for one last session in the CNC router:
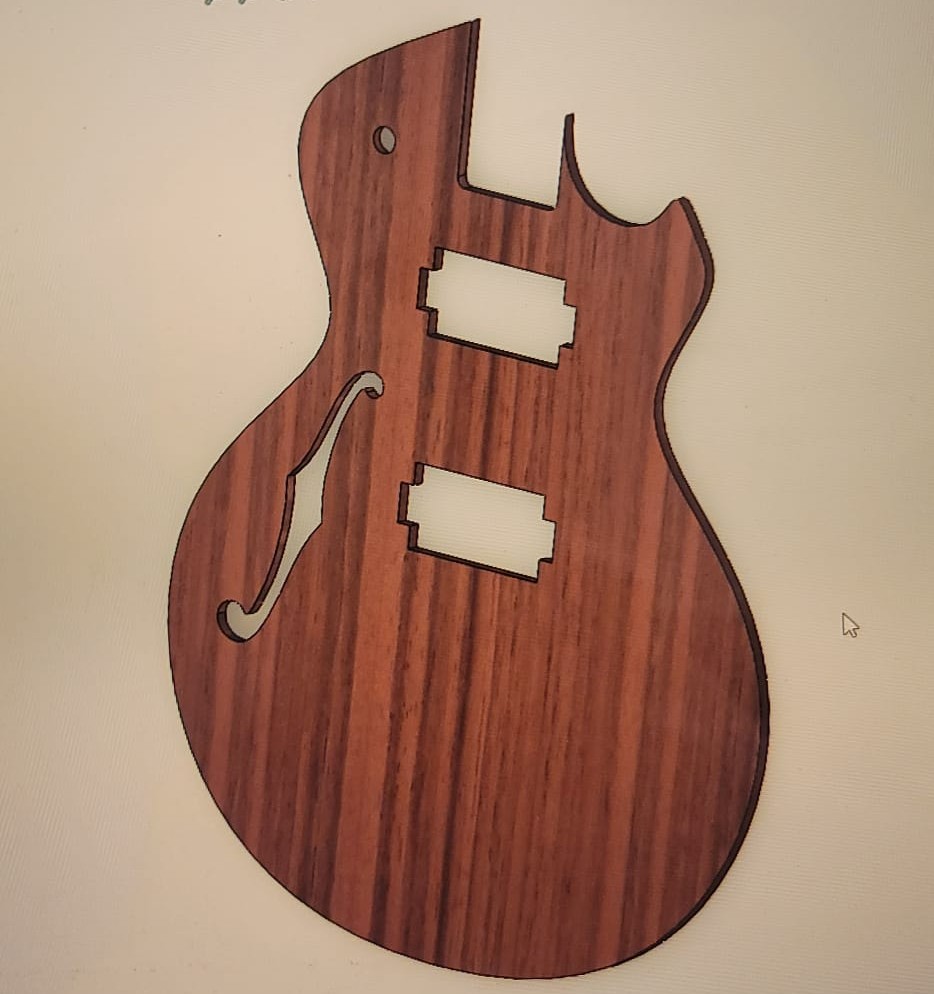 A general yet not final layout was created in SolidWorks to fully visualize the aesthetic. So as to not “cheaply” mimic a true archtop design, I’ve opted for a single F-Hole to communicate the acoustic effect without pretending to be something it’s not.
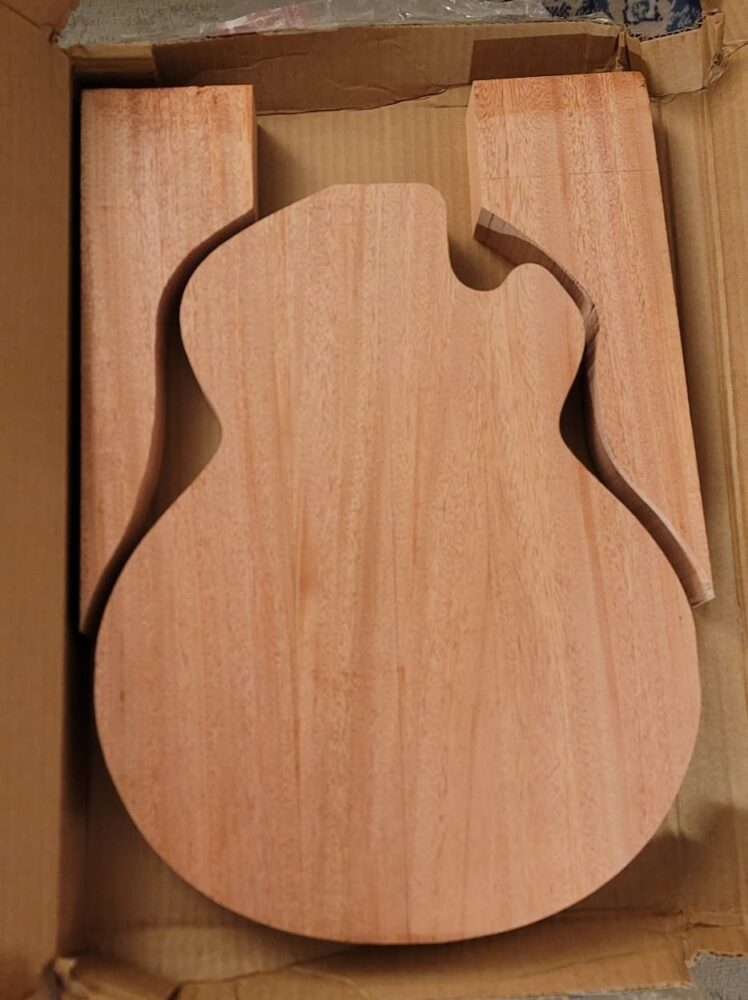 The first of many fabrication evolutions was to trace from a blueprint the guitar’s rough outline (with a 1/2″ offset around the perimeter in case of early errors), and cut it out of the mahogany body blank with the band saw. This was the first “aha” moment in seeing an approximate shape of the design become real and tangible.
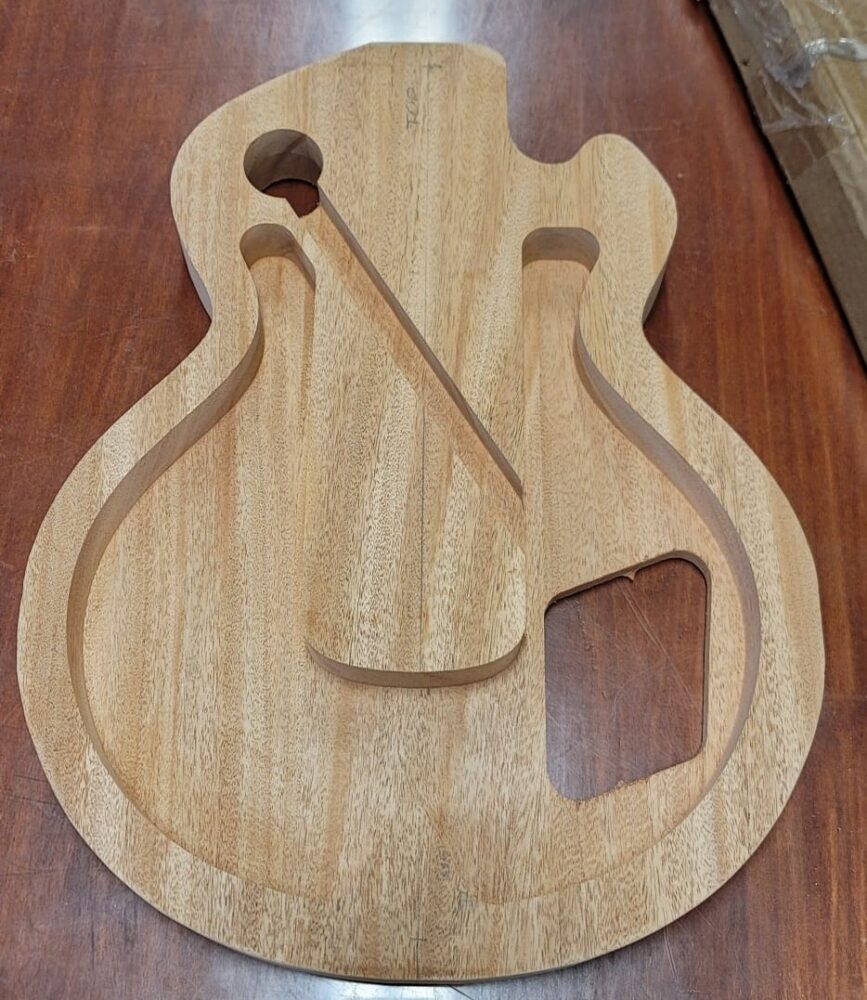
I submitted this roughly cut body for CNC routing through the Environmental Design school’s CLC. The cutting turned out excellent but had a notable 1/8″ offset to the right of center – something to watch out for in the second set of routes – and I re-marked the centerline true to internal structure. I’m thankful to have left that 1/2″ offset for errors like this!
![]() I ran into challenges gluing the bookmatched walnut top together to make one single board/panel. The walnut cupped significantly over a few weeks in the dry Colorado, and I learned a lesson in using too little and too weak a variety of glue. This required me to saw the poorly joined edge again and make another attempt with lessons learned. Fortunately, the gluing held the second time, and I only had to clean glue off of and flatten the seam of a very nicely bookmatched walnut drop top (albeit extremely warped).
I ran into challenges gluing the bookmatched walnut top together to make one single board/panel. The walnut cupped significantly over a few weeks in the dry Colorado, and I learned a lesson in using too little and too weak a variety of glue. This required me to saw the poorly joined edge again and make another attempt with lessons learned. Fortunately, the gluing held the second time, and I only had to clean glue off of and flatten the seam of a very nicely bookmatched walnut drop top (albeit extremely warped).
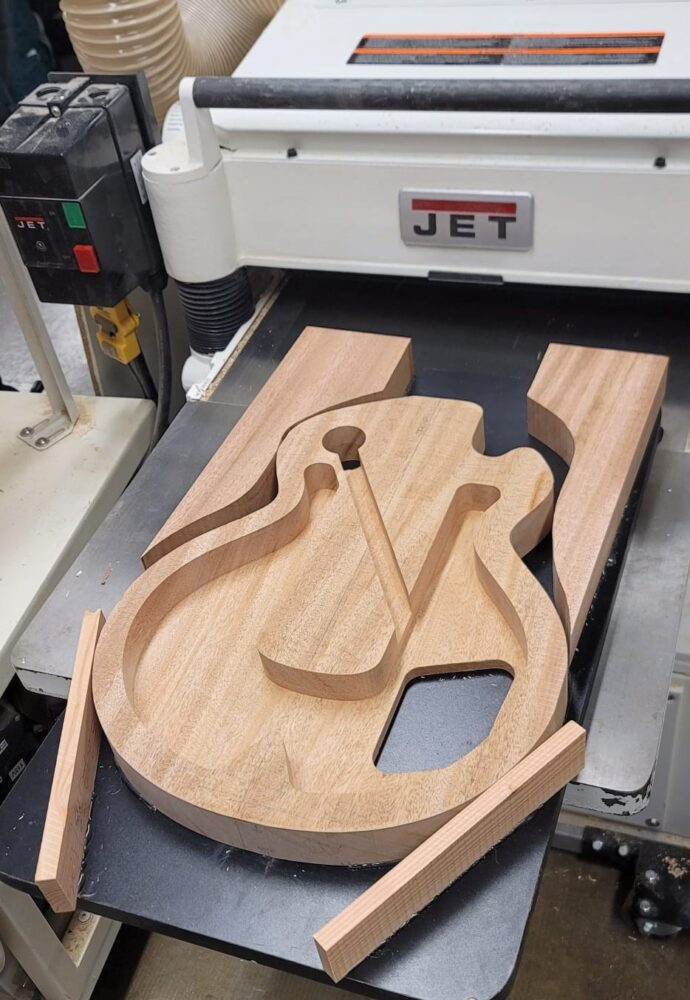 With the removal of so much material through CNC routing, my mahogany body also began to warp… a lot. Once it settled, I had to learn how to gradually flatted an already carved component by removing material through a planer. Making passes on both sides of the guitar, just enough material was removed to make it flat and flush once more.
 This also meant I could confidently trace the guitar’s shape against the walnut drop top. I marked the guitar’s outline with pencil and took the walnut board to the band saw to make a rough outline. After some cleaning up and sanding the joining side, the flamed walnut drop top was ready for gluing to the main body.
 With my plans to have an F-hole on the guitar’s left side, I wanted to add a subtle artistic feature to the inside of the guitar that would eventually be visible through the opening. I turned to Scripture for a phrase that would be thematic of my motivations to build and play an instrument in the first place. From the Bible’s original Hebrew, I found and included the words read in English, “praise and extol and honor the King of heaven.” Tracing these ancient letters first in pencil, I made them a permanent feature on the guitar’s interior by woodburning. So thrilled with the process and end result, I’ll be looking for ways to incorporate more woodburning later in the guitar’s design as well.
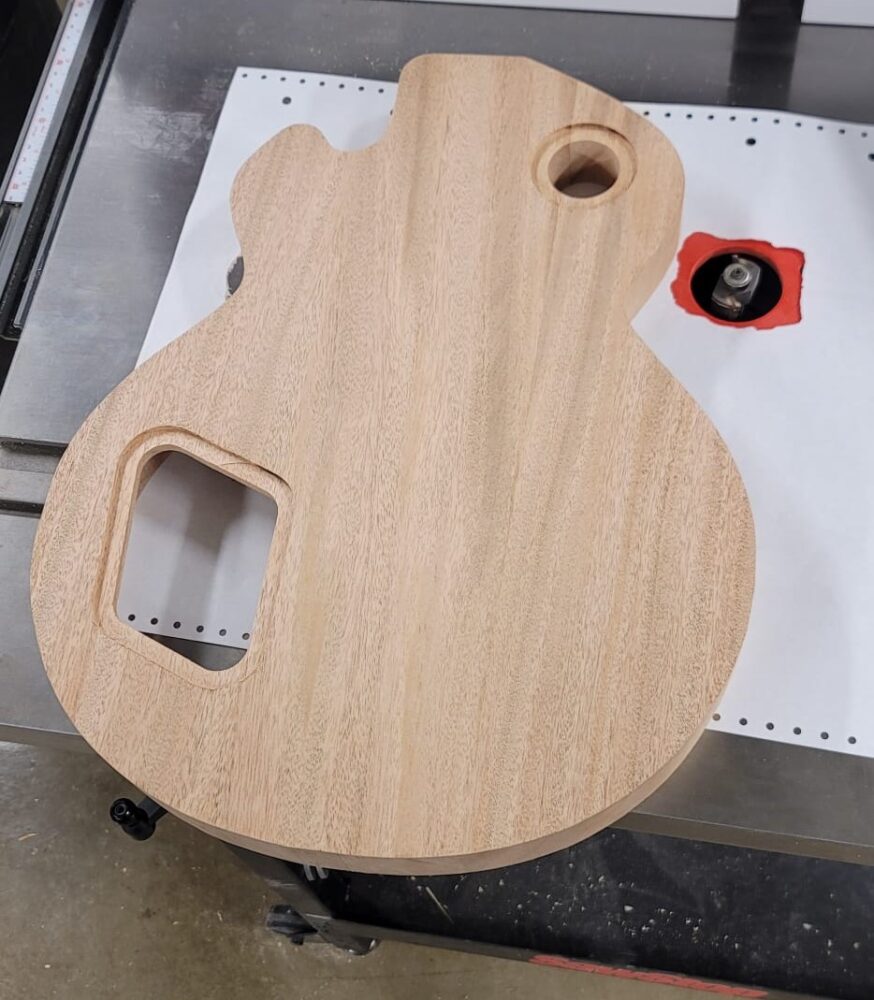 I also opted to countersink the cavities for my electronic controls at this stage in the design since the guitar would be easiest to handle and navigate on a table router without the top glued on. I used the table router to add a 1/8″ deep, 3/8″ offset around the perimeter of both cavities. This allows me to fabricate custom covers later on that will screw in overtop the electronics inside and hide them behind another nicely finished piece of wood.

The most pivotal and stressful operation to date, my next step was to glue the walnut top and mahogany body together. This meant I’d be fighting against the warped walnut top to get a proper seal – and I’d be racing against time. Glue strong enough to hold the warped corners of the top down (Titebond III) only has minutes before it begins to harden and set. I decided to glue the guitar face down on a perfectly flat piece of granite countertop available in the Makerspace.
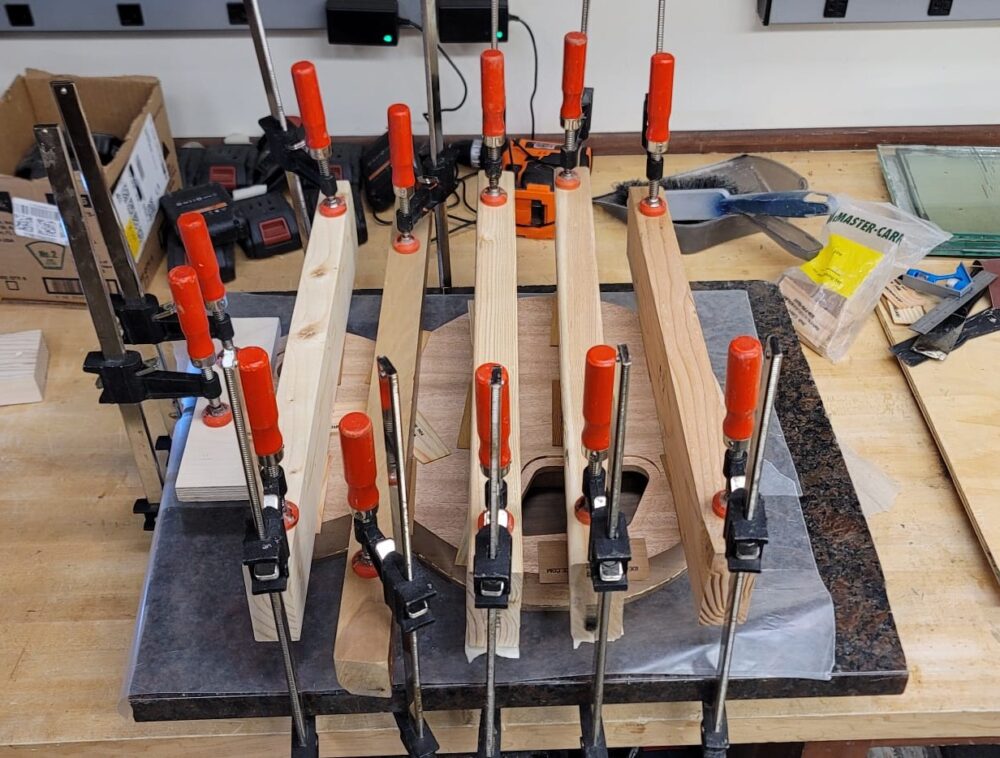
After trying a few configurations, I prepped my station with a cross-beam pattern of boards that would distribute force across the body of the guitar. 12 clamps would mean plenty of clamping force to both hold the guitar flat against the granite and tight for ensuring the entire mating surface was working for me. I completed the glue up in about 12 minutes and then left it over the weekend to cure.
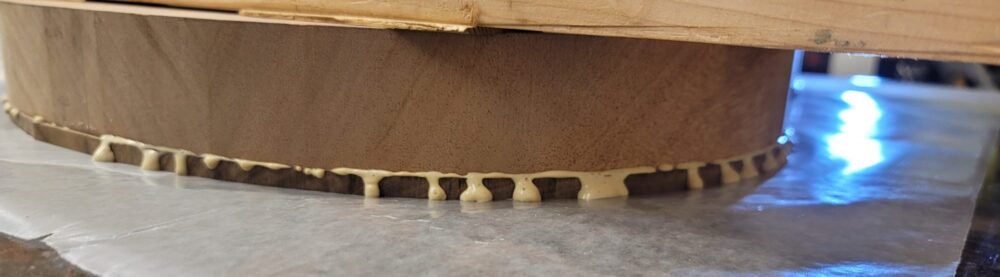
I came back to the best results I could’ve hoped for after a very stressful weekend of worrying the glue wouldn’t hold.
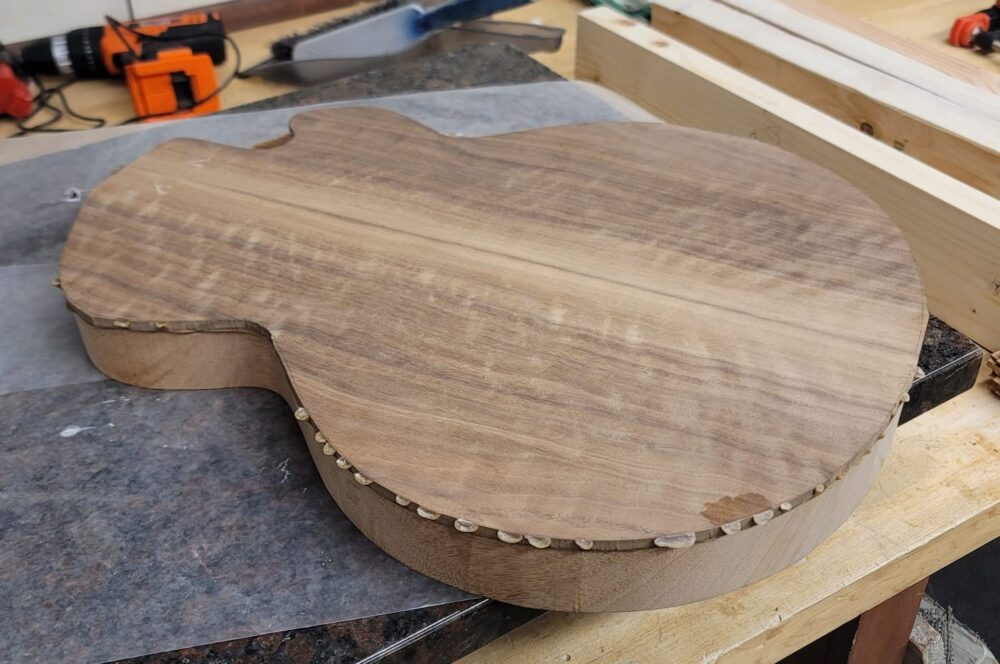
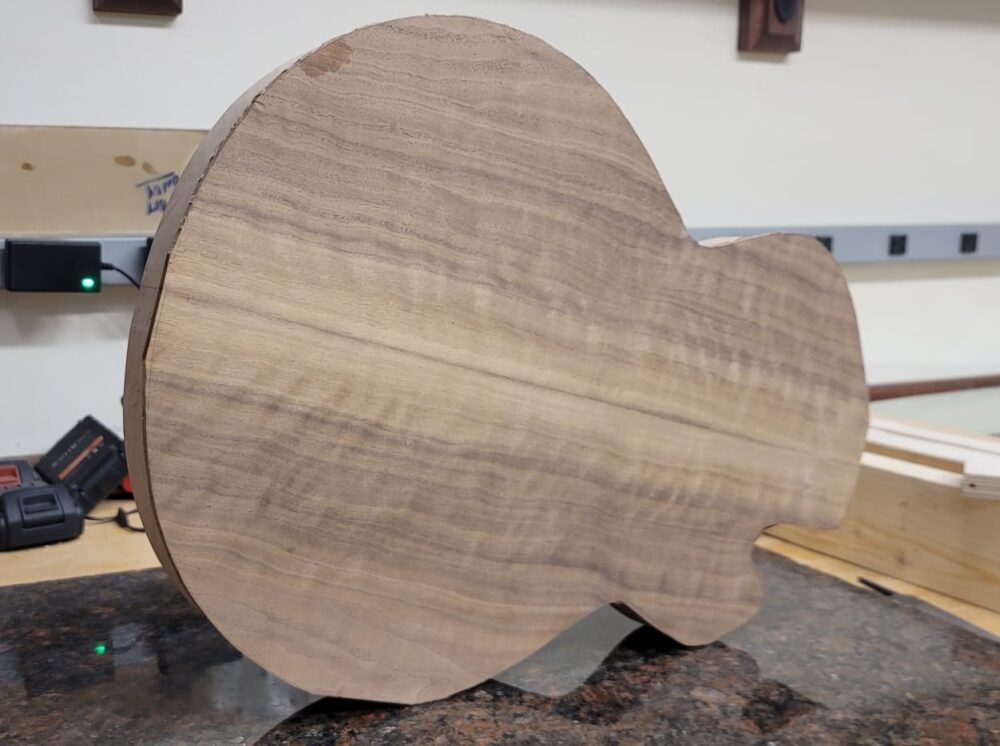
Not only was the glue tightly bonded, but compressing the guitar against flat granite also resulted in an extremely flat top that was previously warped beyond repair. I cleaned up the dried glue squeeze-out to make it easier to handle and tapped a few times against the face to hear the acoustics; subtle yet recognizable. It’s exactly wat I was going for.
 I am still waiting for a pre-fabricated neck and some essential hardware to arrive before I can begin finishing the exterior and aligning parts. In the meantime, I’m preparing a final 3D model to submit for CNC routing that will cut the F-hole and pockets for the neck and two humbucker pickups. I’ll then move on to carving a belly cut for added player comfort and softening the edges as well. Finishing can very nearly begin after that.
My excitement continues to grow as the guitar slowly takes shape. This is a promising sign considering interest tends to level off a few months into any project. I look forward to learning how to accomplish these next steps!
Citations:
3.Chicago Music Exchange. “Gibson Les Paul Special Semi-Hollow Caramel Burst.” Accessed March 10, 2025. https://www.chicagomusicexchange.com/products/gibson-les-paul-special-semi-hollow-caramel-burst-1493376.
2 Comments. Leave new
Hi Seth, this is an awesome project! When I was pondering about what to make for this final project, I remember looking up at my guitar hanging on the wall and thinking about how cool it would be to make my own guitar but I immediately thought to myself how complex it would be and I wouldn’t even know how to start. I ended up not choosing this for my project because I was too scared but I am so happy to see someone else is doing it! I will definitely be following your progress and keeping up with your project. I’m curious how you will be connecting the neck of the guitar later on. Will this be done with any hardware or glue? Also, tell me more about the wood burning technique you used and where you plan on using it out the exterior of the guitar. I also might use this technique in my project so are there any tips you have when doing this? Thanks for sharing Seth!
Hey Cole, thanks for the feedback! I hope you’ll get the chance to tackle this someday. It’s been a blast in there being so much to learn!
The neck I’ve chosen is a bolt-on, like a Fender Strat or Tele. Gibsons have set necks (glued), and I thought the former would be easier to manage on a first attempt.
For woodburning, I just borrowed a kit from the IdeaForge woodshop and looked up a few videos to get familiar. Then I practiced on a piece of scrap (the same mahogany) to get a feel for it and build confidence before making permanent markings. There are also shading techniques with it I haven’t tried yet if you’re thinking of woodburning an image of some kind and not just writing. While I’m undecided on *what* to woodburn on the guitar’s exterior, I think I want to do a word or logo on the headstock (in lieu of an inlay) and potentially on the outside edge of the guitar – right on the flat section of my cutaway horn.
I’ll check out your project too and am happy to chat more!