
For my main project, I’m recreating a mountain shelf I made a few years ago—with added details I’ll discuss later. I love this piece because it perfectly aligns with my personal aesthetic. I’m particularly drawn to wood-based creations, which add a rustic charm and warmth to any space. As a Colorado native, I wanted to design a mountain shelf that echoes the spirit of my home by incorporating the natural wood elements I adore. The aesthetic I am aiming for is Rustic Modern. The Rustic aspect comes through the use of natural materials, specifically wood, while the Modern style is reflected in the clean, visually appealing lines of the mountain peaks. To fulfill the dynamic requirement of this project, I will be incorporating a sleek drawer that complements the design.
Inspiration
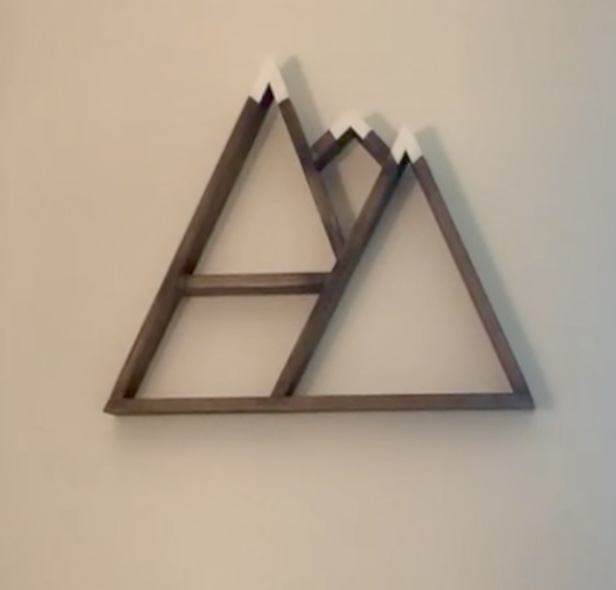
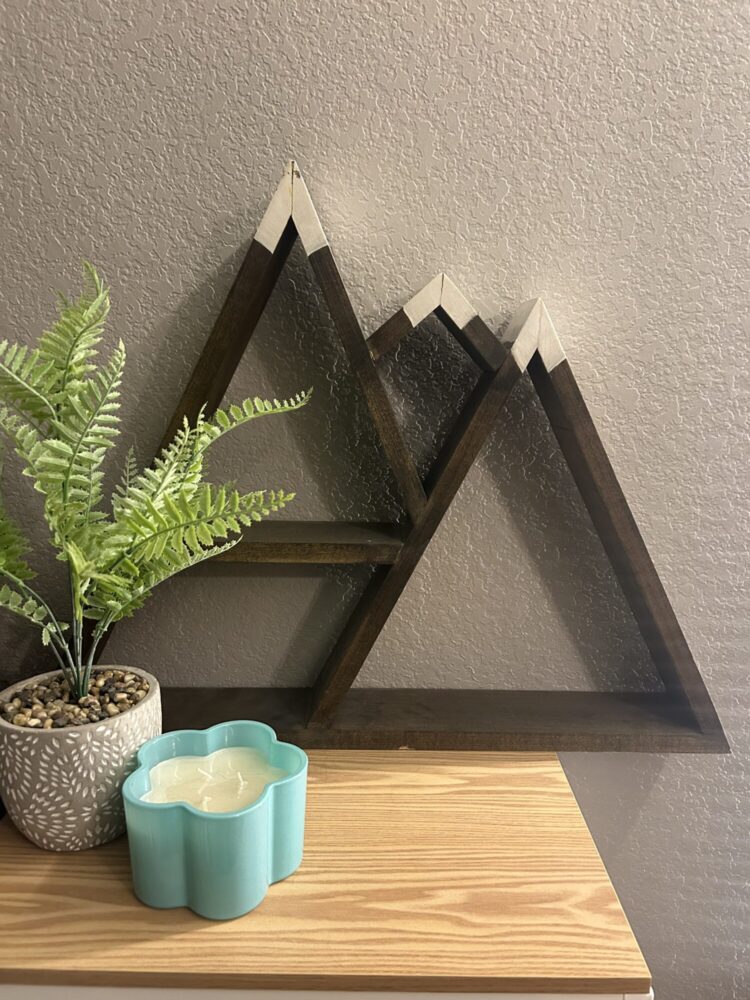
For a closer look at my original mountain shelf, see Figure 1. For this project, I used 1″x4″ boards that I will use again. I made the mistake of cutting at very difficult angles, and I have since learned the lesson and will not have to repeat it. I really like how I incorporated varying-sized peaks, and I will be doing this again. I debated on whether I would with the three peaks or not, and I discuss my final decision below. I really like the stain color and still have it, so I will be keeping it the same color.
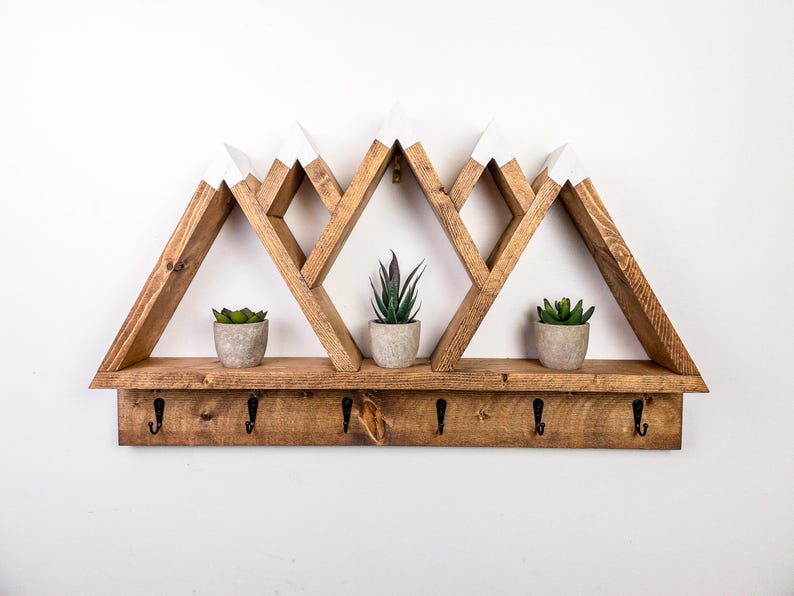
In order to improve my mountain shelf design, I want to create a shelf with a drawer to keep keys and other miscellaneous items in. Originally, I debated whether I should pursue this idea or use a hinged door. The drawer will satisfy the dynamic requirement of this project. I also pondered the idea of adding coat hangers to the shelf. I looked up ideas for this, and there are various ideas on Etsy, one of them shown in Figure 2. I have since decided that I will not be incorporating the coat hanger in addition to the drawer. I like the sleek look of the drawer over the coat hanger. There are currently no mountain shelves on the market with drawers, so I don’t have any inspirational photos for this design.
Project Vision
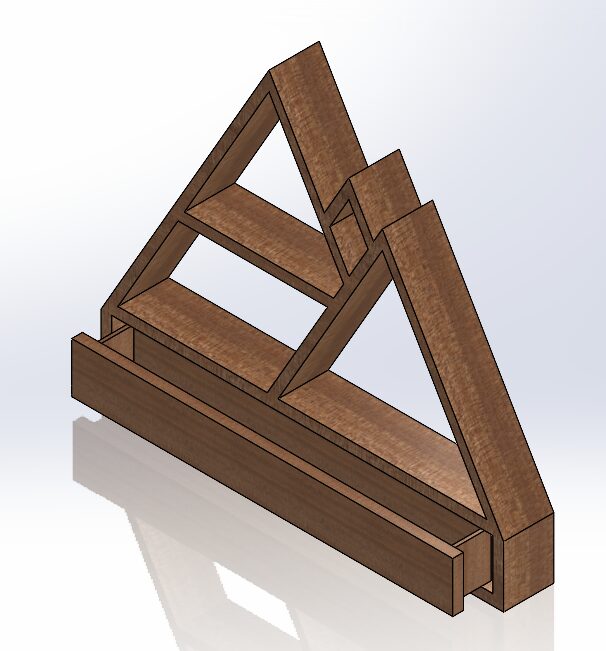
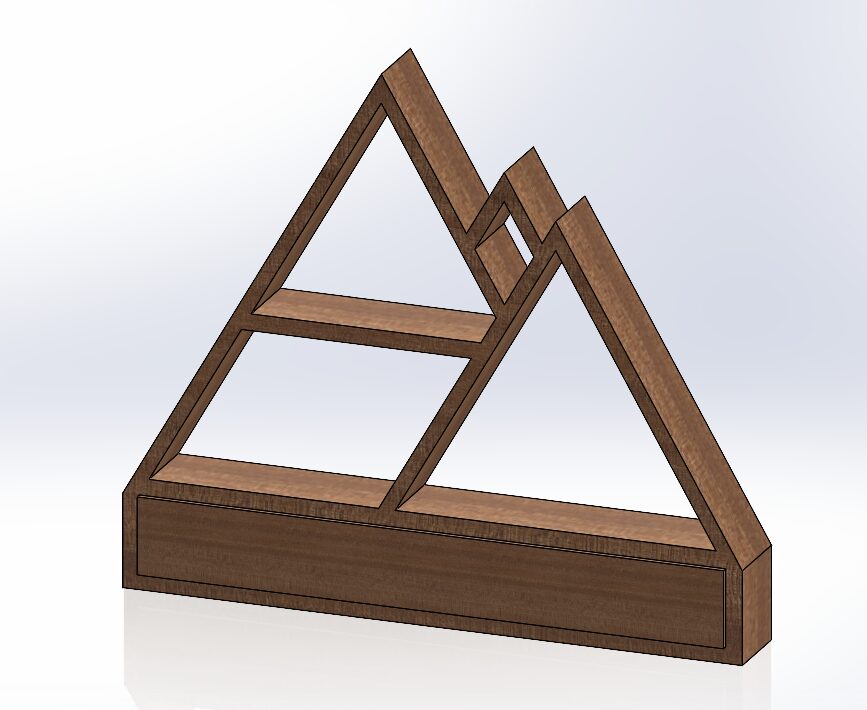
Figure 3 shows the CAD model I created to visualize the final product. I created a CAD model over sketching to accurately determine the dimensions and angles needed for cutting each wood piece. Each of the angles will be easy to cut with the miter saw I have access to.
The overall design achieves the Rustic Modern aesthetic I was aiming for. The stain of the wood will emphasize the natural wood grain and incorporate warm tones. I decided to keep the same design as my original mountain shelf with the three peaks. I like how the three peaks are visually appealing with the different sizes and are asymmetrical. With the inclusion of the drawer, the sleekness is still achieved. I designed the drawer so that when it is closed, it is almost not seen. This keeps the focus on the mountain design rather than the drawer. I have not created a drawer before, but I do not believe that it will require additional woodworking skills.
For materials, I will be purchasing 1″ x 4″ wood boards, 1/4″ thick wood sheet, wood slides, and a drawer handle. The 1″ x 4″ boards are nominal in size and will actually be 0.75″ x 3.5″. These boards will be used to create the overall mountain design and the outer walls of the mountain shelf. It will also be used for the drawer face. I decided to use the same material so that when the stain is applied, it is uniform and doesn’t appear different. The 1/4″ thick wood sheet will be used for the drawer sides and bottom. I wanted to minimize the wall thickness of the drawers as much as possible to optimize the drawer size. I do not have access to tools to make drawer slides because I am a remote student. Therefore, I will be purchasing wooden drawer slides that can be cut to size. The drawer will be a little less than 2 feet wide, so I decided the best placement of the slides was on the left and right sides of the drawer. I wanted the drawer to be as deep as possible, so it made more sense to take a couple of inches off the overall width of the drawer instead of the bottom. I will also be purchasing a brass wood handle to keep the Rustic Modern aesthetic and add to the functionality of the drawer.
Alternate Aesthetics
While I am committed to the Rustic Modern style, it was interesting to consider how my project could fit into other aesthetics.
One drastically different aesthetic is Industrial. To achieve this look, my design would be made of metal instead of wood, as shown in Figure 2. This would require welding experience and access to more specialized tools than I currently have. The Industrial style often incorporates raw materials, exposed hardware, and a utilitarian feel, which would significantly change the character of my piece.
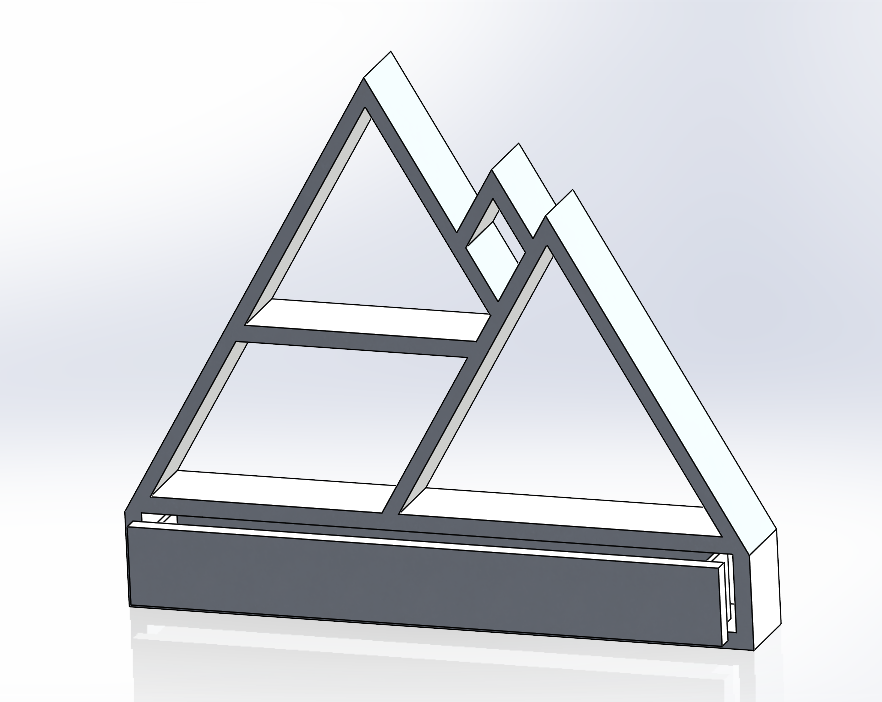
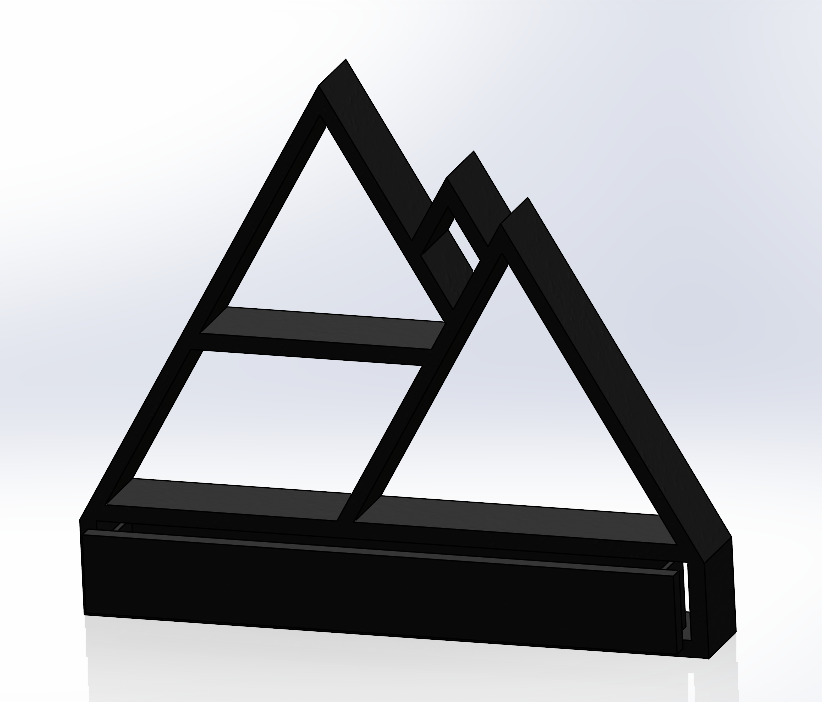
Another alternative aesthetic is Modern. While Modern design also emphasizes clean lines and geometric shapes, it lacks the warm, natural tones of Rustic Modern. Instead, it typically features a monochromatic palette, often in black and white. In Figure 3, I envisioned my design in a Modern style. This variation would be easier to achieve than the industrial version since I could still use wood as my primary material. However, instead of staining it to showcase the natural grain, I would paint it in a solid black or white finish for a sleek, minimalist look.
Exploring these different aesthetics helped me appreciate the versatility of my design and how material choices and finishes can completely transform its visual impact. However, my original Rustic Modern direction remains my preferred choice for this project.
Manufacturing Process
In Figure 6, I outlined my project timeline. I plan to complete this project a couple of weeks ahead of the final due date to give myself buffer room for any mistakes I need to correct and to complete the documentation requirements.
By 3/15, I will have bought all the materials I need for this project. I have already bought most of the items. By 3/22, I will have all the pieces cut to size. In order to complete this step, I will be using a miter saw that has the capability to be locked at various angles. Since the CAD model already has the angles and dimensions laid out, this step will be straightforward. I will need to ensure I make precise cuts so that all of the pieces align together. By 3/29, I will have all of the pieces sanded and assembled. For the sanding process, I have a sanding block and various sandpaper grits. I plan on using low to high sandpaper for this project to achieve a smooth surface finish. I will spend a lot of time on this step because it impacts how the stain will look. For the assembly process, I will be using construction adhesive in addition to a nail gun. This will ensure the joints are strong and the drawer will be able to hold sufficient weight. I will be using wood filler to cover the nail holes. By 4/5, I will have the piece stained and finalized with the final touches. For the staining process, I already have the stain and will be using a microfiber towel to apply the stain. I will let the stain dry overnight before I install the drawer handle. I will also be painting the mountain peaks white, the same as my original design. I also will add mounting hooks to the back to have the ability to hang it. By 4/23, the final product will be completed and all of the documentation will be complete.

References
[1] 5 Peak Mountain Shelf with Hooks – Rustic Decor – Adventure Decor
1 Comment. Leave new
I like how clean your designs are and how you’ve already considered details such as additional features and shape of the mountains. I’ve sometimes seen slots as handles in modern designs, so I was wondering if you’ve considered using that as an alternative to the knob.