
What?
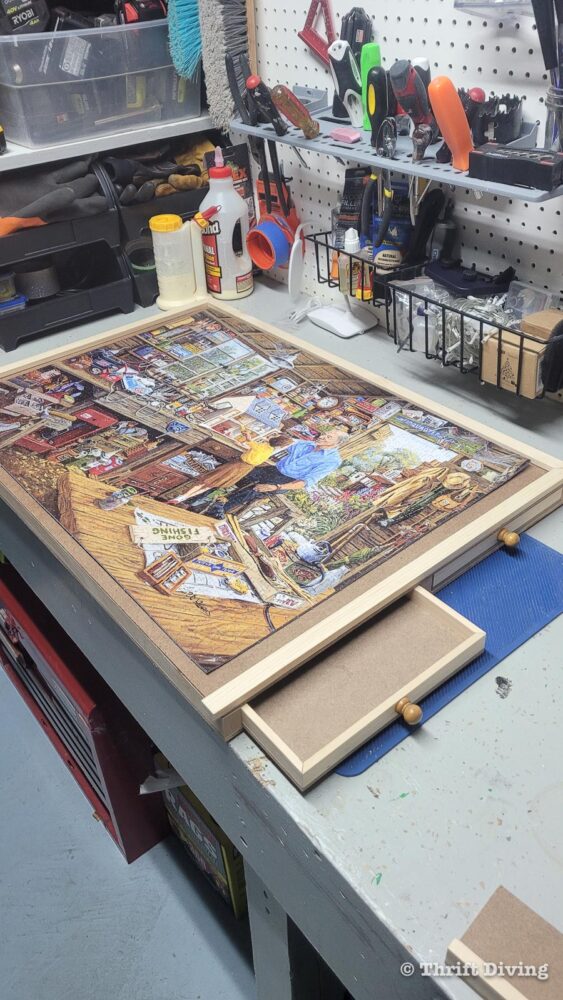
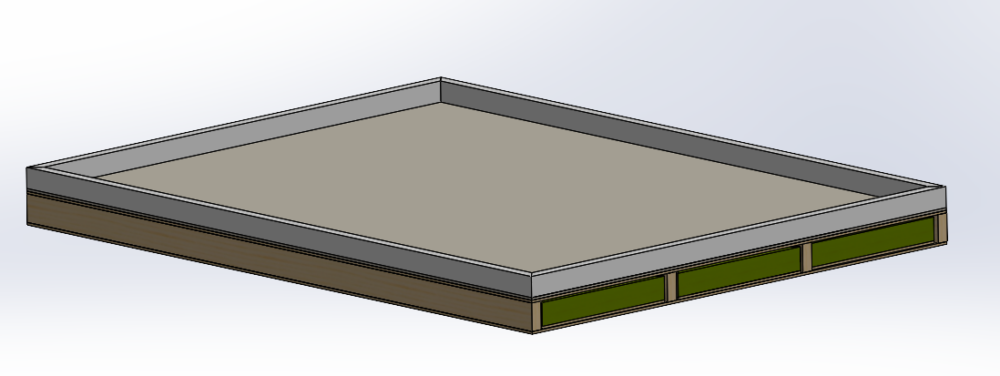
Upon considering what I myself wanted to accomplish (along with what I could feasibly achieve given my current skill set and the project’s timeframe), I decided on a puzzle holder with drawers on the bottom for puzzle piece organization and storage! My main inspiration came from Thrift Diving’s tutorial on YouTube, and later through looking at their step-by-step tutorial online [1, 5]. I heavily based my overall design (along with dimensions and features) and fabrication plans on this tutorial. The only changes that I am implementing are to the exterior appearance (as I am trying to accomplish a certain aesthetic) by adding felt to keep the puzzle pieces from sliding [2] and by painting certain faces.
 - and thought this project could be my way of having something nature-inspired.
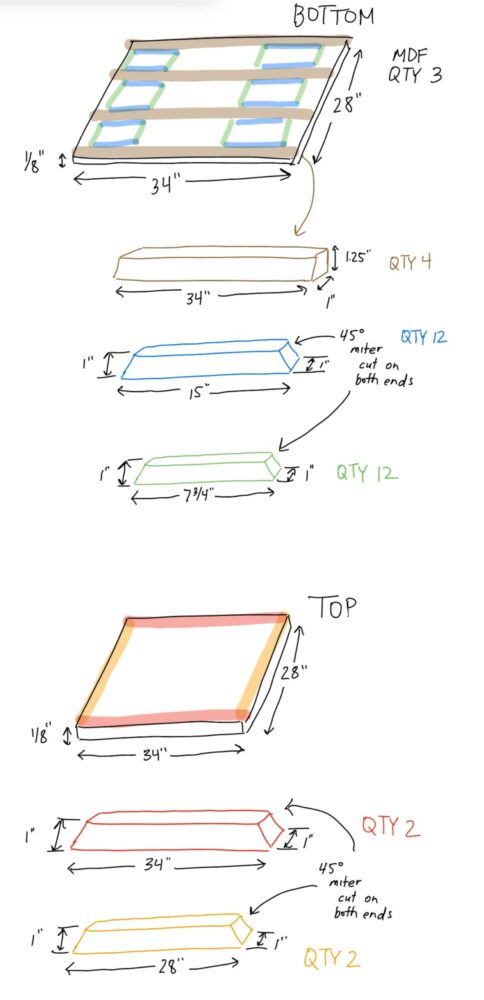
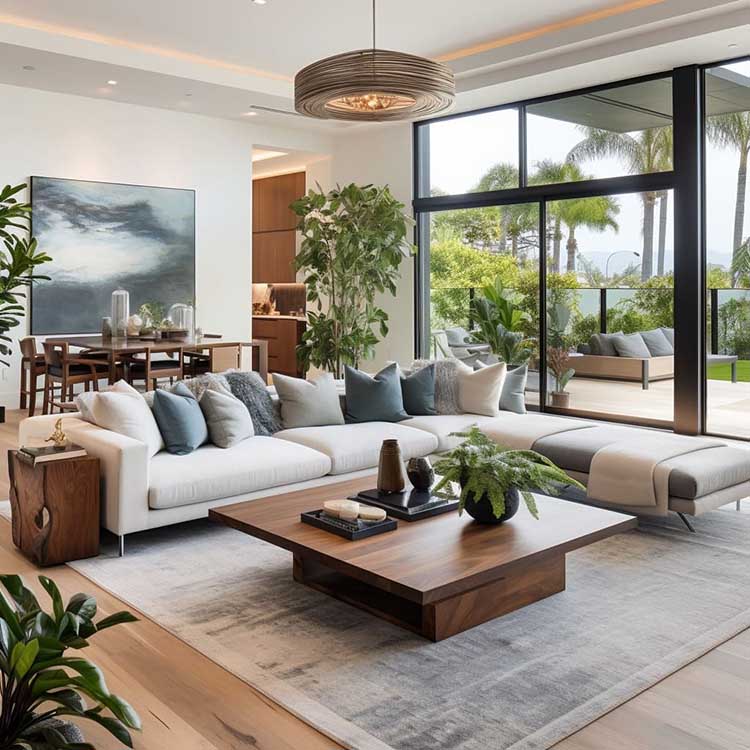
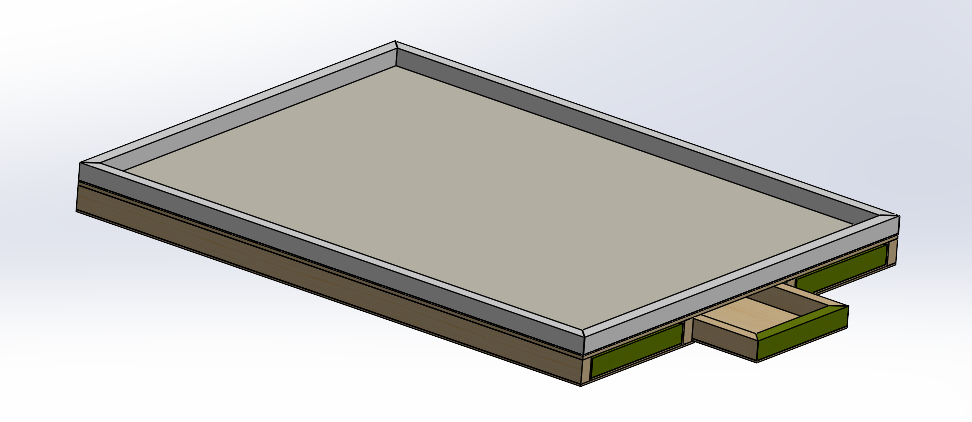
Some initial sketches I made of the puzzle holder are included in this post. I ended up making a CAD model, as I needed some drawings before diving into fabrication, and a couple images are also included. The semi-complete drawings (woodshop just required dimensions, so the drawing is minimal for their reviewing purposes and all units are in inches) for the CAD model can be found here. My concept is relatively simple, but I feel like that lines up with Minimalism. I decided to use a tan felt, which will be placed on top of the top board but below the trims, to keep the pieces in place and keep them from sliding too easily. I also believed it would be a more comfortable surface to work on (i.e. when my hands or arms are rubbing against it). I plan for the top trims to be all white, as I felt like white suited the light wood. Similar to the accent pieces in Organic Minimalism (or even a direct reference to the plants), I wanted to paint the drawer’s outward face either a Sage or Olive to incorporate an earthy tone. I figured the remaining surfaces can be left unpainted, as the light wooden appearance was what I wanted to have/emphasize in the design. For the knobs, I am still deciding if those will be left natural (wood) or painted (and if so… white? a different shade of green?)… I will probably reevaluate down the road.


As was referenced in last week’s post- I did consider two other aesthetics that I felt differed significant from my proposed aesthetic. Those aesthetics were Industrial and Maximalism. Using my existing CAD model, I did change some colors/textures to better envision how I would achieve those aesthetics with this product. Although the alternate aesthetics were neat to consider, I am still planning to move forward with my original aesthetic. I think that my original aesthetic (Organic Minimalism) suits my personal taste better and is more appropriate for making puzzles (as in the holder itself will not distract me or clash with the puzzle pieces). Additionally, I felt that the Organic Minimalist was more feasible given the material I was using and my personal budget.
As for what I have done so far for fabrication… I haven’t officially started working in the woodshop yet, but I have already have some consultations with the head of the woodshop on campus at the Idea Forge. I have been sharing my proposed plan (steps I will take) and my dimensioned drawings with him to get feedback and ensure I am thoroughly prepared to begin the project. I was able to already procure most of my materials! I have the bulk (if not all) of the wood I will need to create the puzzle holder, however materials that I still need to obtain (but will not impede my fabrication process) are: felt, knobs, and paint. I plan on beginning fabrication this week, at least in terms of making cuts and possibly gluing pieces together.
How?
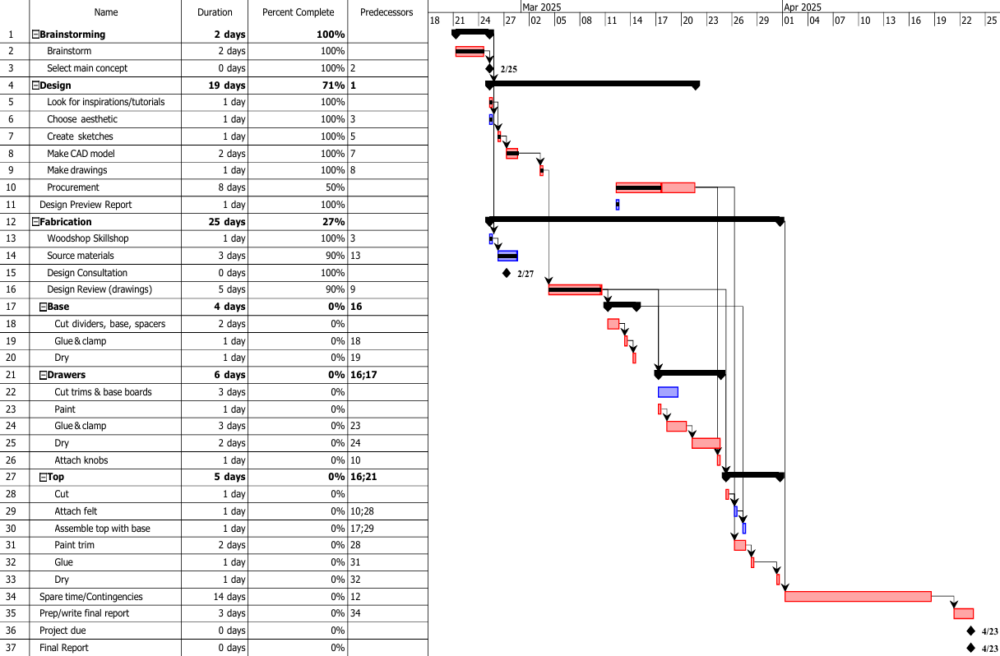
I created a Gantt Chart to help me plan out my design process, and particularly in regards to fabrication [insert Gantt chart]. On the chart, there are progress bars reflecting what has been completed, is in progress, or has yet to be started. I plan to try to adhere to this timeline as much as possible! However, in the case that unexpected issues or changes arise, I have given myself a 2-3 week buffer… and I hope that will be a big enough safety net! As I will have some guidance/assistance from the woodshop staff, my fingers are crossed that I can avoid significant issues from happening (I am going to be ensuring I use the machines properly and am meticulous with following my step-by-step procedure I created along with the tutorial).
As for how I am going to make my project- there’s going to be a lot of learning for sure. As mentioned, I plan on using wood as the primary material with the only other materials being felt, glue, paint, knobs and possibly some nails/screws. To tackle this, I plan on using the woodshop, which is new terrain for me. This will be my first time using some of the saws I need, and the entire process overall is pretty unfamiliar to me. However, I have been receiving some guidance and have been relying on some handy tutorials. I did take the woodshop workshop through Idea Forge, which showed the workspace and demonstrated the tools.
The outline I created for the fabrication process (which aligns with that section of the Gantt Chart) is as follows:
- Cut bottom (base) board to size (Qty: 1)
- Cut drawer dividers to length (Qty: 4)
- Cut drawer spacers to size (Qty: 3)
- Measure out and position the dividers and spacers on base
- Glue spacers onto base
- Glue and clamp dividers onto base lengthwise, 8″ distance between each divider
- Cut drawer bottoms to size (Qty: 6)
- Cut long and short trim for drawers, 2 long and 2 short pieces per drawers (Qty: 12 long, 12 short)
- Make miter cuts on trim pieces (45 degrees on each end)
- Paint short trims and let surface dry
- Assemble drawers – glue trim pairs to drawer bottoms, clamp, and allow time to dry
- Screw knobs onto front face of each drawer (Qty: 6)
- Cut top board to size (Qty: 1)
- Cut long and short trim for top (Qty: 2 long, 2 short)
- Glue/nail top board to base assembly (with base board, dividers, and spacers)
- Make miter cuts on trim pieces for top (45 degrees on each end)
- Paint trims and allow to dry
- Cut felt to size and attach/glue it to top board (Qty: 1)
- Glue and clamp trims to top board
- Final assembly – slide drawers into designated spaces on base assembly
I am looking forward to really throwing myself into this project! Wish me luck!
References:
[1]: How to Make a Puzzle Board with Drawers – Thrift Diving [2]: How to make a Puzzle Table | DIY | Great Home Ideas [3]: Make A Spinning Puzzle Table [4]: DIY JIGSAW PUZZLE TABLE | Full Tutorial for Portable, Inexpensive Puzzling Solution [5]: 10 Steps to Create a DIY Puzzle Board with Drawers Tutorial [6]: Organic Minimalism Interior Decor [7]: Organic Minimalism Interior Decor
4 Comments. Leave new
This is really well planned out! You have an amazing head start and I am impressed to see the thought that has gone into every part of the project. I used to have a puzzle holder like this and I ran into the issue of the MDF board becoming decently warped. It looks like you have plenty of dividers to support the board so I hope this will not be an issue for you, I think your plan to nail it all together is awesome and would hopefully create the most robust product possible.
Hopefully warping won’t be an issue! I hadn’t even thought of that originally, but it’s a good reminder!
Beautiful Design! The CAD drawing is really good and your timeline are very organized
Thank you!