
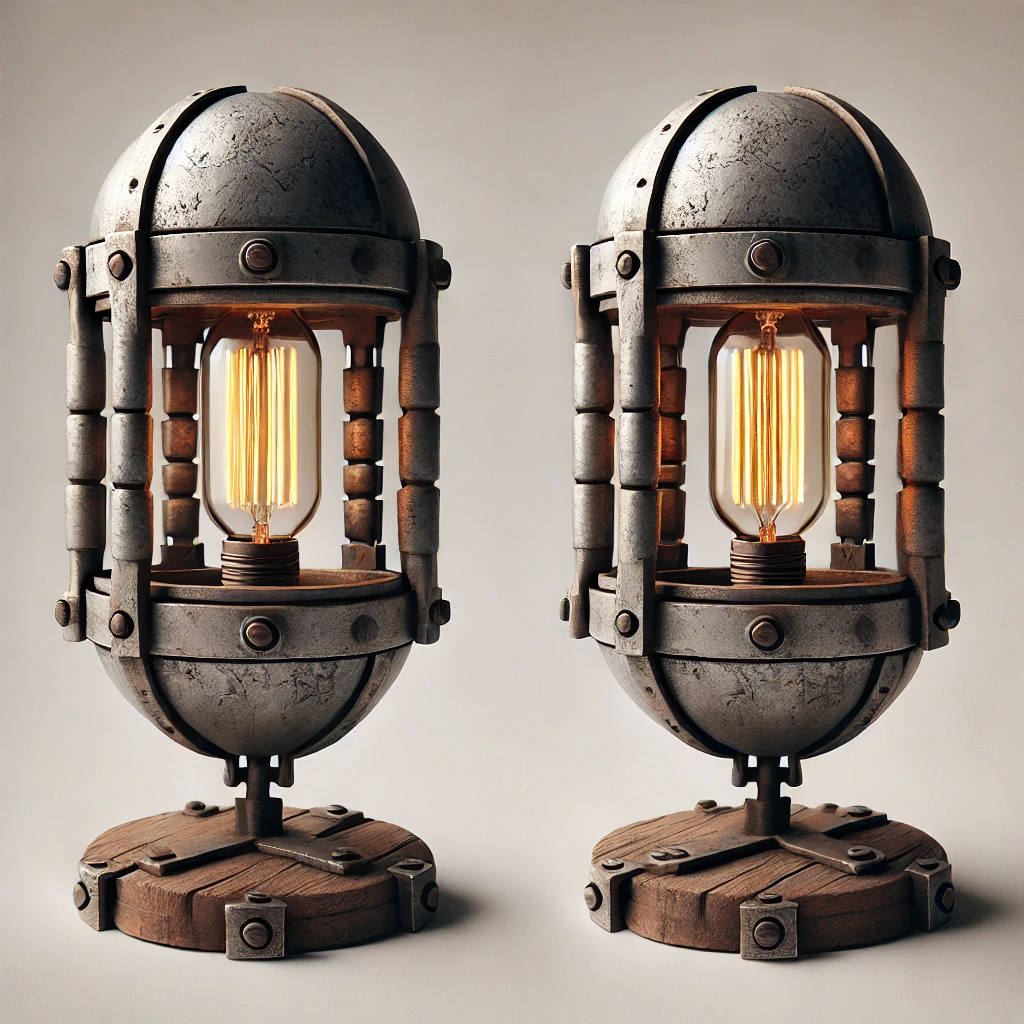
*The featured image is purely conceptual and does not fully illustrate the final design intentions of the lamp*
Inspiration and Vision:
For my main project, I will be designing a lamp whose base and top are connected via a sliding rail. There is a momentary switch that when the lamp is closed, the light is off, and the moment you lift the top, which contains the light, the momentary switch is released and the light comes on. The main reason that I chose to create a lamp in general is because where our stove top is located in the kitchen, the lighting in that area is very poor which can be difficult and often times annoying when trying to cook.
The lamp shape was inspired by a spotlight, similar to ones you would see around a theater. The main components that I will be replicating are the circular shape of the base and the swiveling component also on the base. The purpose of the swivel component is two fold: first, to connect the light to the rail and two, to be able to tilt the light up or down.

The aesthetic will follow one that is fitting of me, which would be more of a rustic minimalist aesthetic. I can potential also incorporate my passion for craftsmanship into this as well, but I have yet to decide if the final product will be wood or metal. This decision will depend on the capabilities of the wood shop and if I can do it, then that will be my approach. All of my designs and plans are currently to do the base and top portions of the lamp out of wood.
The rugged minimalist aesthetic focuses on simplicity, durability, and raw materials. It highlights natural elements like wood, steel, and stone that age well and develop character over time. Designs are straightforward, with clean lines, neutral colors, and visible construction details like exposed fasteners and joints. Every element serves a purpose, avoiding unnecessary decoration. Imperfections, such as knots in wood or patinas on metal, are embraced as part of the aesthetic. The style values strength, authenticity, and tactile engagement, creating pieces that are practical, long-lasting, and honest in their design.
The rugged minimalist aesthetic fits really well with this project. It focuses on simplicity, durability, and raw materials that highlight natural elements like wood or metal that develop character over time. The design will be straightforward, with clean lines and visible construction details that emphasize function over decoration. Imperfections, like knots in the wood or a natural patina on metal, will add to the authenticity and character of the final piece. Whether the final design is wood or metal, the result will be a piece that reflects craftsmanship and purpose, fitting seamlessly into its space while providing much-needed light.
When considering other alternate aesthetics, the two that I considered were industrial futurism and organic modernism. In exploring these alternative aesthetics, I was drawn to the idea of warm diffused lighting from the Organic Modernist concept.
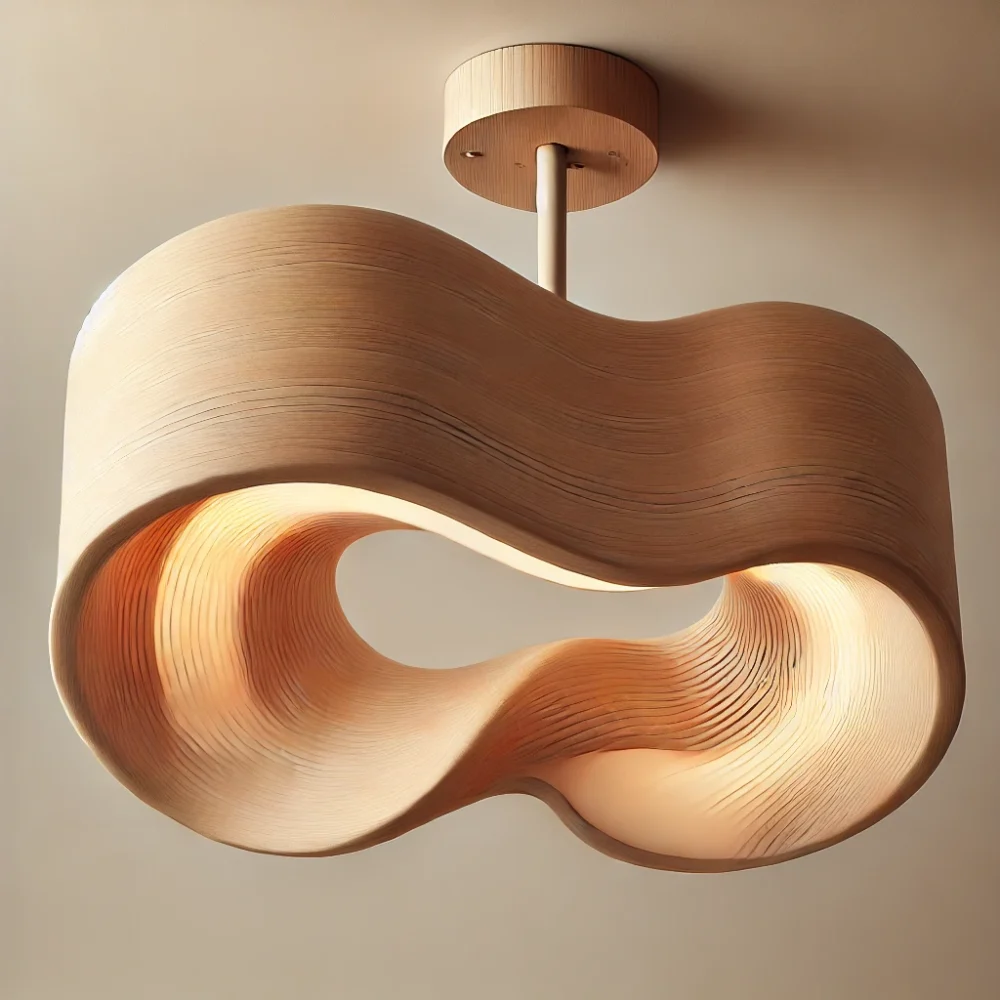
This approach focused on gentle lighting to create a calming design. While my original plan was to use a standard LED, I realized that an amber light would better capture the warmth and depth that aligns with both the Organic Modernist influence and my core rugged minimalist aesthetic.
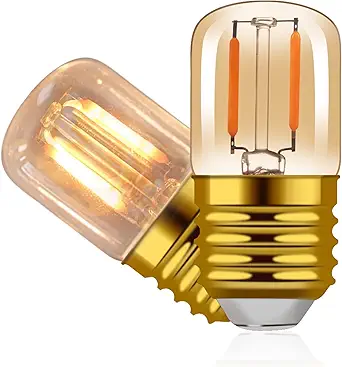
The amber light offers a softer, more natural glow that complements the raw materials of the design. It also adds a sense of warmth that feels more intentional and crafted, which is something that an LED wouldn’t quite achieve. This subtle shift not only enhances the overall aesthetic but also creates a more inviting atmosphere, especially for the functional space it’s designed for. Even with this influence, the project stays grounded in rugged minimalism, emphasizing simplicity, durability, and authentic materials. The amber light feels like a natural evolution of the design, blending functionality with a refined, warm finish that adds depth to the final piece.
The Design and Fabrication Process:
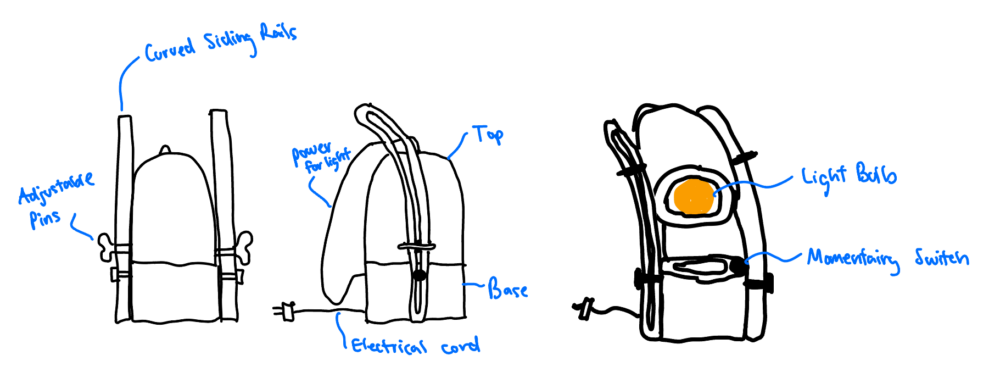
Seen above is my initial sketch of the final product. My progress so far includes purchasing all the over the counter products which are the rails, the electrical cord, the light bulb socket, the light bulb, the wire crimps, and the momentary switch. The only portion of this product that I will be manufacturing myself are the lamp’s top and base, which is currently planned to be out of wood.
Like I stated before, I have already gone through the material purchasing process, minus the wood for the base and top. In the coming weeks I will continue to explore and further flush out my design, and then will begin on the most time consuming portion of this project, which will be manufacturing the top and the base of the lamp. The manufacturing portion will require me to speak with the woodshop professor and determine the best approach to manufacturing the base and the top.
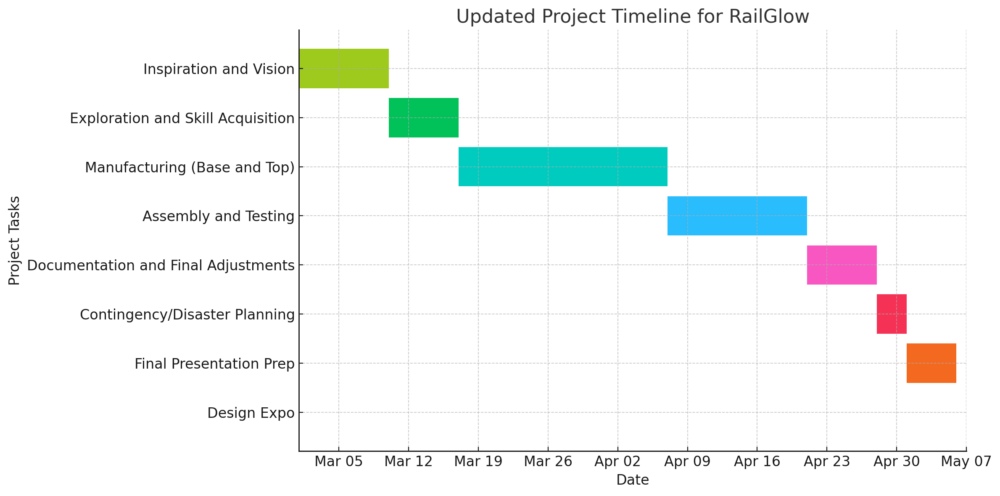
The fabrication process for the RailGlow lamp will follow a structured approach, which started with the initial concept and will end with the final product, which will be at the design expo.
The process began with inspiration and vision, where I developed initial sketches focusing on the lamp’s circular base, sliding rail, and momentary switch mechanism. The design goal was to create a lamp that not only functions well but also enhances the visual appeal of my kitchen space. One key decision that was influenced by the alternate aesthetics was selecting an amber light bulb instead of a standard LED. This choice was influenced by the aesthetic of Organic Modernism, which emphasized warm, diffused lighting. The amber light will create a softer, more inviting glow that complements the rugged materials and tactile engagement of the lamp.
Next, I will focus on skill acquisition, particularly in woodworking or metalworking, depending on the final material choice. If I decide on wood, I’ll need to refine my lathe turning and finishing techniques to shape and polish the base and top components. If metal is chosen, I’ll explore basic cutting, grinding, and welding techniques. Additionally, I’ll need to understand the electrical setup for integrating the momentary switch, ensuring that it activates reliably when the lamp slides open. During this phase, I’ll also create small mock-ups of the rail and swivel mechanisms to confirm their functionality before moving to full-scale fabrication.
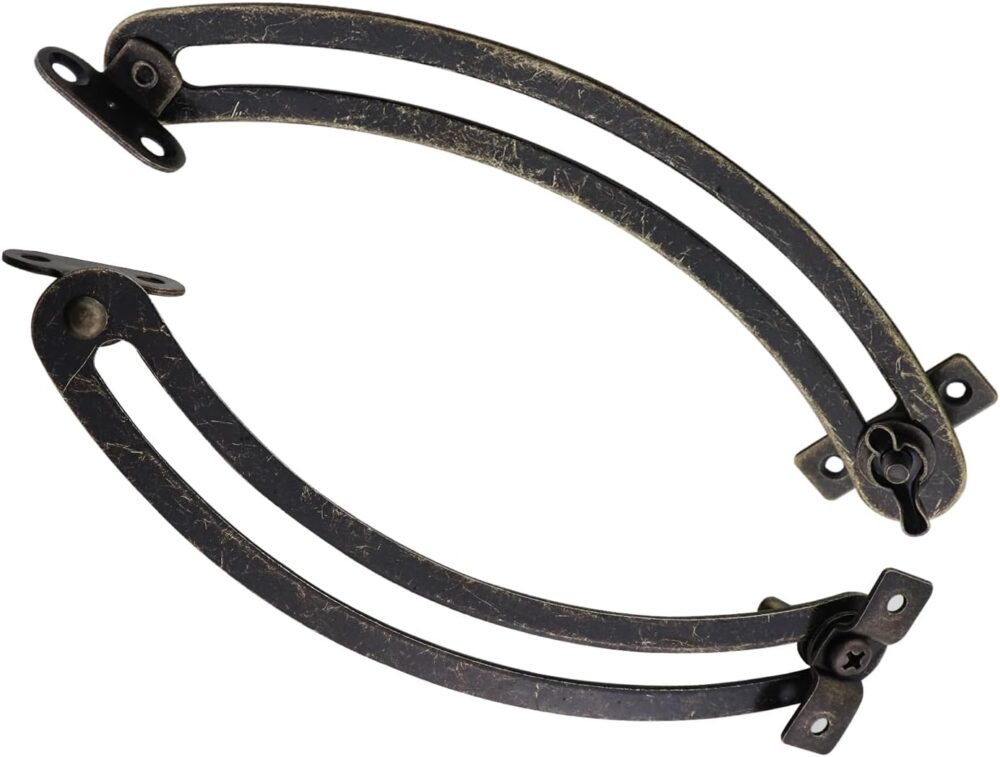
The manufacturing phase will begin with fabricating the lamp’s base. If using wood, I’ll shape it with a lathe and smooth it using sanding techniques. For metal, the process will involve cutting and grinding the material to size, then drilling holes for mounting the sliding rail and wiring. The top component will follow a similar process, with additional work to create a secure channel for mounting the light bulb and integrating the swivel joint for adjustability. Once both components are shaped, I’ll install the sliding rail and ensure the mechanism operates smoothly to activate the switch. Here is an image of the sliding rails for better visualization:
The final part of this phase will focus on electrical installation, securely wiring the momentary switch and bulb socket, and ensuring that everything fits neatly within the structure. For finishing, I’ll apply a natural oil or stain if the material is wood, or a patina or sealant if it is metal, to highlight the material’s raw character.
After fabrication, I’ll move into assembly and testing, first conducting a dry assembly to ensure all components align correctly. I’ll test the sliding mechanism and switch activation to confirm that the lamp functions as intended. Any mechanical or electrical issues will be addressed at this stage before securing the final components. Once assembly is complete, I’ll focus on documentation and final adjustments, capturing detailed photos of each process step, creating final sketches, and writing down key decisions and challenges encountered. This will ensure a thorough record of the process while allowing for any last refinements to improve stability or function.
In preparation for potential setbacks, I have allocated time for contingency and disaster planning. This includes sourcing extra materials, identifying alternative fabrication methods, and ensuring that the lamp is durable under repeated use. This step is crucial for avoiding last-minute issues and ensuring that the project remains on schedule.
As the project nears completion, I’ll dedicate time to final presentation preparation, organizing visuals, sketches, and process photos to clearly communicate the design process. I’ll also develop talking points to explain how the design evolved, why certain materials were chosen, and how alternate aesthetics influenced the final product. If possible, I’ll include short video clips demonstrating key fabrication steps to add depth to the presentation.
The final step will be the Design Expo on May 7, where I’ll present the completed RailGlow lamp alongside supporting documentation. The focus will be on showcasing how the design reflects the rugged minimalist aesthetic, the process behind its fabrication, and how thoughtful design choices, like selecting the amber light, enhance both form and function.
Throughout this process, I’ll document progress with detailed sketches, photos, and diagrams to capture the full scope of the project. This will not only serve as a valuable reference but also enrich the final presentation by providing a comprehensive view of the design journey.
I am excited to see how this project turns out an plan to finish the semester strong. If anyone reading this has any ideas or helpful tips, please let me know! Thank you for reading.
Sources:
Featured Image: Image created using DALL-E, an AI image generator
Image 1: https://www.vecteezy.com/free-vector/spotlight Author: Adobe Stock Photos
Image 2: Image created using DALL-E, an AI image generator
Image 3: https://www.amazon.com/dp/B092J34VTK?ref=ppx_yo2ov_dt_b_fed_asin_title&th=1 Author: Unknown
Image 4: My design sketch
Image 5: My projected timeline
Image 6: https://www.amazon.com/dp/B0DKJGCLDR?ref=ppx_yo2ov_dt_b_fed_asin_title Author: Unknown
1 Comment. Leave new
This is SOOO cool! I really like your inspiration photos and can’t wait to see how it turns out.