
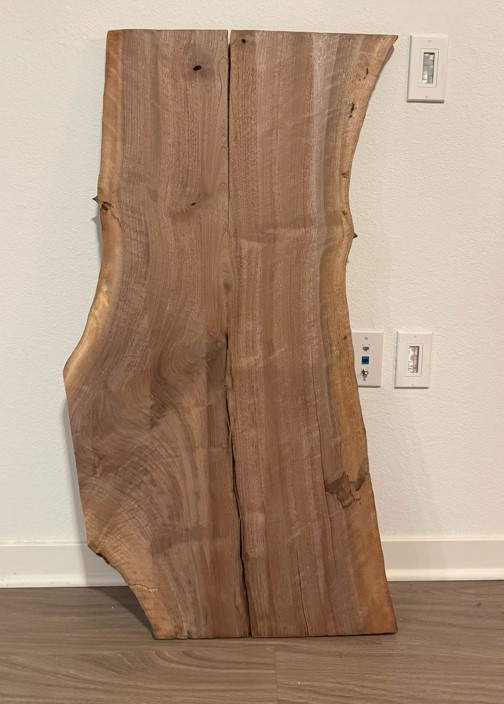
For my main project, I’ve identified that the most difficult obstacle I’ll need to overcome is the preparation for the epoxy pour. So far, I’ve cut the original piece into half and sanded it down to a 100 grit surface to remove the dirt and other blemishes of the live edged black walnut wood. I found the piece at at Collectors Specialty Wood in Denver for a decent price that measures 2’6″x 3’6″ and will be cut down a little bit more to bring the shape I want with the table and do some testing with the material and the epoxy.
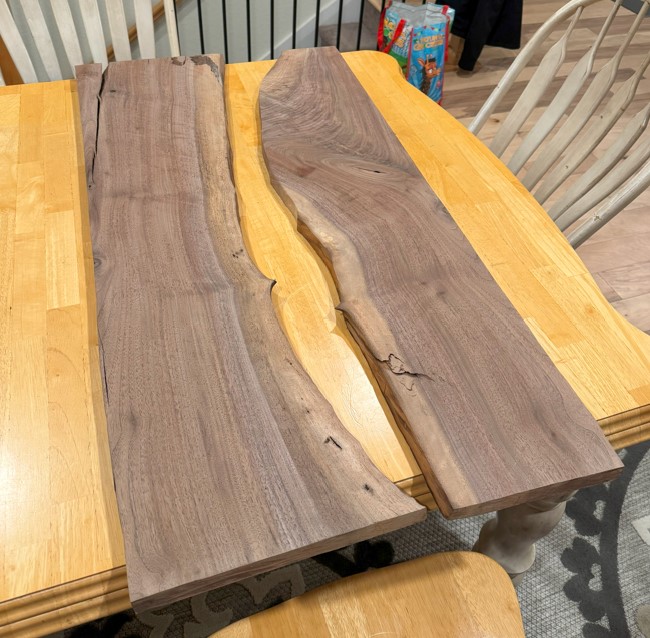
The final dimension for the table will be 2′ 7″x3’4″ and will be put into a form I will cut from melamine. This won’t be to difficult I will just need the precise measurements in the inside to match my dimensions and screw the form together. There will be about 3-4 in the long edge and 2-3 in the short edge. The thick of the pour will be around 1.25″ which means that I will need to at least do 2 deep pours for the epoxy resin in the center. The epoxy resin will be black in order to bring to life the character and colors of the wood.
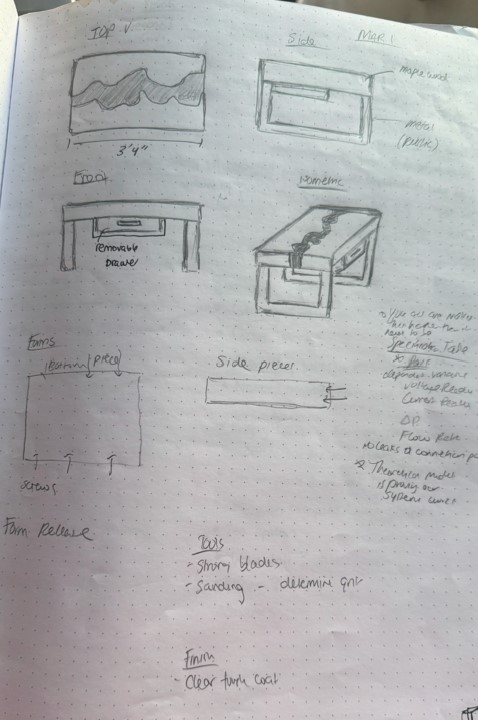 I believe the preparation for the epoxy pour will be the most difficult part of the process due to the chemical reactions that occur with the resin and the wood. As I sanded my piece down, I could see little holes of sap in the wood that will melt when the epoxy is poured unless I remove it prior to. I will need to use a mineral spirits solution to get this off. This is important for the finish of the wood because it will cause bubbling. Also, there are multiple grits of sand paper that I will need to go through for the epoxy finish that will be very time consuming. Epoxy is water based so the wood will need to be clamped down so it doesn’t float when the pour touches the wood. I will be using a mold release on the form and using C-clamps to keep the pieces down.
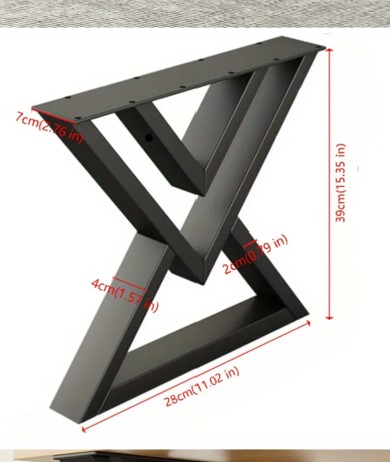 Finally, I will add a removable drawer and implement legs to the coffee table to bring the interactive part to the piece. I’ll anchor the legs down with fasteners and create a cubby of some sort for the drawer. I’m still looking into the handle I want to incorporate as well as the overall frame for the cubby. I want to keep it simple and minimalistic so there will be more to come. Currently, I don’t see much of an alternative as I’ve purchased the wood piece for my table.
Work Cited:
The legs will come from Temu
3 Comments. Leave new
Hi Pisay
This project is super cool and I’m excited to see how it turns out. If you haven’t you should check out BlackTailStudio on YouTube, he makes amazing tables similar to yours. I like the legs, but it might be worth making them yourself (unless it is a ridiculous amount of work.)
Your post does a great job detailing the preparation process and the challenges of working with epoxy and wood. The breakdown of sanding, forming, and clamping shows strong planning and attention to detail.
One question: How do you plan to test the epoxy pour before committing to the final piece?
Hi Pisay, this project seems really cool! I’ve always seen videos online of people creating this type of thing with resin and wood, and I find it fascinating. I like your idea of making the resin black. I think it will add a sort of intensity to the final product. Plus, it will match the color of the legs. This table is an impressive feat and I’m looking forward to seeing the progress and results later!