
Personal Aesthetic
My personal aesthetic is a combination of many aesthetics, including MCM, modernism, minimalism, and contemporary. While these are slightly conflicting aesthetics, I think that they can all come together to form a unique and personalized aesthetic. My aesthetic comes out in many different forms but is most prevalent in my interior design and furniture aesthetic. I love that minimalism allows a room to have lots of open space to let light in and allow the walls and floors to show through. Minimalism also keeps a room simple and allows for a simple, clutter-free environment that decreases stress in a room. Modernism has some crossover with minimalism and focuses on simple designs with clean lines. MCM has a large focus on natural wood, leather pieces, and the incorporation of color to keep a room fun. Personally, I like to keep a room simple at the base and then incorporate accent pieces to keep it interesting. This can be seen through fun shapes, colors, or patterns on specific accent pieces to have focal points within a room.
Main Project Artifact
For my final project, I plan to make a side table that focuses on a modern, sleek design incorporating mostly wood materials and possibly some glass elements to add more depth. This glass top would also be functional as it would prevent some of the normal wear and tear that occurs on wood surfaces. I would also like this table to be functional and include a door with storage shelves inside and other useful design elements.
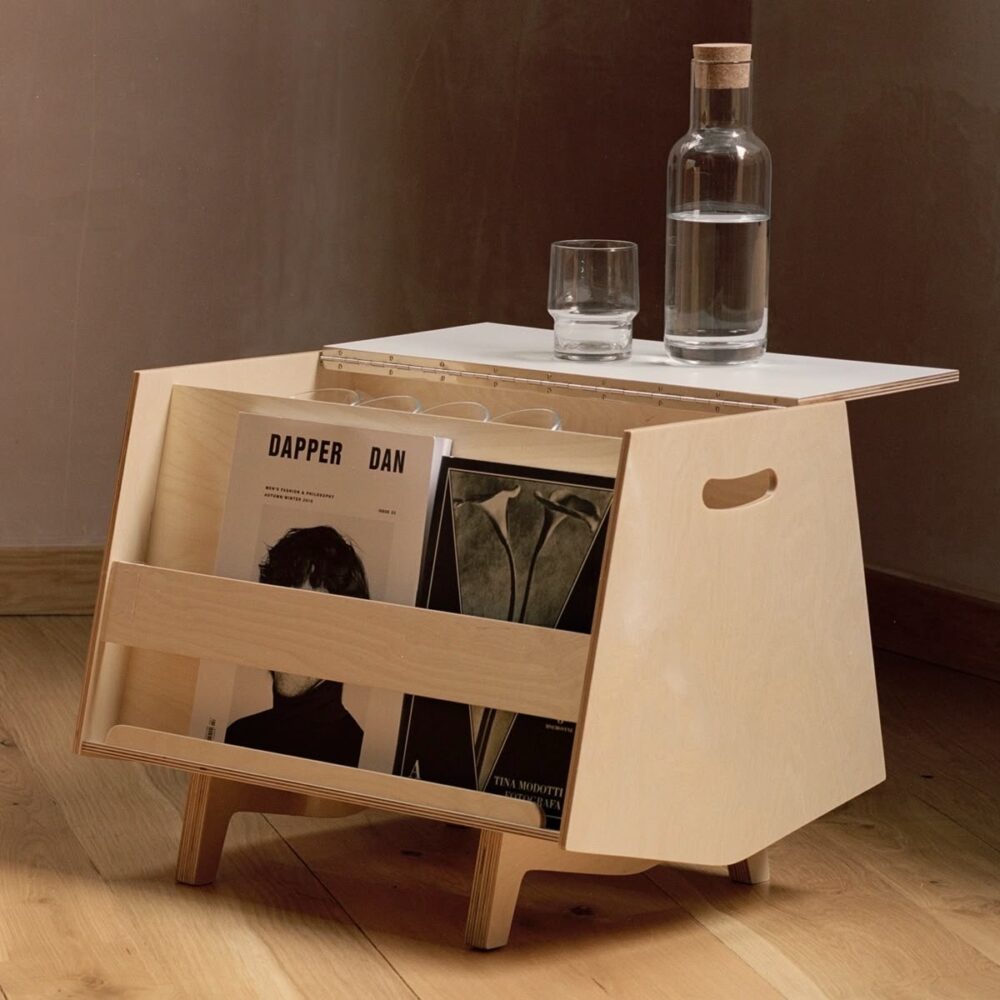
Figure 1: Flip-Top Table with Storage
I love the minimalist aesthetic of this piece as the main material is plywood. It also incorporates a nice functional aspect with storage on the interior and the lid functioning as a tabletop when opened. The front storage for magazines I see as storage and a display for “coffee table” magazines or books.
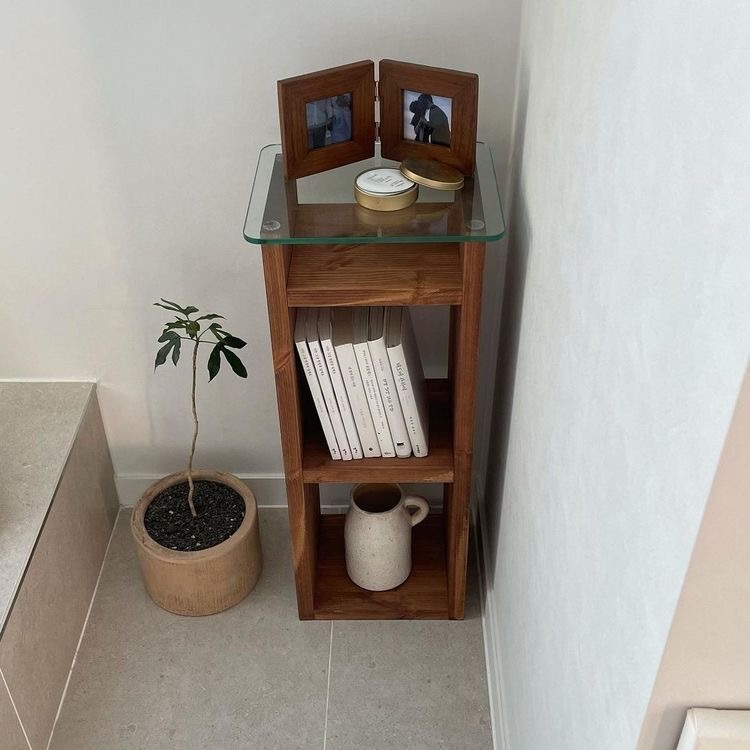
Figure 2: Accent Table with Glass Top and Shelves
I also love the simplicity of this table and the glass top that makes the items on top look like they are “floating”. This piece also has a great shade that I would love to mimic for the stain in my piece. It is a bit too simple so I would add a door for concealed storage in my own project.
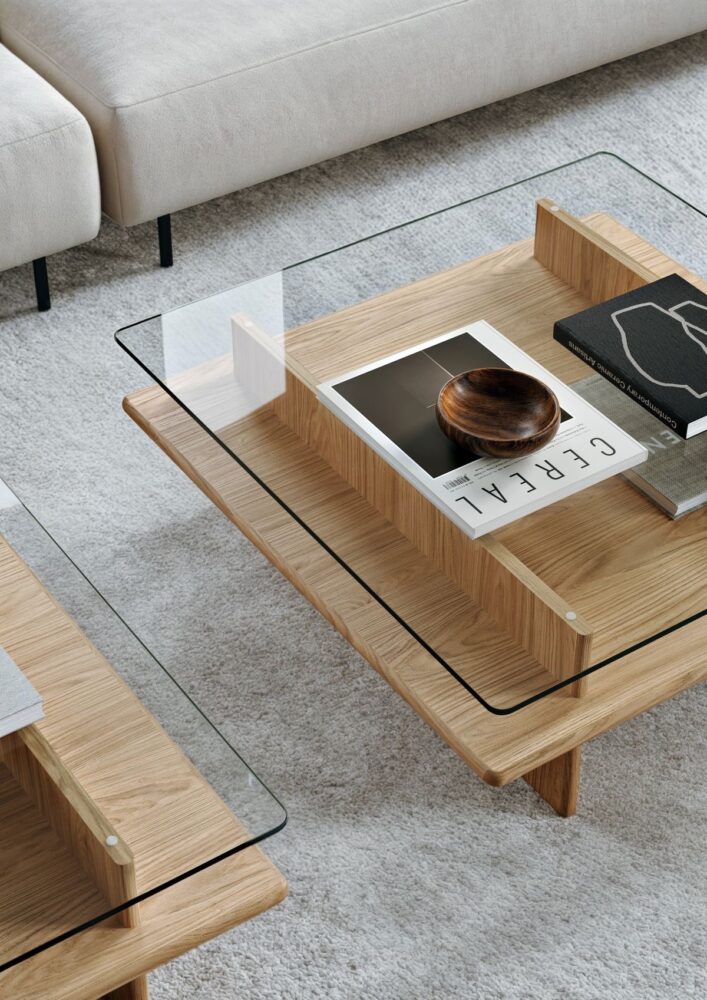
Figure 3: Coffee Table with Glass Top
This table is one of my favorite pieces I found when researching for my final project. The full glass top gives the same “floating” appearance but also allows the items on the shelf to be visible. This reduces clutter as I would be more likely to keep the shelf neat when it remains visible. I also like the idea that books and art could be displayed underneath the glass. It fully encapsulates the combination of art and furniture I would strive for in my project.
Project Specifications
For my final project, I will be making an accent table that follows my personal aesthetic which is a combination of modernism, minimalism, and MCM. I would like to use wood as the main material and give it a natural stain to keep it simple and natural, pulling from the MCM aesthetic. Ideally, I would also like to have the top surface made of glass to give it that dimension and depth shown in the inspiration pieces above. Overall, my goal is to create an accent table that is functional, visually appealing, and matches my personal aesthetic.

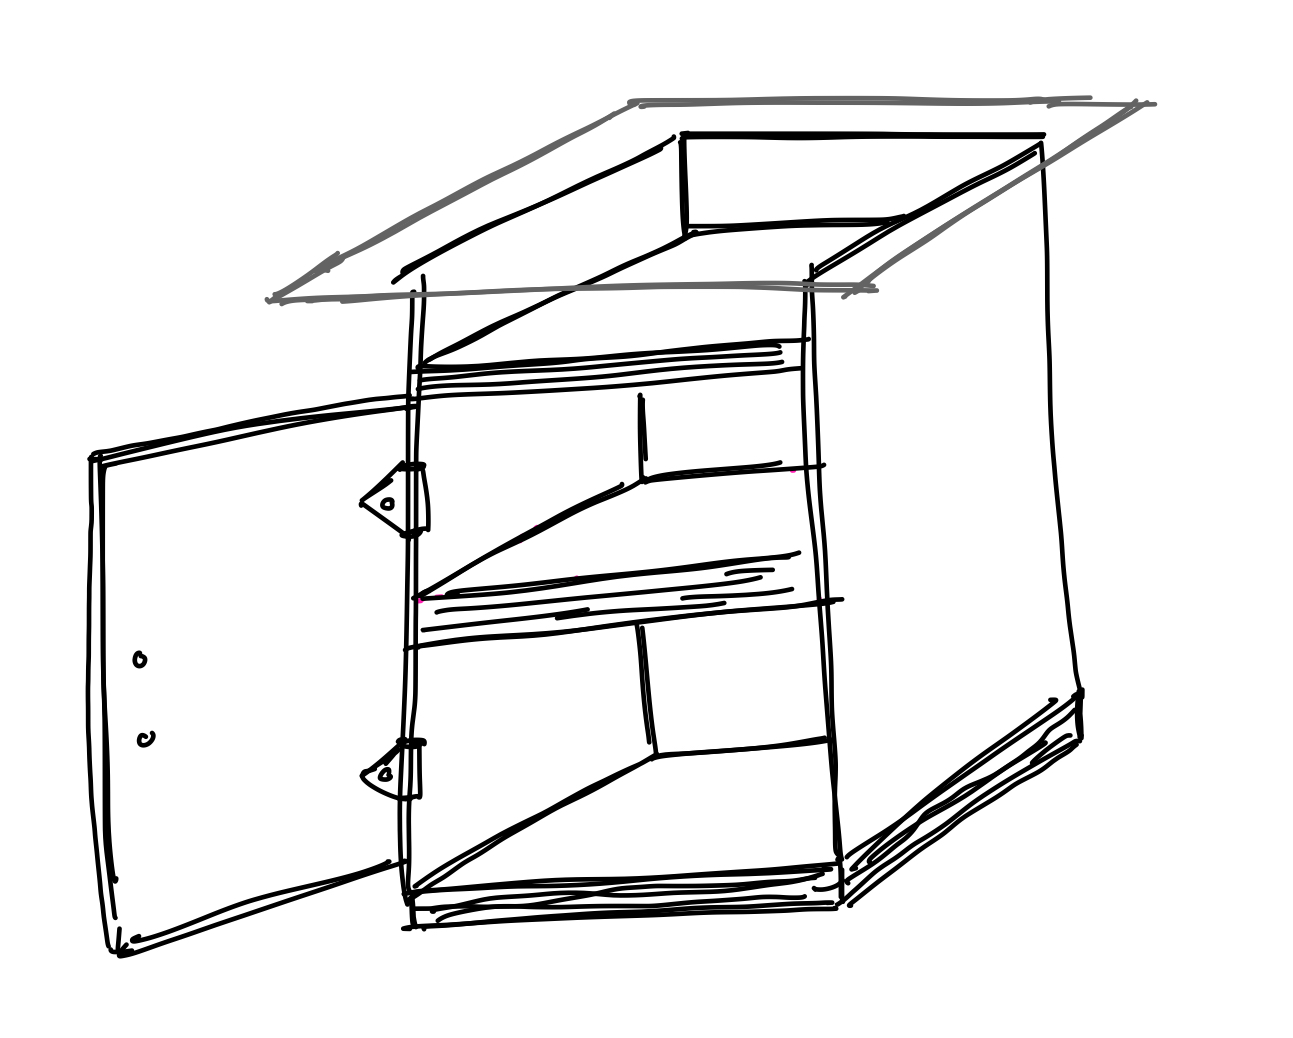
Figure 4: Side Table Sketch (Initial Ideation Stage)
In the sketch above I have shown the table as a whole. The door is shown in the open position to demonstrate that there is a shelf on the inside. The top surface functions as another shelf and the true top surface is the glass (shown in grey).
Alternative Aesthetics
The two alternative aesthetics I chose to explore were Brutalism and Futurism. My chosen aesthetic is minimalism and MCM which focuses on timeless designs, typically using natural materials like wood. Brutalism also focuses on raw materials but typically incorporates more concrete in the designs. Brutalism also frequently has very sharp, harsh lines and the designs can come off as more cold. The second aesthetic I chose was futurism which focuses on futuristic shapes and concepts. It also uses bright whites or splashes of color. The shapes are typically rounded and to me, sometimes look like abstract spaceships.
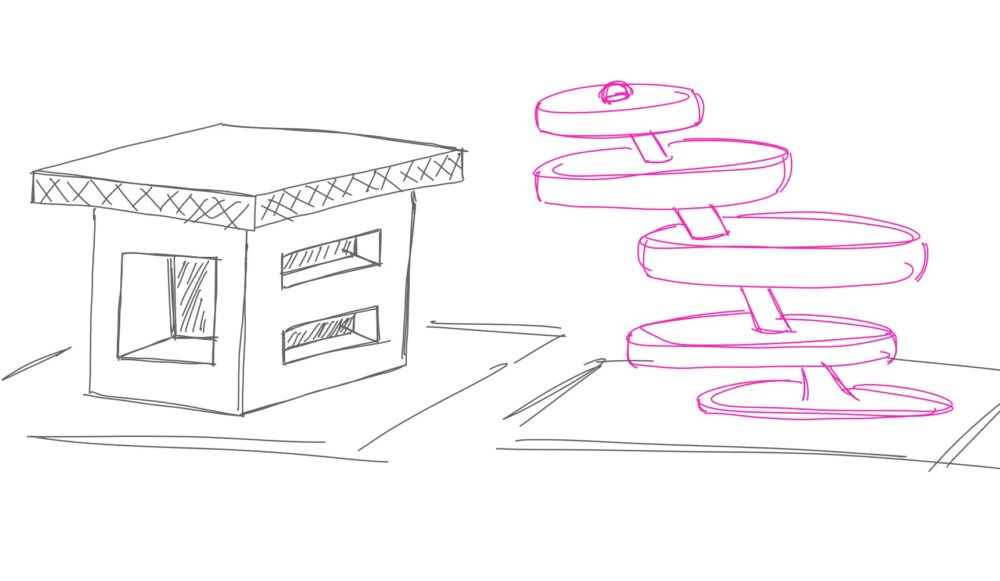
Figure 5: Alternative Aesthetic Sketches, Brutalism (left) and Futurism (right)
For my brutalist end table on the left, I imagined it would be made of a large concrete block as the base and a slab on top as the surface. It would only incorporate straight lines and one material to keep it very simple, functional, and free of frills. It would have small cutouts that could be used as shelves on the two visible faces. It would require no fasteners as the top slab would be held with just its own weight.
For the futuristic option on the first, I imagined a tiered approach for the table. It would extend in a diagonal direction to give it a floating feel making it seem “otherworldly”. I sketched it in pink but I could imagine it being any color. It would be made of a material that would allow it to be shiny, another common futurism theme. Each shelf tier would be circular and disk-shaped to give a futuristic effect. I really liked this design and I think it would make a really fun alternative final project.
Prototyping & Fabrication Progress to Date
So far I have mostly been focusing on the research and exploration portion of the project. I have looked at many similar projects for inspiration on the aesthetic, design, and fabrication process. I have planned out the overall design as seen in the sketches above. This includes the dimensions and features I would like to incorporate, including a door and a shelf on the interior and a glass top as the main surface. This week I have been looking at materials and will be picking up wood on Friday. I will be using birch plywood that is 3/4″ thick, it will be $70 for a full sheet. I will likely only need one sheet, but I am making a cut list before picking up the wood to double-check. I am still in the process of sourcing glass for the top. I ordered a biscuit joiner as that was one key tool I did not already have at home. I will be getting a door handle in the next few weeks as well as a stain for the piece.
Project Timeline
March 3rd to March 7th
- Draw out plans
- Research materials and vendors
- Plan a tentative schedule with possible roadblocks
March 10th to 14th – Current Week
- Design Preview Presentations (Week 1)
- Finalize design and plans
- Begin collecting materials
- Possible roadblock: Picking up a full sheet of plywood is hard with a small car, I will need to coordinate the timing
March 17th to March 21st
- Purchase as many materials as possible
- Try to finalize all major materials (other than hardware/stain)
- Begin cutting pieces and sanding
- It will take time to measure and mark all the materials to ensure no pieces need to be recut, wasting material
March 24th to March 28th
- Studying for the FE Exam
- No anticipated time for work
- If I do make progress that would put me ahead of schedule
- If behind schedule, finish any last cutting that needs to be done
- Finish selecting glass and hardware and order/pickup
March 31st to April 4th
- Taking the FE Exam
- Not much anticipated time for work
- Begin assembly
April 7th to April 11th
- Continue and finish assembly of the main frame and drawers
- Stain and varnish after assembly (base and drawers separately)
- Likely one full day for it to set and dry
- Begin adding hardware, drawers, and smaller details
April 14th to April 18th
- Final touches
- Make sure drawers are working smoothly
- Attach and test glass top
- Add feet (if planning to use)
April 21st to April 25rd
- Fabrication must be complete by April 23rd
- Prepare for Presentation
- Pod presentations in class from April 25th to April 30th
April 28th to May 2nd
- Documentation and Report Writing
- Prepare for the Design Expo
May 7th (1:30 pm – 4 pm)
- Design Expo in the Idea Forge
Fabrication Process
I will be making the piece almost entirely of wood so the main skill used will be woodworking. I have very minimal experience in woodworking so this project is out of my comfort zone, but I am excited to learn a new skill. My dad used to build furniture so he will be available if I have questions or need any help. Having him as a resource will be very helpful throughout this project. I also have most of the tools I will need already which will help keep a reasonable budget.
Materials:
- 3/4″ Birch Plywood
- Biscuit Joiner and Biscuits (used to connect two pieces of wood without hardware)
- Door Hinge
- Door Handle
- Glass Top
Fabrication Steps:
- Acquiring materials (wood, hardware, and tools I do not have)
- Creating a cut list (plan out how the material will be used, ensure I have enough and can minimize waste)
- Measuring and cutting pieces (sides, bottom, door, and shelf within the cabinet)
- LOTS of sanding and finishing each piece
- Assembly of the main frame
- Attach shelf and door
- Stain the entire piece
- Attach the hardware and make the final touches
- Place the glass on top (heavy and will rest on the top of the table)
- Any necessary rework can be done at the end
Sources & Images
[1] https://pin.it/2Pn9ZRv3A
[2] https://pin.it/1DSegQTaw
[3] https://pin.it/4zHWEp8tb
[4] Personal Sketch [5] Personal Sketch
2 Comments. Leave new
I appreciate your handle on the aesthetics which you relate to and how they will incorporate into the project. I think combining functional furniture with art is a great expression of yourself and you seem to have a great plan to execute. I like your use of glass to add depth, I wonder if you want to still be able to see what is stored inside somehow when the front door is closed?
Hi Keith, thanks for the comment and feedback! My goal is to just have the top shelf visible through the glass. The other two shelves will not be visible and can be used as normal storage.