
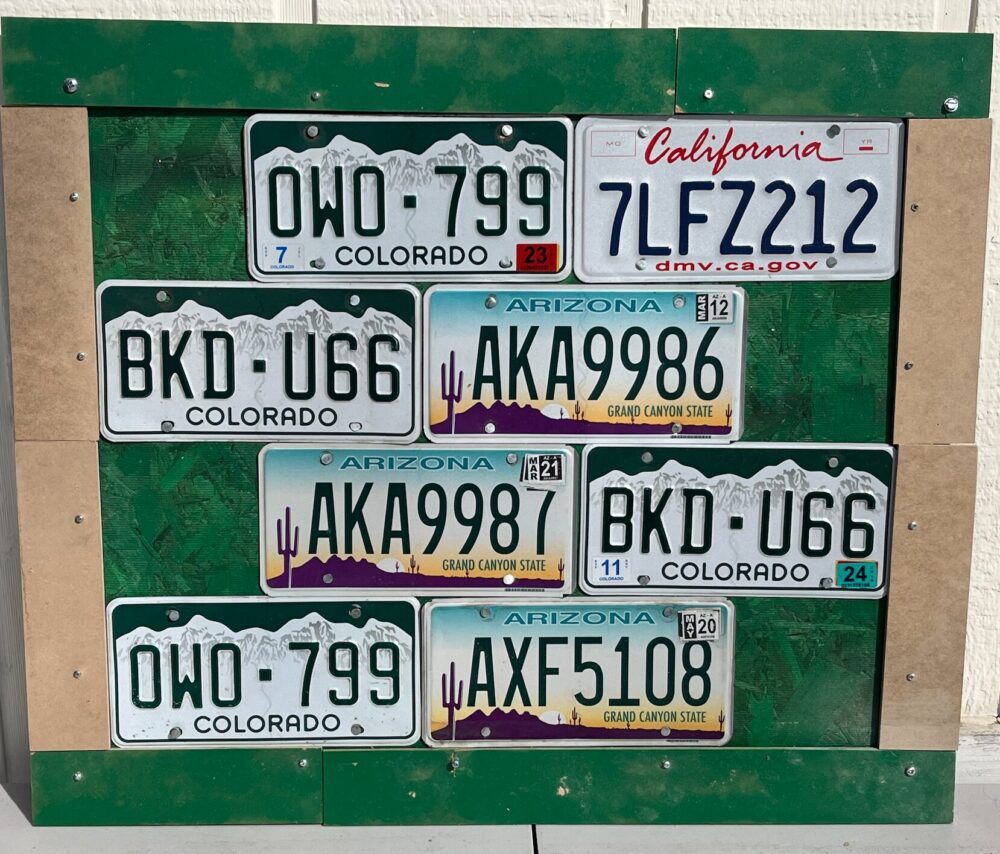
I’ve struggled a lot to come up with an idea for this project compared to the previous project. I think the upcycle restriction of that project helped me narrow down my ideas significantly to something easy and realistic, so when I saw the license plates that had been sitting in my room for years I instantly knew I wanted to create an elevated way to display them.
I really like the way that my previous project turned out, so initially I wanted to do something in a similar vein where I take something I already own and create something new out of it that’s nicer and more displayable wherever I live. However, the idea of elevating something old felt way too similar to the previous project, so I didn’t want to make the old materials the focus of my design. I still like the idea of creating a better way to display things that I own, even if I don’t incorporate those things into the design of the project like with the license plate frame, so I decided to pivot to create something that’s designed to display all sorts of things, not just something specific.
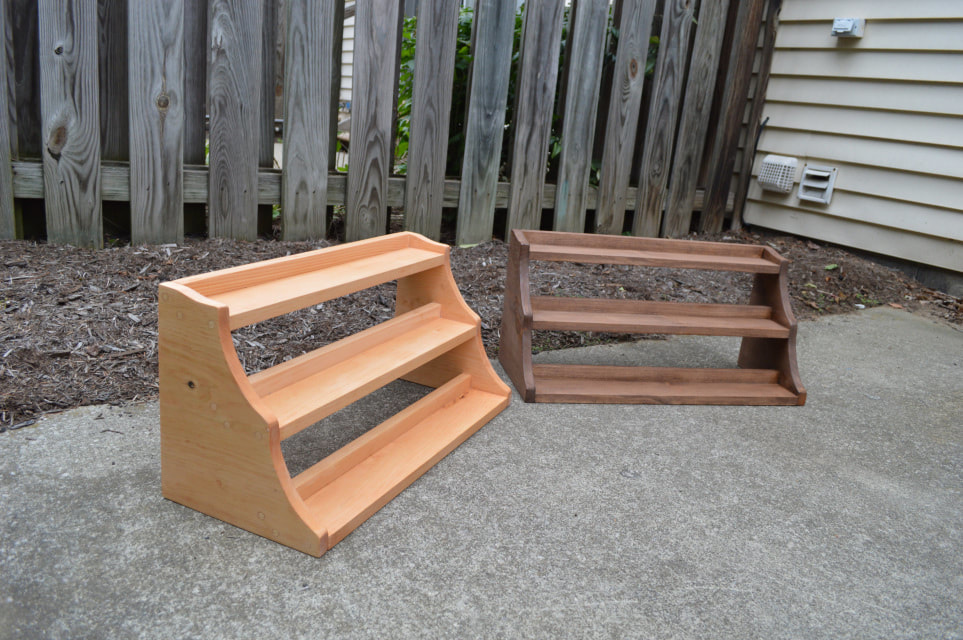
Something that I’ve always been a fan of are stair case shaped display stands that can be used to show off rows upon rows of things without obscuring the items in the back. The use case I’m most familiar with for this design are Lego minifigures, but it could be used to display anything small enough to fit on the shelves. Below is a design from Tricked Out Bricks that uses acrylic sheets to display up to 80 different lego characters in a way that allows each minifigure to be seen and appreciated. While I love the shape and clean look of the design, the large footprint makes it difficult to use without plenty of space. Having the display only looks so good when its surrounded by other various clutter, so making something that fits neatly on a desk or bookshelf is important for me,

The only requirement of this project is that there is an interactive or dynamic element. While the user has to decide what they want to display and how to arrange it upon the stand, I decided that’s just the function of the project so I wanted to add something else to fill this requirement. With the Tricked Out Bricks design, there’s a lot of empty space underneath the display stand that I feel could be put to use as a storage compartment. With a solid back and a sloped shape, a drawer could be inserted into the stand to allow the user to store any extra items that they might want to keep in rotation. With the see-through acrylic however, the contents of the drawer would be a bit too visible, so I’m thinking about changing the material to a light wood or more solid acrylic all around.

A big inspiration for the idea for this project, besides the function behind displaying all the random things I’ve collected over the years, comes from my love of Lego growing up. While I’m not necessarily making this project to display Lego minifigures, I’ve been building Legos and watching videos made my Lego content creators for a large portion of my life, and its from those videos where I got the idea to recreate the stair shaped display case which so many creators use. As for my personal aesthetic, I love rustic, woodsy, cabincore decor, since it always reminds me of the mountain town I grew up in, so I want to use wood as the primary material as well as lots of natural colors like brown, tan, blue, and green to make sure it matches my other decor. I think laser cutting the wood would give me the nice natural shapes I need with relative precision, but coming up with a way to make sure everything fits together is definitely the next step in the design process.
References:
(FI) – Inked Woodworking – https://www.inkedwoodworking.com/store/p80/Tiered_Craft_Display_Stand.html#/
(1) – Tricked Out Bricks – https://trickedoutbricks.com/product/80-figure-podium-stand-for-lego-minifigures/
(2) – Tricked Out Bricks – ” “
6 Comments. Leave new
Hi Max,
I really like your main project! I’m an admire of wood and the craft of it. There’s so much beauty to find in the grains and a lot of technical hand work that goes into it. Mark is fairly knowledgeable with wood at the ITLL machine shop and I’ve heard Josh is a wood fanatic if you need any pointers. I’m curious to see what type of finish you’ll go with and the final product!
That’s a good idea, I haven’t used the resources available at the ITLL too much but talking to those guys could help a lot with smoothing out some of the finer details of this project. I’d love a glossy finish to give things a nice clean look but I also don’t want to diminish the functionality of the stand or the more rustic aesthetic that I’m trying to achieve.
Hello Max,
Your original upcycling project with license plates is very cool. I am also having a hard time narrowing down a project concept. One way you could secure the different wooden pieces is with glue. You could also cut the wood with slots to secure the different pieces. Is the wood, is there a specific way you will incorporate, besides the wood, your aesthetic?
I think the thing that helped the most when choosing an idea for me was coming up with a thing I thought could be useful and that I actually wanted to create, and then conforming my personal aesthetic to that item. You make a good point though, wood alone doesn’t really make something cabin core, so I think the color, finish, and any decorative flourishes I add really need to help cultivate that vibe within my project.
I really appreciate how you’ve connected your personal experiences and interests to this project. Your love for Lego and the rustic, woodsy aesthetic shines through, and it’s clear that this project is deeply personal and meaningful to you. It’s great that you’re thinking about how to make the design functional and aesthetically pleasing, especially with the use of natural materials like wood and earthy colors. You mentioned wanting to use laser-cut wood for precision and natural shapes. Have you considered how you might join the pieces together? For example, would you use traditional woodworking techniques like dovetail joints, or are you thinking of incorporating a more modern approach like hidden fasteners? Additionally, how might you ensure the drawer slides smoothly while maintaining the rustic aesthetic?
While hidden fasteners and joints to help keep the wood together are really good ideas, I’m worried about my own ability to implement those features smoothly. I think conversations with the shop experts in either the ITLL or IF would be really beneficial in learning how difficult either of those strategies could be to use, otherwise I think wood glue will turn out alright. As for the drawer I was planning on just having a slightly looser fit with wooden guiding elements to make sure the drawer doesn’t move around on its own.