
My upcycling project is centered around the “Modern Rustic Charm” aesthetic, which is characterized by the combination of rustic materials and warm tones with the addition of some modern design elements. I view modern rustic charm as a more cozy, simplistic version of the farmhouse aesthetic, as it focuses more on the rustic materials and warm lighting with hints of modernity, instead of highlighting the clean and modern aspects.
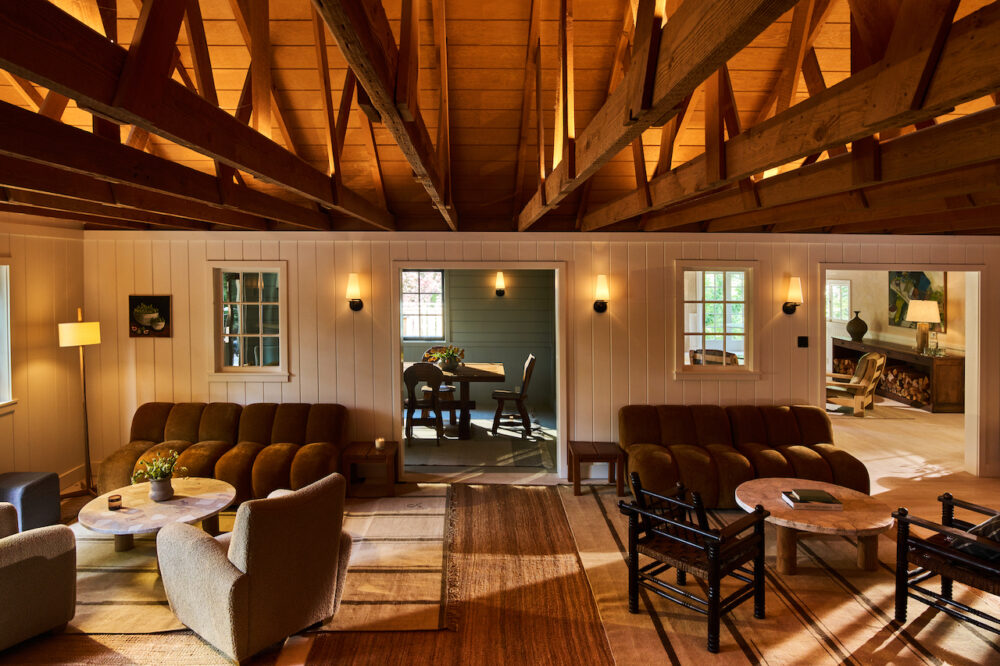
[1] A room with the modern rustic charm Aesthetic
The early stages of the design process for this project were determined almost entirely by the materials I could source. This helped to give me direction when trying to narrow down the multitude of directions I could go with the project. Because I knew I had barnwood siding that I had collected from my great grandfather’s dairy farm in upstate NY, I knew that I could make something that adhered to the rustic aesthetic. I chose to pivot this to my chosen aesthetic after a classmate (James Overburg) highlighted modern rustic charm in his first blog post. I felt that the modern rustic charm aesthetic wouldn’t clash too much with my personal decorating aesthetic, as most of my furniture is either Scandinavian minimalist or MCM.
After the aesthetic was chosen, it was a fairly easy decision for me to make a ski rack. I’m very passionate about skiing and ski gear, and I have wanted to display the graphics on my active pairs of skis for a while now. The inspiration for my design came mostly from the GoodRacks ski mounts. Unlike most ski racks, these use the sidecut of the ski to lock everything in place, allowing for the topsheet graphics of the skis to be showcased. While I could have 3D printed a clone of the GoodRacks design, I wanted something that would add to the aesthetic of my room, even when the skis weren’t present.
[2] The GoodRacks ski rack

[3] The GrassRacks ski rack
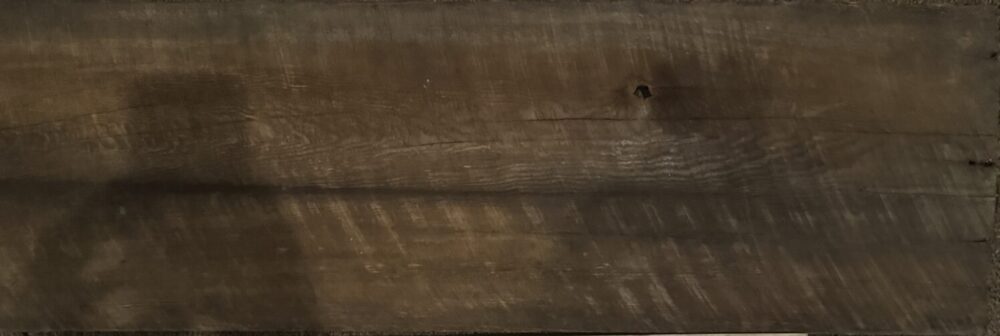
The original idea was to use a slab of Barnwood with cork padded pegs to grab the skis by their sidecut. This was inspired by the GrassRacks ski mount design, and would allow me to mount the skis without the need for positioning the pegs individually on the wall. This way I could do less damage to my wall, and have something nice to look at when the skis weren’t mounted. I also planned on skip-planing the wood to lighten the color palette whilst highlighting the grain pattern and saw marks made from the sawmill it was cut on.
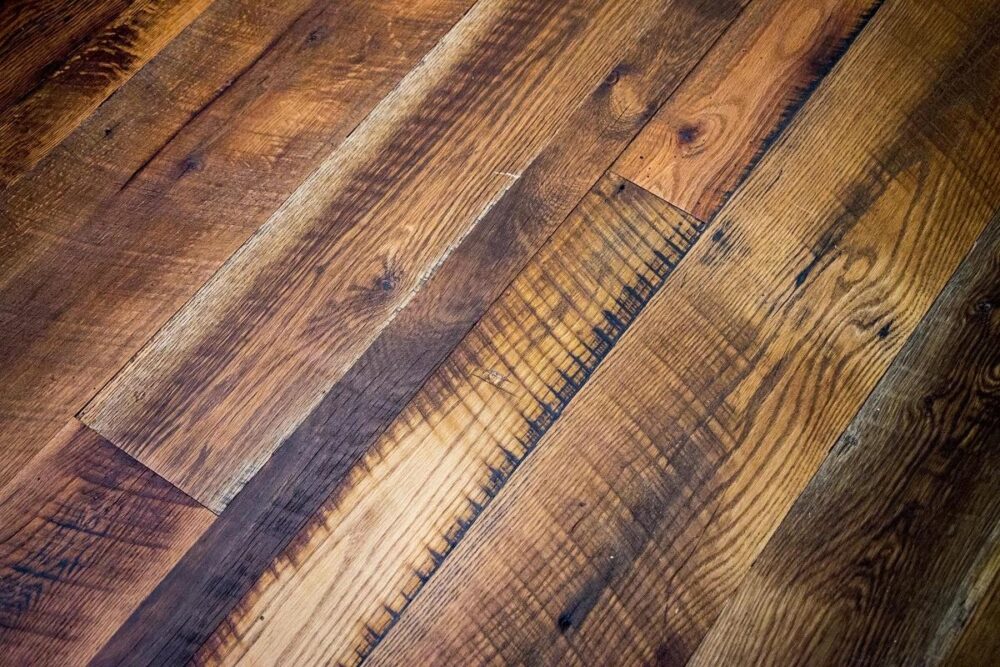
[4] Skip-Planed barnwood flooring
The first step of this process was selecting the wood I was going to use for the project. All of the recycled barn wood I had collected from my great grandfather’s barn is non-structural, and made of ¾” thick Douglas Fir. Because of how soft and thin these boards are, full depth cracks and heavy weather damage was very common, and the saw marks were not as deep as I had initially anticipated. The low strength of the wood also encouraged me to add some structural backing to ensure that whatever load bearing fasteners I used wouldn’t crack or damage the wood. I chose a piece of barnwood with clear saw marks, as they are a unique relic that’s really only found in reclaimed wood. For the backing material, I found a piece of scrap ¾” thick pine in my garage.
The slab of barnwood chosen for the project
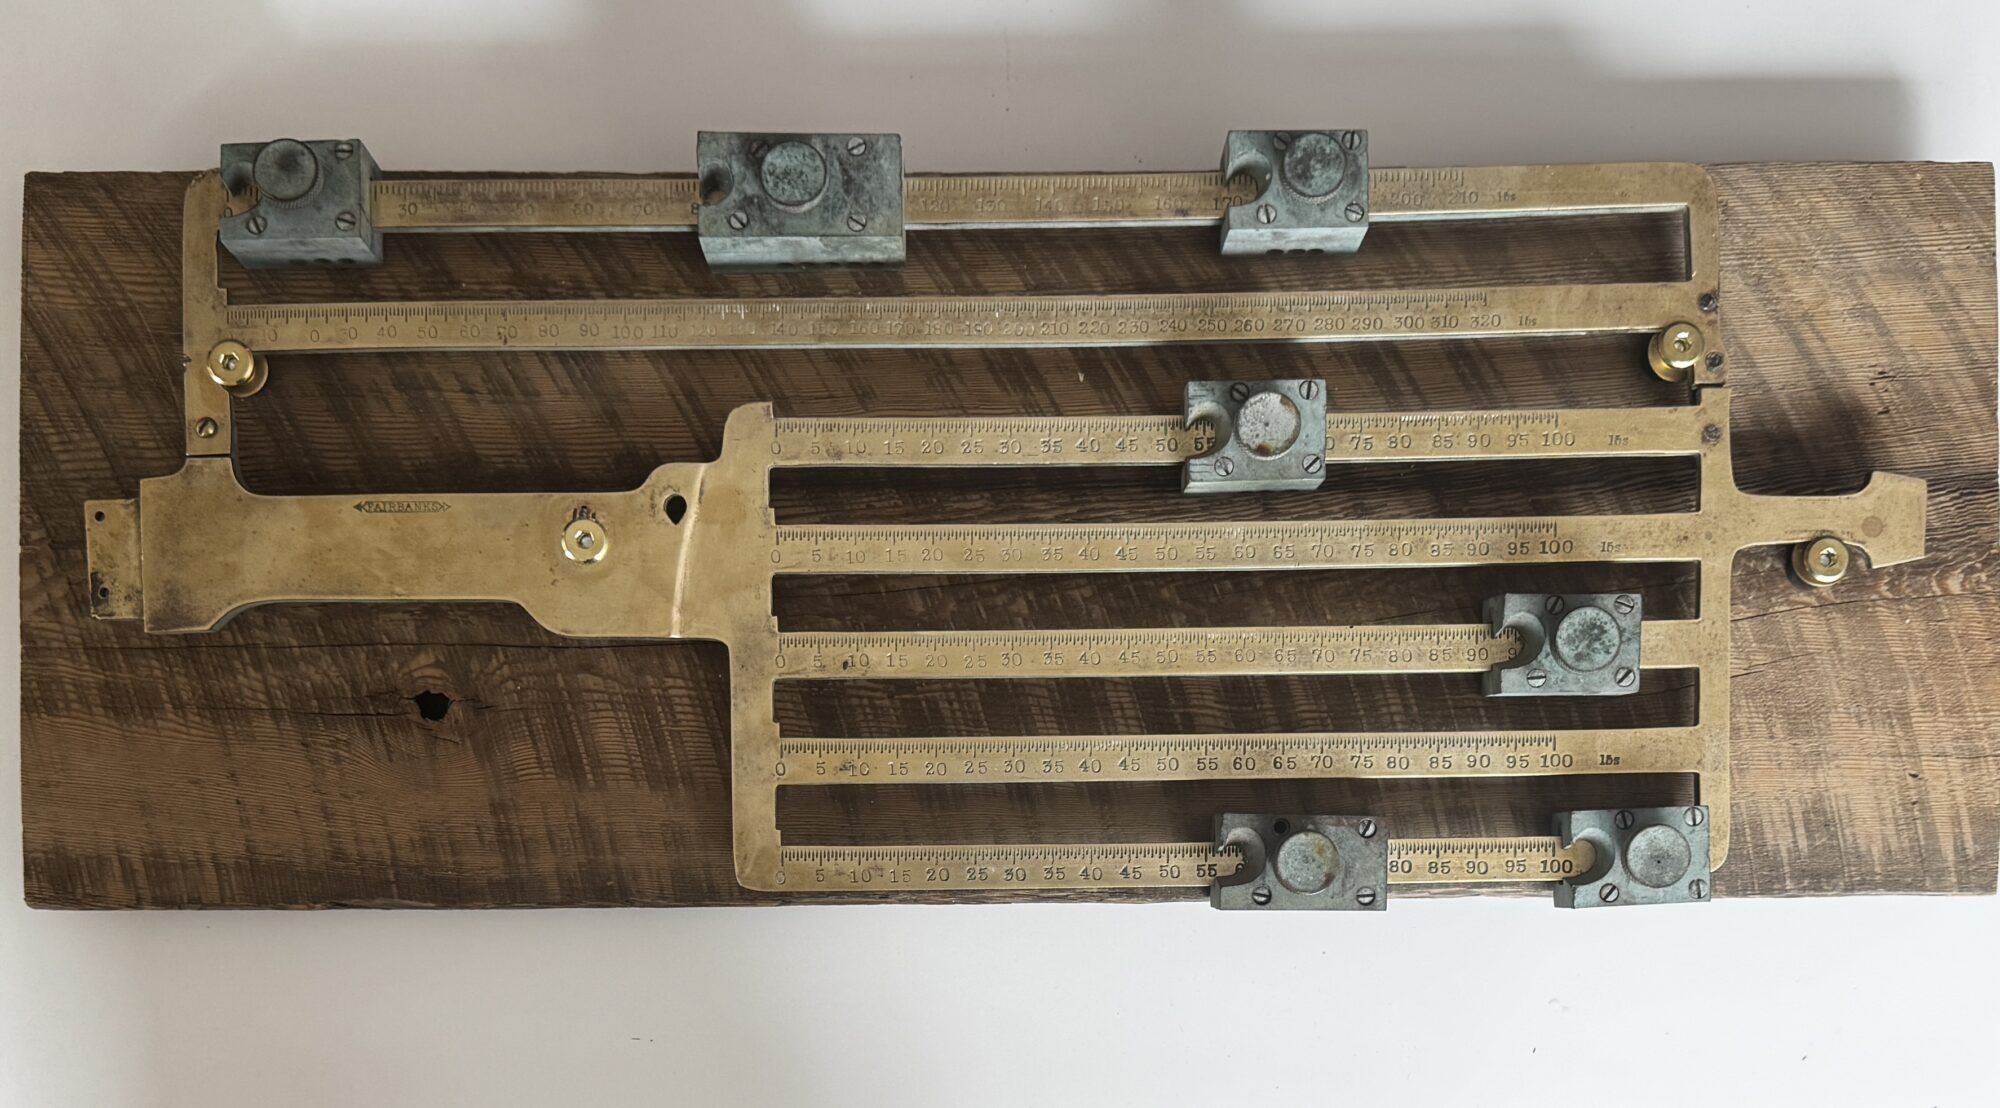
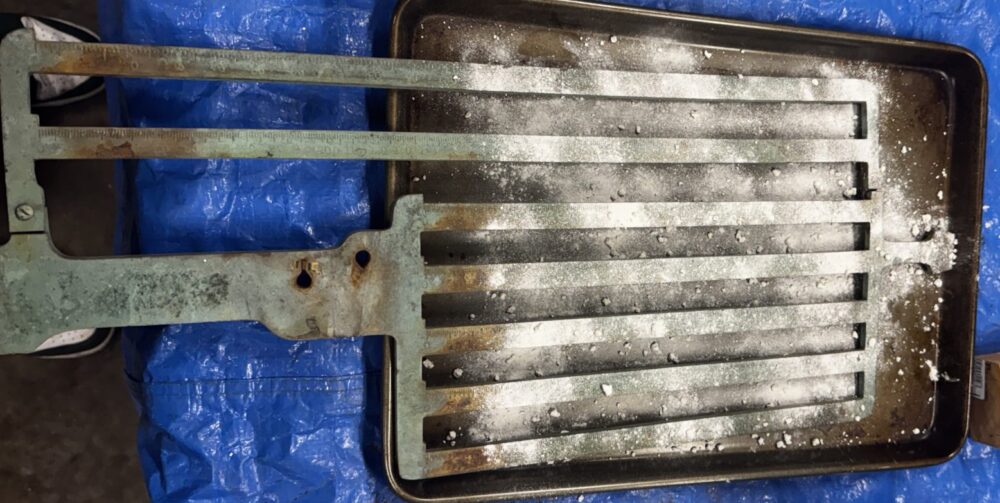
While I was picking the wood, I happened across a 7-slider scale head that we had found in my great grandfather’s barn. This was attached to a pedestal scale, and used in the early 20th century to weigh milk. The head is made of brass with a high copper content, which has developed a thick green patina. All of the cast iron components were incredibly rusted. I decided to refinish the scale and use it instead of the pegs. This would allow me to adjust the width of the ski slots for different pairs, and have extra space for hanging gloves, poles, or a jacket.
 The scale in it’s initial form
The scale was first disassembled. All of the sliders could be removed using a flathead screwdriver, and there was little resistance due to corrosion, as the screws and threads were made of brass. The two pins were then punched out using a pin punch and a hammer. The riveted iron counterbalance was removed by grinding the rivet heads off and punching them through with a pin punch. The top section on the right side of the scale had broken off at some point, and had been repaired with a piece of steel and two rivets. While rusted, we decided to leave this splice intact.

The disassembled scale head
The brass of the scale head was refinished using a combination of barkeeper’s friend, rubbing compound, scotchbrite pads, and an orbital sander. Barkeeper’s friend and scotch brite pads were first used to remove the heavy green patina, and an orbital sander and rubbing compound were used to polish the brass from bronze to a slightly shiny gold color. The sliders were kept with their patina, just to add some contrast to the project.
Application of Barkeeper’s Friend
The original plan was to skip plane the wood to highlight the saw marks. However, fir is soft, and the sawmarks were very shallow, so I decided to lightly sand the top surfaces of the wood with a belt and orbital sander instead. This achieved the aesthetic I was looking for, highlighting both the grain pattern and the sawmarks.
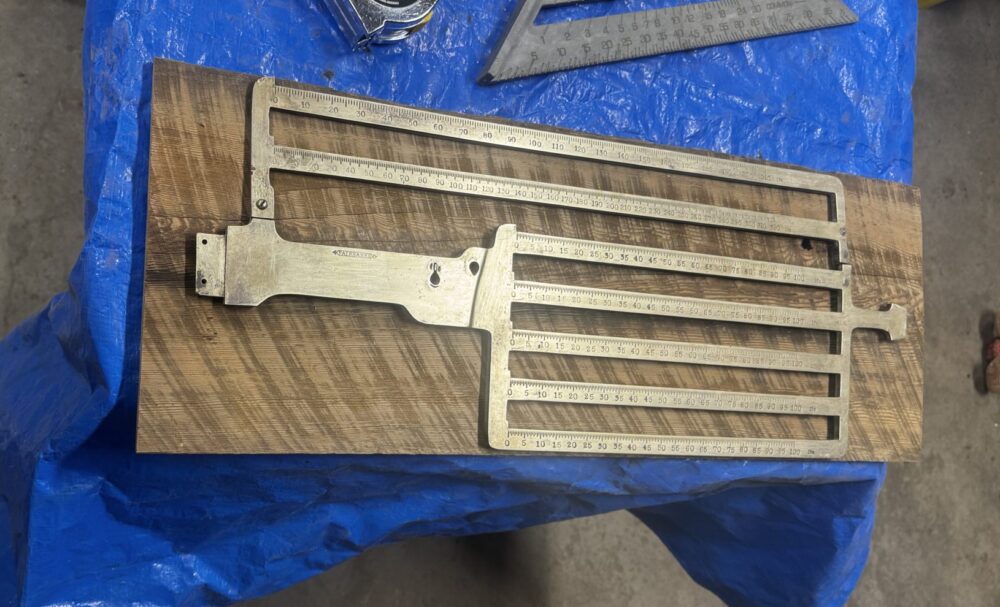
The refinished scale head and barn wood
The french cleat was cut into the backing board, with leafs on each side to help support where the fir had cracks. These leafs also allowed for more flexibility for positioning the hardware to mount the scale to the front of the artifact. The back of the cleat was sanded down using the orbital sander to help protect the interface with the wall.
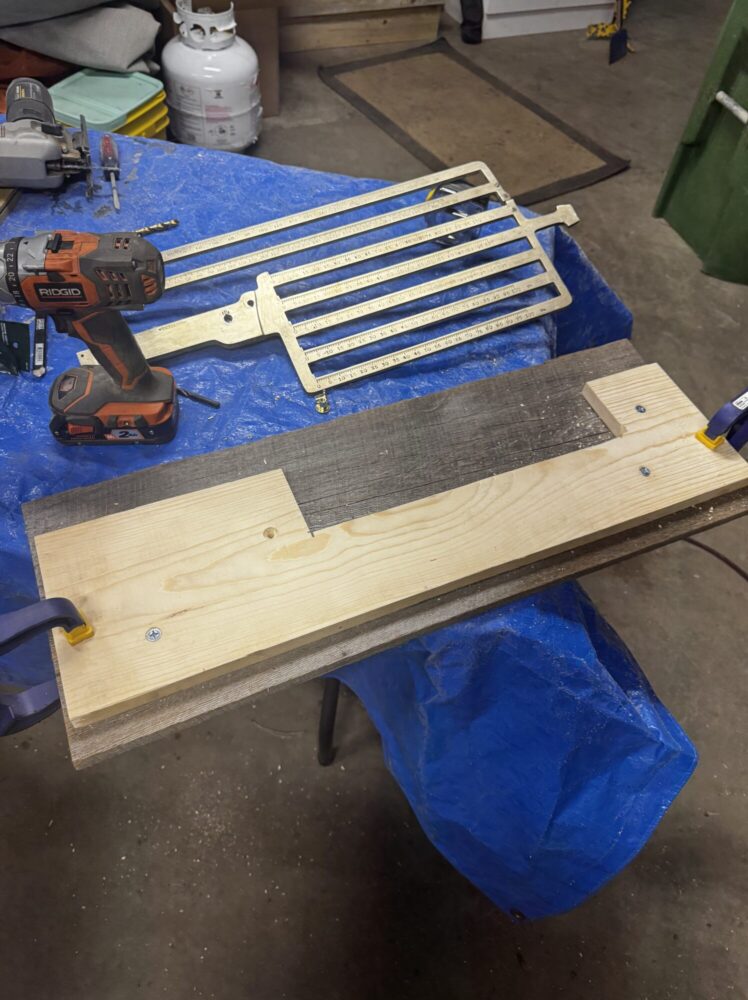
The French cleat clamped and countersunk
The scale was fastened to the front of the barnwood board using countersunk bolts attached to brass flange nuts. These nuts were sanded using the same rubbing compound/scotch brite combo I used to polish the scale. A spacer made of recycled fuel line and a brass washer were placed underneath the scale to provide space for the sliders to move.
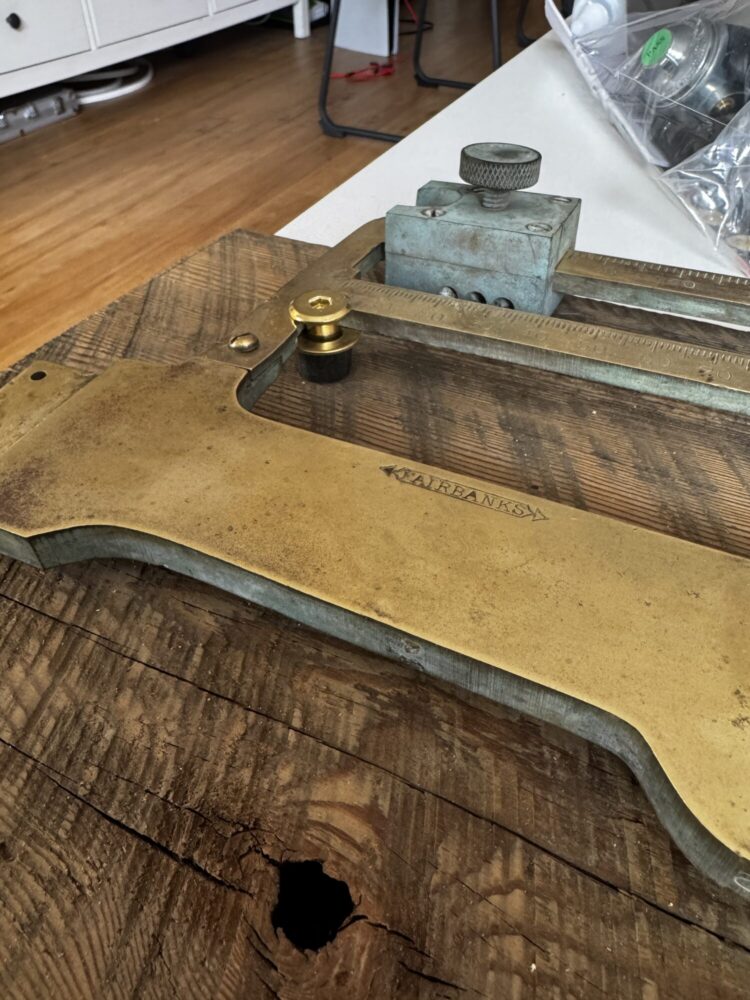
The recycled standoffs used to mount the scale

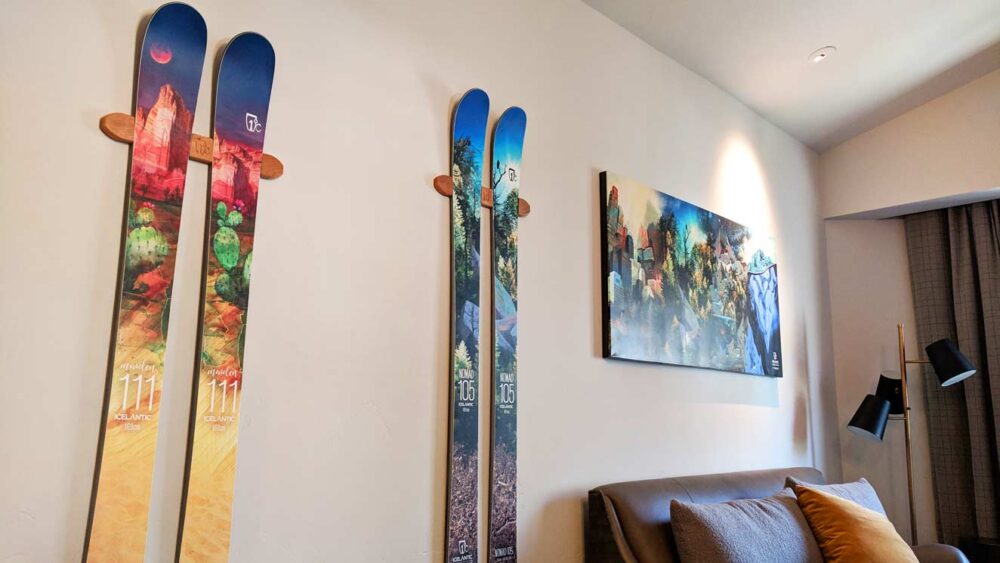
The finished artifact
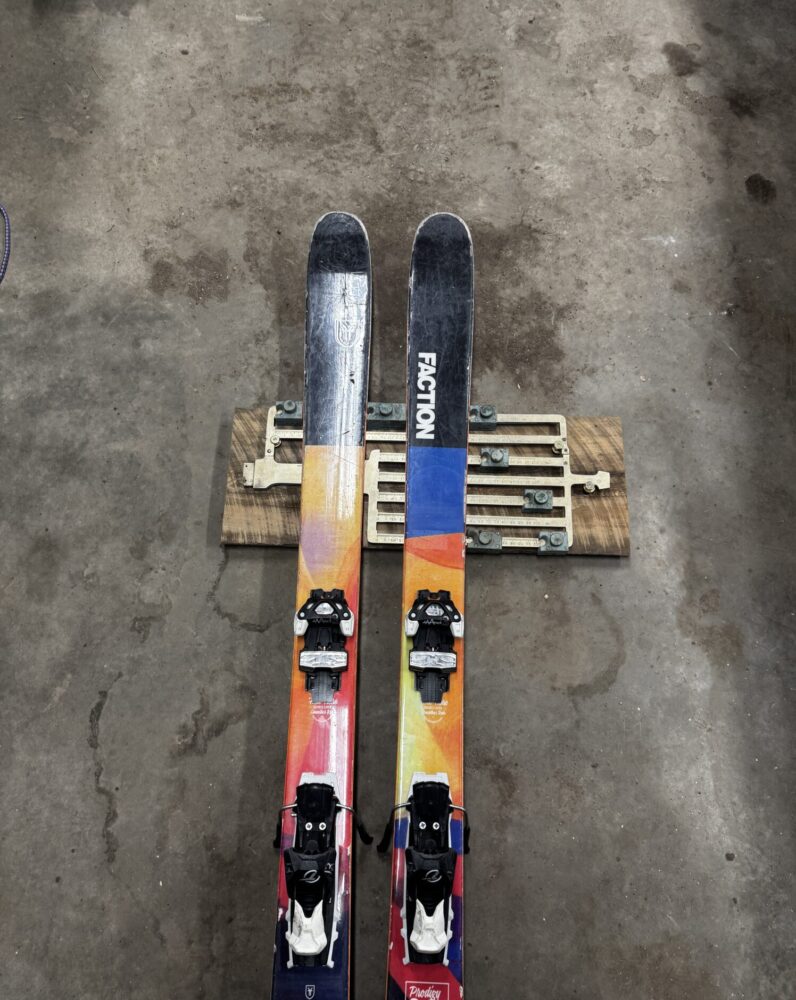
The finished artifact with 2019 Faction Prodigy 3.0 skis
I initially planned on adding 3D printed spacers in between the skis and the sliders to help protect and secure them, but after putting the rack in use, I decided it wasn’t necessary. The soft brass doesn’t marr the steel edges at all, and the sliders allow me to really crank down on the sidecut to ensure a secure fit. Additionally, most of my skis have a very large sidecut radius, which helps engage more of the slider’s face and prevent the skis from falling forward out of the mount.
I believe the artifact adheres well to the chosen aesthetic, especially when featuring skis with a modern/abstract topsheet design. The refinished barn wood background and patina on the sliders really help to make the ski rack rustic, while the shine of the restored scale head and the aesthetic of the skis add modern elements to contrast it. Additionally, the overall design of the ski rack is extremely simple, which helps to add to the modernity of it.
Overall, I’m very pleased with how this artifact turned out. It allows me to showcase any pair of skis while drying my gloves and jacket, and features the Fairbanks scale head and the barnwood as an ode to my great grandfather. The overall aesthetic of the design meshes very well with the other furniture and decorations in my room, and I will have it mounted in my house for years to come.
Sources:
[1] https://design-milk.com/dawn-ranch-blends-rustic-charm-and-contemporary-elegance/
[2] https://www.goodracks.com/explore/gallery.php
[3] https://www.grassracks.com/collections/ski-racks/products/flush-ski-wall-rack
[4] https://wideplankflooring.com/blog/rustic-charm-how-interior-design-can-completely-transform-a-space/
5 Comments. Leave new
Wow, I love how you matched this beautiful rustic cabin look into your ski display. If I had a cabin, this would be a wonderful decoration to fit in. This mix of materials, along with the weathered recycled material, seems to nail the look of modern rustic charm. I think it is wonderful to use the wood from your grandfather’s barn to add sentimental value!
Your upcycled ski rack turned out great! The way you incorporated barnwood from your great-grandfather’s farm adds such a meaningful touch, making it more than just a functional piece. I also like how you blended modern and rustic elements, especially with the refinished scale head—it adds a really unique character to the final design. Was there a particular part of the restoration process that was the most challenging?
Hi Danny,
Thanks for your comment!
Scrubbing off the patina/barkeepers friend from the scalehead itself was the hardest part of the restoration for me – it took a few hours and a ton of elbow grease to get the finish back to what I wanted it to look like.
Hey Jacob,
I liked how your project blend rustic charm with modern design elements, creating an aesthetic that feels both nostalgic and sleek. The way you repurposed your great grandfather’s barnwood and refinished the scale head really stands out as a strength, adding depth and history to the design. Your attention to detail throughout the restoration process is pretty cool. What was the most challenging part of restoring the scale head?
Hi Luke,
Thanks for the comment!
I think the hardest part of the restoration process was probably scrubbing off all of the oxidation, especially without marking up the brass itself.