
Upcycling Plan: Final Method & Materials Gathered
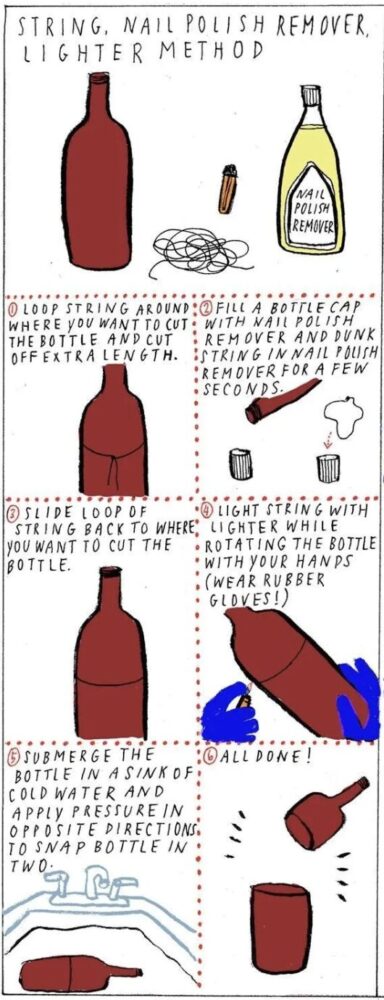
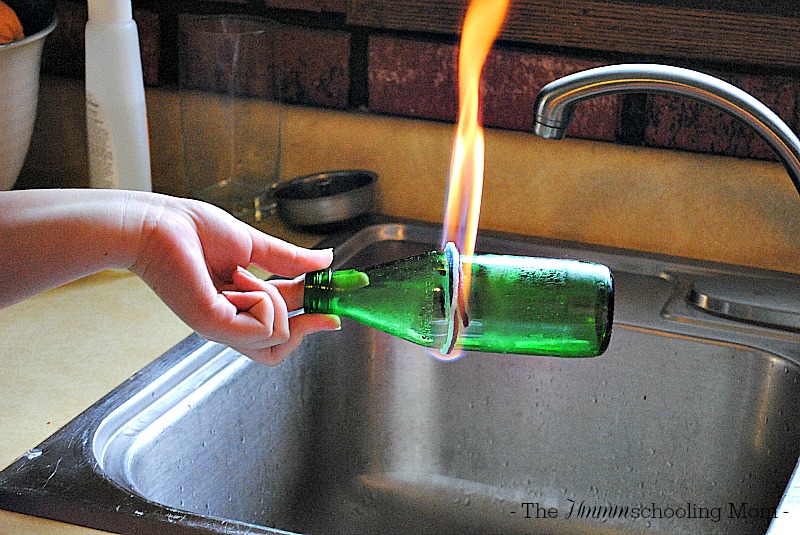
After researching different ways to cut glass bottles for my upcycling project, I have decided on a method that seems both accessible and effective. I explored options like using a glass cutter and hot water method or even a wet saw for precision, but I wanted something that didn’t require special tools or heavy equipment. After careful consideration, I have chosen to use the string and fire method to turn bottles into cups and vases.The visual demonstrating the method was made by Yumi Sakugawa.
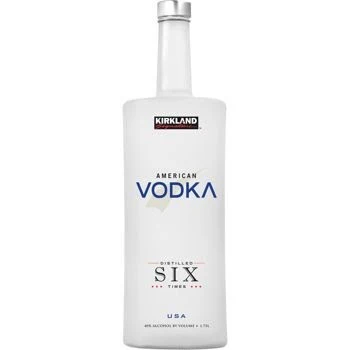
Now that I’ve finalized the approach, I have also gathered the materials I will be working with. I selected a Hennessy bottle, which has a distinct, rounded shape that should make a great tumbler or decorative vase. A Grey Goose bottle will also be part of the project since its tall and elegant design is well suited for a drinking glass or flower vase. Lastly, I will be using a large Kirkland Vodka bottle, which I think will work well as a statement vase or centerpiece. Each bottle has a unique design, and I hope they will result in some interesting final pieces.


Why I Chose the String and Fire Method
Through my research, I found that the string and fire method is one of the easiest ways to cut glass bottles without the need for power tools. It works by heating a concentrated area of the glass with a burning string, then rapidly cooling it in ice water, causing a clean break. This method appealed to me because it requires only basic household materials, can be done without expensive tools, and offers a clean, controlled break with some practice.
My Planned Step-by-Step Process
1. Wrap a cotton string around the bottle where I want the cut and tie it tightly, ensuring it is secure and evenly placed.
2. Soak the string in acetone or rubbing alcohol, making sure it is fully saturated so it burns evenly.
3. Light the string on fire and slowly rotate the bottle so the heat is distributed consistently along the cutting line.
4. Immediately dunk the bottle into a pot of ice-cold water after the flame dies out. The sudden temperature change should cause the glass to crack along the heated line.
5. Sand the edges smooth using wet sandpaper, starting with 100 grit and working up to 600 grit for a polished, safe-to-use edge.
Anticipated Challenges and Adjustments
While this method is straightforward, I know there may be some trial and error involved. Based on my research, common challenges include uneven breaks, jagged edges, or the bottle not cracking at all. To improve my results, I plan to experiment with different string types to see which burns most evenly, adjust the fuel soaking time to ensure the string is fully saturated, and vary the cold water temperature to see if adding more ice improves the break quality. Sanding will also be an important step. While I plan to start with wet sandpaper, I may need to resort to other strategies depending on how clean of a cut I get with this method.
Next Steps
With my method finalized and my materials gathered, I am ready to start the cutting process. I expect my first few attempts may not be perfect, but I’m excited to refine the technique and see what works best. I have gathered a few extra bottles to experiment with so hopefully by the time I complete the full process I will have mastered the craft. Once I have some finished pieces, I’ll evaluate whether I want to add any decorative elements like etching or paint.
Featured Image: https://thehmmmschoolingmom.com/how-to-cut-glass-with-yarn/
2 Comments. Leave new
Hello Thomas! This is a great breakdown of the string and fire method! I appreciate the step-by-step explanation and the insight into potential challenges. The choice of bottles sounds perfect for creating unique upcycled pieces, and I’m especially curious to see how the Grey Goose bottle turns out as a vase. Looking forward to seeing the final results! Have you noticed any difference in break quality when using acetone versus rubbing alcohol to soak the string?
Hi Witt, I appreciate your comment. When experimenting with the break I found that what you burn matters less than the string. I was running into issues because where I would tie the knot it would hold a larger flame and I would experience cracking at that location.