
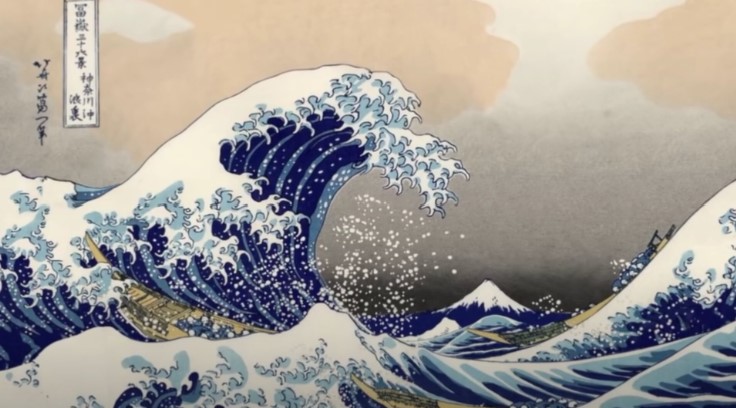
My inspiration started with the first blog post of this class when we researched an aesthetic. The aesthetic I chose to research was Japanese wood blocking as I ran into a discounted book at the Boulder Bookstore. I didn’t know that these pictures that I had seen in Japan, when I once lived there, came from a woodblock print and I wanted to dig a little more into this aesthetic. The most common one I’ve seen is The Great Wave Off Kanagawa and didn’t have the slightest clue that it was not painted by hand. I thought this was so beautiful with it’s pastel tones and delicate lines and had seen this picture on T-shirts, walls, Lego sets, and more. If you refer back to my first blog post, it goes into more of the history on it’s origin and how it evolved over time but in this post I will go into more of the creation of my piece and creativity behind it.
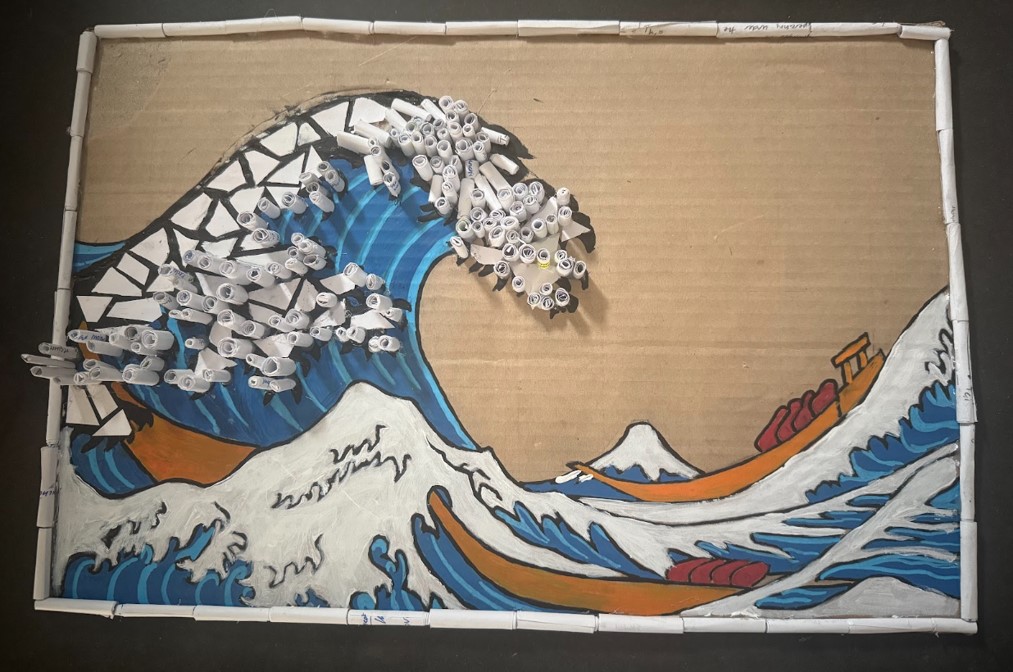
Originally, I wasn’t entirely sure the direction I wanted to go for my upcycle project but I found a lot of cardboard and recycled paper laying around in my apartment. I started to research what I could do with the paper and paper beaded jewelry caught my eye. I thought this would be the easiest to manipulate and adapt to the painting. Memories from art class in middle school about mosaic art surfaced and the vision for my project came to life. With the combination of paper beads and the mosaic aesthetic, I thought I could pull off a different flavor from “The Great Wave” and there weren’t too many specifications I wanted for this project. I was definitely focused more on the aesthetic instead of the functionality of the piece and I believe I achieved it.
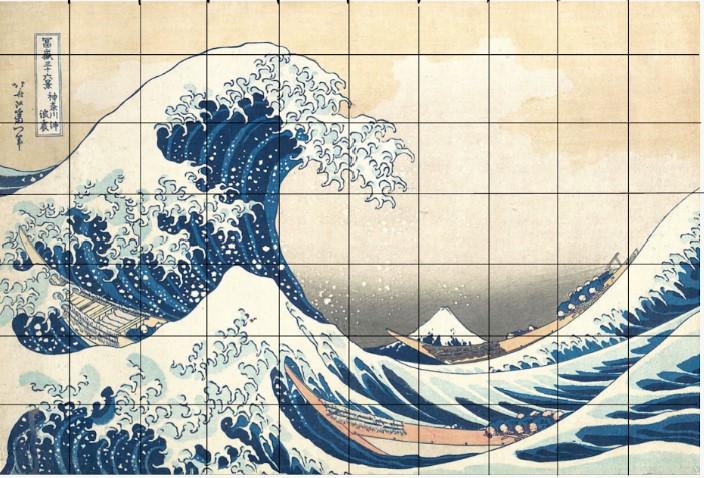
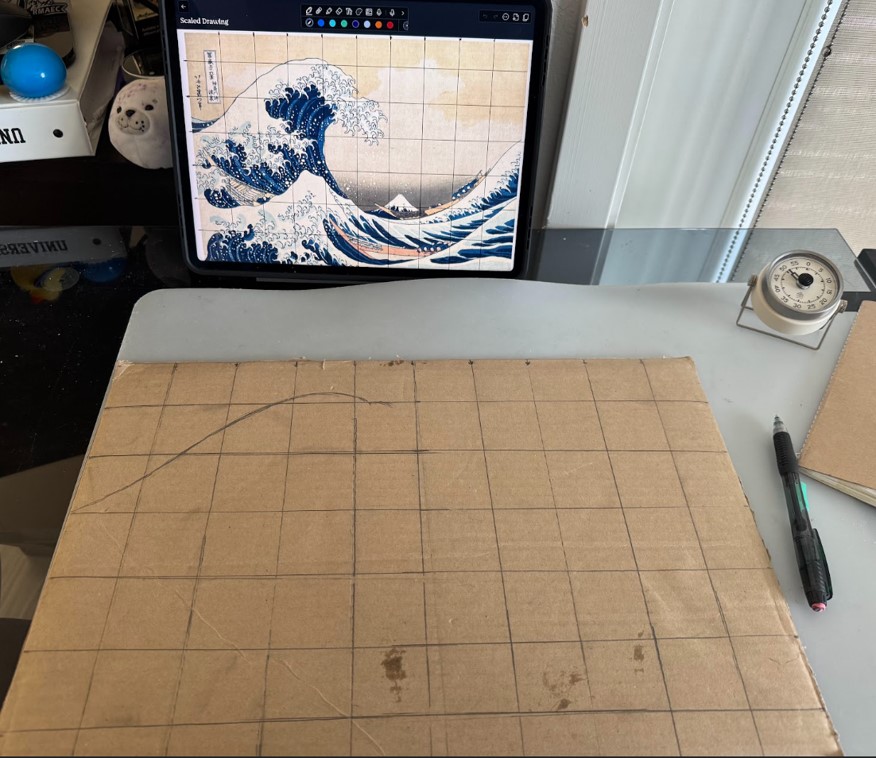
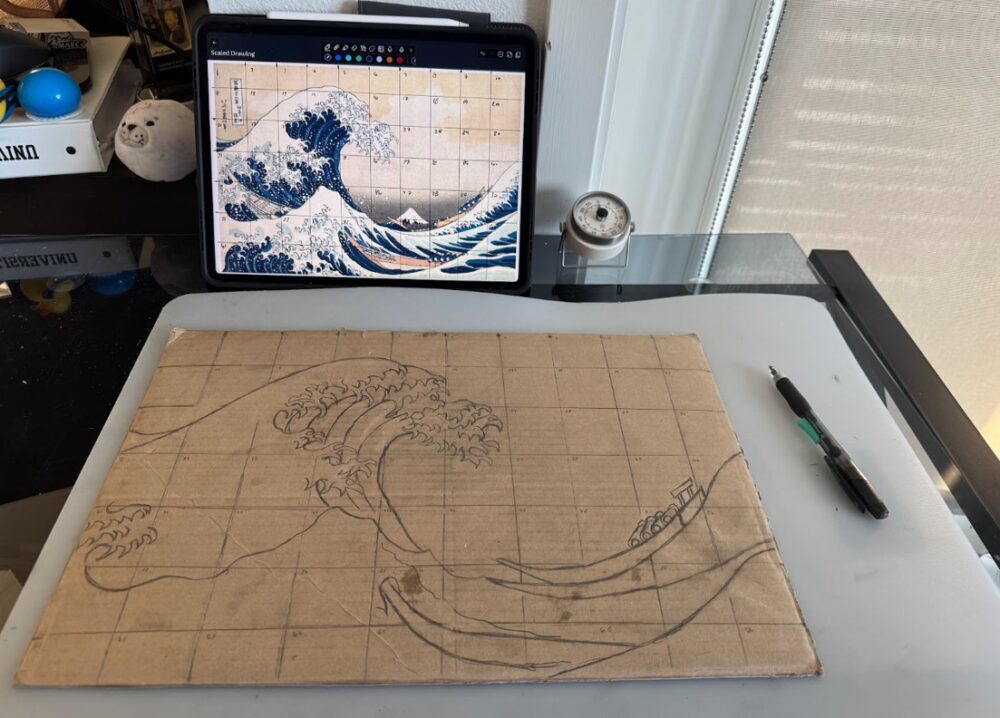
The fabrication process was fairly simple yet tedious. The supplies came down to scissors, paper, Elmer’s stick glue, hot glue gun, acrylic paint, acrylic markers, carboard, and paper. I initially started off with creating a grid on my iPad and carboard in order to transfer painting in a the correct scale to the cardboard. I found the measurement for the width of each square from the iPad and determined the scaled width by dividing by the number of lines from the length and width of the cardboard.
The following step after the scaled grid was sketching out the picture on the carboard. This I found to be the easiest and quickest step for me because the squares allowed me to position certain lines in the respective area. Also, I’ve drawn a lot in my past so it wasn’t too difficult for me to accomplish quickly.
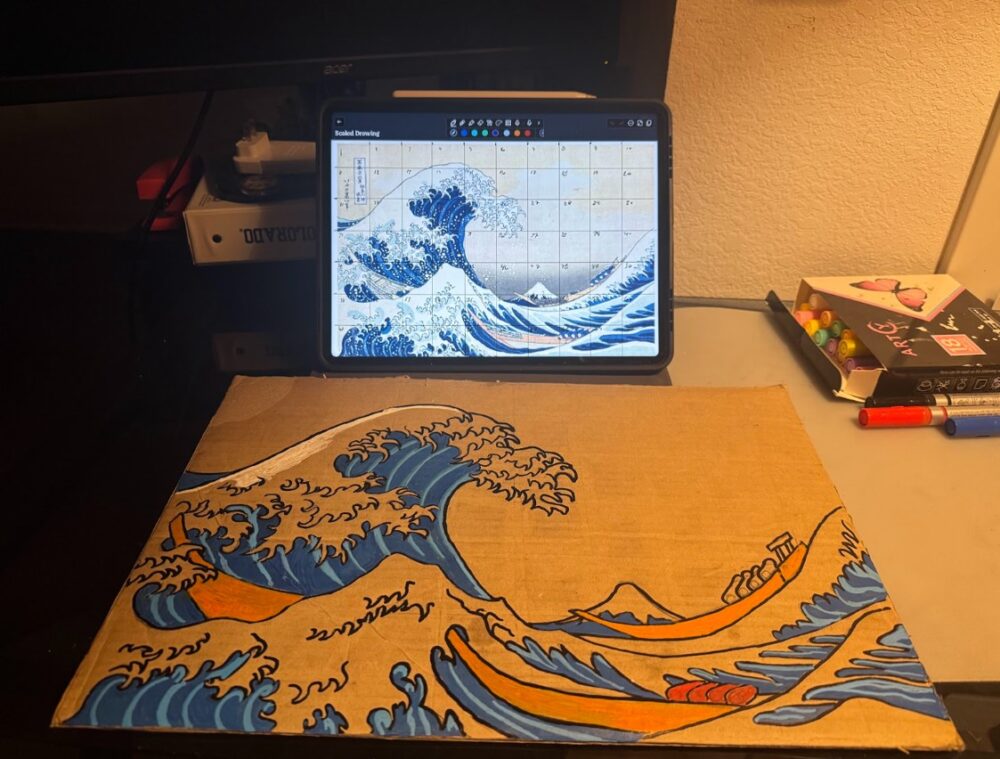
Once I completed transferring the drawing onto the cardboard, I started to outline the sketch with a black acrylic marker. This allowed me to get a better idea about how the drawing fit. From this point, I started painting to give it more life and messed around with different color combinations to see how it would look with the cardboard. I had to paint over the blue a few times in order for it to become the full color I wanted. I tried to experiment with painting the wave white in the respective area and I didn’t really like how it looked with the acrylic marker. I considered just leaving it with the carboard background but it developed into more.

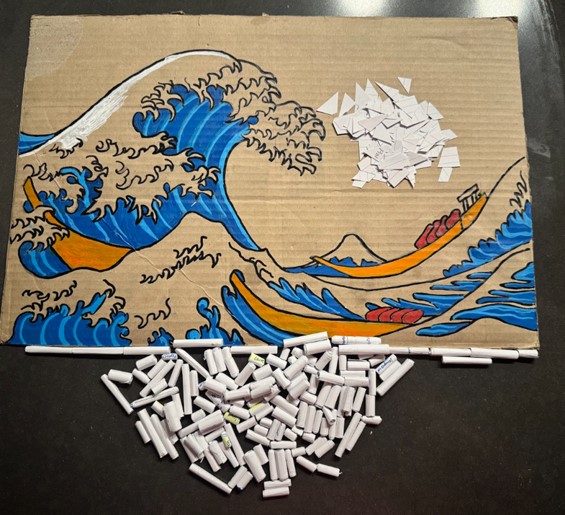
Once I started putting the paint to the brush, I wanted to leave it because I liked it for what it was but it wasn’t the aesthetic I was looking for. When the painting came to a close, I started cutting and rolling as many paper beads as I could to start getting my vision on the board.
Piles of paper started to accumulate and I didn’t exactly know how it would be arranged and tried different configurations to get a better idea. I personally wish I would have lift the paper beads in a looser roll because I think it gave it more character. These paper beads were glued down by a hot glue gun and the flat pieces of paper were stick glued down.
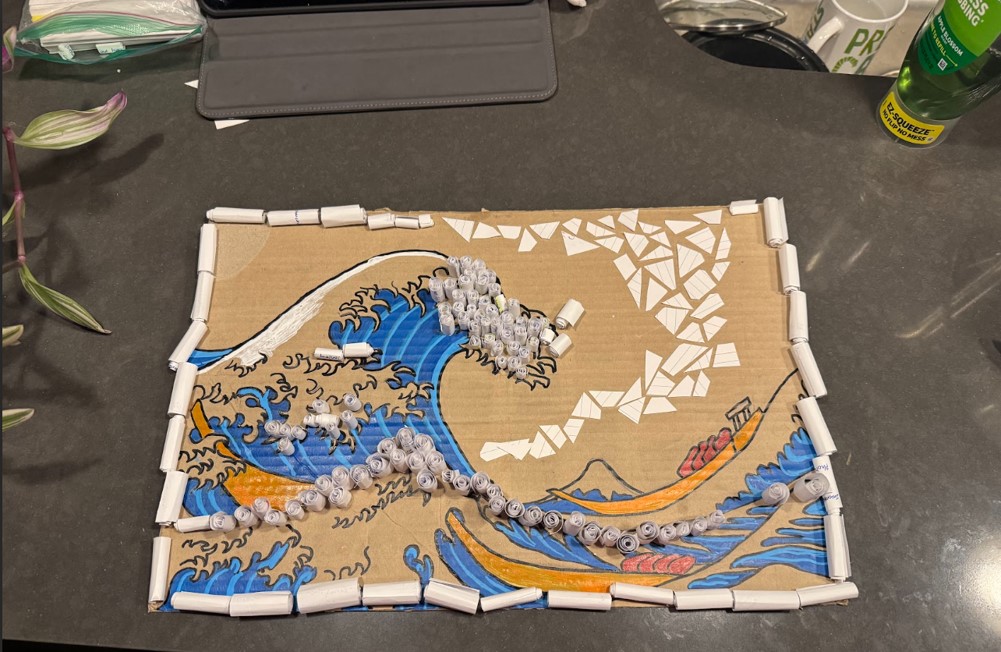
Ultimately, the final artifact became a story. It became of story of texture, colors, and more. You can see a little bit of where I cut off a piece of cardboard because I didn’t like how thick the black framing I created for the mosaic laid. Layers of paint cover the waves along with different level of paper beads creating more action within the piece.
 The artistic goal for my project was achieved but I believe that there could be more attention to detail with the paint as well as addition of more paper into the negative space. The original drawing had a lot of detail and I didn’t realize how difficult it would be for me to capture that portion of the piece. I tried to create a more live effect with the different levels of paper beads as well as positioning of length and width.
For my next move with this project, I would like to get back into drawing, painting, and experimenting with different layouts and artwork. It was a fun project for me to decompress from exams and homework assignments as an engineering student and I would like to continue with this as a hobby. The layout of this mosaic was a little rushed and I would like to see how I could bring more detail to this specific project. I’m considering cutting smaller pieces, rearranging the paper beads, and working with the negative space of the cardboard to build on the mosaic aesthetic. Once I’m complete with the additions, I’ll set it on my wall somewhere to be reminded of the fun I had with the project.
Cited work:
https://en.wikipedia.org/wiki/The_Great_Wave_off_Kanagawa
2 Comments. Leave new
Wow, I’ve never seen the technique of using rolled paper for textures and I like it. I think this is a super creative project, and I’m impressed by how it turned out! Very nice, job. If you wanted to add more texture, you could look into acrylic gel and how it mixes with paint.
This is a super cool project. I can tell you put a lot of work into it! I think that you absolutely nailed your rendition of the art and brought it to the next level with the mosaic texture. I think you’ve already mentioned this but some more precision on the rolled up papers could probably make this even better. Overall I think you nailed your aesthetic with a cool project.