
Purpose & Inspiration
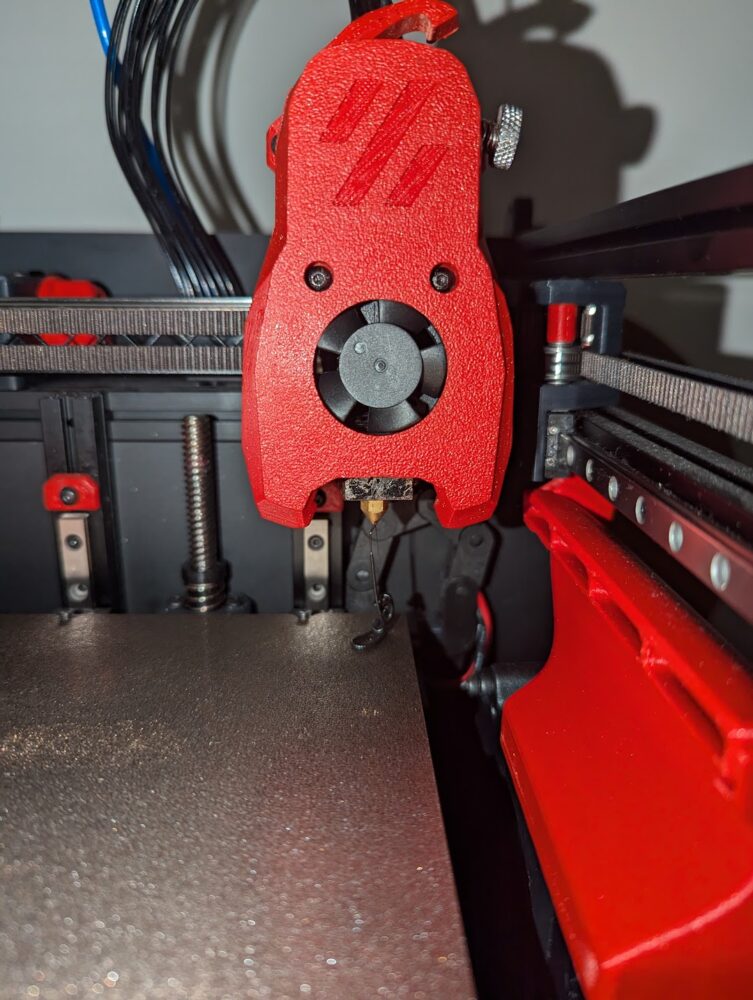
For the upcycle project, I knew I wanted to utilize 3D-printed waste as my main material. 3D printing is a fantastic tool for both functionality and artwork. The library of printable objects is constantly growing, offering innovative ways to create and design tools, knickknacks, and whatever random thing you can think of! However, 3D printing generates a significant amount of waste byproduct. Prepping the printer, such as swapping filament, creates what the 3D printing community calls “filament poop.” Additionally, FDM printing (fused deposition modeling) leads to an accumulation of excess plastic. Most of this waste ends up in landfills, and if not carefully monitored, can lead to improper disposal. [1]
One way to minimize this excess waste is to adopt a closed-loop system, which reuses and recycles excess or failed prints, filament scraps, and support structures. This approach helps reduce waste and energy consumption. [1]
“filament poop”
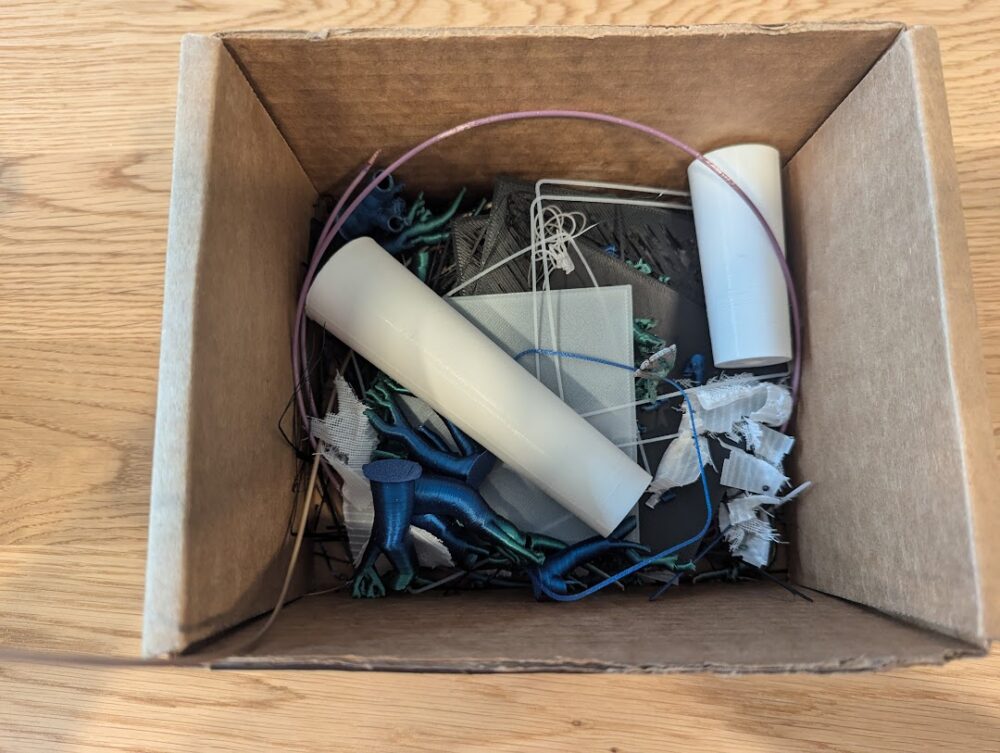
Scrap filament I had collected
The idea for coasters came about after researching ways to repurpose 3D-printed waste. I came across an article titled Upcycling 3D Printing Waste in Artistic and Practical Ways (link). That article linked to an Etsy shop where an artist created coasters using 3D printing scraps (link). I realized I could easily recreate this idea and that it would be a great way to upcycle my scrap filament.
Etsy shop inspiration [3]
The Aesthetic
The coasters’ aesthetic features vibrant colors in an abstract, expressive pattern, reminiscent of Jackson Pollock’s “drip technique.” This style, known as abstract expressionism, emerged in New York City in the 1940s and 1950s. [4] Abstract expressionism, as their name suggests, aims to make art that is both abstract and expressive or emotional with the surrealist idea that art should come from the unconscious mind. [4] This project unintentionally recreates elements of this artistic style, making for an interesting connection between upcycling and fine art.
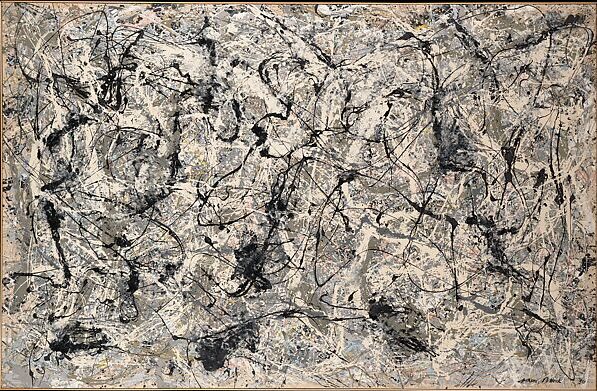
Number 28, Jackson Pollock [4]
Fabrication Process
To create the coasters, I researched methods others had used for similar projects. I found a helpful video demonstrating the process I ultimately followed (link).
I started by making a Bill of Materials (BOM) for the necessary tools and appliances:
Table 1: BOM for Upcycling Project
| Item | QTY | Price | Link |
| Toaster Oven | 1 | $20.00 | Walmart |
| Blender | 1 | $19.00 | Walmart |
| Silicone Molds | 1 | $18.00 | Amazon |
Next, I gathered scrap filament from recent 3D printing projects. I decided to use only PLA filament to ensure uniform melting and minimize uneven textures in the final product.
Using a blender, I shredded the scrap material to facilitate melting in the molds. I separated the colors so I could experiment with different designs while filling the molds.
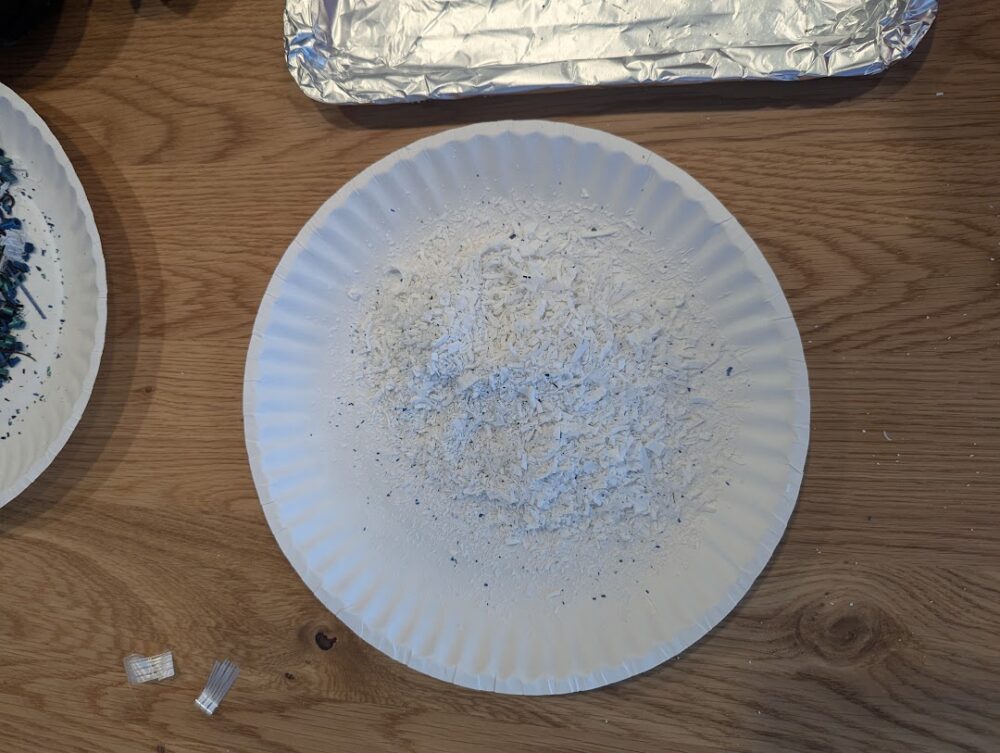
Blended scrap filament, separated by color
For my first prototype, I filled the mold with solid black filament scrap and placed it in the oven for about five minutes. I closely monitored the plastic to prevent overheating or fire hazards. After five minutes, I removed the mold, added multicolored filament for the desired aesthetic, and baked it for another five minutes or until the plastic had fully melted. Once removed from the oven, I let the coaster cool.
The first prototype had some minor imperfections. The edges were rough and uneven, and the coaster was too thin. For subsequent attempts, I ensured the molds were completely filled, paying special attention to the edges.
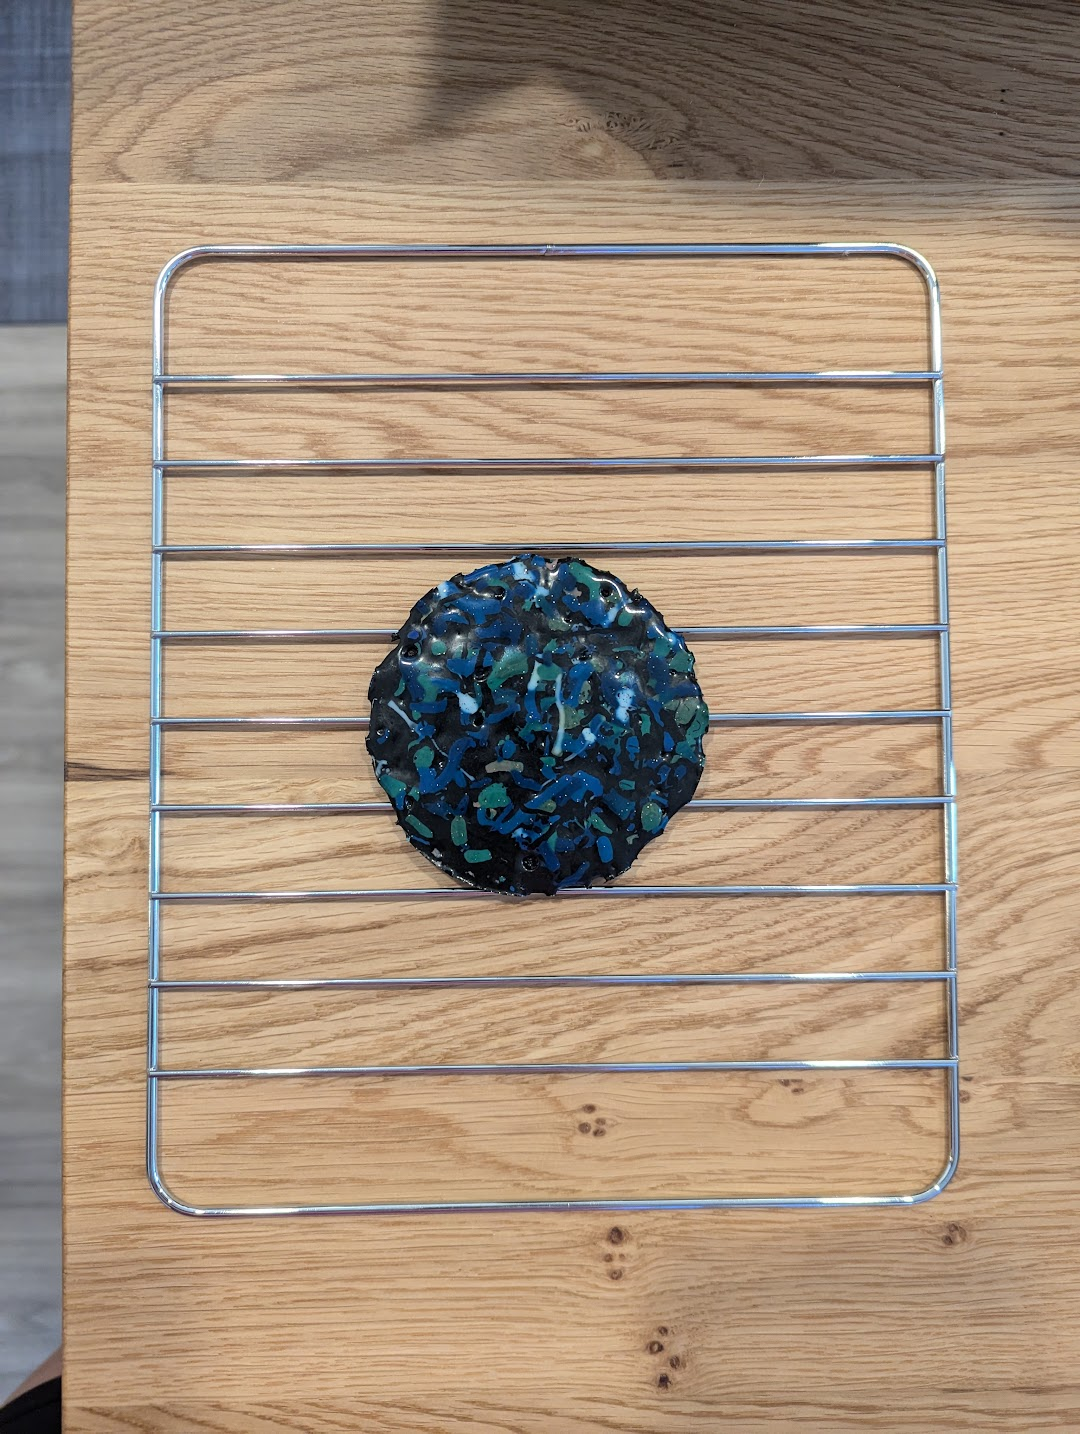 First prototype
As I made more coasters, I noticed trapped air bubbles in the melting process. To mitigate this, I continuously added more filament as it melted to minimize air pockets.
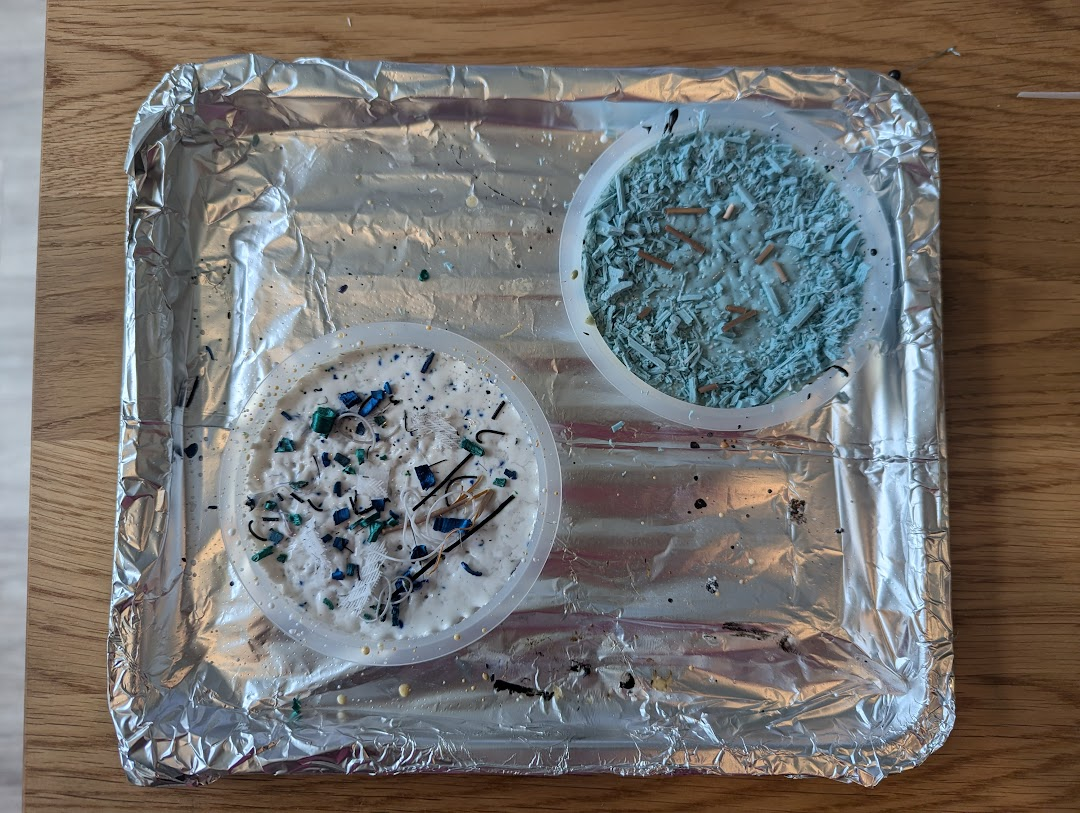
Adding more filament to melt
After several iterations, I refined the melting technique. The process required patience and vigilance to achieve a smooth finish. One coaster even developed discoloration around the edges, likely due to slight burning. Interestingly, PLA cools to a glossy finish when melted at higher temperatures. [5] Although I set the oven to 375°F (190°C), which is on the lower end of PLA’s melting range, prolonged exposure in the enclosed space may have increased the temperature, contributing to the glossy appearance. [5] The final step was sanding and buffing the edges for a polished look.

Left the scrap to melt for a bit too long that the edges started to burn. Also noticeable air bubbles forming.
Safety Considerations
PPE was essential for this project. I used safety glasses, heat-resistant gloves, and hearing protection. The blender posed a risk of scattering plastic debris, while the oven presented a potential fire hazard. A fire extinguisher was kept nearby as a precaution. Proper ventilation was also crucial to avoid inhaling PLA fumes. If this project were to be recreated, please take proper safety precautions.
Functionality
This project explores the contrast between minimalism and maximalism. While the coasters serve a simple, functional purpose—protecting surfaces from liquids—their chaotic, colorful designs embody maximalist principles. Each coaster is unique, allowing for endless customization. I enjoyed this aspect of the project, as it contrasts with my personal aesthetic and encourages me to embrace spontaneity.
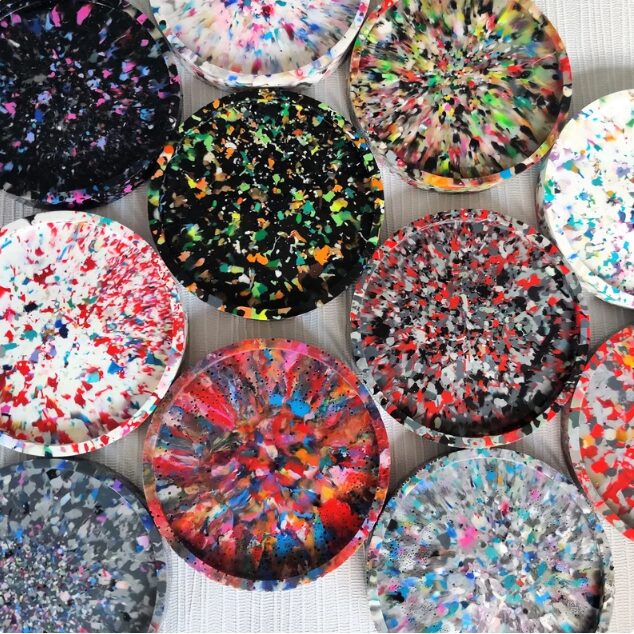
Result
Overall, I am thrilled with how the coasters turned out! Both the aesthetic and functionality were successfully achieved. I love the ability to recreate this process repeatedly, experimenting with different color combinations and design direction!
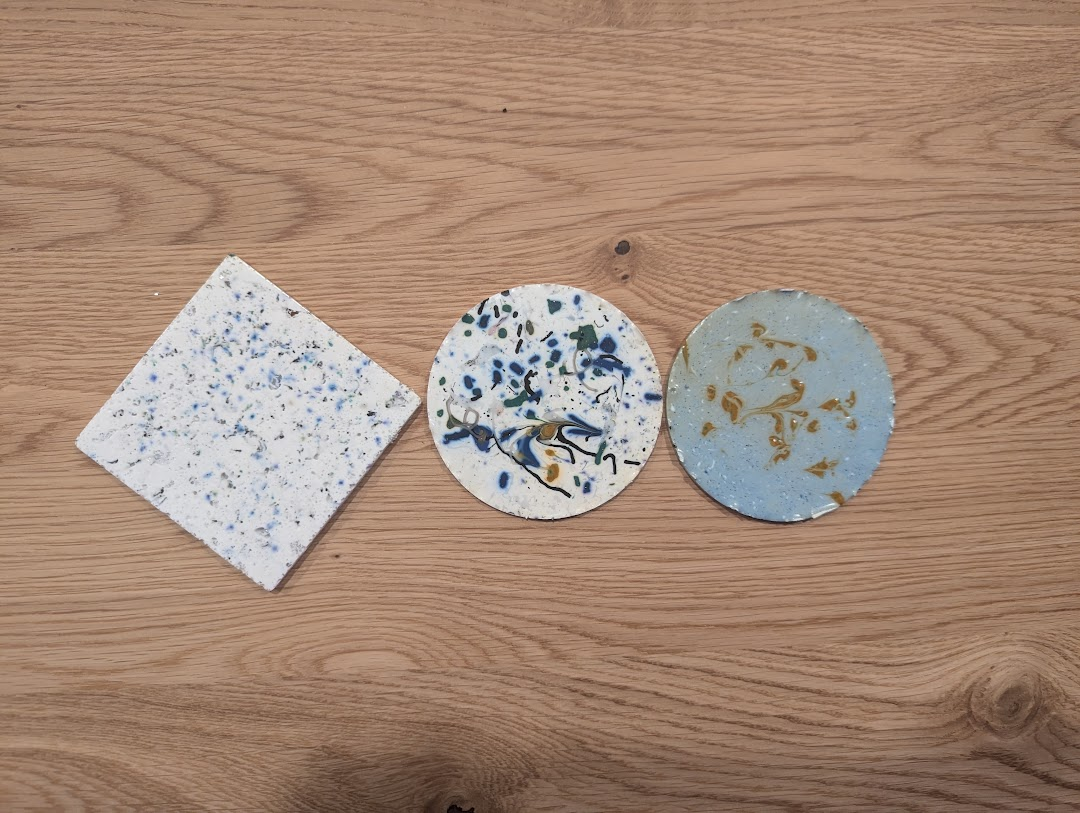
Finished coasters!
What’s Next?
This project sparked ideas for further experimentation. One potential next step is 3D-printing a custom coaster holder. I also want to explore creating different objects using various molds—perhaps even creating DnD dice! Additionally, I aim to refine the cooling process to eliminate air bubbles, possibly by using a vacuum chamber. Whatever the case, I’m excited to continue upcycling as I generate more filament scraps in the future.
 [link]

References
- Nota3D. (2023, August 11). The environmental impact of plastic 3D printing. Retrieved from https://nota3d.com/2023/08/11/the-environmental-impact-of-plastic-3d-printing/
- 3DWithUs. (n.d.). Upcycling 3D printing waste: Artistic & practical ideas. Retrieved from https://3dwithus.com/upcycling-3d-printing-waste-artistic-practical#3D%20Print%20Fails
- Instagram. (n.d.). Post by @nota3d. Retrieved from https://www.instagram.com/p/CKcC0STsvv0/?img_index=1
- Tate. (n.d.). Abstract expressionism. Retrieved from https://www.tate.org.uk/art/art-terms/a/abstract-expressionism#:~:text=The%20action%20painters%20were%20led%20by%20Jackson,it%20from%20the%20brush%20or%20a%20stick
- MakeShaper. (n.d.). Matte and glossy PLA prints. Retrieved from https://www.makeshaper.com/post/matte-and-glossy-pla-prints
- Etsy. (n.d.). Coaster holder for 4 coasters. Retrieved from https://www.etsy.com/listing/1728391571/coaster-holder-for-4-coasters-holds?ga_order=most_relevant&ga_search_type=all&ga_view_type=gallery&ga_search_query=coaster+holder&ref=sr_gallery-1-6&sts=1&content_source=375b20543b2b0bec8429f472645a02f891448a28%253A1728391571&organic_search_click=1&logging_key=f039fcea68af748d0ee7abf8b1effd6de0be739c%3A1728391571
- Amazon. (n.d.). PJOY food-grade silicone mold for making lovers. Retrieved from https://www.amazon.com/PJOY-Food-Grade-Silicone-Making-Lovers/dp/B0CLTZLBN1?th=1
4 Comments. Leave new
Hi Jamie,
I like that you included a BOM which is something I haven’t seen on others posts. You must be on the FSAE team haha! I also appreciated that you documented your use of PPE. While its fine in the short term, it may give you peace of mind to wear a respirator for prolonged exposure to fumes when baking. Anyway, I thought this was such a clever project and you sparked an interest in me for Jackson Pollock’s work.
Hi Robert!
Thanks for the tip! I will definitely use a respirator next time I try this out (those fumes are strong!!!) I’m glad you liked my project! I had a fun time creating the designs
Hi Jamie! Cool project! The final coasters ended up aligning with your aesthetic goals really well in my opinion (especially the middle one)! I think this is a great idea for reusing the plastic waste from 3D printing, and thought that it was cool you were even considering other products to make as well! Out of curiosity, for the coaster prototypes that you made in the beginning, did you end up using those coasters or were you able to resuse that material in some other way?
Hi DawnMonique,
Thanks for your comment! I’m super happy with how the coasters came out (the middle is also my favorite!)
Yes! I still use the prototype as it can still function as a coaster haha! But I wonder what would happen if I re-melt the first prototypes and see what else I can add to the design. That’s another good idea and I am curious about doing that now!