
In trying to find what to do for my project I took to looking around my house. What really caught my eye originally was this metal snowman statue/candle holder I own as a winter decoration. It is made of sheet metal and wires and is a fun decoration that I can have during the coldest months of the year. This inspired me because I believed that it was possible to make something of this scale. The majority of this snowman is made up of sheet metal parts and wire all painted to make it look like the finished product it is.
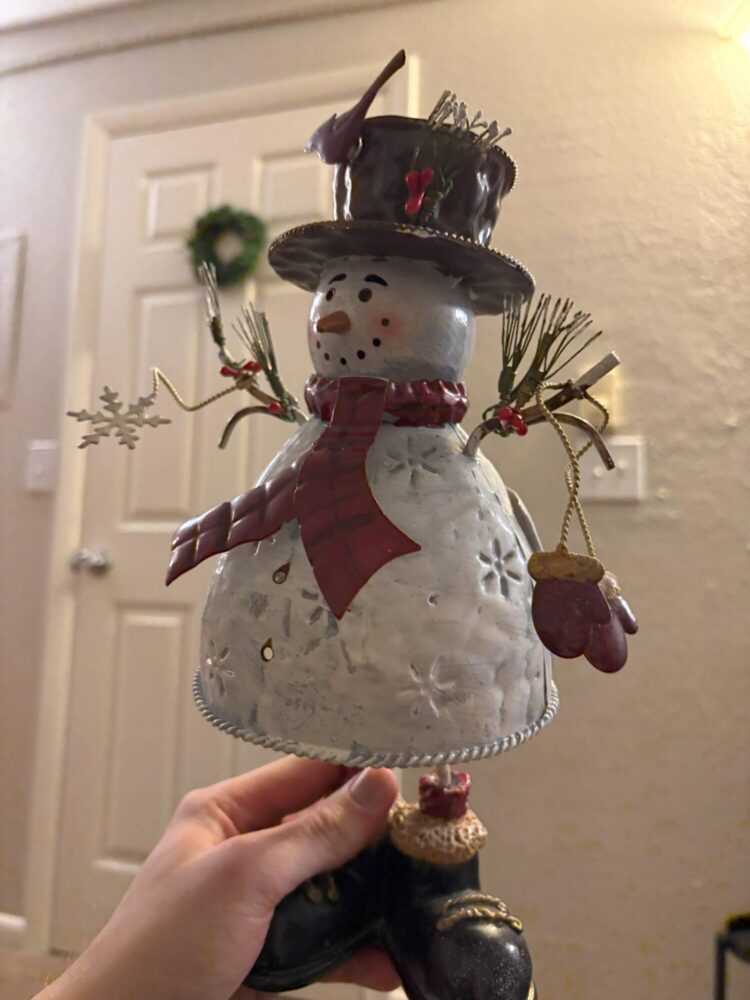
Snowman Decoration
I wanted to mimic this method. However, I wanted to make a new decoration for the part of the year when you have the fewest things to decorate with: summertime. In order to mimic the metallic makeup of this decoration, I thought that I could make it using something like beer cans for the main material and some wire for the main body framing and the extra decorations. When cut into sheets aluminum cans are thin and malleable, and while they are hard to properly flatten out, I believed that they would make great scrap material.
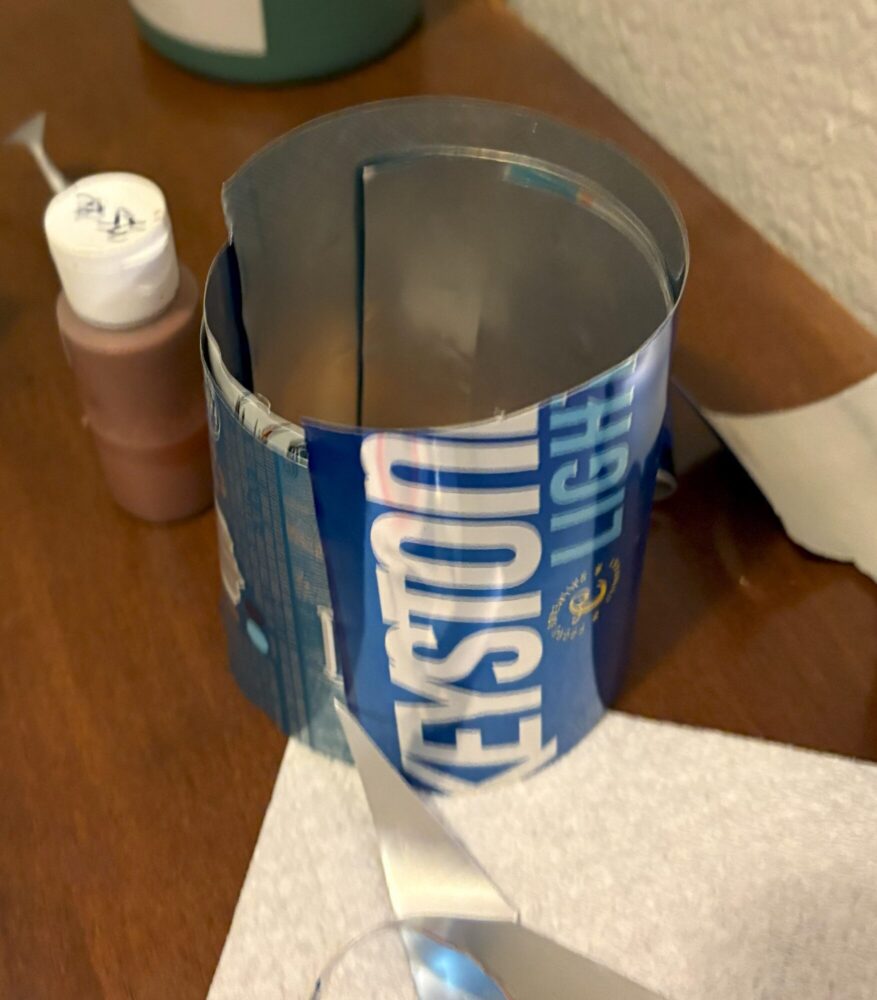
Cans Cut Into Sheets
Aluminum cans are easy to come by and are just thrown away. Using them as sheets of aluminum felt like a great way to upcycle. I was able to collect several over just about a week or so and I have seen many people online cut away the top and bottoms of cans to create sheets. I also briefly looked into scrubbing off the labels of the cans so that they were a flat silver color, but the process involved a pressure cooker that I do not have, and could be skipped by simply painting the final product.
When trying to think of an alternative decoration for the summer season, a figure that really stood out to me that represents hot summer days for me, is a cowboy. When I think of a cowboy I think of hot days, warm rustic colors, dust, dirt, and the outdoors. These for me all describe the summer, and when looking into different aesthetics, also describe the Old Western aesthetic. The Old Western aesthetic is a style that draws inspiration from the American frontier during the late 19th and early 20th centuries. This aesthetic consists of rough untamed landscapes, rugged individuals, and a brutal sun. There is a sense of lawlessness and self-reliance that lends itself to the cowboy’s individuality. This often blends a mix of practicality and rustic charm and speaks to the struggles of the early Western settlers.
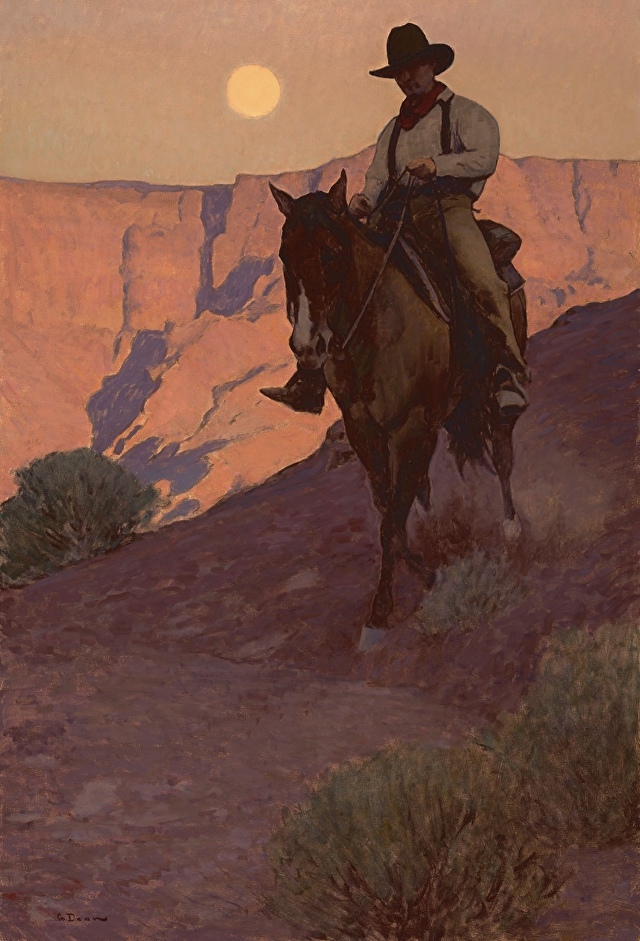 Shadow Rider – Glen Dean
The colors in Old Western aesthetics are earthy and natural. I think of browns, dusty tans, rust reds, and deep greens. reflecting the desert landscape and the aged, weathered materials. There’s also a strong presence of golds, burnt oranges, and shades of gray, which reflect the weathered, sun-bleached look of the environment. All of these colors, mixed with the aspect of the brutal sun make me think of hot summers, which is why I wanted to engage with it as my aesthetic for this project.
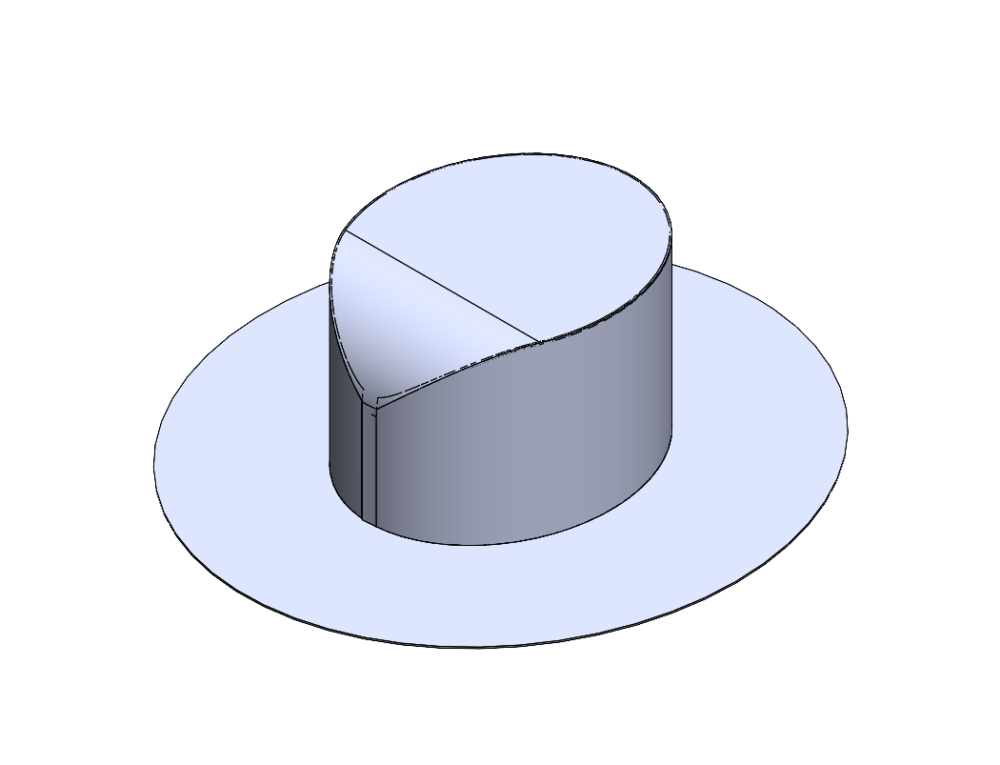
To begin, I started with sketches. I wanted to create stencils to cut out on paper that I could later follow on the aluminum. After getting a rough idea for most of the components I moved to Solidworks so that I could both mirror the sketches and scale them to properly print at the size I want. With this I was also able to properly size all of the parts in comparison with one another, and I was able to find the more complex lengths and curves needed for the hat and boots.
![]()
![]()
![]()
![]()
![]()
![]()
![]()
![]()
![]()
![]()
![]()
![]()
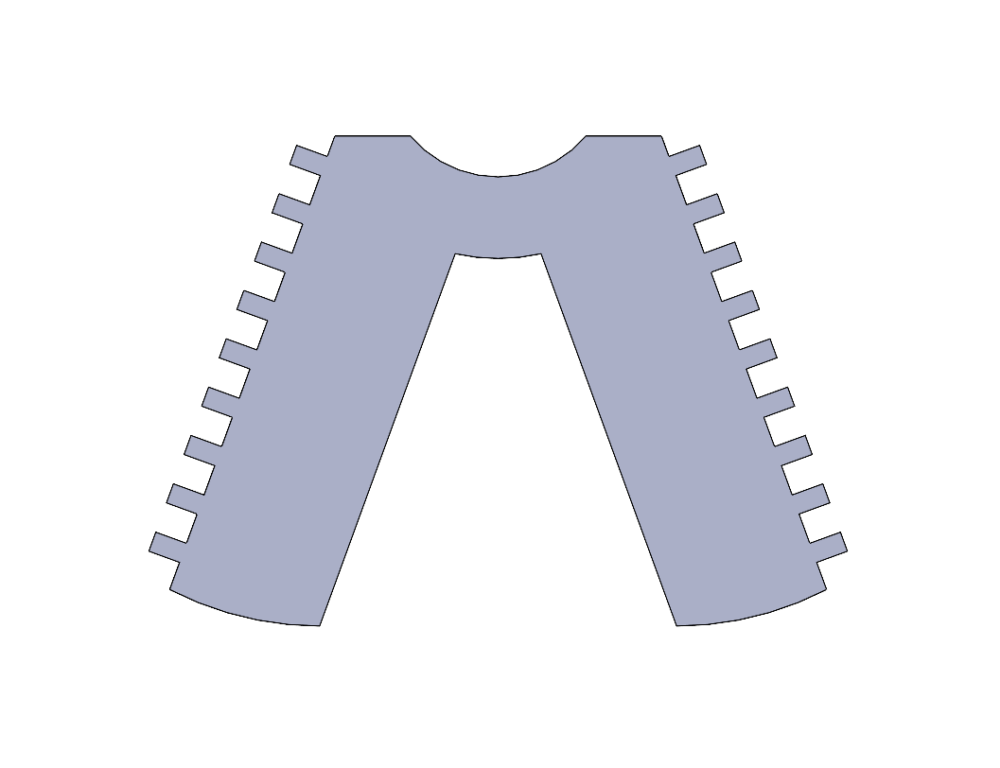
Hat, Pant, & Boot Models
After modeling, I then flattened these components out as sheet metal parts in the program and printed out the flat patterns. I also wanted to add both a lasso and a vest to the final product. However, I believed the hat and boots were complex enough that I wanted proper digital drawings to get the scale and lines right for the stencils. The chaps were a little bit of a debate for me, but I came to the conclusion that if I were to try and draw out the tassels on the edges without a digital software, they would look terrible.
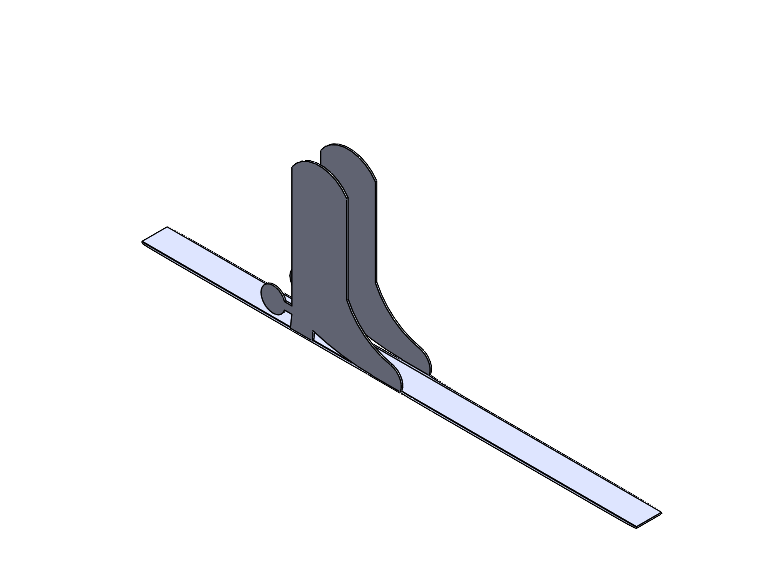
From here I started with the boots. For these the plan was to start by cutting out the outline of the boot on either side, and then bending the middle sheet into place. The worked well but immediately I ran into the dilemma of what adhesive to use with this project. To start with my plan was to use either solder or superglue. My thoughts however were that the solder would struggle to stick to the smooth aluminum and the plastic coatings on both sides, and that the superglue would struggle similarly if the surface were not prepared properly. Along with the fear that the super glue would take a long time to set. All of these assumptions were correct, and after trying both adhesives thoroughly I concluded that neither would work for this project.
Boot #1
From here I had to step back and begin thinking of other methods to help me. My first thought was to design the stencils with tabs that fold into each other. However, this was very unappealing to me, as it both too a lot of redesigning on parts where this method would be very inconvenient, along with the fact that placing cuts in the middle of an aluminum sheet was not something I had the tools to do. So, after some more thinking I realized the answer was much more simple than i was making it. The adhesive that would be best for my project is really just the most common crafts adhesive available, a hot glue gun. This really was the simplest and easiest solution, however, it seems that I had just forgotten it as an option. After coming to this realization however, I began to make quick progress with the project.
For this project I needed the sheet metal from the aluminum cans and I also needed some sort of wire to make the standing frame and lasso. I was not able to find these materials as scrap in any workshop or makerspace across campus, so I resorted to looking in a nearby resale craft store ArtParts. Here I was able to find paint for later, a hot glue gun and plenty of glue, wire for the body, and even a braided wire to make the lasso out of. None of these parts were bought new and it really made the project feel like I was still recycling all parts of it.
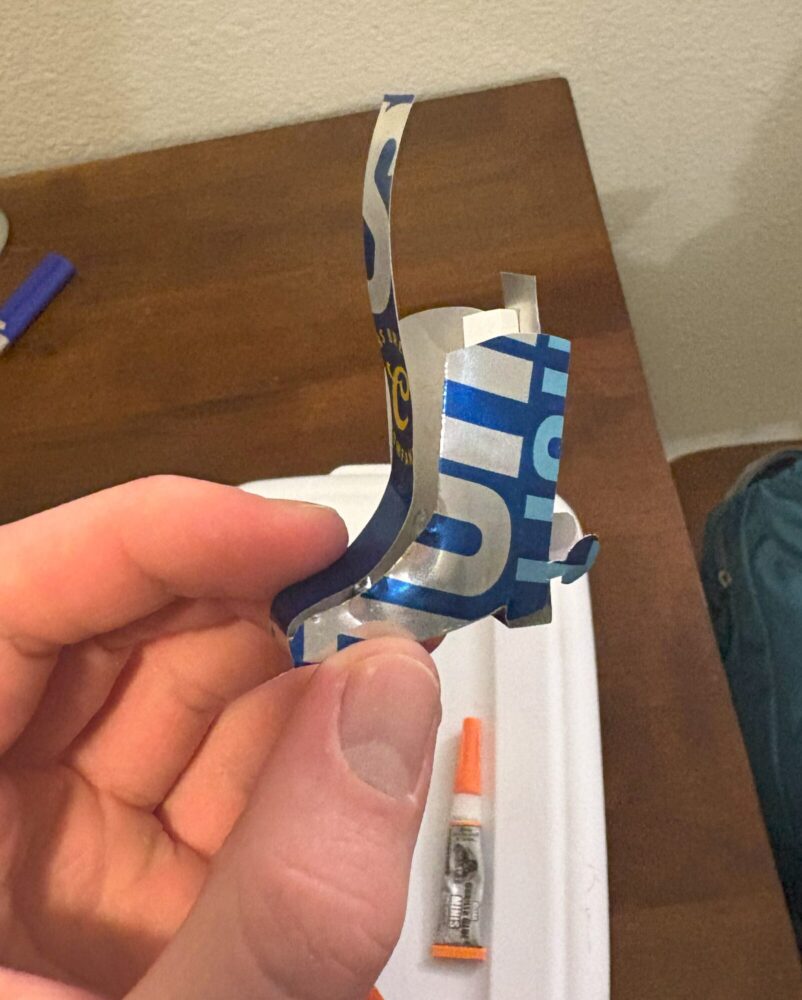
With the hot glue gun in hand the boots came together much easier than they had been with the other adhesives, and while I struggled with the hat heating up so much that other portions remelted when adding additional glue, I was able to get it assembled pretty cleanly. The chaps were harder to cut out than to glue together, and I spent a total of about ten minutes cutting the vest to shape as it was just a game of proportion.
Partially Assembled
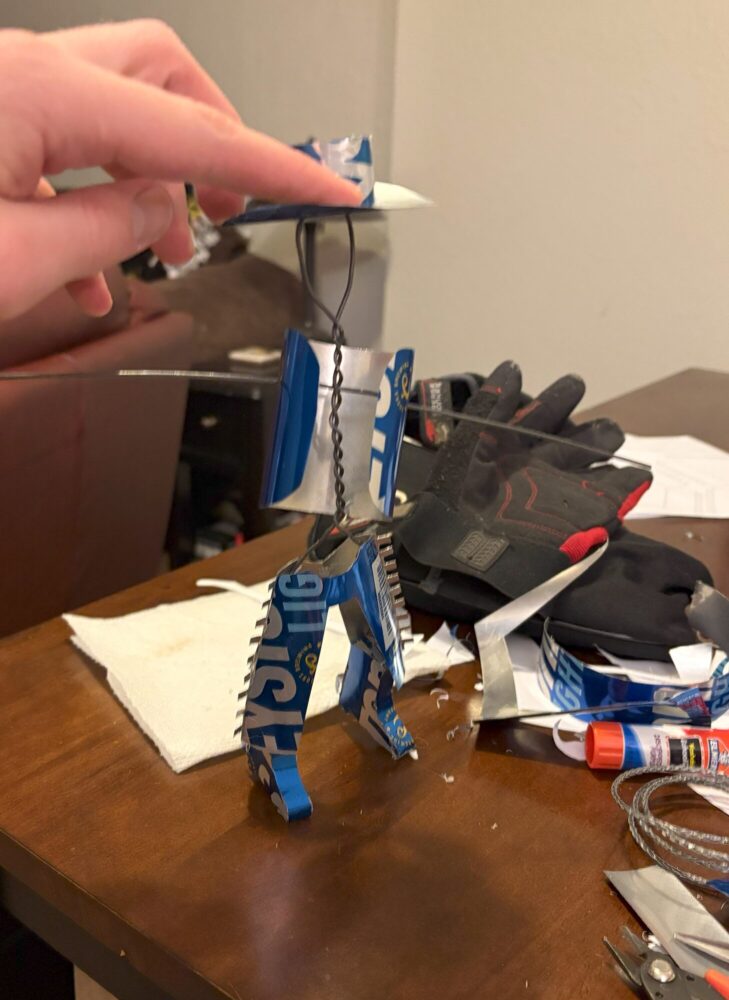
While waiting for glue to dry or tweaking the sizing of some of my stencils, I would be working on bending the body to shape. In general it was a really simple shape, with the head, torso, and legs all being made from just one piece of wire.
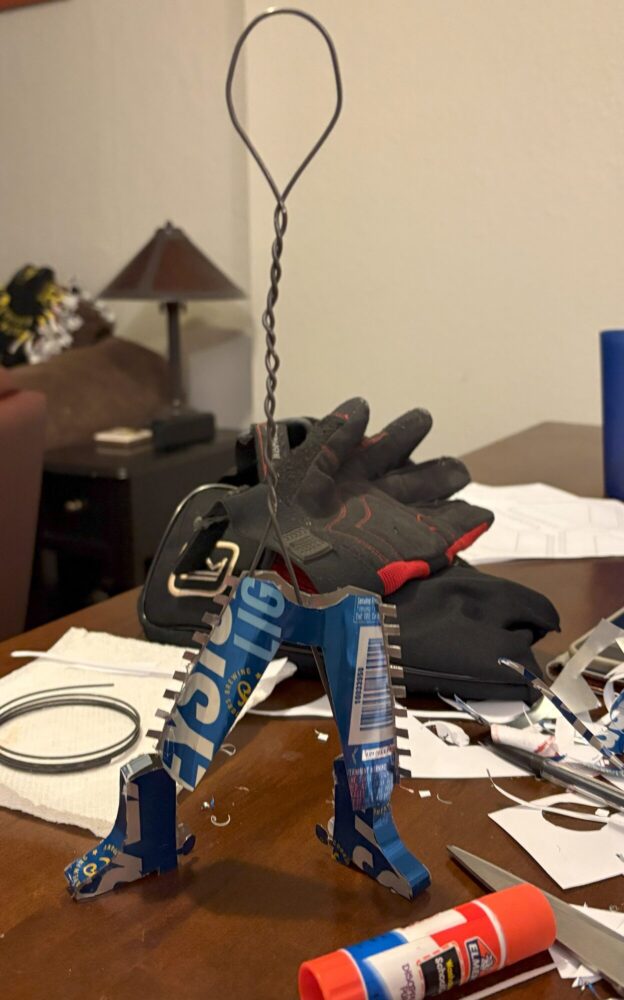
Main Body
I played a lot with the size of the head and the length of both the torso and legs, but without gluing anything together I was able to get a really good idea of what the final cowboy should look like. The arms were added only after getting the torso to shape, as they consisted only of a straight wire slid between the twists of the torso, and were bent to shape after also being slid through the vest. The lasso was pretty trivial and came together quickly by tying a simple loop and leaving some coil to be wrapped around the statue’s other shoulder.
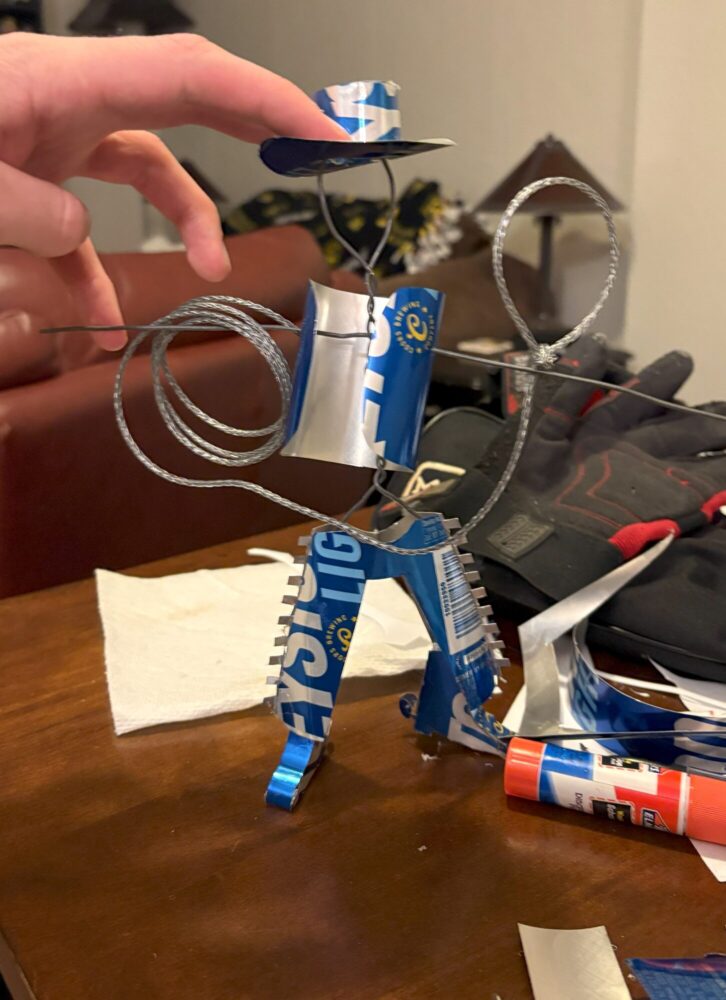
Full Component Assembly
From here, all parts of the project were completed. The only things that needed to happen were to paint all the components, bend the arms to shape, and glue it all together. For painting I took off the boots, chaps, and the hat. However, the vest could not easily be added back on once the arms were bent, so I opted to paint it on the assembled cowboy. For colors I found a yellow/brown/gold, a light brown leather like color, and a deeper red/brown tone. This gave me options when painting so that the final cowboy was not just one color, but I also felt really fit into the aesthetic of Old Western.
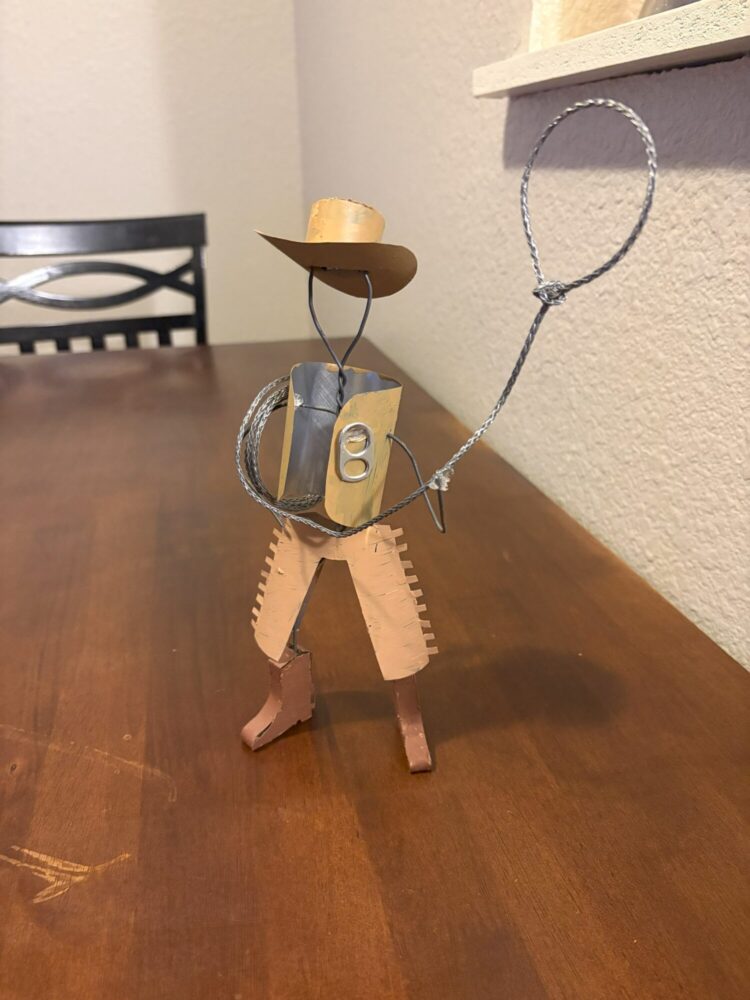
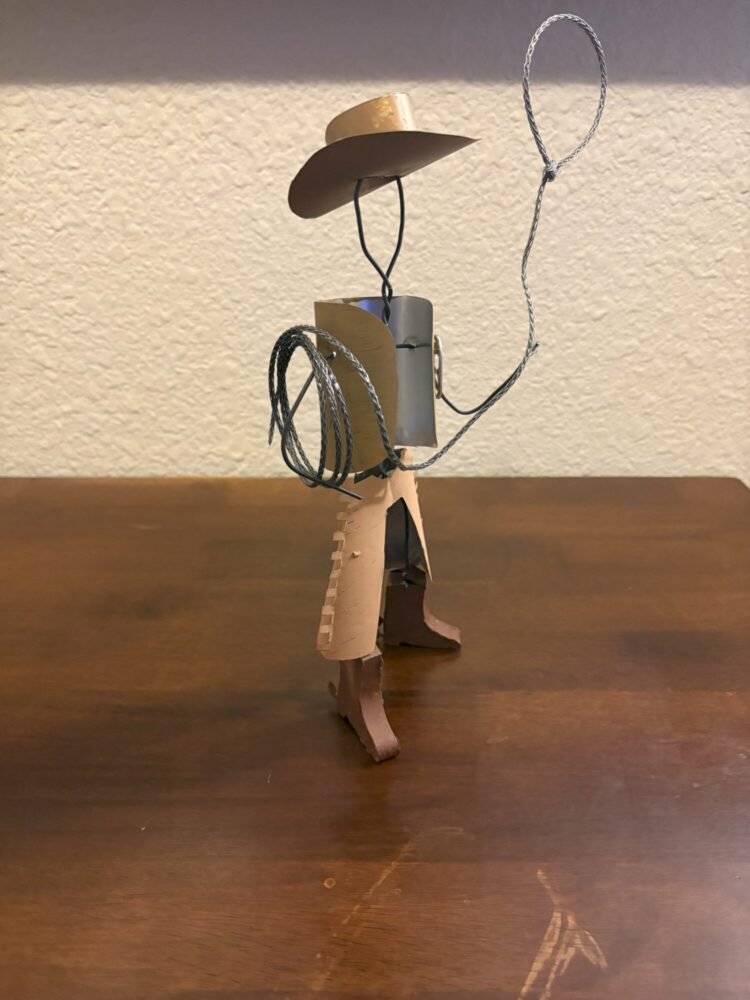
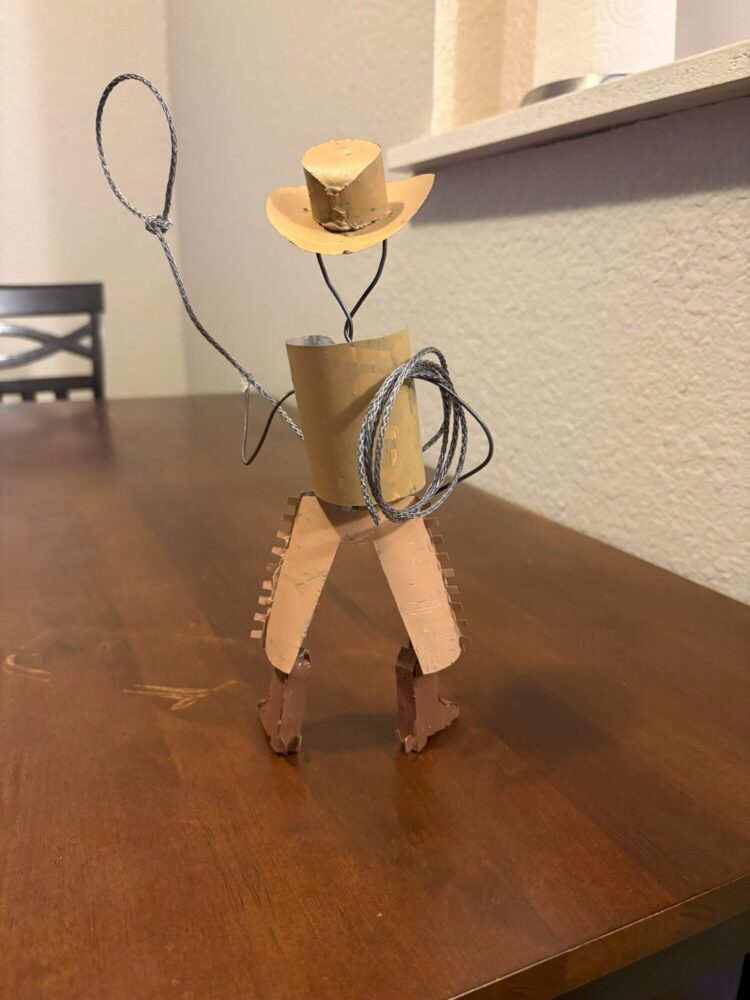
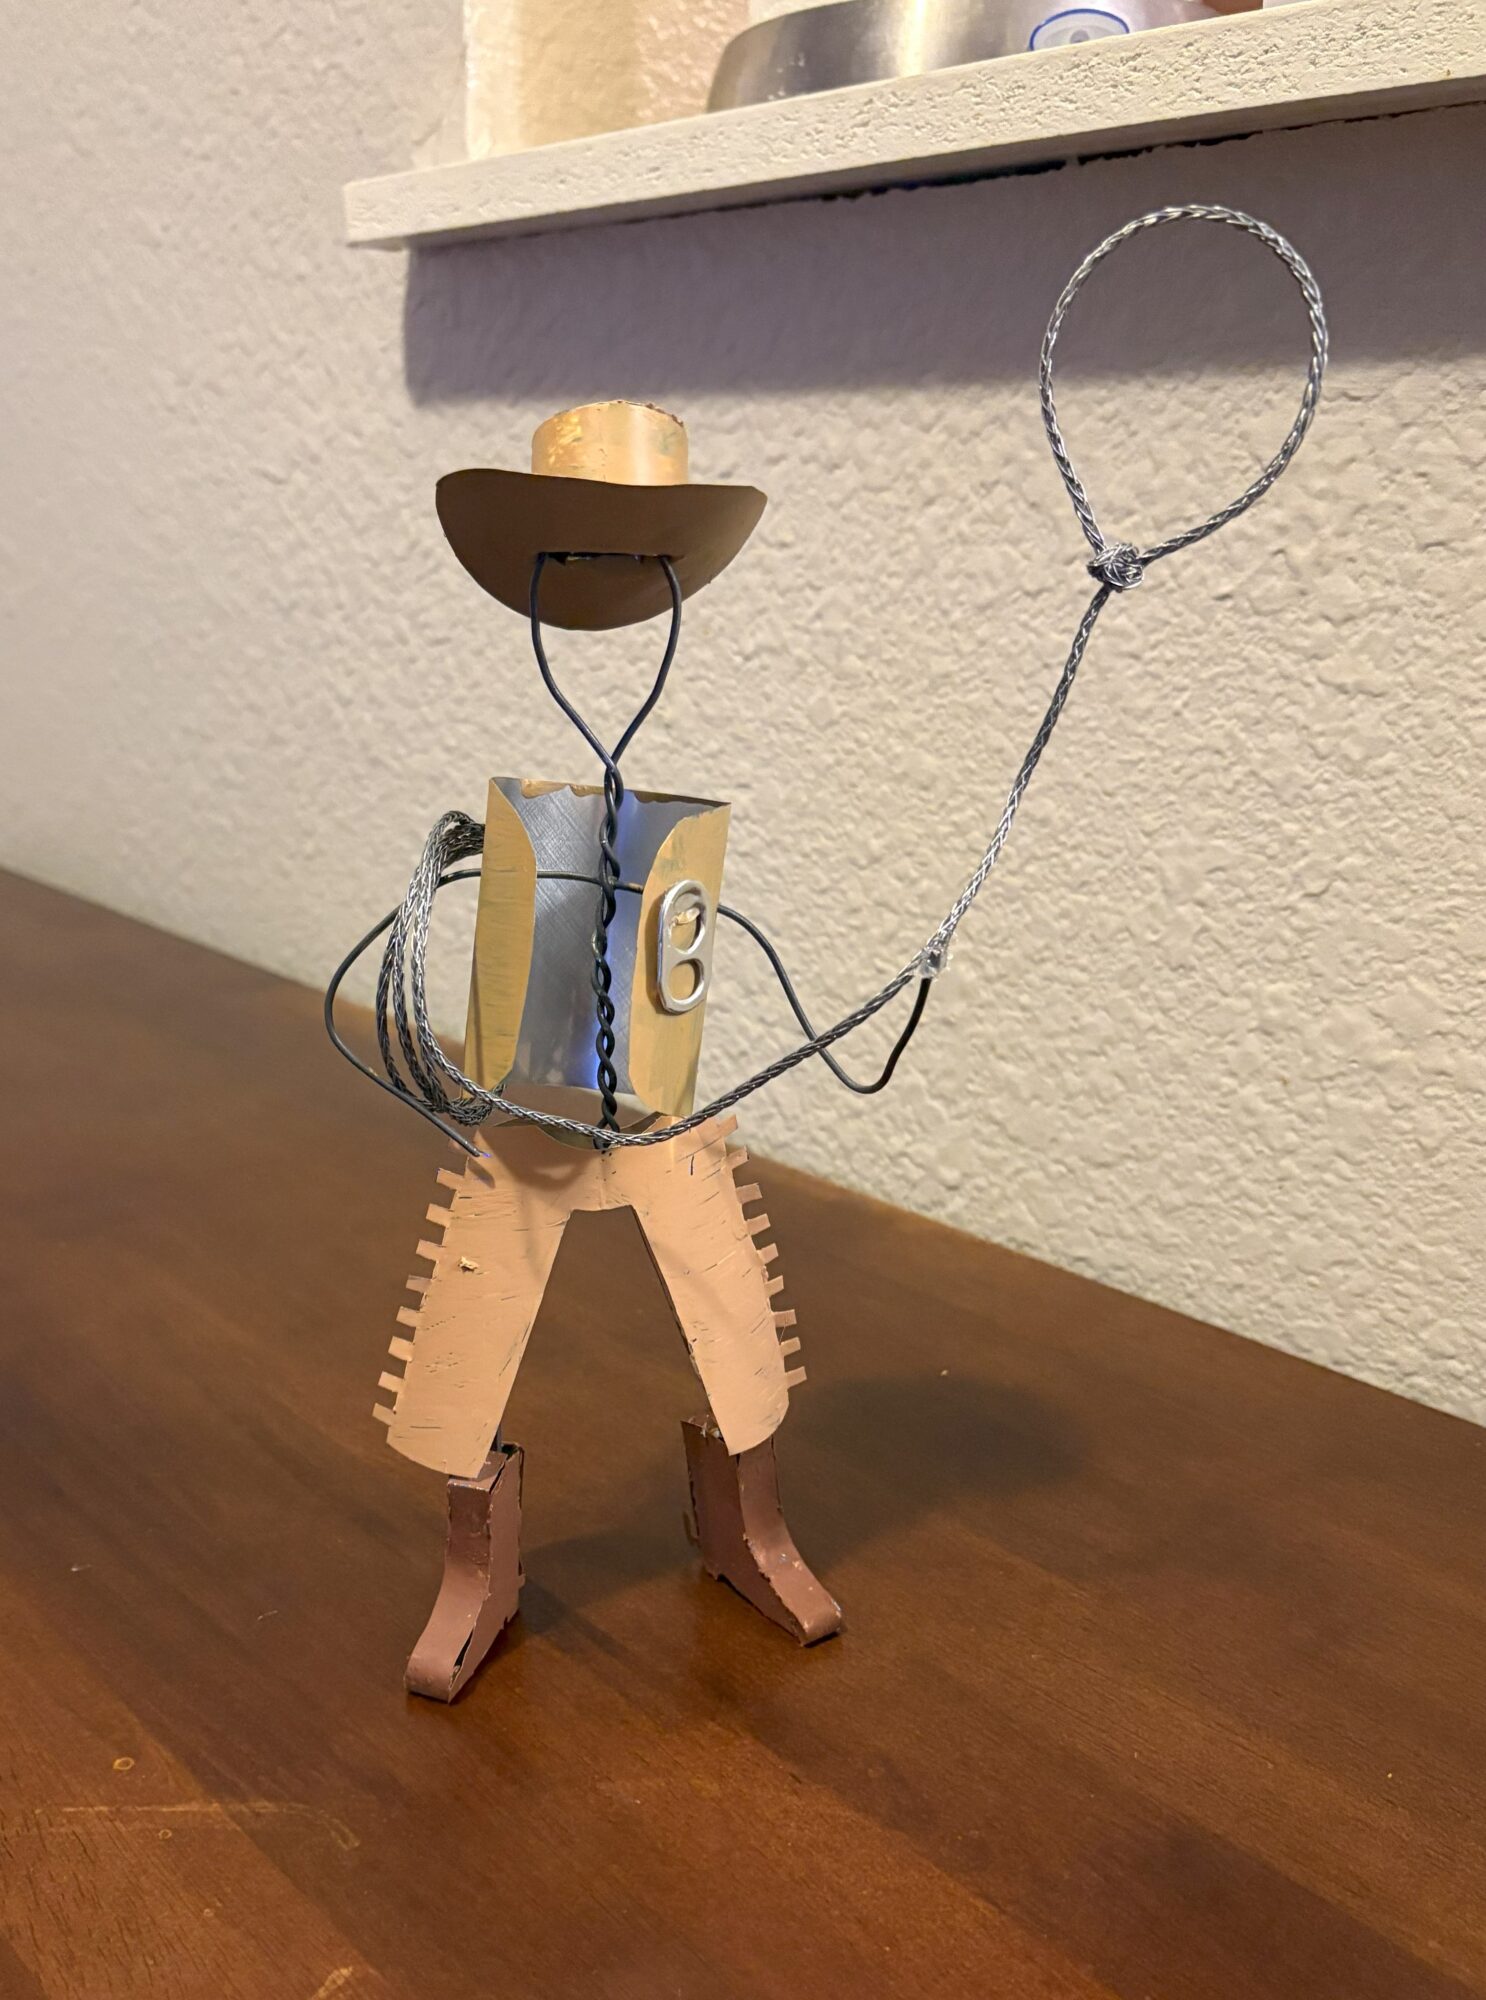
Finished Cowboy Pictures
I am actually pretty proud of how this project came out. I began to seriously doubt my timeline after wasting a considerable amount of time trying to get superglue and solder to work on the aluminum. But seeing the statue fully assembled really brought it together, and I felt that i had enough separate components to make it truly interesting as a decoration. I even added the tab from a can as it was recommended in one of my last posts as a way to adorn my project. Great idea! I feel that with the colors I was able to include, the lone cowboy came to embody the Old Western aesthetic. With some of the main defining features of someone living in the wild west, such as the vest, chaps, boots, hat, and lasso, this project stands as a fun decoration that meets the aesthetic I wanted it to.
Sources:
Dean, G. (n.d.). Shadow rider. www.landscapesofthewest.com. https://www.landscapesofthewest.com/workszoom/5482648/shadow-rider#/
4 Comments. Leave new
Hey Alex,
I think you did great work with this project, and I appreciate the presentation you were able to fit in on short time!
Having done a project using recycled cans myself, I understand some of the difficulties you ran into.
One main strength I see from your project is your ability to capture a mood and aesthetic from simple materials. You were able to incorporate movement with the lasso and paint a picture with the design of the rest of the cowboy, even with simple materials.
How do you think this cowboy’s design would evolve into an expanded “scene” including more characters like himself, or even a horse as was mentioned during your presentation?
Hi Cole,
I appreciate your mention of creating motion with the lasso. I think that if I were to add to the family it would add a lot to have characters or animals in motion too. I do not believe I have the talent to make a horse, but if I were to I would want it to be in motion too.
Hi Alex,
This cowboy is absolutely adorable. I love how it turned out and I am now inspired to make an entire Keystone Light family of my own. It’s funny, I didn’t think of using hot glue at all while reading this until you revealed that detail. It makes sense, hot glue is kind of like the welding of the crafting world. This project kind of reminds me of those “Metal Earth” model kits. I’ve actually made a couple of those in the past and ended up using hot glue for some parts. I’m wondering how you were able to cut the pieces of the can without leaving sharp edges that could cut you. Did you have to sand them down at all? Did you use scissors or a blade? It could be interesting in the future to make a figure that embraces the print on the can instead of painting it. I also like how you used CAD to help you plan. Overall great job! I am super impressed with this project
Hey Chrisianna,
To be honest I completely forgot about those Metal Earth kits. I have done some too and found them to be a lot of fun but I did not think of them at all when making this project. Maybe part of that was because I could not get the insane precision and slot assembly methods as those kits do. My tool kit consisted of a pair of side cutters, some durable scissors, and a knife to make the initial cut in the cans.