
As my upcycling project, I created a diorama of a witch’s cabin (or a corner of one).
Inspiration, Aesthetics, & Design
The aesthetic and concept of this project were roughly decided around the same time. While looking for a topic for the aesthetic exploration post, I had decided to use that aesthetic for my upcycling project. At the time, I planned on using an old spice bottle as upcycling material for my project, so I wanted an aesthetic that would fit with the bottle.
After scouring the wiki, I stumbled across witchcore: an aesthetic centered around witches and witchcraft. I was inspired and wanted to turn the spice bottle into a potion bottle or a mini witchcore-themed terrarium. But those ideas were scrapped because they felt too simple and were slightly too small for the size requirement. However, they did lead me towards dioramas.
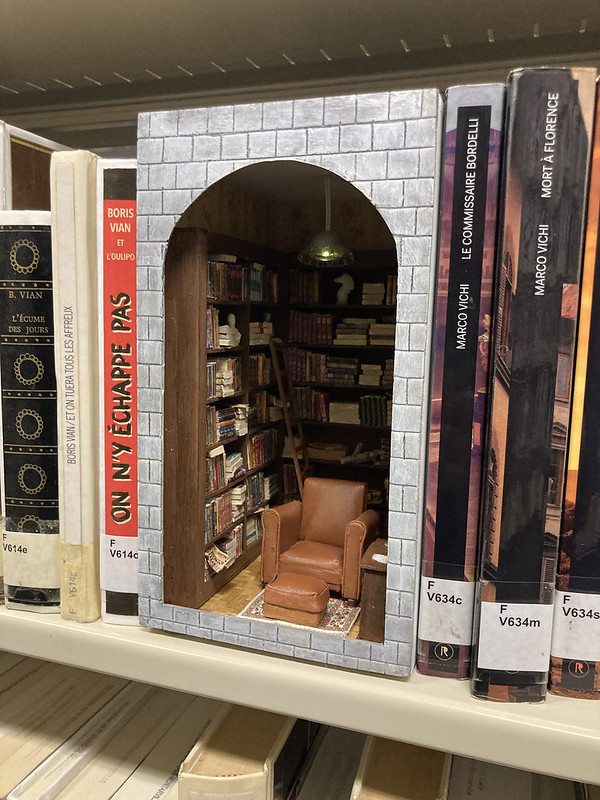
Have you ever seen those little dioramas that children make? I remember seeing some in elementary school and being filled with awe. It was something that I’ve never done before or had a reason to do, so this was my chance to try something new. In addition to those, I was inspired by the detailed book nook decor pieces. The details were spot on and felt like their own miniature worlds. Thus, I decided to create a witchcore-themed diorama of my own.
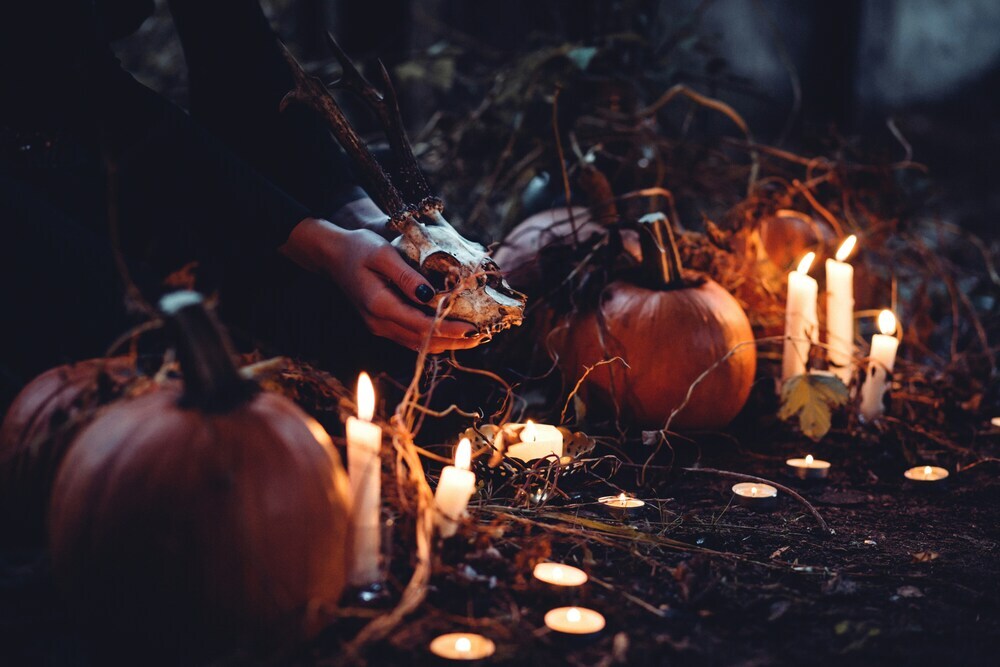
As the aesthetic is centered around the concept of witches, there are many potential layers to it, each focusing on different aspects of the aesthetic. Generally speaking, the aesthetic is often associated with dark, dull colors scheme and motifs abouts magic, herbs, natures, occults, and death. For my project, I went with a more rustic and cottage core adjacent version of witchcore because that’s how I imagine a witch’s home—a cabin tucked away in the middle of the woods.
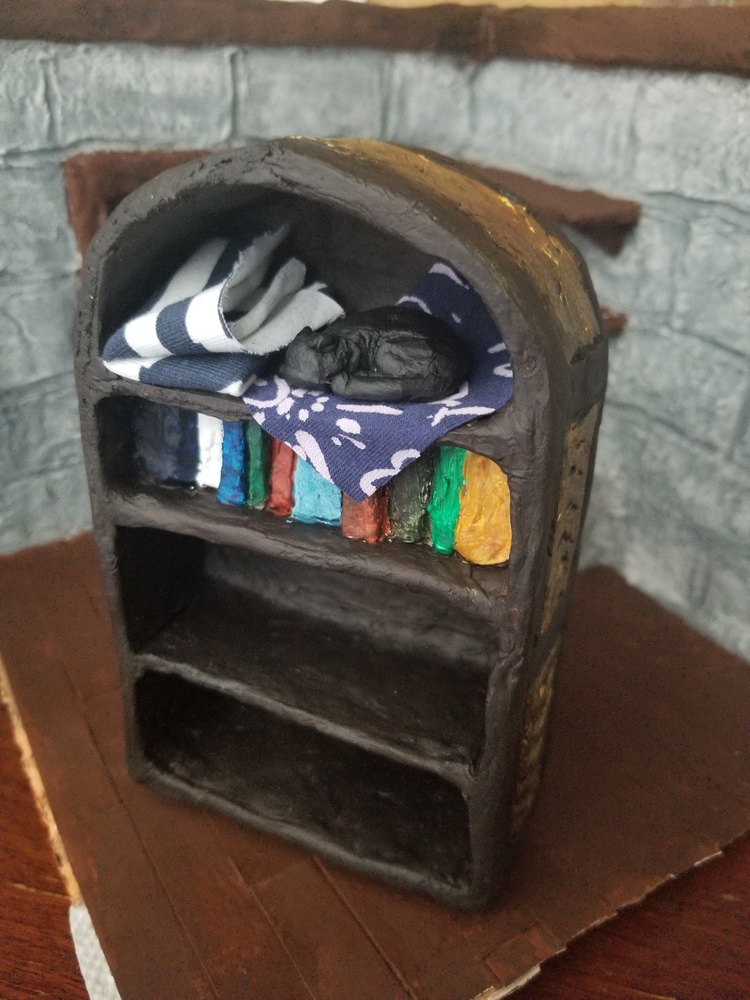
Because an entire cabin would’ve been too much work, I decided to focus on a single corner of a witch’s home—their work station. Of all the areas, this would probably be the most “witchy” area because it’s where all the things that identify them as a witch exist. While designing my diorama, I used Emma Foss’ miniature witch’s shelf (@ystreetstudio) and Tamas Erdodi’s “Witch Room” design as inspiration and references for my design. Their works helped me come up with decor ideas and solidify the ideas in my head.
In my design, I used a wood plank texture for the floor and stone texture for the walls because it fit the rustic/cottage core adjacent version of witchcore. The stone walls add more texture to diorama and emulate the coldness of the witchcore. The wood plank floors add color and the warmth of cottages. Moreover, the smooth simpleness of the floor contrasts with the roughness of the walls.
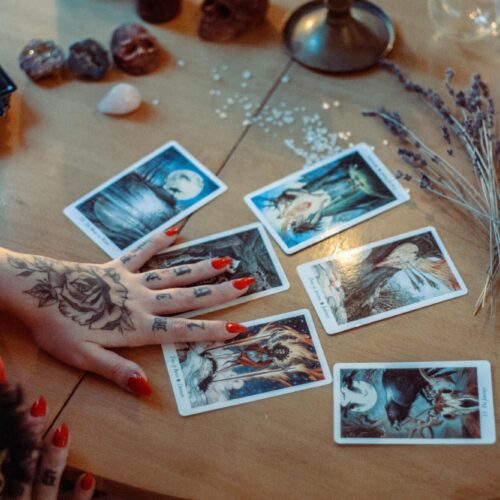
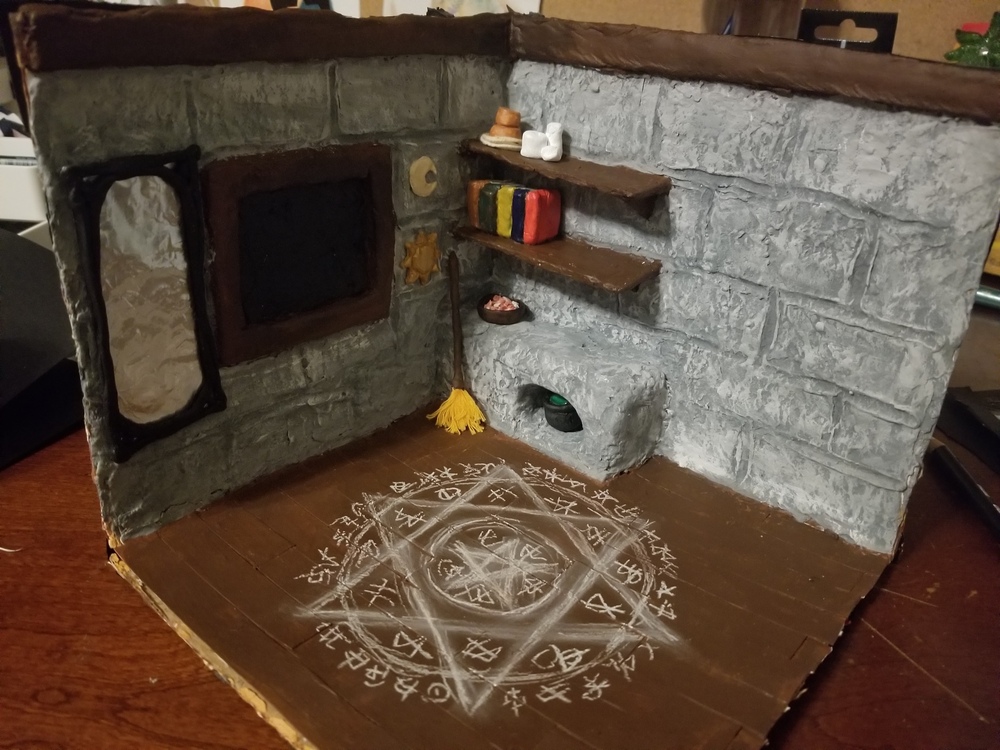
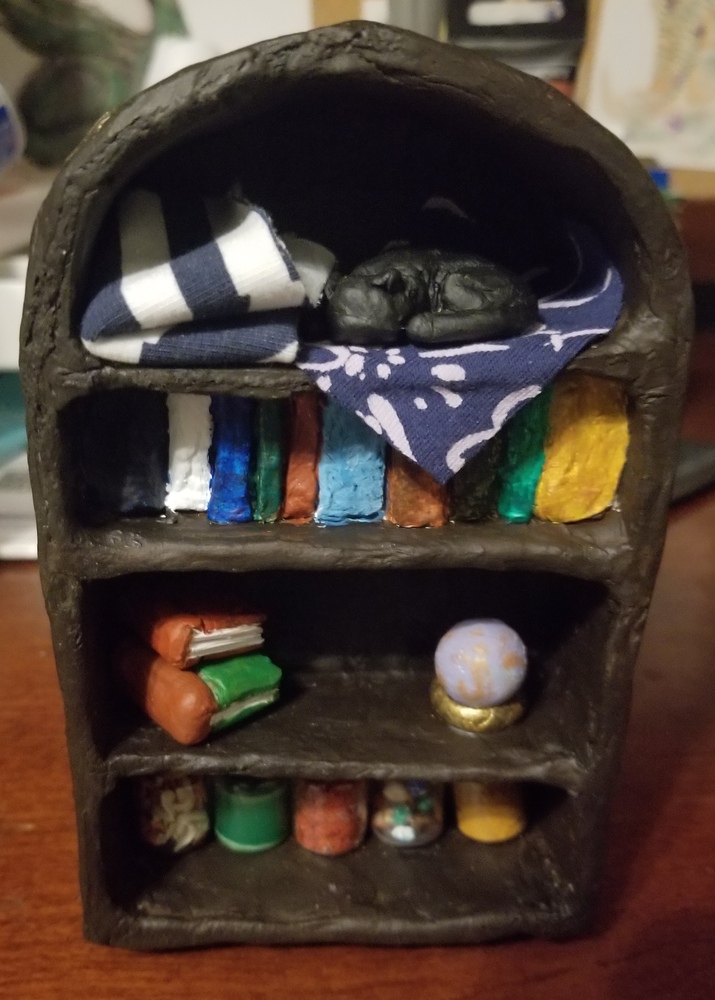
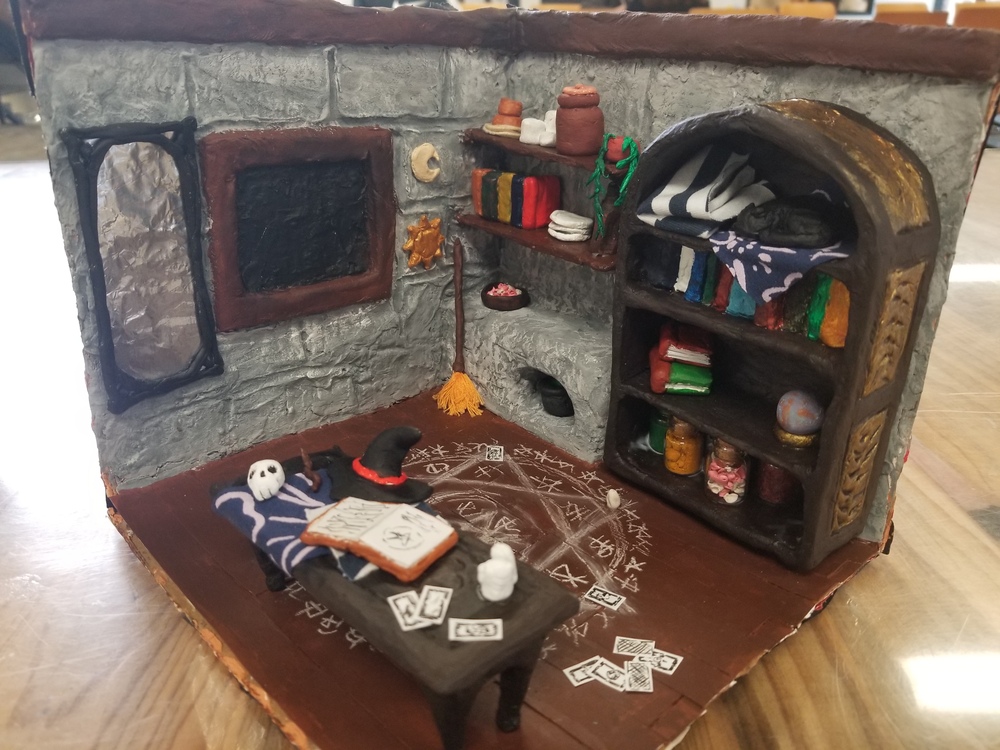
Gothic architecture and furniture fit the vintage aspect of witchcore, so I used those as inspiration for the table, cabinet, and shelves. The first piece was a cabinet with a glass door, inspired by my grandparent’s old cabinet. I planned on adding intricate details to the sides of the table and cabinet. In addition to the furniture, I planned on creating small decor items for the space to give it a more cluttered and used feeling. The initial pieces were jars filled with potions and potion-making supplies, books, a witch’s hat, candles, and herbs. Later, I added other decor pieces such as a mirror, skull, ritual circle, wand, and tarot cards because the space didn’t feel full.
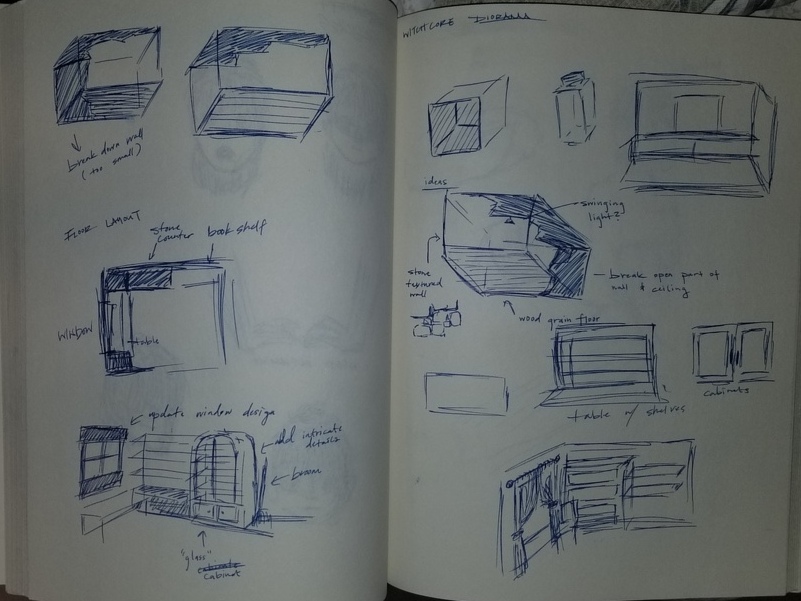
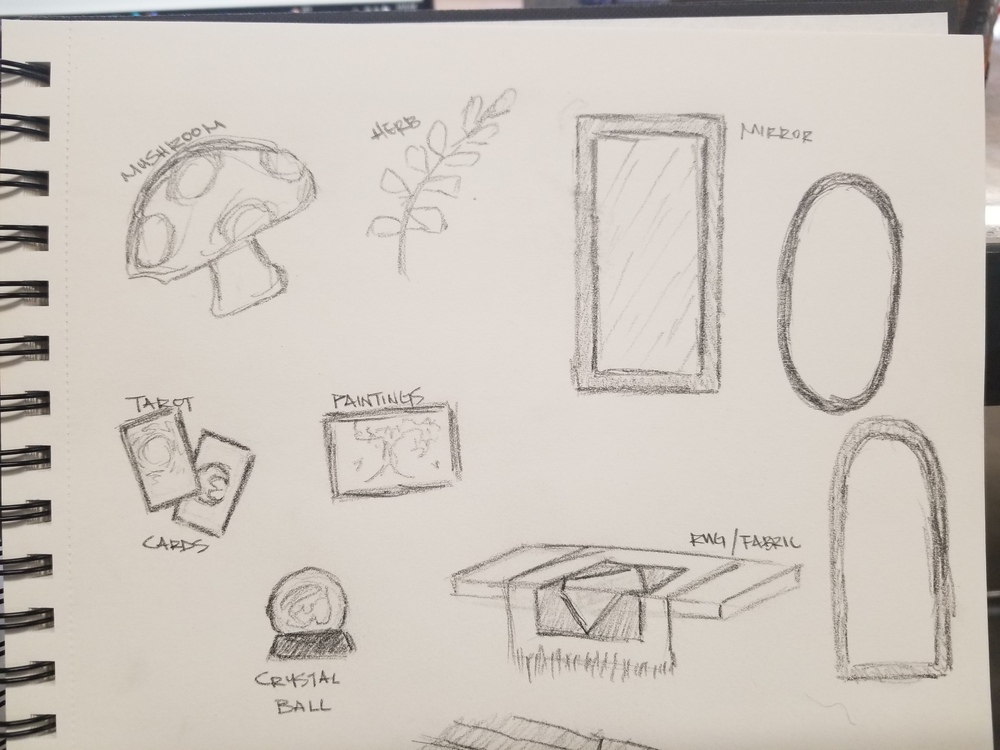
The initial designs also included plans for a half roof/ceiling and a swinging lamp. However, these were not included in the final project because I couldn’t find a singular mini LED light, and I had already spent a lot of time on the details.
Materials & Process
Over the years, I have collected a lot of materials and scraps. Hence, I wanted to mostly use materials that I already owned with a few additional purchases:
- Cardboard
- Clay
- Paint
- Cardstock
- Watercolor Paper
- Styrofoam
- Modge Podge
- Mini Glass Bottles
- Aluminum Foil
- Watercolor
- Water
- Turmeric & Chili Flakes
- Fabric Remnants
- Charcoal
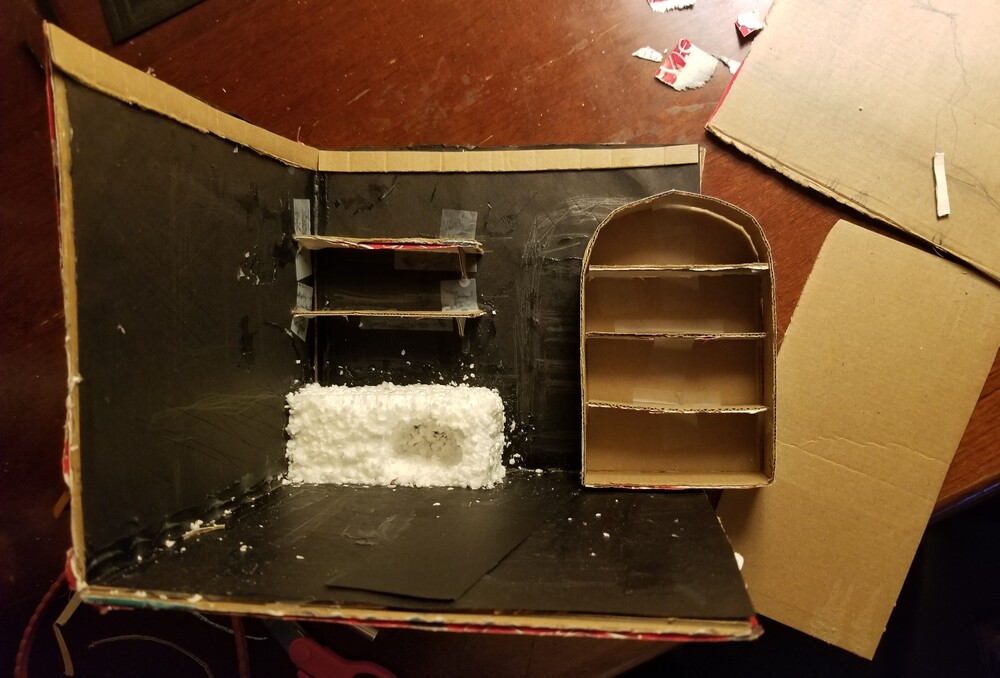
After restructuring the cardboard box, I glued black cardstock on the inside to act as a base for the clay and a black backdrop. Then, I re-sketched the room design onto the cardstock to help me envision furniture placement and served as a guide for sizes.
Next, I carved out a “stone” counter and furnace from styrofoam, gluing it onto the cardstock. I used a mixture of styrofoam scraps and modge podge to fill in cracks, providing more support to the foundation. While waiting for the modge podge to dry, I built bases for shelves, the table, and the cabinet with scrap cardboard. I connected the pieces with glue and tape to get their general placement.
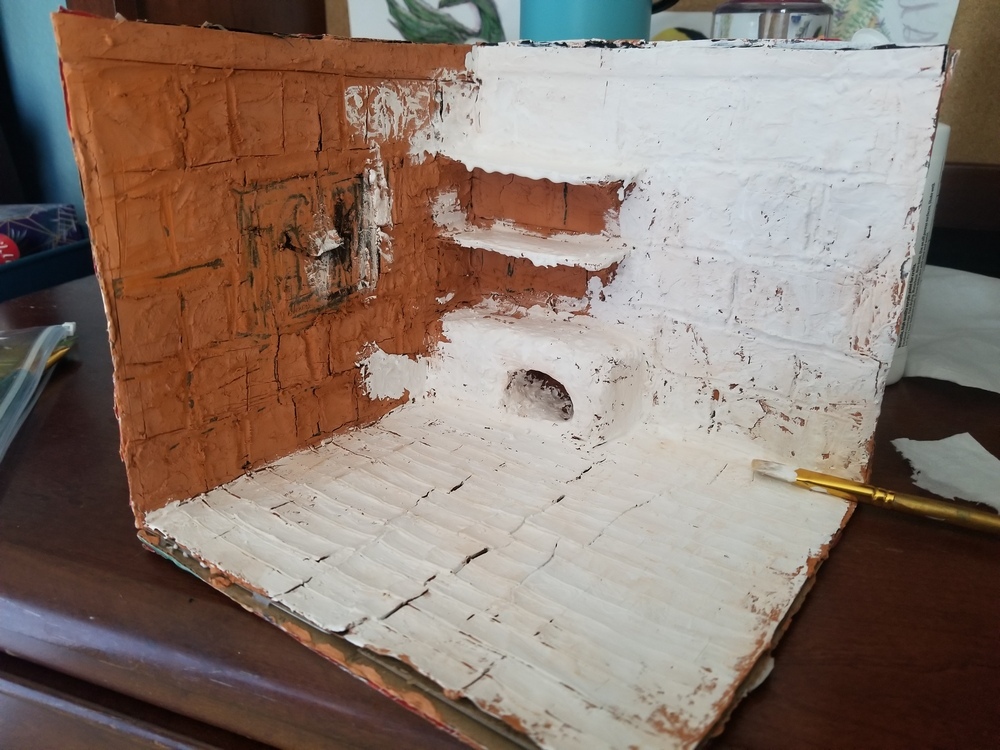
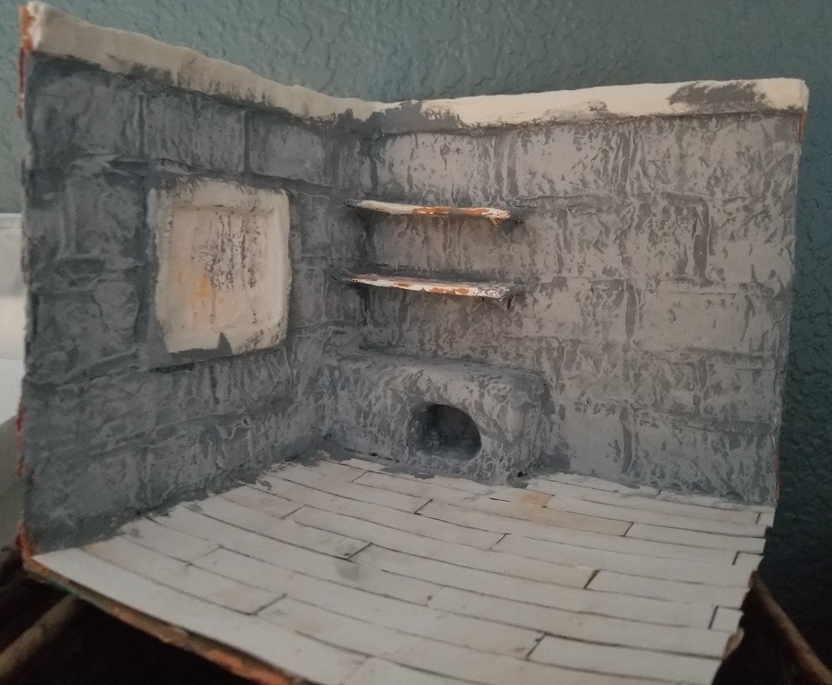
With most of the foundation done, I started working on the clay aspect. The goal was to cover the foundations with clay and use the clay to add details. I covered the entire base with a thin layer of clay, molded the wall into a stone brick pattern, and cut the plank floor pattern into the floor. If things went as planned, painting over the clay would preserve the details of the patterns.
The clay dried overnight, and there were cracks and warping. I expected that, but my hope was that the cracks and warping wouldn’t be too difficult to fix. I first coated everything with a layer of white paint to gauge the damage and prevent the colored clay from staining everything. While the walls were fine (the cracks just added more character), the floor was extremely cracked and warped.

Since I couldn’t fix it, I decided to try my initial plan for the floor plank. Originally, I wanted to create the floor by laying down strips of cardstock like wood planks. However, I was more confident in my ability to cut clay straight than cutting paper. Moreover, I believed that clay could better preserve the pattern of planks, so I didn’t bother trying. While it turned out better than expected, there was still warping from the previous attempt.
At this point, I had used up most of my supplies—modge podge and air dry clay—and needed to restock before I could continue. Moreover, I needed to buy additional supplies for the witchcore decor: mini glass bottles. While shopping, I contemplated the floor’s warped state before deciding to strip and redo it with modge podge and watercolor paper (which is thicker than cardstock) to reduce the warping. It turned out quite well.
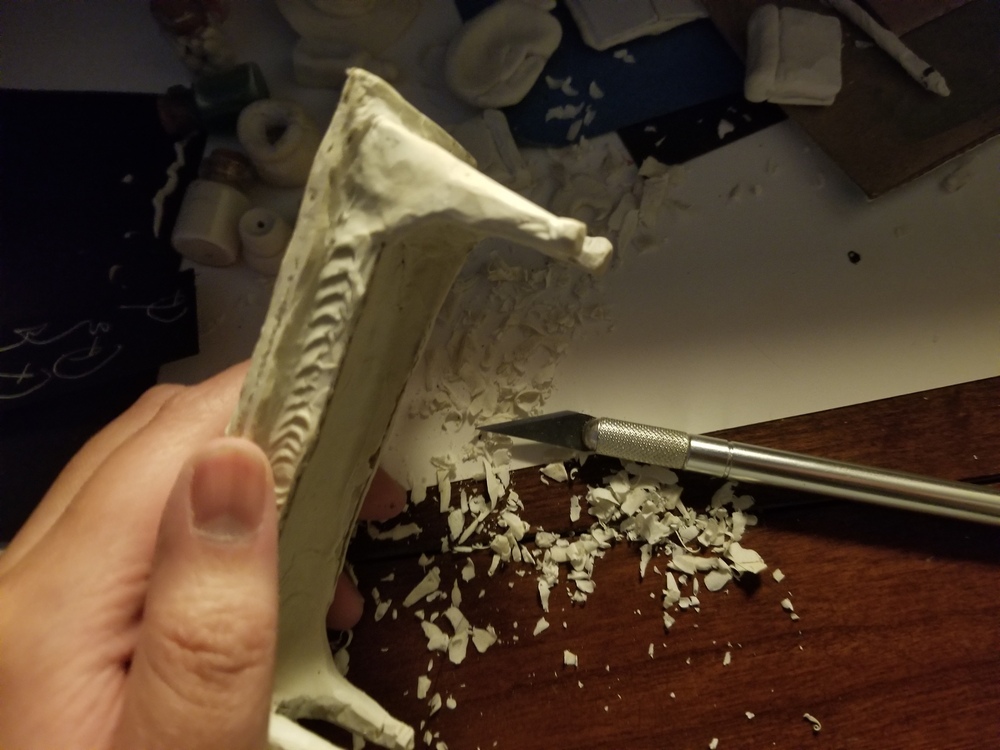
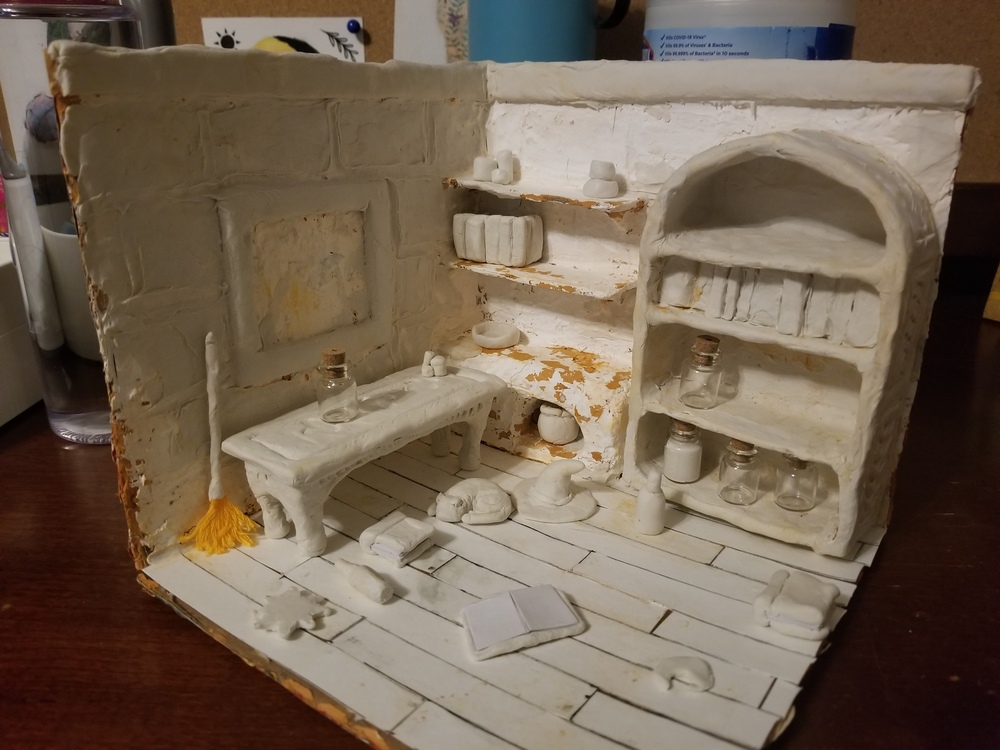
Afterward, I used clay to fill gaps, further build up the brick structure, thicken the furniture, and create some miniature decor. The process was somewhat difficult and tedious because everything was small and the clay was fragile. It kept sinking into itself, making it hard to sculpt without a foundation.
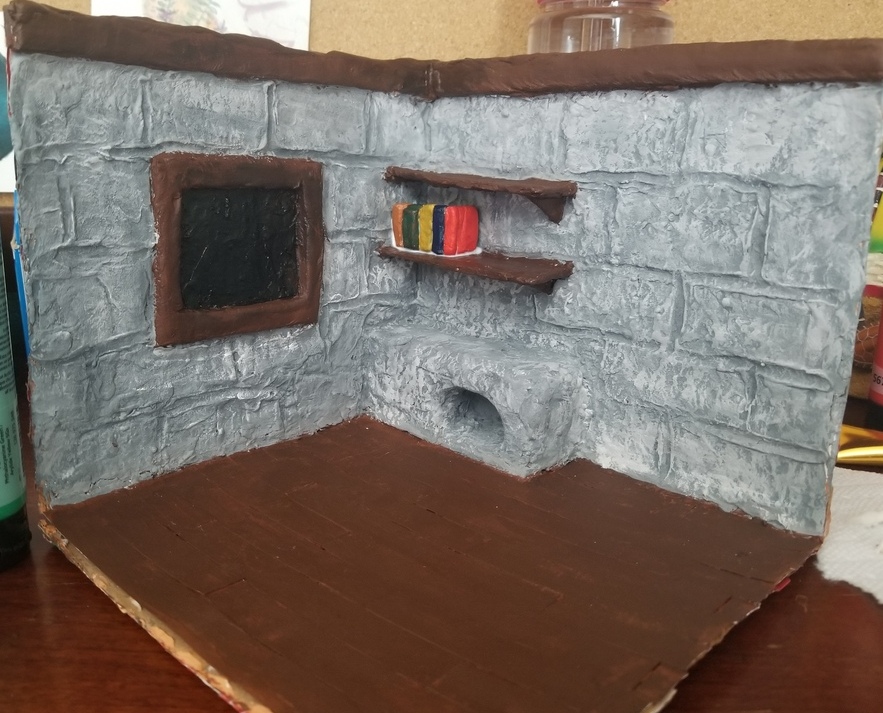
When the clay dried, I grabbed my Exacto knife and shaved the clay into shape, smoothing out the sides and adding details to everything. I repeated this process until the shape was close enough. After letting everything completely dry, I first painted the base, getting darker colors into the cracks and dry-brushing the top with a lighter color for contrast. Next, I painted all the furniture and other decor pieces using multiple colors that were reminiscent of the witchcore aesthetic.
I went back and forth between colors before I got everything to look right. Then, I assembled the pieces together, modge podging the decor pieces onto the base or the individual furniture. There were a few changes between these steps because the diorama didn’t feel full enough. Hence, I created additional decor pieces during this time and moved the table from the wall to the center of the room. Additionally, I added a ritual circle to the floor because it felt too empty.
Final Project, Goals, & Next Steps
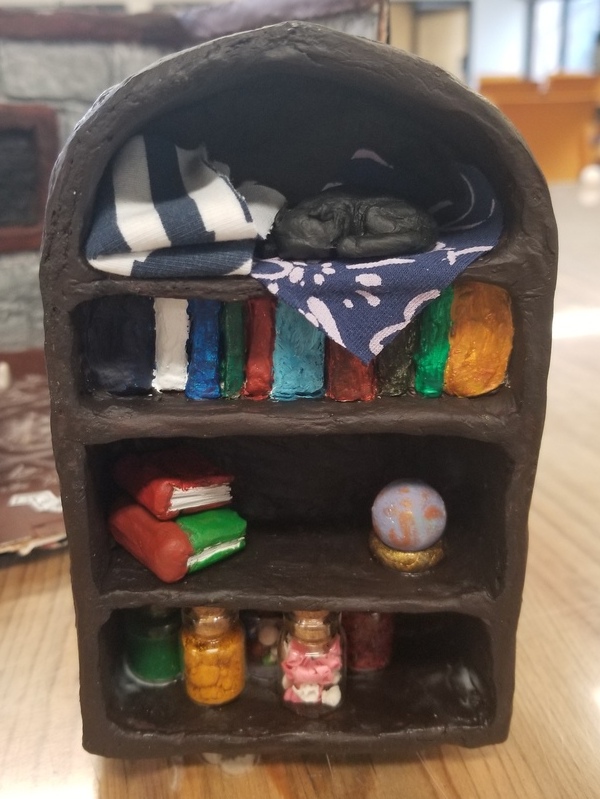
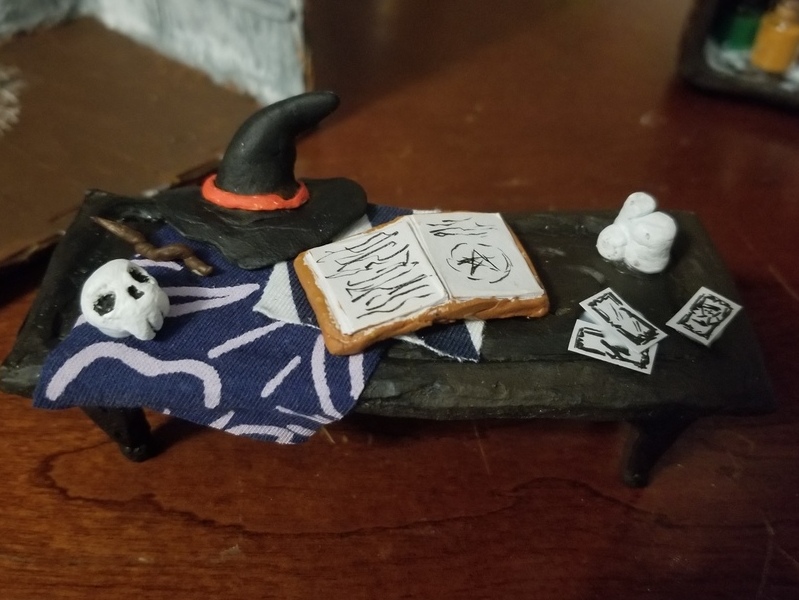
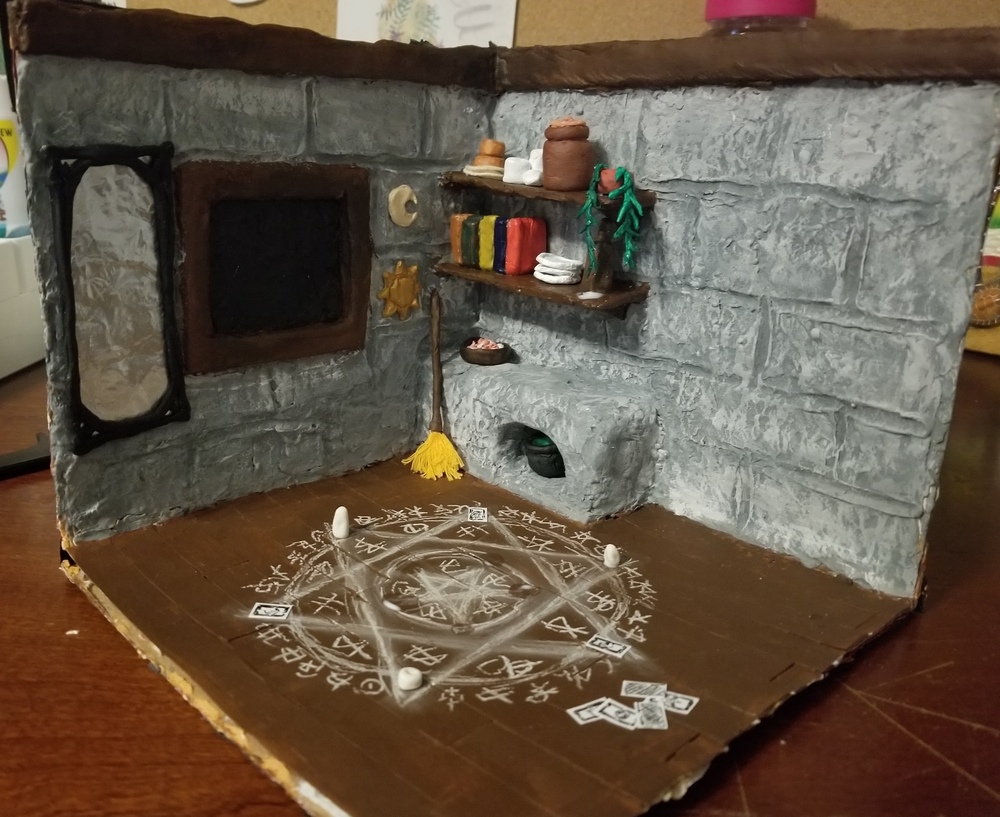
Honestly, I’m very happy with the final results. Everything feels like a lived-in space and part of a witch’s cabin. The detailing in the cards, jars filled with random items, roughness of the walls and furniture, chalkiness of the ritual circle, and other aspects of the build add to the witchy/cottagecore/rustic aesthetic that I was going for. Moreover, I adore the addition of other materials to add texture to the piece. It makes the diorama feel more alive and like an actual space. Hence, I believe that I’ve met my aesthetic goals.
This project had no functional goals (in the end because I couldn’t figure out how to make openable clay cabinet doors or buy a singular mini LED) besides being a piece of decor. It was a nice project to make and fulfilled a childhood desire of mine.
As for next steps, I plan on keeping this diorama and potentially adding more decor to it in the future (when I have time). Some things that I want to change is making the mirror a standing mirror. It looks slightly awkward on the wall. Being on the color would give more space and help me fill the floor space. Additionally, I want to add a chair to fill up more space. Besides that, I plan on touching up some of the colors and pieces.
2 Comments. Leave new
The level of detail is so impressive! Its so crazy how you were able to create this with so many materials, and shows your tenacity for creating. This will look so cool on a shelf. After this experience, are you more excited to do something like a terrarium or do you want to stick with this aesthetic?
Wow, the end result is very impressive, and it seems like you put in a ton of effort to make it good. I am impressed by all the different materials and processes you used to create it! It has great texture and color, along with tons of details. The clay base is identifiable and makes me want to try to make something out of clay again. The sketches are also very impressive, including your initial designs and the floor sigil. I made a kind of similar sculpture, but I just designed it in CAD first and then 3D printed and painted it. Both processes yield similar yet distinct results.