

I based my project on a special edition of LeBron James Hennessy. In my project, I am repurposing the bottle for decoration. The bottle is unique, and I am converting it into a table lamp—the lamp in my living room to provide light for the area. My girlfriend gave me a bottle of Cognac, so I wanted to commemorate the gift and occasion by immortalizing it as a decoration and functional piece of my living room.
My original inspiration for my design is the aesthetic found in sports bars. I have always loved going to sports bars to watch my favorite team play, and the decoration and aesthetic found in these sports bars have always appealed to me. Whether it is jerseys, memorabilia, or team-themed decorations, I enjoy the bright colors and vibes of the sports bar aesthetic that gained popularity in America when one of the first prominent sports bars, Legends, founded by NFL football player Dennis Harrah, opened in 1979. Legends was one of the first bars with TVs everywhere to watch games. As mentioned above, this bar included a lot of memorabilia from different American sports. It ranged from boxing gloves to jerseys to a car hanging from the ceiling.
The sports bar aesthetic inspired me because I enjoy sports bars so much. I have always enjoyed watching sports and want to upcycle something reflective. Also, I am slowly collecting sports memorabilia for decoration, so a project with this theme makes sense. Another major inspiration is the use of old alcohol bottles as decoration by many other college students. Walking into someone’s house and seeing a display of old bottles is common when going to Boulder. This trend inspired me to use an old bottle to decorate my house. Overall, a couple of inspirations came into play in the ideation of this project, and I am happy with how it turned out and the design process behind it.
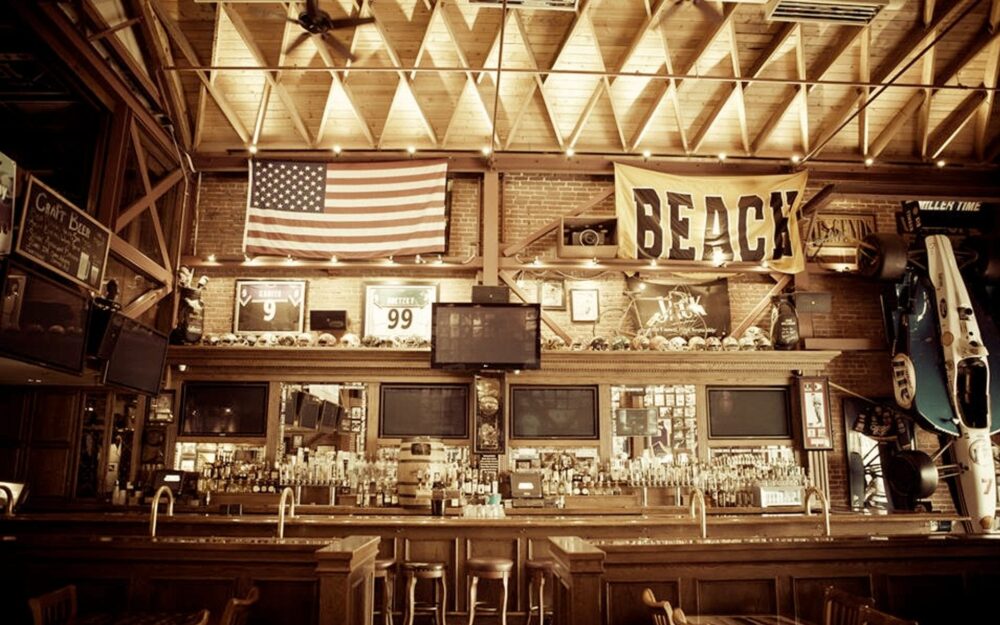 Picture 1: The Original Modern Sports Bar, Legends
As previously stated, my project uses an empty bottle of the special edition Lebron James Hennessey pictured above. The bottle was released to celebrate the storied basketball player LeBron James. Light up the bottle and get a lamp conversion kit from Amazon to make it a lamp. The central requirement for its functionality is its ease of use and ability to light the room. I am hoping that it can plug in and successfully light up. That is the only criterion for the functionality of the lamp.
Along with functional criteria, I want to ensure that the project meets the general inspiration of the project. All the materials should be very cheap or something that I already own. The material selection helps ensure the project is upcycling and not making something new.
I have also set some artistic standards for the creation of this project. The creative vision I had is a lamp that is impressive but not overt. I hope to highlight the Hennessy bottle without overshadowing it with other components. The highlighting of the bottle depends on the base and lampshade. The sports bar aesthetic is also vital for this project. It is the whole point and the main inspiration behind my design.
Along with the sports bar aesthetic, I want the lamp to generally appeal. While the aesthetic is critical, it is equally essential that the lamp is a nice-looking decoration. It is hard to define metrics for this, but I got feedback from my friends throughout the design process to ensure I was not biased in appraising the project’s visuals.
The fabrication progress went as planned. There were minimal setbacks in the fabrication progress, although it took some time. The first step of the fabrication was the sourcing of materials. The sourcing of the lampshade was the most difficult of this process. If I had not found one, I would have gone to Goodwill and bought a shade secondhand. I also found an LED underlight that was not in use. The next part of fabrication was the 3D modeling, which was the most time-consuming part. I used SolidWorks to do all of the Computer Aided Design. A basketball net inspired the first design for the base. It was challenging to get the correct proportions and texture of the net. The final project looked unpolished, so I pivoted to another design.
 Picture 2: Original 3D model of lamp base
I struggled to develop another lamp base concept, so I sought external inspiration. After talking to my roommates about possible concepts, we settled on the LeBron James apparel logo. To model this, I first sourced a picture of the logo, as shown below.

Picture 3: Lebron James logo
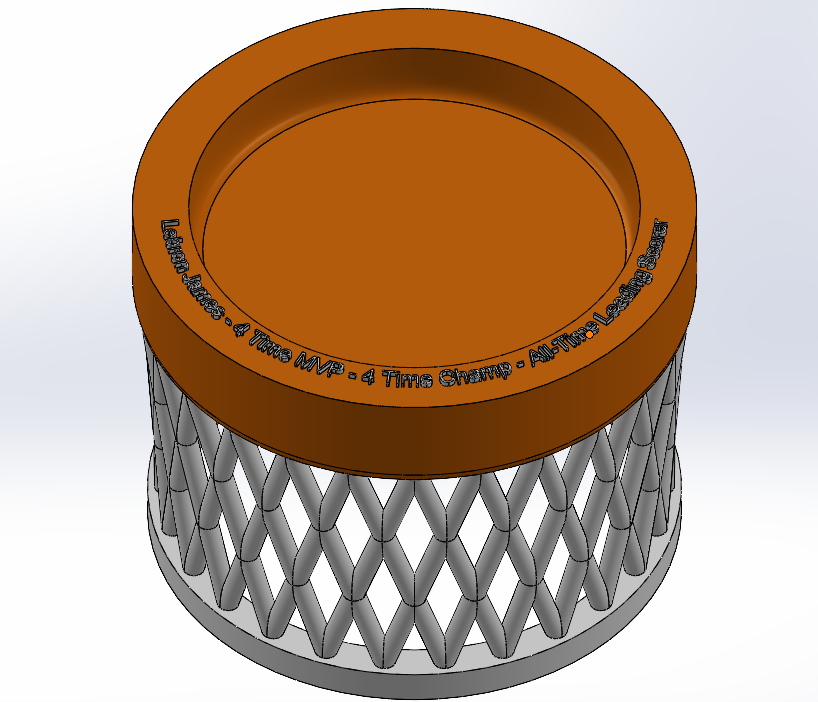
I then downloaded the logo onto my computer and opened it in Preview, Apple’s photo viewing software. I used the selection tool to make crucial measurements of the logo. After collecting all of these measurements in pixels, I used them to model the logo in SolidWorks. The logo took a while because the angles and radii features are hard to measure in Preview. However, I could create a 3D model I was happy with after some time. This model was made entirely by measuring pixels. I put the pixels into inches, with 1000 pixels 1 inch and 100 pixels 0.1 inch. After the model was complete, I scaled it up. I did this by measuring the base of the Hennessy bottle and then using a scalar multiplier to increase the model’s size until the top was big enough to house the base.
 Picture 4: 3D model of the LeBron Logo lamp base
I have a 3D printer at home, so I could print the base without using the ITLL and CU Boulders printers. Because of the size of the base, there was an enormous filament cost. I hollowed out the model to minimize the time to pint and the filament cost. The first print took about 4.5 hours. The design turned out great, but I mismeasured the base of the Bottle, so the print was too small. After adjusting, I increased the base cutout’s size and created a perfectly fit base. The next fabrication step was assembling the lamp conversion kit, as shown below.
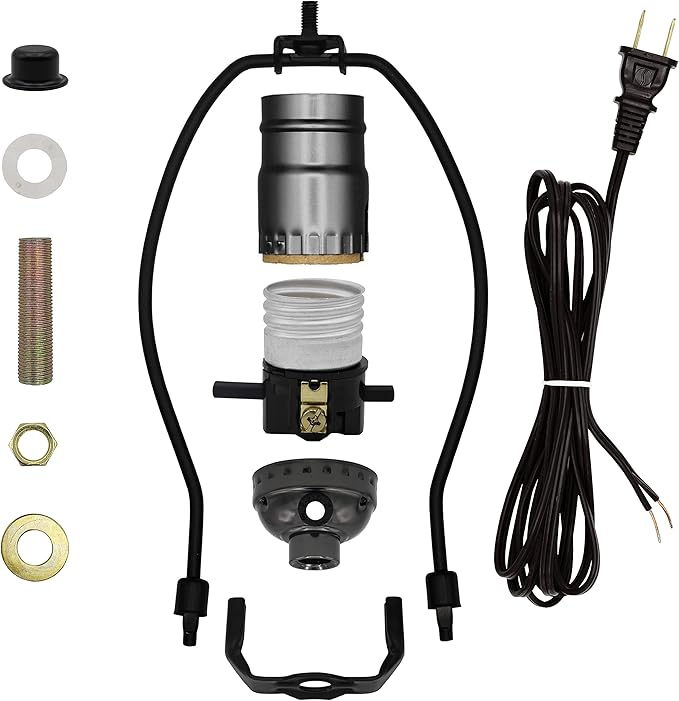 Picture 5: Lamp Conversion kit, Amazon
I bought the kit from Amazon. I thought it would fit perfectly into the top of the bottle and have a wire sticking out, but I learned that the manufacturers routed the wire through the bottom of the kit, so I could not run the power chord to an outlet unless I cut a hole through the bottle. Because of this, I needed to print an adapter to hold the lamp kit and plug it into the top of the Hennessy bottle.
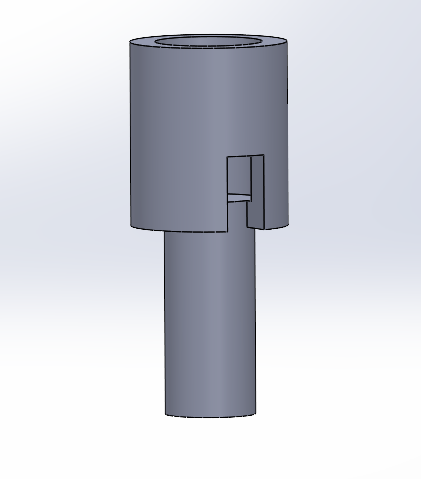
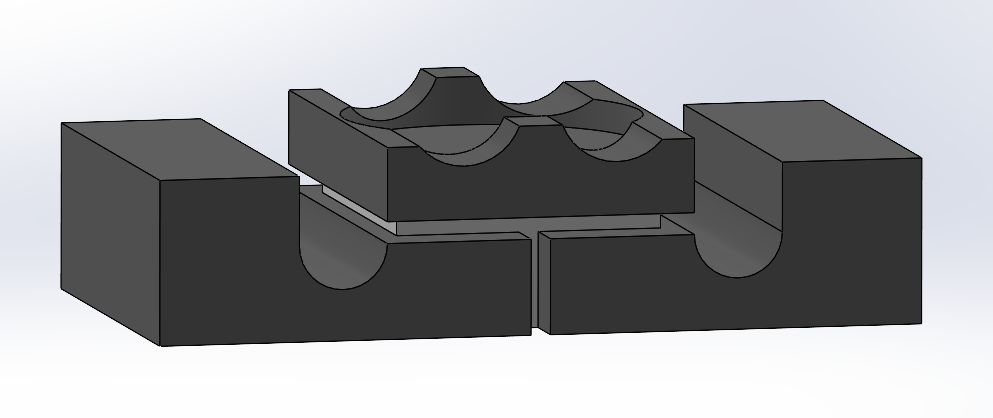
Picture 6: Adapter for a conversion kit to bottle
I modeled the adapter in SolidWorks. The first print of the adapter was too small, but I made a second iteration that fit perfectly into the bottle. After printing the adapter, I simply needed to combine the lamp conversion. This process was simple. It consisted of assembling a couple of pats and then using the screw terminals on the lighting feature of the kit to connect to the power cable. I also needed to use rubber bands to fasten the conversion kit to the adapter. Finally, I assembled all the separate components into the lamp shown below.

Picture 7: Final assembly of the lamp
The final lamp is entirely functional. I used black filament to print the base of the lamp. The base’s color ensures the bottle and its intricate graphics are not overshadowed. The adapter fits nicely into the top of the bottle and holds the conversion kit, which supports the lamp shade. I also effectively cut out a small place for the underlight that improves visual appeal.
I effectively addressed the project’s functional and artistic goals. Functionally, the lamp is fantastic. It has a great warm light that spans across the room. A light switch controls the lamp’s outlet, so I control the underlight and the lightbulb from the front of the room. The project met the main artistic and form goals. There is room to improve because the lampshade does not fit the aesthetic most. Also, the bottle is empty, and I think it could look slightly better if something were inside to increase the aesthetic.
While I am happy with the outcome of this project, there are clear steps to take to improve it in the future. The lamp is currently not fastened to the base, so that I can modify it. Once I finish the improvements, I will fully fasten the bottle to the base with glue. Also, I think the lamp would look much better if a component were inside the bottle. I am researching methods to fill the bottle with dyed epoxy to make the bottle appear full. Epoxy will give the lamp a more realistic look. Finally, I want to wire the chord from the lamp conversion kit and the chord from the underlight to the same plug. While it is not an issue right now because of the switch in my living room, if there were not a switch, it would be kind of inconvenient to have to use two different switches to turn the lamp on entirely. I believe the project turned out great, but there are ways to improve that I intend to do.
References:
Society PB. (2022, June 6). The history of sports bars. Society PB. Retrieved from https://societypb.com/history-sports-bars/
Pictures:
Picture 1: https://legendssportsbar.com/about/
Picture 2: Made by Nike, sourced from: https://1000logos.net/lebron-james-logo/
Picture 5: https://www.amazon.com/
4 Comments. Leave new
Garrison, such a sweet way to commemorate a gift from your girlfriend. I really like the idea you had of filling the bottle with a Hennessey colored resin in order to make it appear full. I could be cautious of having any wiring in the bottle during the resin curing process as it is exothermic and can melt plastic insultation. In addition I would’ve loved to see more second-hand components incorporated into the upcycle. Overall, I think this project is a neat piece of decor and a great conversation starter, great work!
Hello Claire,
I agree that the epoxy would be a cool way to fill the bottle. If I follow through with it I will most likely keep the wiring external. I did not thinking of it being exothermic, but I figure it would be difficult to wire through the resin anyway. I will definitely think of ways to incorporate more second hand components to future projects. Thanks for the advice!
Hey Garrison, I think that your final product turned out great, I think it has a cohesive look that would fit into any sports bar. I thought your discussion of iterating your design throughout this project was interesting. I think using some colored epoxy would be an awesome way to make the bottle appear full and add some more character to the design.
Hello Grant,
Thank you for the kind words. The iteration throughout the project definitely led me to my final product. Also I definitely try and do the epoxy eventually to make the design better.