
Introduction
For my Upcycle project, I wanted to design an item that would be used on a frequent basis in my workshop. A recent project of mine has been my race car build which has taken up a significant amount of my free time for design and fabrication of the many components. Many of the components that make up the build of this racecar are constructed from sheet metal such as the wheel housings and fender flares formed into various shapes and require specialized tooling to form the metal. A shrinker/Stretcher is one of the specific sheet metal tools in my shop that allows me to form compound bends in the sheet metal. However, I lacked a work stand to secure this shrinker/stretcher into place for easy tool use. I then decided that my Upcycle project should surround the use of scrap materials to create a shrinker/stretcher tooling stand in my shop to help me work sheet metal more easily for my race car build.
Influential Designs
My first step towards coming up with an operational design was to research the commercially available designs on the market that would provide some ideas towards my first iteration. Many of the designs that I came across were foot operated. However, I preferred to operate the shrinker/stretcher with a hand lever as I am more used to this type of human input to work the metal.
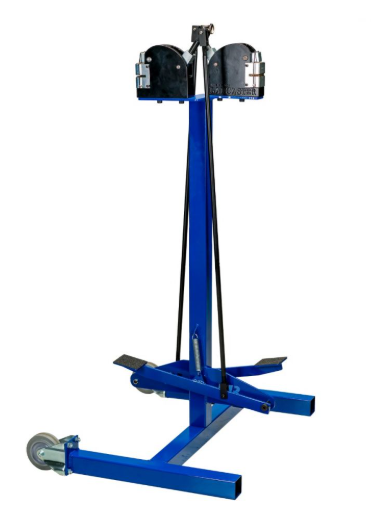
The image shown above is an example of a shrinker/stretcher stand manufactured by Mittler Bros Machine Tool Company. This stand allows for operation of the tool using a foot pedal. However, I prefer to use the original hand lever to operate the jaws. Additionally, this stands retails for over $400 and is another reason that I decided to create my own stand using scrap materials.
Project Aesthetic
The Aesthetic that I chose for this project is a utilitarian aesthetic. This aesthetic prioritizes function of a design over unnecessary ornamentation. Designs incorporating this aesthetic often are characterized as minimalistic and have little in the form of decorative aspects. I decided that this aesthetic would be appropriate since the goals of this project are mainly focused on successful operation of the shrinker/stretcher to perform shop related tasks.
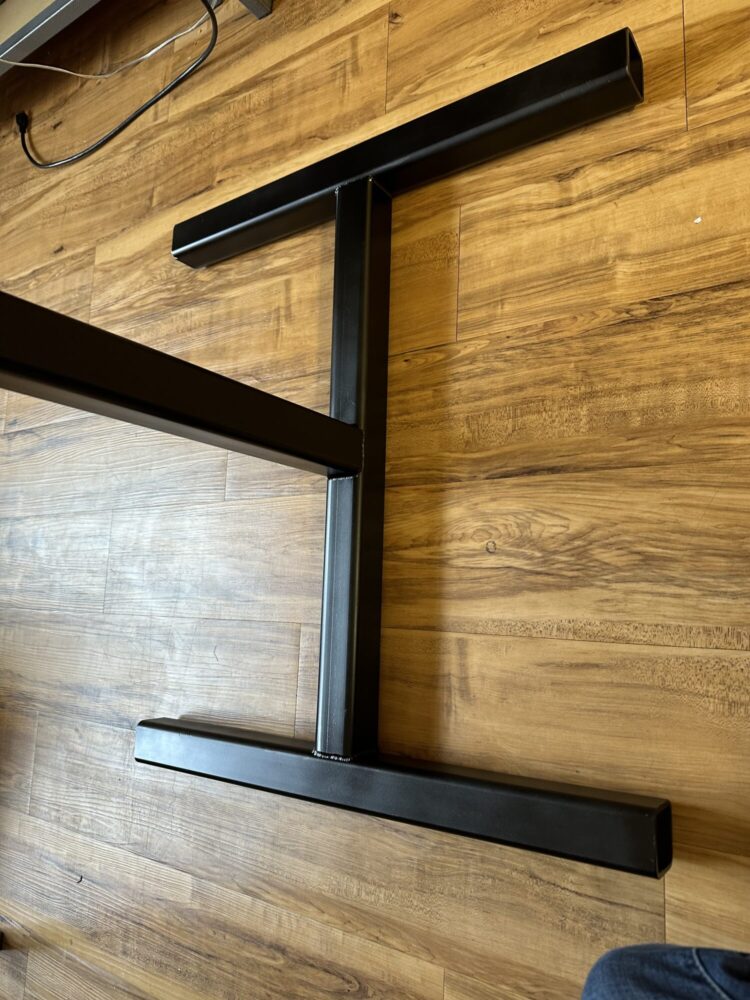
Initial Design
After deciding on an aesthetic, I decided to begin iterating my own design using SolidWorks.
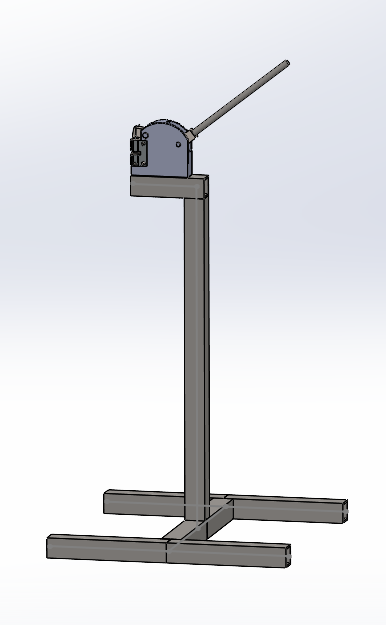
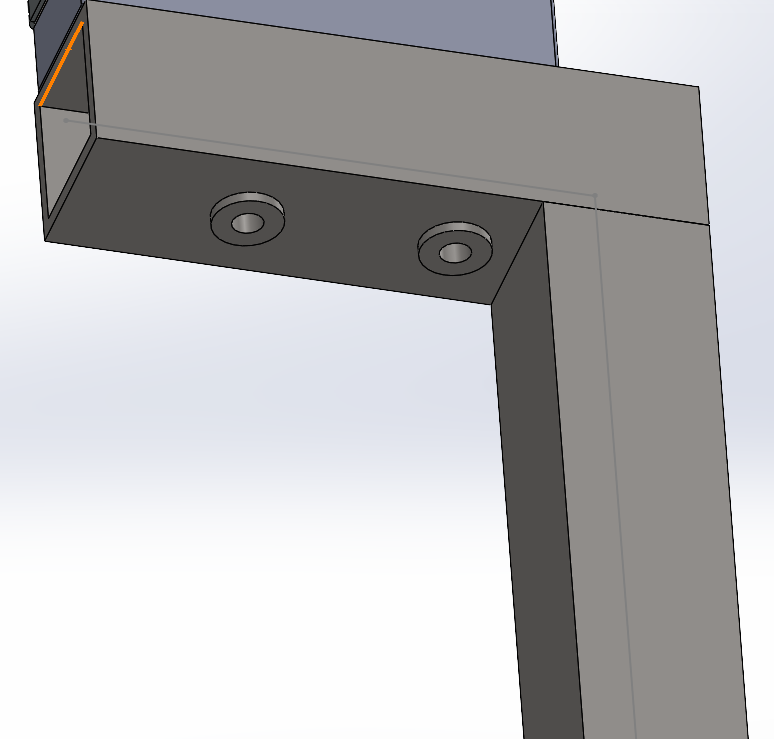
The images shown above are an example of one of my latest design iterations. I decided to create this work stand from 2 x 2-inch square steel tubing as this was a very common size of material that could be easily attained from scrap and is weldable. Additionally, I decided to include weld on tube bungs in the design which will allow me to mount the shrinker/stretcher to the work stand using two 3/8-16 bolts and prevent crush of the tubing caused by torquing the bolts in place. The work stand is also approximately 36 inches tall which allows comfortable access to the top of the machine and the operating lever.
Material Sourcing
After deciding on a final design, the next step was to source scrap material for the square tubing and weld thru bungs. I was successfully able to find some scrap cutoffs of 2 x 2-inch, 3/16 wall thickness, steel box tubing for free on Facebook Marketplace which would work perfect for the main structure of the work stand.
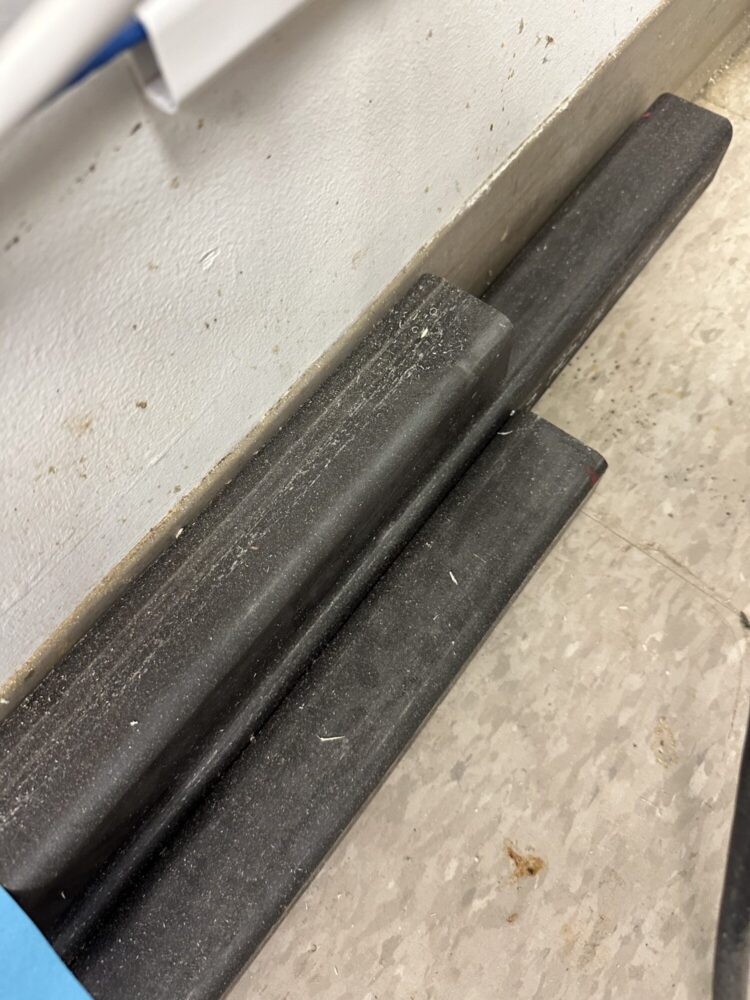
The image shown above is the 2 x 2-inch hot rolled steel box tube cutoffs that were found as scrap. This tubing is large enough that it will allow for a rigid construction of the work stand.
The image shown above illustrates the material used to create the weld bungs. I was able to source some 1-inch diameter HR-50 steel round stock from the ITLL machine shop scrap shelf.
Manufacturing
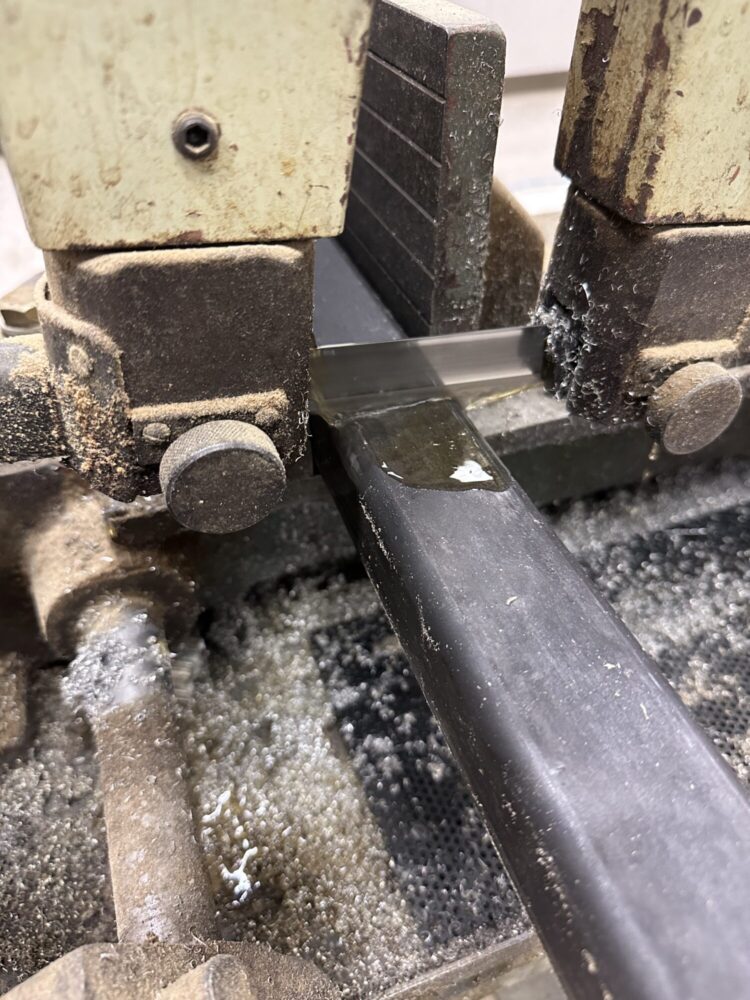
Step 1: The first step toward manufacturing was to cut the tubing down to the correct dimensions in the CAD model. This was accomplished using a horizontal bandsaw in the ITLL machine shop. The tubing was then deburred and cleaned for welding using a flap wheel on a grinder.
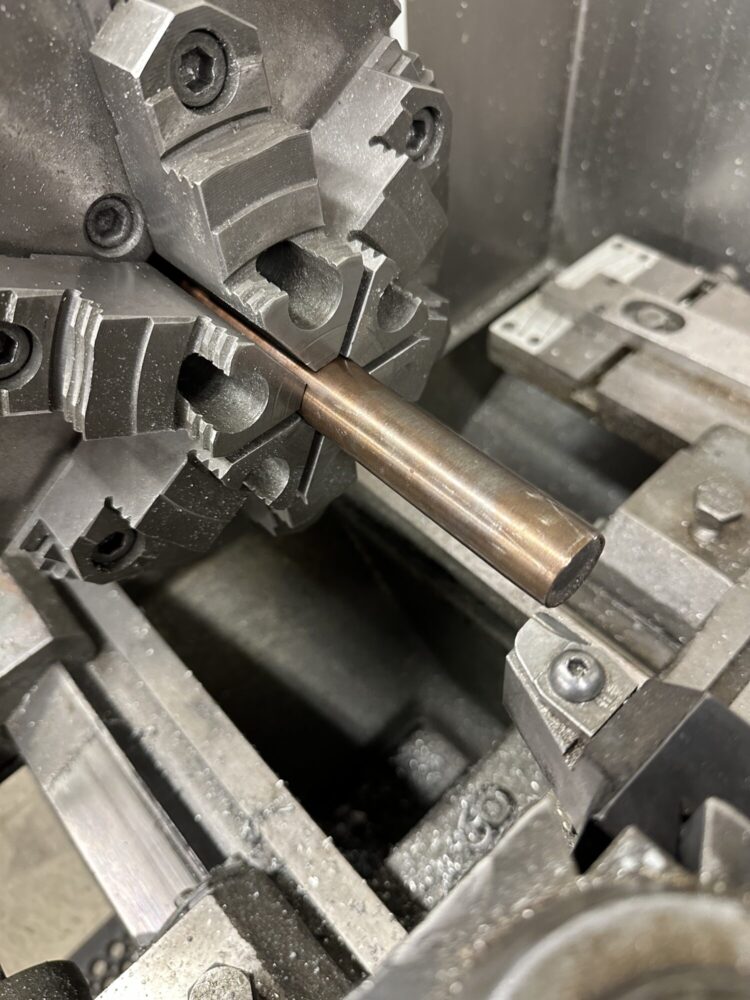
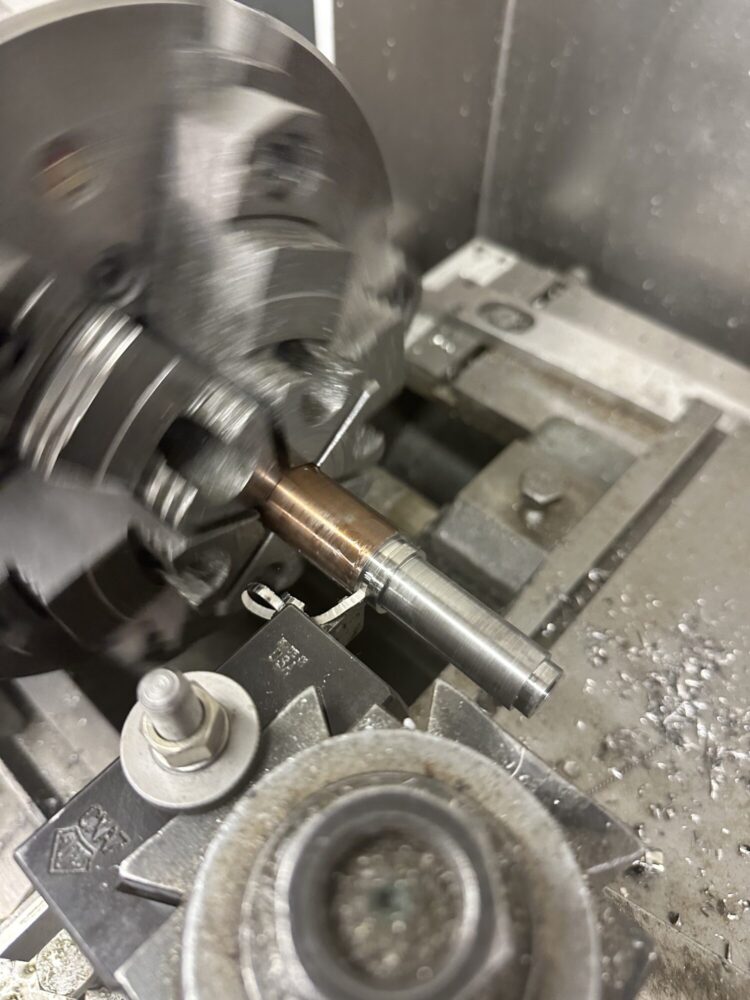
Step 2: The second step in manufacturing was to turn down the HR-50 steel rod on the lathe to create the two weld on tube bungs with the correct inner diameter to accept a 3/8-16 bolt. This process is shown in the image below and was completed in the ITLL machine shop.
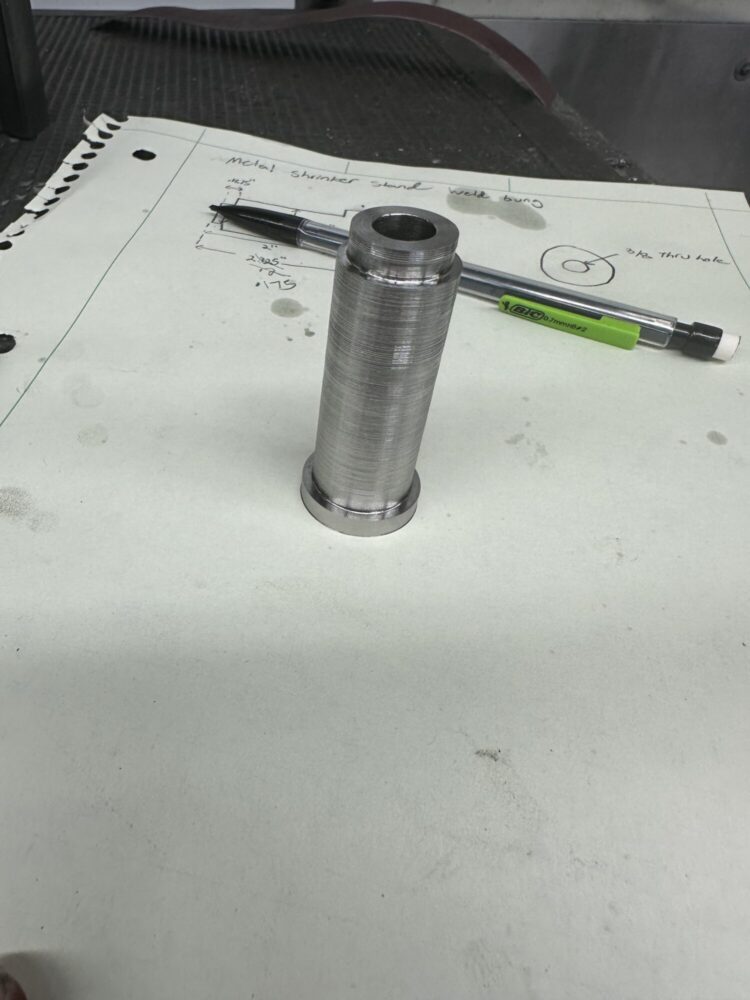
The image above exhibits the completed weld bung after the stock has been turned down on a lathe.
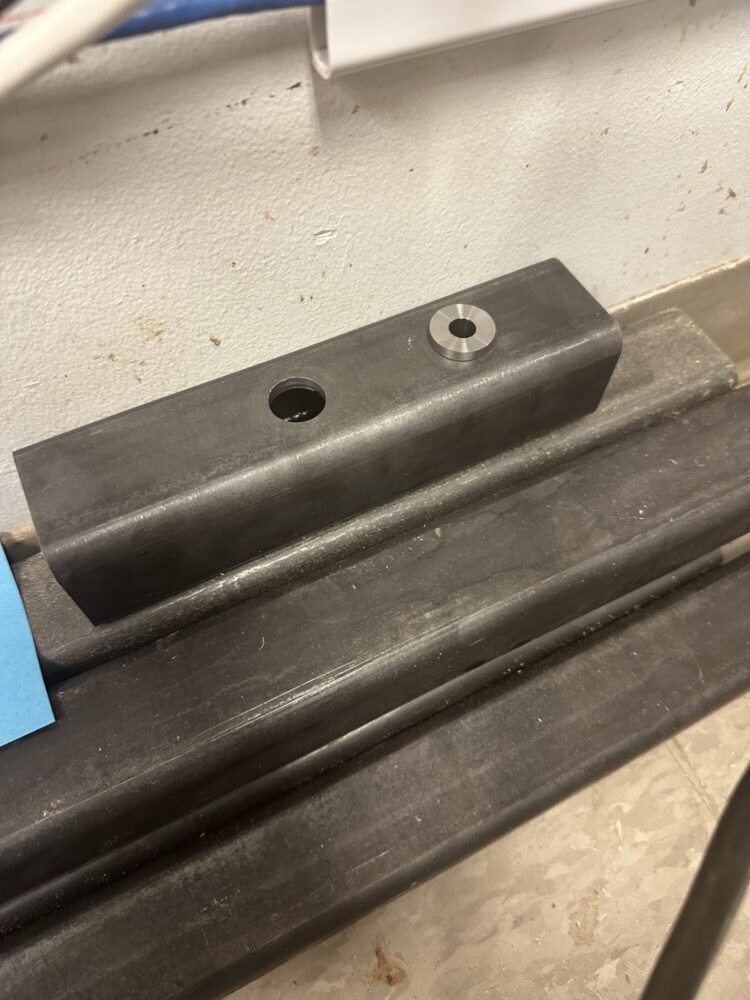
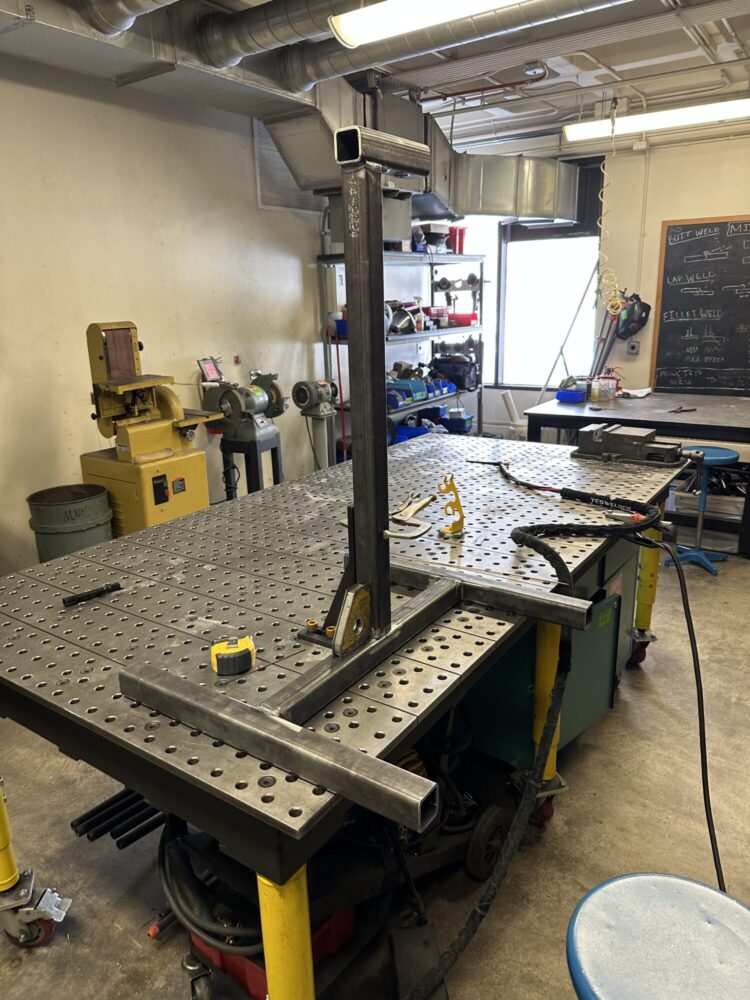
Step 3: The next step in the manufacturing process was to holes in the box tubing for the weld on tube bungs. Once holes were drilled in the box tube using a Bridgeport milling machine, the tube bungs were inserted into the box tube and cleaned for welding. These features are shown in the image below.
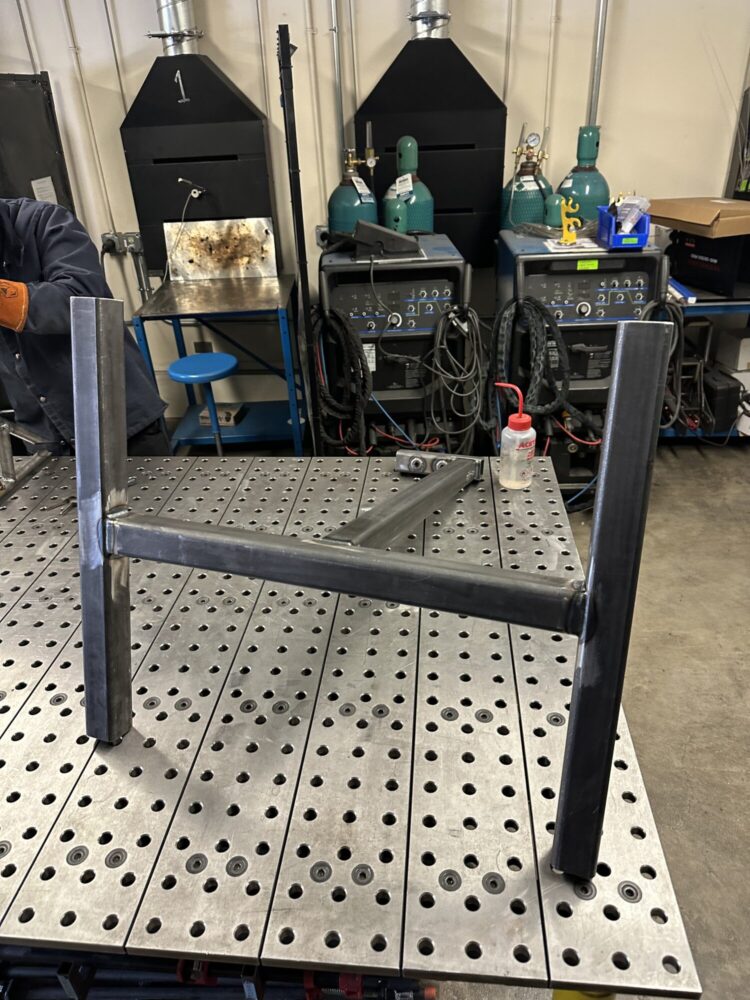
Step 4: The next step in the manufacturing process was welding the frame together. This welding was completed in the idea forge using the TIG welder. The baseplate was welded together first and then the vertical beam was fixed in place on the weld table using a square and clamping fixtures before the welding was complete.
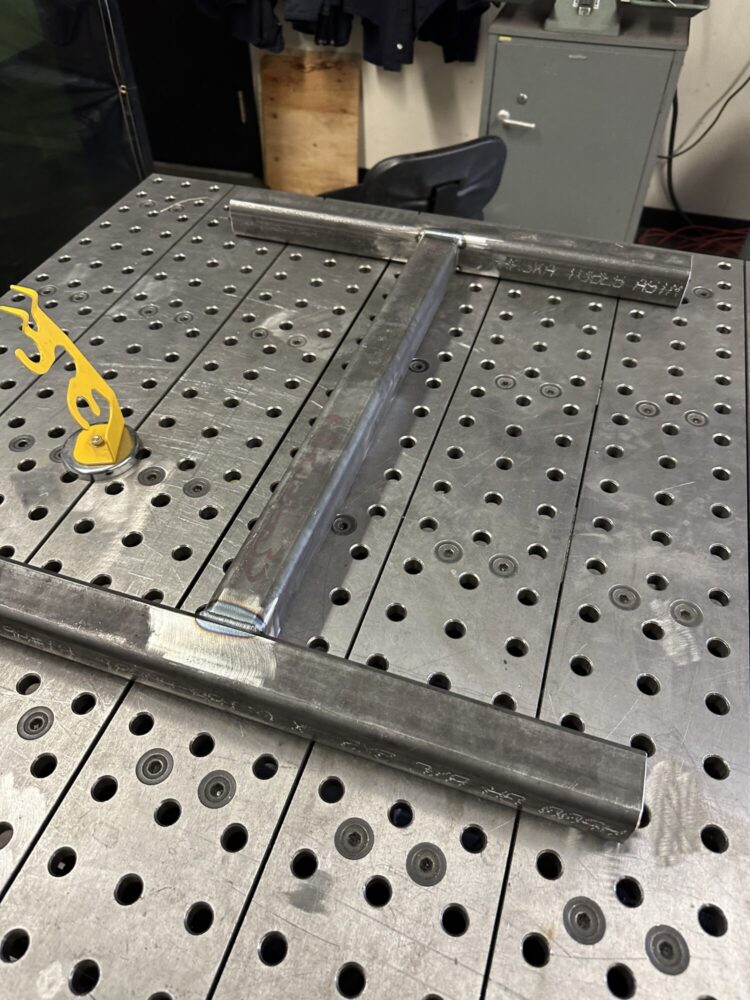
The image shown above illustrates the welded base.
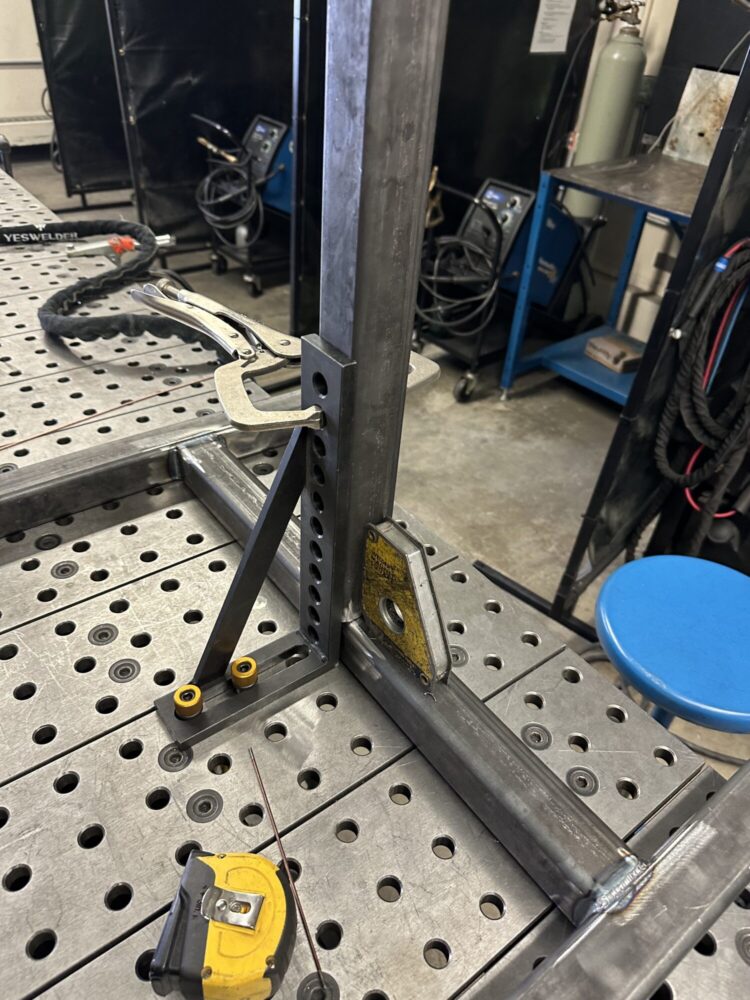
The image shown above illustrates the fixturing of the vertical beam prior to finish welding.
The image above shows the configuration of fixturing square and clamps to make sure that the vertical beam is straight and does not deform during welding.

The image above shows a completed weld securing the vertical beam in place.
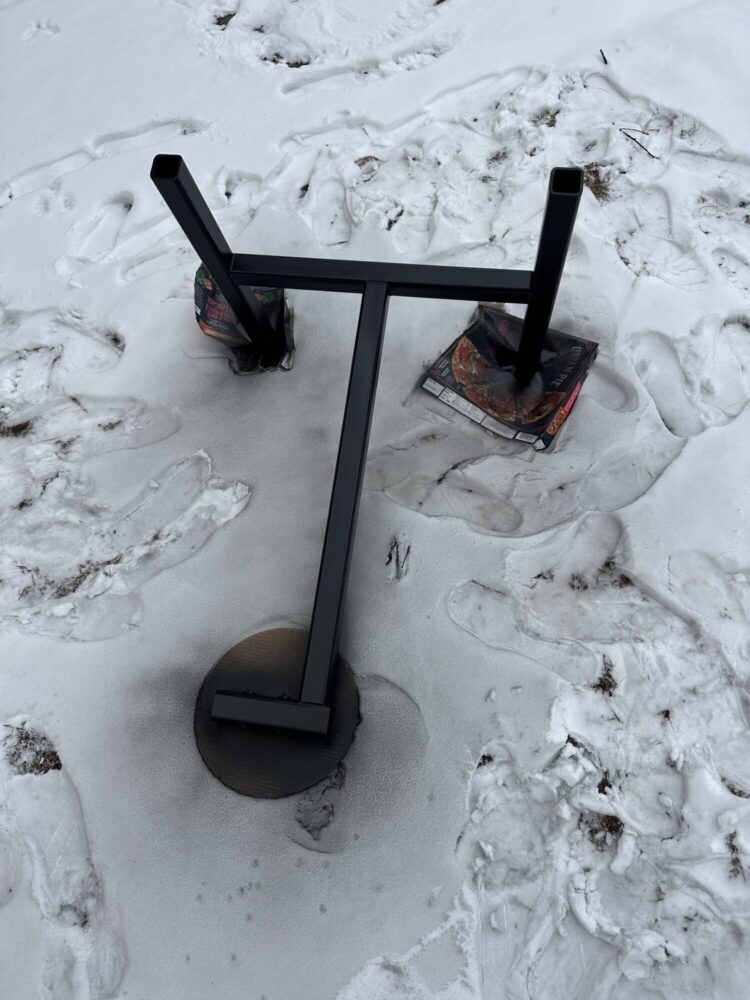
Step 5: The final part of this project was cleaning and painting of the work stand that is shown in the two images below. The frame was prepped for paint using an acetone solution in the Idea Forge. After I cleaned the work stand, I relocated the stand outdoors and using a pizza box as a painting platform, I applied two finish coats to the work stand. I decided to use a 2 in 1 semigloss black paint and primer as it contributed to the utilitarian aesthetic and would be easy to touch up in the future when the surfaces get scratched. At this point, the work stand was a finished product.
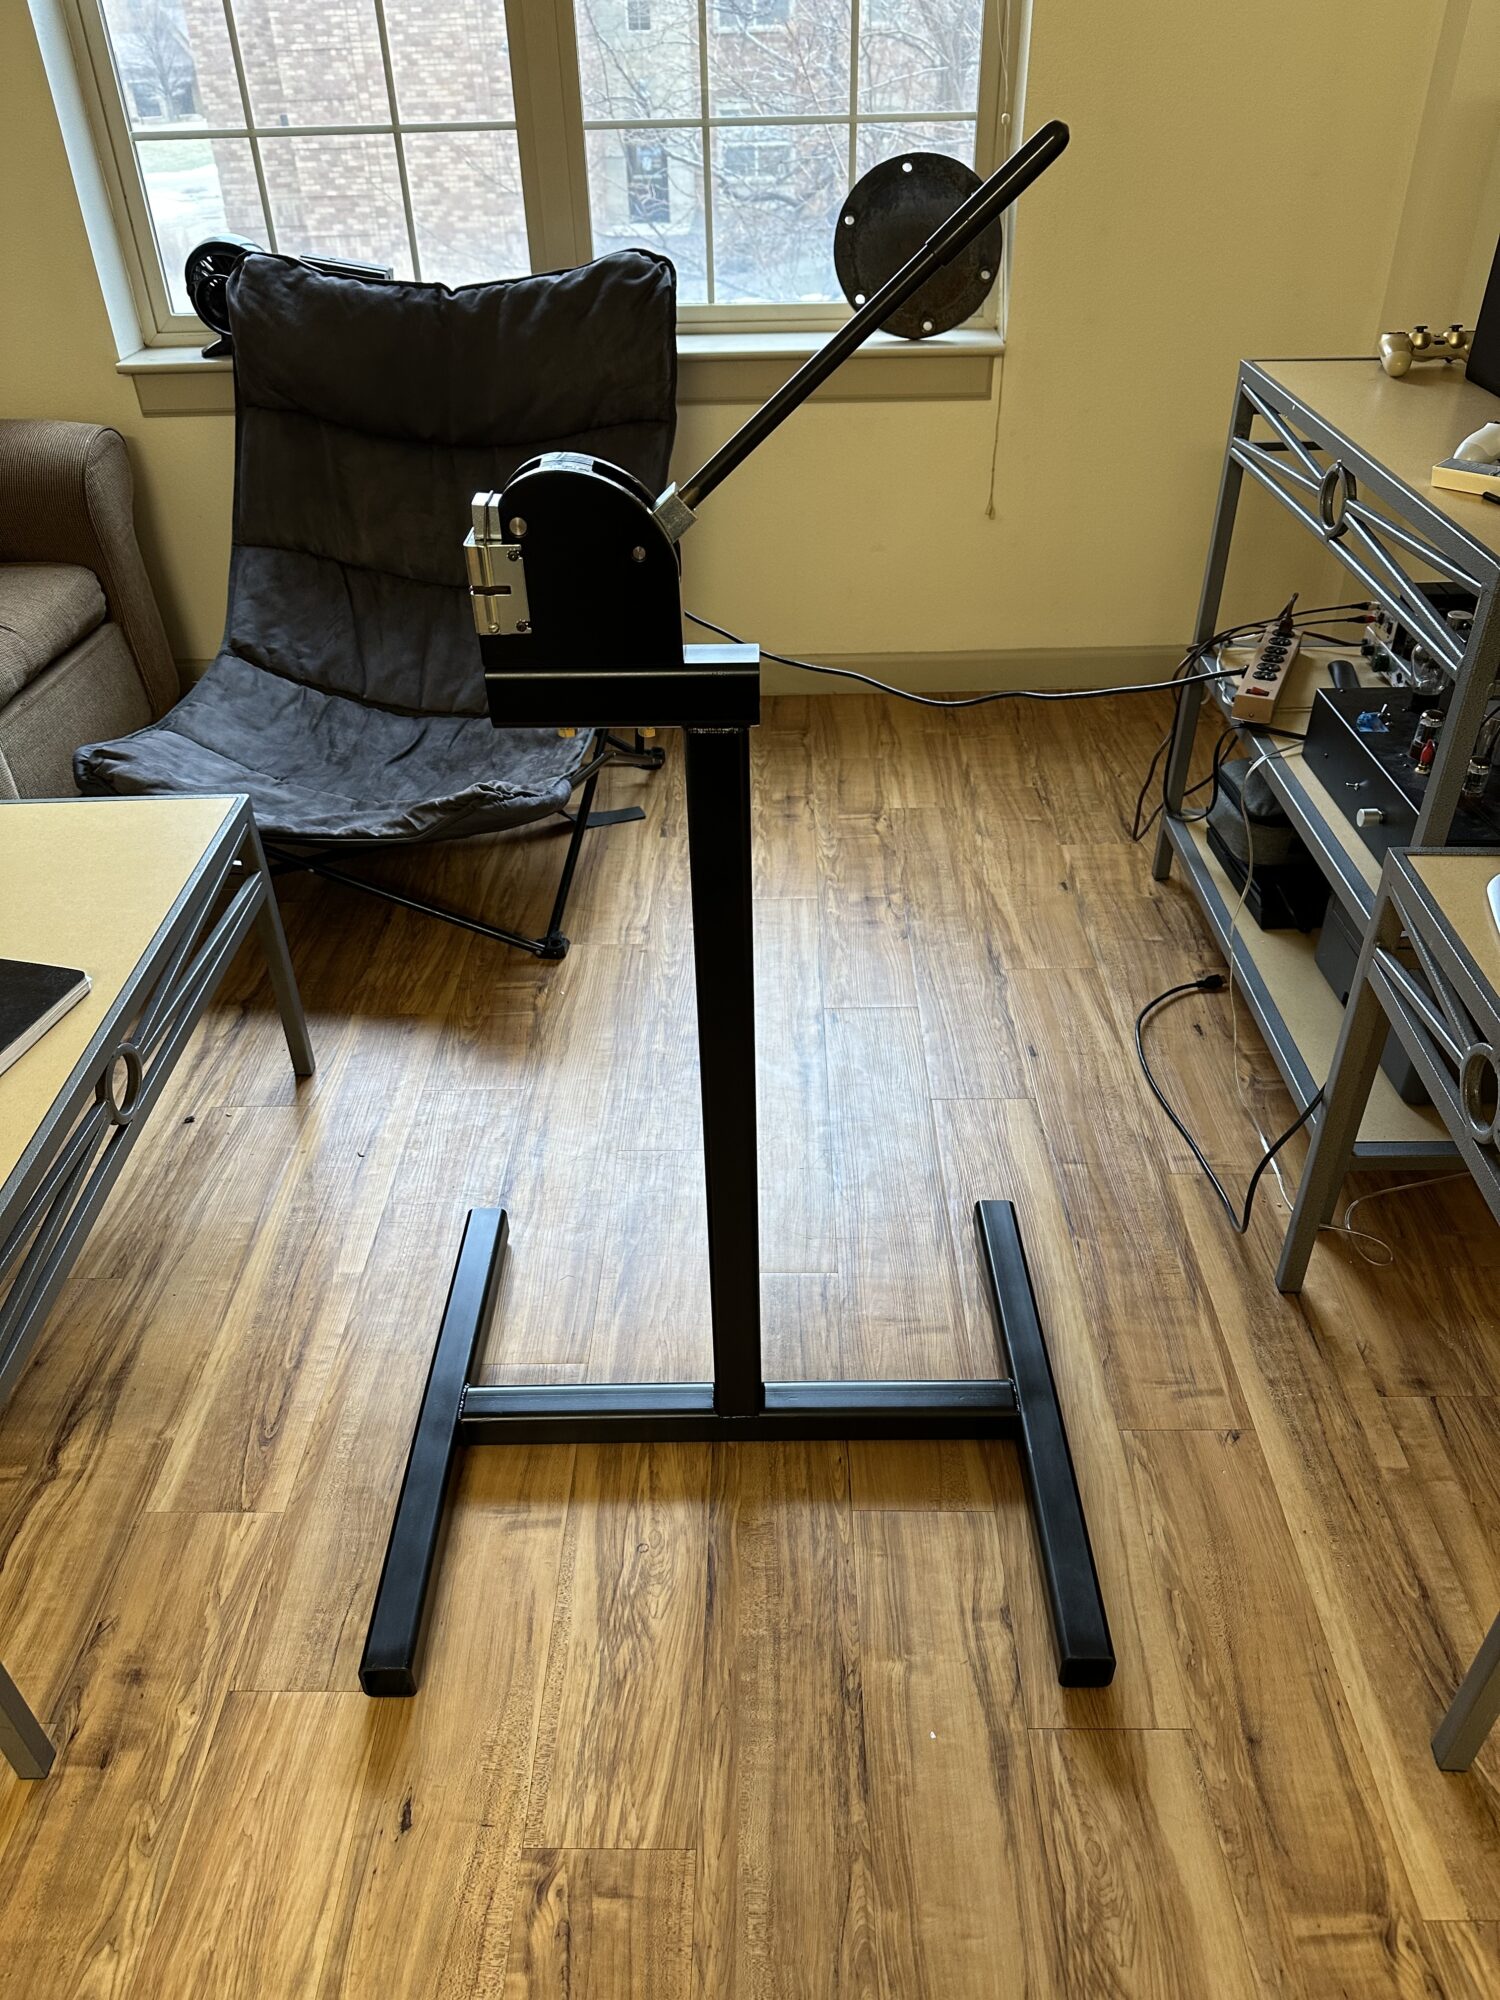
Completed Project
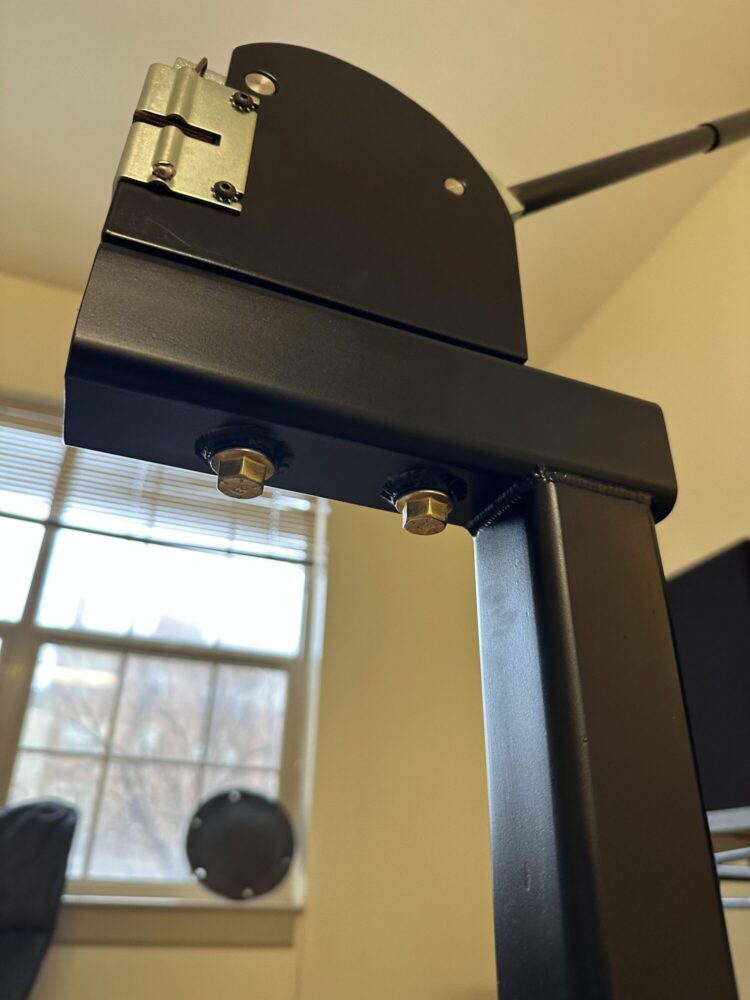
The images below show my completed shrinker/stretcher stand. I had no issues bolting the tool to the work stand, and the operating lever is now at a comfortable work height. I feel that I was able to build this project and meet the goal of following a utilitarian aesthetic as the final design prioritizes function and is minimalist. It is also built for longevity with the thick heavy steel tube construction, and I hope that it will outlast the life of the shrinker/stretcher tool itself. This stand offers a significant amount of clearance to the jaws of the tool which will allow me in the future to work large pieces of sheet metal. I am incredibly pleased by the finished product, and I hope that this tool will see many years of use.

Sources
“Shrinker / Stretcher W/ Foot Operation Stand.” Mittler Bros Machine & Tool, www.mittlerbros.com/shrinker-stretcher-w-foot-operation-stand.html. Accessed 18 Feb. 2025.
2 Comments. Leave new
Great job on your upcycle project David! It’s very cool to see how it has turned out. One part of the project I really enjoy is the simplistic nature of the artifact and how that matches the utilitarian aesthetic, this alongside the black paint makes it almost disappear which allows the user to focus on the metalwork. It seems like it will have a good home in your shop and see lots of use in the future as you work on your racecar project. I am not sure how much force is required to use a shrinker stretcher tool but I am curious whether you think the stand needs any more strength features like gussets at the base of the stand. Overall I hope you are very happy with how the project came out, and very sweet welds by the way.
Hi Chris! Thanks for all of the comments. I also really like the black paint color which I thought complemented the whole simple utilitarian aesthetic. I also thought that the 2 in 1 paint and primer that I used would also be easy to touch up any areas that would be scraped off during use of the tool. I wasn’t able to find an exact required force for the operation of the hand lever. However, I recently used the stand for shrinking some .050″ thick aluminum sheet and the stand did not seem to have any noticeable deflection. I do like your idea to implement gussets to improve the stiffness of the stand if this becomes an issue in the future.