

Introduction
For my upcycle project, I decided to take a piece of scrap wood I found in a dumpster on campus and transform it into a functional and aesthetic cutting board. This project is an opportunity to experiment with my woodworking skills, while simultaneously creating a useful and unique piece for the kitchen. I wanted to craft something that was not only functional, but also leans into the rustic beauty of natural wood. By refining this scrap piece, I hoped to create a versatile cutting board that would last for years to come.
Inspiration
I’ve always enjoyed the hobby of woodworking, especially because of the tactile nature of working with different materials and how they come together to create something lasting. In particular, I’ve always been drawn to the way natural wood tells a story through its grain and imperfections. I wanted to maintain the integrity of the original piece of scrap wood, while enhancing its visual appeal and durability. For this project, I was inspired by the concept of rustic and minimalist design, where simple forms and raw materials take center stage.
Inspiration also came from some of the DIY cutting boards I’ve seen on social media where people cut and glue scrap wood together to create a useful and sometimes valuable final product. I wanted my design to stand out, a when I found the piece of scrap wood with the CU logo in the center, I knew that was how I could separate my project from those which I used for inspiration.
Vision & Specifications
My goal for this cutting board was two-fold: functional utility and aesthetic beauty. On the functional side, I wanted a cutting board that would be durable enough to stand up to heavy use, where it wouldn’t absorb food liquid like normal porous wood. The idea was to create a reversible cutting board, with one side dedicated to food preparation and the other side intended as a serving tray. I wanted the piece to also serve as a statement piece in the kitchen, because of its visual intrigue.
In terms of form, I wanted the board to maintain the rustic, natural look of the scrap wood I was working with. I envisioned a minimalist design, where the grain and natural imperfections of the wood would be showcased, rather than hidden. The board’s overall shape would be simple, with clean lines that reflect both functionality and aesthetic balance. I also wanted to make sure that the board would be ergonomic and user-friendly, so I planned to fillet the edges and smooth out any sharp points or corners. There were also several slots/holes from whatever the scrap wood was used for before I found it in the dumpster. The plan was to fill these holes with epoxy to allow for a smooth working surface on both sides of the board.
On the artistic side, I was drawn to the idea of enhancing the natural beauty of the wood with a food-safe mineral oil finish. I wanted to preserve the raw look of the wood, while giving it a refined and polished finish that would protect it from moisture and wear. This would also allow the board to maintain its rustic charm while ensuring it was functional and durable.
Fabrication Process
![]()
The first step was to examine the piece of scrap wood I found. The wood had various imperfections—holes, cracks, and slots—from its previous use. Rather than seeing these as flaws, I embraced them as unique features that would tell the story of the wood’s previous life. These imperfections would be incorporated into the design to maintain the board’s recycled, rustic aesthetic. Before I could begin working on the wood, I needed to clean it up. Once cleaned, I sanded the surface to remove rough spots and smooth out any uneven areas, using an orbital sander that we had in our garage. I used a combination of coarse and fine sandpaper to refine the surface gradually, the biggest challenge I had was that the top layer of the scrap wood was not raw wood but rather a plastic-like surface. Removing this film layer was essential to make sure the stain would bind with the wood and achieve the desired result. The next step was to fill in the holes with epoxy, because the wood had several cracks and holes from its previous use, which I wanted to fill to create a smooth, functional surface. I used a high-quality epoxy resin to fill in these gaps. After mixing the epoxy, I carefully applied it to the cracks and allowed it to set. Once the epoxy had fully cured, I sanded the surface again to ensure that it blended seamlessly with the rest of the wood.
![]()
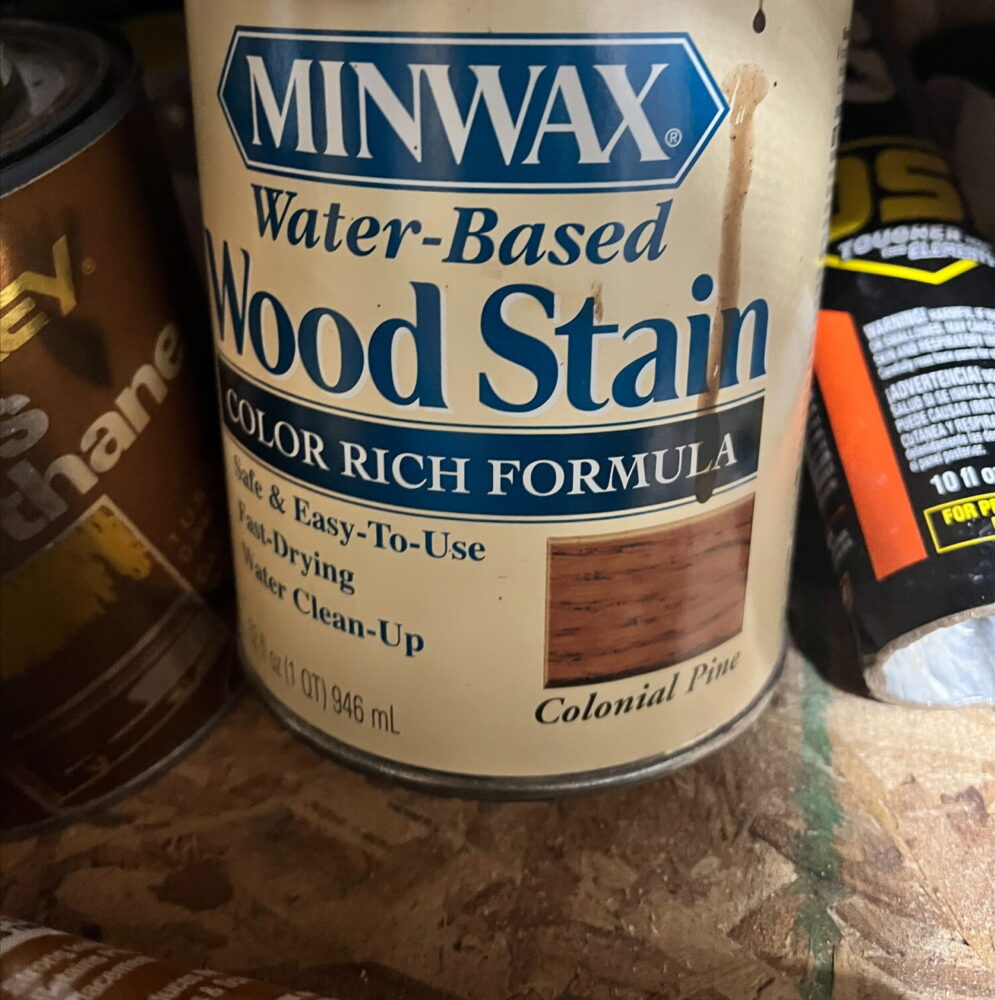
With the surface smoothed and imperfections filled, I began to shape the cutting board. I decided on a rectangular shape with slightly rounded corners to ensure the board had a clean, modern aesthetic. I then focused on filleting the edges to remove any sharp corners, making the board more ergonomic and pleasant to handle. To do this, I used a belt sander to file down the sharp edges, which didn’t create the perfect, symmetric edges, but I decided it was best to embrace these imperfections I had made as a part of the aesthetic. Once all the sanding was complete, I applied several coats of a pine wood stain. It required about four coats in order to achieve the amount of stain I wanted, and to achieve the rustic aesthetic to its full effect.
Once the stain had cured overnight, the finishing step was to apply multiple layers of food-safe mineral oil to the board to protect the wood and enhance its natural beauty. The mineral oil helped to bring out the deep color of the wood grain and provided a protective barrier against moisture and wear. After allowing the oil to soak in, I wiped away any excess and let the board dry completely, through my research this would make the board officially food-safe and useable as a cutting board in my kitchen.
Final Artifact Description
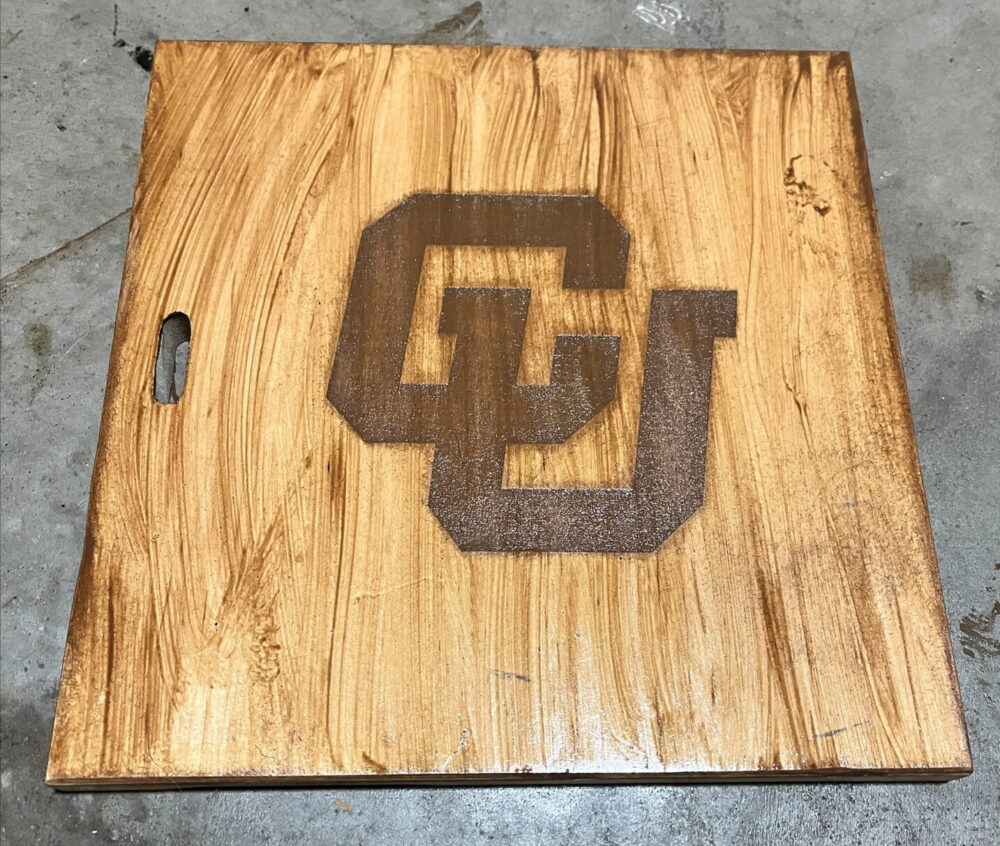
The finished cutting board is a beautifully crafted, versatile piece of kitchenware that blends rustic charm with modern design. The board is roughly 18 inches by 12 inches, with rounded corners and a slightly beveled edge for a smooth, ergonomic feel. The surface of the board showcases the natural grain of the wood, with the imperfections filled seamlessly with epoxy. The CU logo is engraved onto the serving side, providing a unique, personalized touch. On one side, the board serves as a durable cutting surface, and on the other, it doubles as a serving tray for cheese, fruits, or bread. The food-safe mineral oil finish gives the board a refined, glossy appearance, while still preserving the natural look and texture of the wood.
Comparing to Functional Goals
Functionally, the cutting board met the goals I had set out to achieve. It provides a smooth, durable surface for food preparation, with a reversible design that allows it to be used for different purposes. The ergonomic shape and filleted edges make it comfortable to handle, and the board is sturdy enough to withstand the wear and tear of regular use. The epoxy filling and mineral oil finish ensure that the board will be resistant to moisture, making it easy to clean and maintain.
Comparing to Artistic Goals
In terms of artistic goals, I am satisfied with how the board turned out. The natural wood grain is beautifully showcased, and the imperfections in the wood were integrated into the design in a way that adds character and uniqueness. The minimalist approach to the overall design, with its clean lines and simple shape, helped to highlight the natural beauty of the material. The engraved CU logo added a personal and decorative touch without detracting from the board’s rustic appeal. The finish is exactly what I had envisioned, polished yet natural.
What’s Next?
Looking forward, I am pleased with the outcome of this project but am considering refinements to further enhance the design. I received some useful feedback and ideas from the members of my pod after I presented. One I liked the most was to put a leather strap through the slot in the board so further the rustic aesthetic and make the board easier to hang on a hook. This also gave me the idea to add weathered brass hardware to further the aesthetic. I was thinking non-slip feet on one side would be a useful addition to the board.
Conclusion
This upcycled cutting board project allowed me to combine both my functional and artistic goals into a single piece. The result is a versatile, durable kitchenware item that showcases the natural beauty of the wood while also serving a practical purpose. Throughout the process, I learned valuable skills in woodworking and design, and I look forward to continuing to refine my craft in future projects.
Works Cited
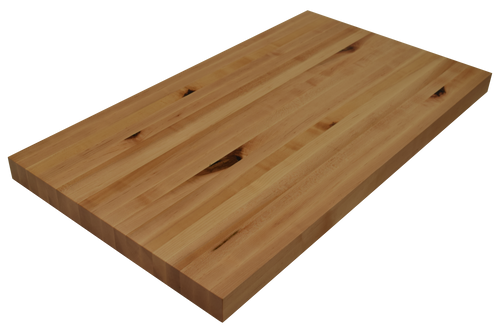
“Rustic Maple eg.” BigCommerce, n.d., https://cdn11.bigcommerce.com/s-qzfum2xyru/products/3805/images/9313/Rustic_Maple_eg__11880.1596121191.500.750.png?c=2. Accessed 19 Feb. 2025.
Mwa Woodworks. “Best Finish for Cutting Boards.” Mwa Woodworks, https://mwawoodworks.com/best-finish-for-cutting-boards/. Accessed 19 Feb. 2025.
“Rustic Wooden Cutting Board.” Etsy, https://i.etsystatic.com/17115679/r/il/eb6994/3177764928/il_570xN.3177764928_kg2k.jpg. Accessed 19 Feb. 2025.
3 Comments. Leave new
This is an awesome upcycling project! I really appreciate how you embraced the imperfections of the scrap wood and turned them into unique design elements rather than flaws. The thought you put into balancing functionality with aesthetics really shows—especially with the reversible design and the epoxy work to maintain a smooth surface. The CU logo adds a personal touch that makes this board stand out, and the idea of incorporating a leather strap and brass hardware would enhance the rustic charm even further. It’s great to see how you pushed your woodworking skills while staying true to your original vision. Looking forward to seeing what refinements you make next!
I have always wanted to make a cutting board, and this one is super refined and the wood grain came out beautifully! This was really well written; I am going to have to make a cutting board following your steps.
How did you do the engraving? Was it done in the wood shop? It is a very cool touch and fits the rustic wood aesthetic. Hopefully, you get around to adding a leather strap because that would also add to the rustic aesthetic since the leather adds a vintage aesthetic.
I really enjoyed the aesthetic of your project with the rustic minimalistic look. I think that your choice to leave the blemishes in the scrap piece of wood rather than repair these blemishes adds perfectly to the rustic aesthetic. I also do like the addition of a leather strap in the future as a handle.
I do think it would be a fun addition to see multiple different cutting boards with different types of stains and varnish to experiment with which gives the most “rustic” aesthetic. Overall, it thought that your finished product looks excellent and professionally built.