
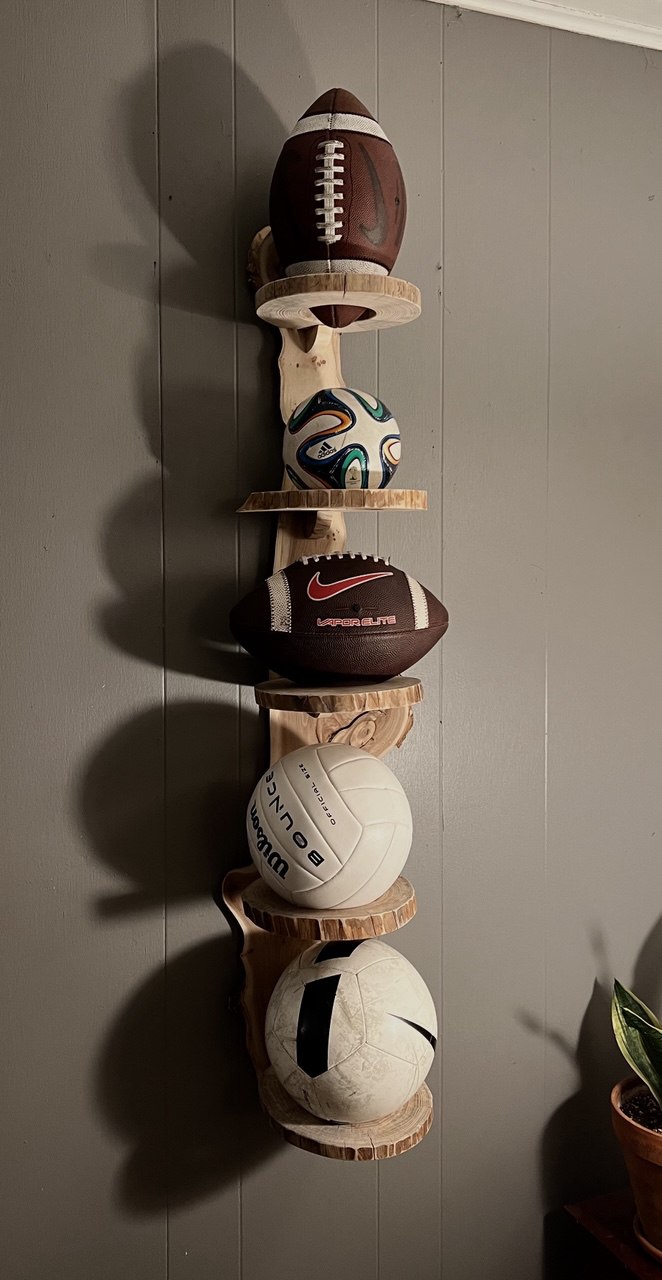
Here it is, the rustic aesthetic sports ball shelf! This shelf can hold and feature multiple shapes and sizes of balls to organize and highlight natural grain patterns and beauty of wood.
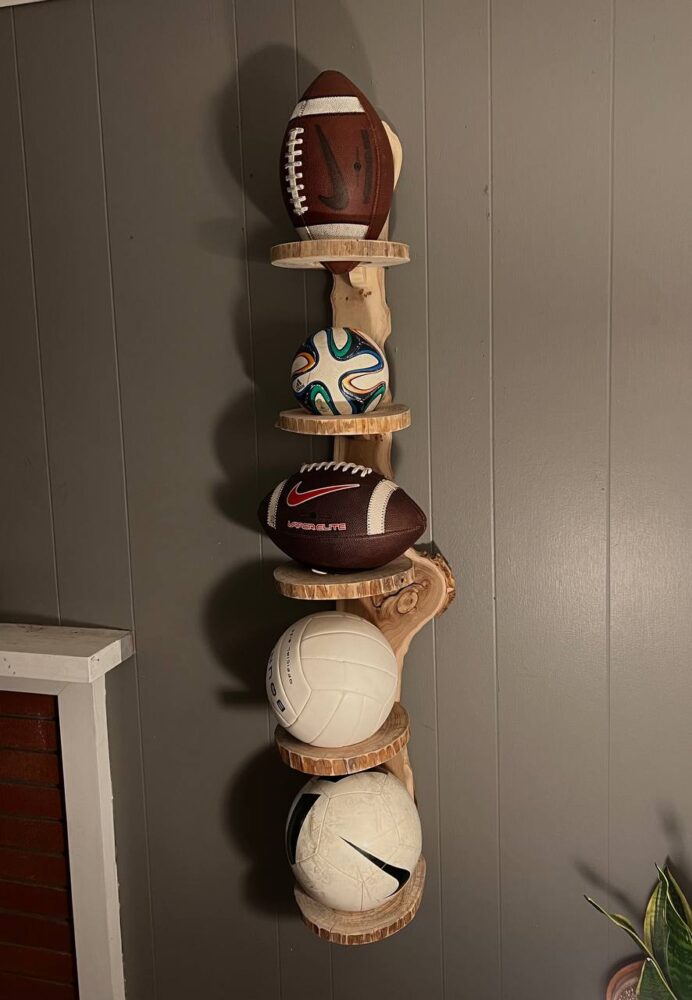
Final Rustic Sports Ball Shelf
My initial inspiration for this upcycled ball shelf came from constantly having sports balls lying around my house and room without a proper place to store them when not in use. Additionally, when I try to place balls on flat shelves, they tend to roll off, which isn’t very effective. To solve this problem, I thought it would be interesting to create an aesthetic sports ball shelf that stores balls in a unique and visually appealing way. While there are existing ball shelves and organizers, they are often made of black metal tubing or basket-like materials, lacking any real aesthetic appeal. Some wooden ball shelves exist, but they are mostly designed for smaller balls like pool or golf balls. Since these designs don’t incorporate a strong aesthetic, I aimed to create a ball shelf that embodies a rustic style by using old, repurposed wood. This rustic aesthetic transforms the ball shelf into a decorative wall piece rather than just a functional storage solution.
The rustic aesthetic is inspired by rural living, cabins, and farms, with wood as one of its main building materials. This wood is often weathered, aged, and showcases its natural grain and imperfections. Rustic design is also characterized by “primitive” and “unfinished” elements, embracing natural flaws and irregularities in the materials (1). Another key characteristic of rustic design is its harmony with imperfections, highlighting them as unique features rather than flaws. An example of a classic rustic aesthetic is shown below:
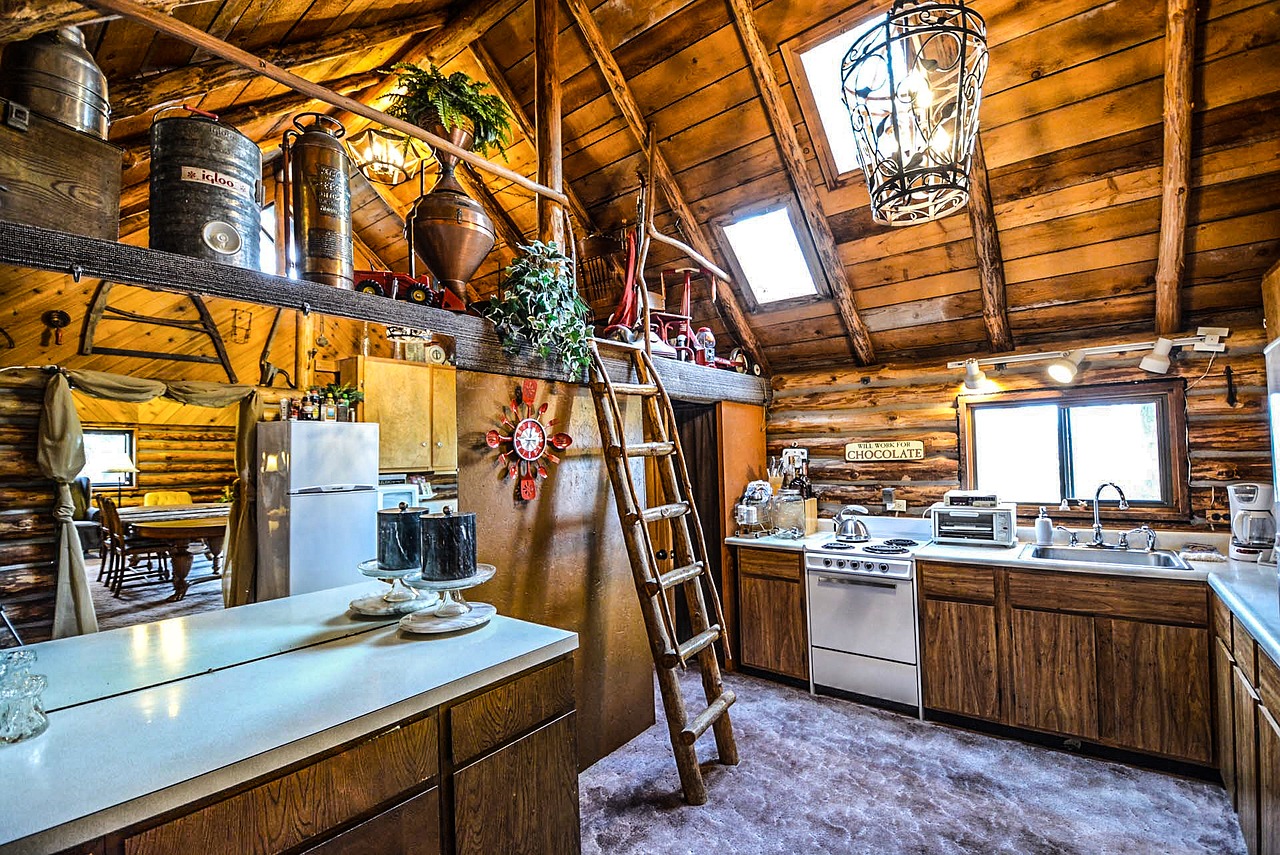
Classic rustic aesthetic in a cabin (2)
After identifying my project, I moved on to the design and material selection. My main functional requirement was that the shelving unit should securely hold four to five different-sized balls without them falling or rolling off. In terms of form, the design needed to showcase the rustic aesthetic while highlighting the natural grain and shapes of the wood. To bring this project to life, I sourced materials from a scrap wood pile in Boulder. I found five 10-inch diameter wood rounds and a live-edge slab of wood (roughly the size of a 2×4). These materials, which are shown below in my fabrication process, provided the perfect foundation for my rustic design. With these materials in hand, I was able to finalize my design, as shown below:
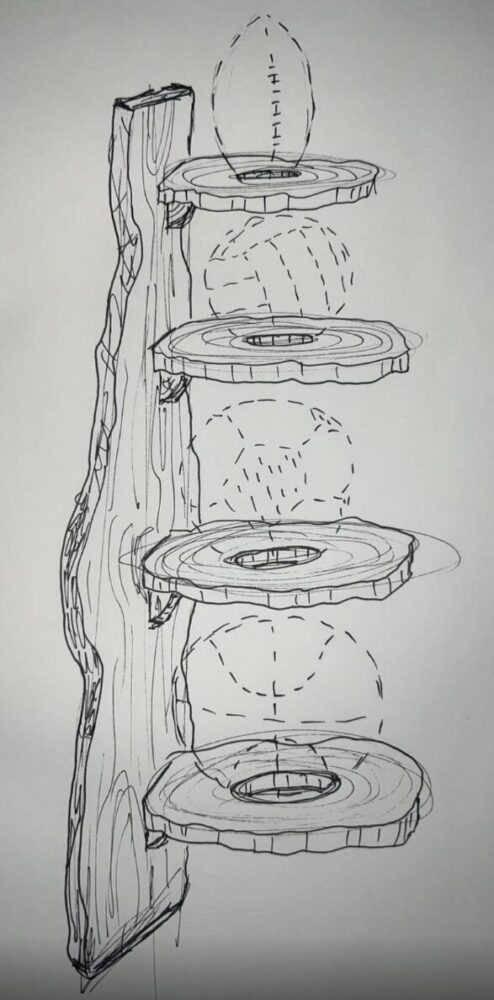
Final design of the ball shelf
To begin my fabrication process, I first needed to rough sand all the pieces of wood as they had very poor surface finishes. To do this, I used 40 grit sandpaper and a rotary sander. After this rough sanding, I moved to a less aggressive sandpaper that was 60 grit. This took off some more of the rough cutting lines from the chainsaw. Here is my sanding setup for all my sanding:
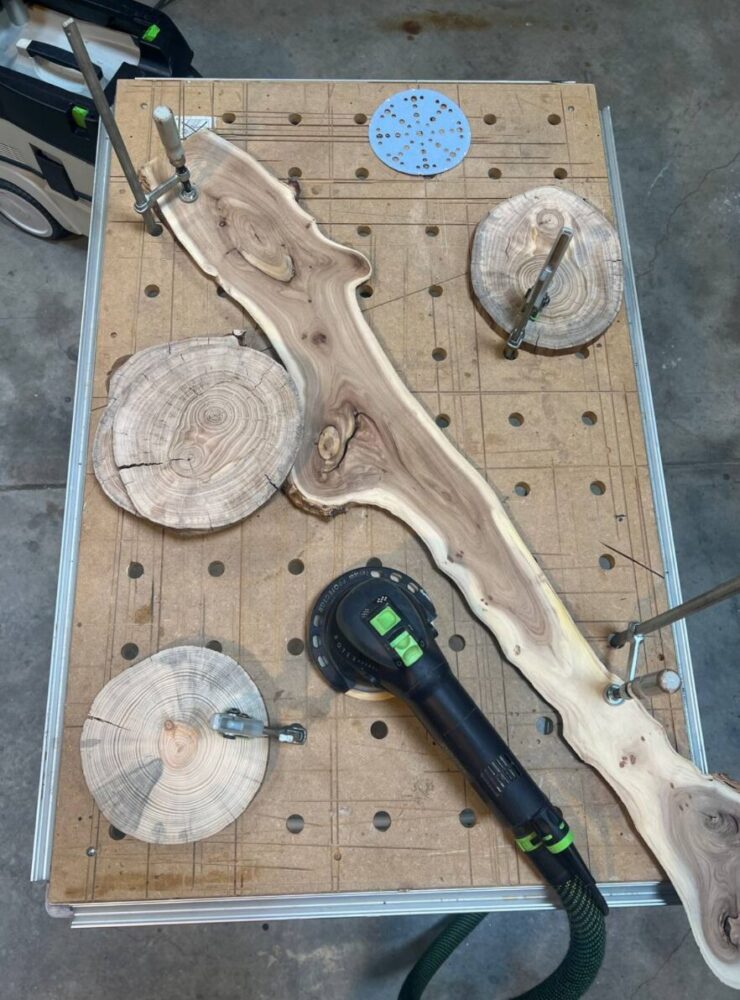
Sanding setup with workbench and rotary sander
Once each piece of wood was level and smooth, I was able to make my fist cuts into the wood rounds. These cuts included cutting off an edge off the wood round to create a flat surface on one side and to do this I used a miter saw. From here, I could then cut holes into the rounds for the balls to sit in and not fall off of the shelves. I did this by using a drill and 4″ diameter hole saw. I made sure to measure where the holes needed to be cut from to ensure that most balls would fit onto the shelf. Here is the setup for cutting the holes out of the wood rounds:

Hole saw setup with hole saw connected to drill
After making these cuts, I used a 1/8″ router to round the edges of the internal hole. Next, I completed the sanding process. I started with 120-grit sandpaper for a rough initial sanding, then followed up with 180-grit sandpaper for a final, smooth finish that enhanced the wood’s natural features. From there, I moved on to making the wooden brackets that would support each shelf. To create these, I repurposed the circular pieces cut out during the hole saw process and used a bandsaw to trim them to size. After cutting, I sanded the brackets down to 180 grit, matching the finish of the other parts.
With all the components sanded to the desired smoothness, I proceeded to the assembly. I clamped the brackets in place on the shelf and used a 1/8″ drill bit to drill angled pilot holes through the brackets and into the shelf, being careful not to drill all the way through. Once the holes were drilled, I secured the brackets using 1-inch #6 screws. After completing this step, I was left with the assembled pieces, as illustrated in the image below:
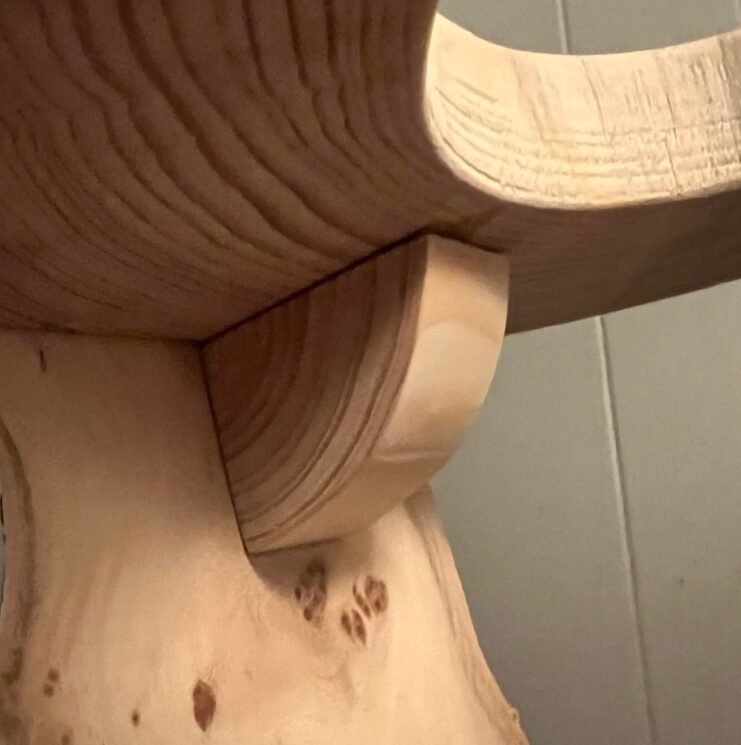
Brackets attached to the shelves
Next, I measured and aligned each shelf onto the slab to fasten them securely. To do this, I drilled two holes into the back of the slab using a 1/8″ drill bit with a countersink attachment. The countersink ensured that the screws would sit flush with the surface rather than protrude. After drilling the holes, I partially screwed in #6 screws from the back of the slab, allowing the tips to poke slightly through the front. This helped mark the exact placement of the shelves. I then positioned each shelf onto the slab and pressed them against the protruding screw tips, creating small indentations that indicated where the holes needed to be drilled on the actual shelves. Using these indentations as guides, I drilled matching holes into the sides of the shelves. Finally, I secured the shelves onto the slab by driving the screws fully into place, completing the final product, the sports ball shelf.
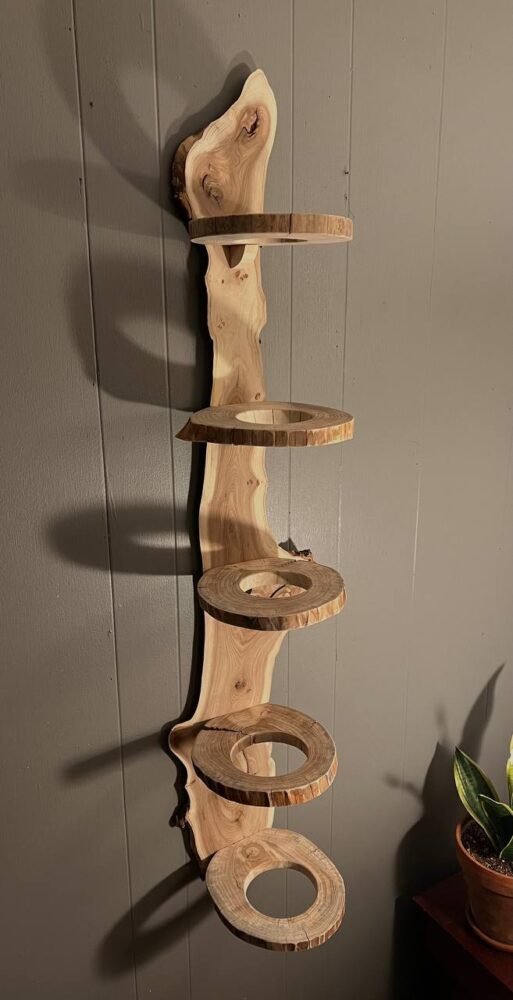
Final sports ball shelf without sports balls
This final shelf consists of five individual shelves, each featuring holes designed to securely hold sports balls, preventing them from rolling off. This design not only solves the problem of balls constantly rolling around on the floor but also embraces the rustic aesthetic. One of my primary goals was to preserve the wood’s natural grain and features, which was successfully achieved in the final artifact.
Functionally, the design effectively organizes athletic balls while ensuring the shelf can be securely attached to a wall, both of which were key objectives. In terms of artistic goals, I am pleased with how well the shelf embodies a rustic aesthetic. However, in retrospect, I would have liked to stain and seal the wood to further enhance the grain and darken the natural tones. While the rustic style typically emphasizes a natural look, staining the wood would have added contrast, making the grain stand out more while also providing additional protection. Beyond color, the form of the shelf was another important aspect of the design, and I am very happy with the result. By using wood rounds and a natural wooden slab as the back “spine,” the shelf gives the impression that each tier was carved directly from the tree, which I find visually appealing. The live edges of the wood contribute to this effect, highlighting the organic shapes and textures. Additionally, I am particularly pleased with how I was able to conceal the screws, ensuring that only the natural wood is visible from the front. I felt it was important to avoid exposed hardware so as not to distract from the rustic aesthetic.
Looking ahead, I plan to further refine this design by staining and finishing the wood. While I didn’t do this initially, I believe it will enhance both the shelf’s durability and overall appearance. Additionally, some of the wood rounds have small cracks that could benefit from being filled with epoxy. Using black epoxy would not only strengthen these areas but also add to the shelf’s character, ensuring it remains durable as balls are repeatedly placed on and removed from the shelves.
Works Cited:
(1) https://heald.nga.gov/mediawiki/index.php/Rustic_style
(2) https://ericabuteau.com/2018/05/21/rustic-home-aesthetic/
(3) All other photos taken by me
5 Comments. Leave new
Hello Cole!
This project turned out so amazing, I am very impressed on how this turned out, it is so nice to see how this exactly matches your aesthetic style. Just looking at this and knowing that you like plants, would you think about making a similar shelf system for your plants?
Hi Cole, Turned out amazing! Super cool way to not just throw the balls in a cupbaord. I am a big fan of the aesthetic and the project as a whole. I really like the wood you found and how you implemented the live edges on all the pieces. I find it awesome how versatile it is and how it works for all different kinds of balls.
Thank you Clemens! I made it a priority to keep the live edges of the wood becuase they really highlight the rustic aesthetic and make the shelf more interesting to look at. Functionally, the shelves can hold all types of balls which is very nice for me as I have all sorts of sports balls around my house. Thanks for your feedback!
Hi Cole! First off, your project turned out awesome! I think you captured your aesthetic really well. It’s cool to apply this type of aesthetic to a product that is normally created using just plain metal, and definitely adds some character to it. The “spine” that you used works really well for the piece! You mentioned staining the wood in the future, but are there any other design changes you would consider making based off what you learned from this project?
Hi! Thank you so much for your feedback and I’m glad that you enjoyed my project! I was super lucky with the price I used for my “spine” as it was the perfect height and width for what I was going for. Additionally, it has a really nice live edge which was important for my aesthetic. The only design change that I’d consider making is removing one shelf from the design to first give the balls more space and second to show off more of the natural wood. With the ball shelf filled with balls, the balls end up hiding a lot of the wood so removing one shelf could make the wood a little more apparent and interesting. Thanks for your comment!