
For my upcycle project, I created a hand carved wooden chess piece, using only a small stick, and a pocket knife. This was an incredibly enjoyable project, and one that I am very glad I undertook. My project did not however start out as this, with my original intention being to create a full rustic chessboard. My plan for making this board was going to involve a few things, but the main component was different types of wood that are either used, or natural. I planned on using a combination of both offcuts from the wood shop, as well as parts of sticks and maybe smaller logs that I find on the ground. For half of the squares, I thought it would be interesting to use “tree cookies”. I would create these by taking small sticks that are roughly the same diameter as the width of the squares, and use them for the light squares. For the dark squares, I weighed using more tree cookies but just staining them, as well as simply using a darker shade of wood than the pine the cookies will likely be made of. In order to give the board a smooth finish, I looked into using clear epoxy resin, to both seal the wood, and allow it to feel finished while still feeling old and rustic. However, after doing further research into this process, I determined that the time it would take to make this board and to make it well was more than the time that I was going to have to spend on this project. This lead me to pivot to the chess piece, and I am very glad I made that move. When I made the switch, I listed my goals out in blog post 3 which were as follows.
The piece I am looking to create is a queen, as I think it will give me the most creative freedom to embrace the rustic aesthetic. In order to execute this vision, my plan is to carve the piece from a natural stick. I have already found the piece of wood I’m planning on using, which is a short stick a little over 4 inches in length and a little over an inch in diameter. I hope to make the final piece around 3 and a half inches tall. My plan for carving the piece is to use my pocket knife and slowly whittle away the wood to my desired shape.
Figure (1): The pocket knife I used to do all the carving
I think that overall, I was able to execute this design vision about as close to my plan as possible. My final piece, as seen above, measures out to almost exactly 3.5″ tall, and I carved it exclusively with a small pocket knife. There were a couple of reference images that I used as inspiration when carving. The first image is a classic style wood chess piece that has the general shape that I strived for with this piece, while the second picture is an example of the roughness that I was hoping to get from whittling. While the second image is from a YouTube tutorial, I did not follow the tutorial while making the piece.
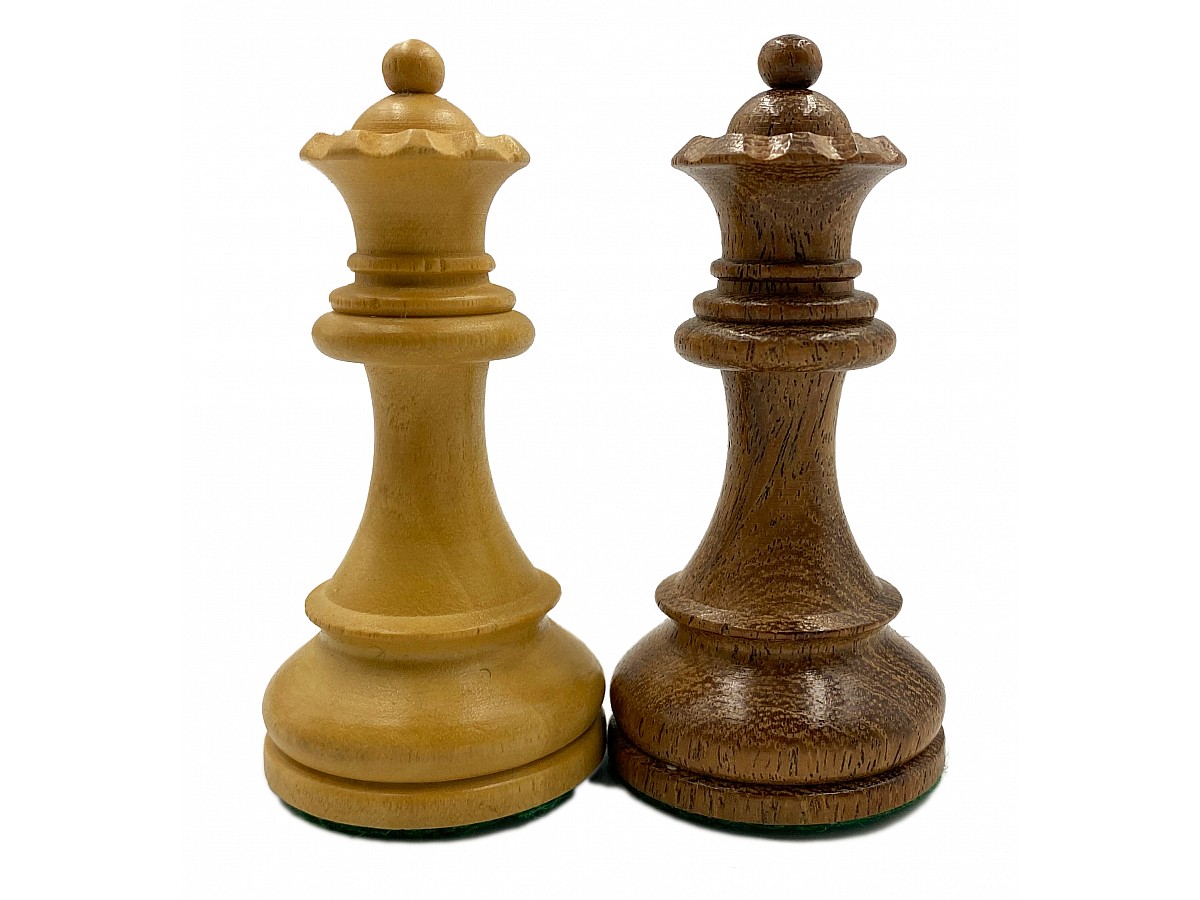
Figure (2): A reference image I used as inspiration for the shape of my design (chessonlineshop.com)

Figure (3): Another reference image I used for the rough finish I was hoping for out of the piece (Woodcrafter’s Corner)
To begin, I took my stick that was the right diameter but way to long and cut it down to size. I used the same knife I carved with, which has some serrations on the blade that allowed me to saw the stick down to size, which was about 4 inches. Once I had a small cylinder, I drew on some guide lines in areas I knew I needed to keep more material. These lines were for the location of the rim of the crown, as well as for the bulge at the bottom. At this point in the process, I had started to carve out the general shape of the bottom of the piece by cutting in an indent. I made sure to keep the indent high enough on the stick so as to not cut into the base of the piece. At this stage, I had also shaved down the whole stick to the diameter that I wanted.
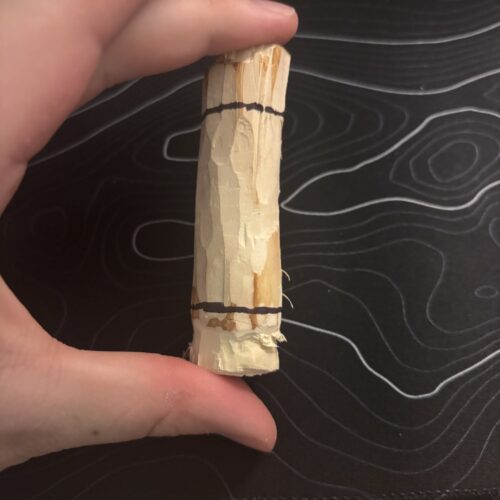
Figure (4): My first progress photo after minimal carving
My next steps were to start eating away at the material left in the middle of the stick. I wanted to middle of the piece to have a concave shape similar to the shape seen in Figure (2). While I would ultimately end up adding more detail to the center portion than the simple curve, I needed to get the rough shape of the curve down on the stick so that I could visualize where I wanted those details later on.
Figure (5): Middle stage photo where I have begun defining the general shape of the middle portion of the piece
My next step was to start working on the crown of the Queen. I knew that I had too much material on the top of the piece, and that I would have to take some material off to get the point on the top of the crown. I was nervous about this portion however, as if I were to cut too much material off the top, then my piece would end up being shorter than I intended, and the proportions of the middle curve would end up being off. I sketched another guideline, this time with pencil on about where I wanted the top edge of the crown to be. I very slowly worked the top down to nearly flat aside from the point in the middle. This was much more time consuming, and required me to use lots of small delicate strokes to avoid taking off too much material, or breaking off my top point entirely.
Figure (6): Middle stage photo after carving out the rough shape of the crown
After outlining the crown, I went in and cut the slats that are typically seen on chess queens. This was also a slow and tedious process, as cutting into the grade of the wood was much harder than cutting with the grain. I struggles to get detailed cuts in these components, and this is still one of the roughest parts of the piece.
Figure (7): Piece with details added to crown
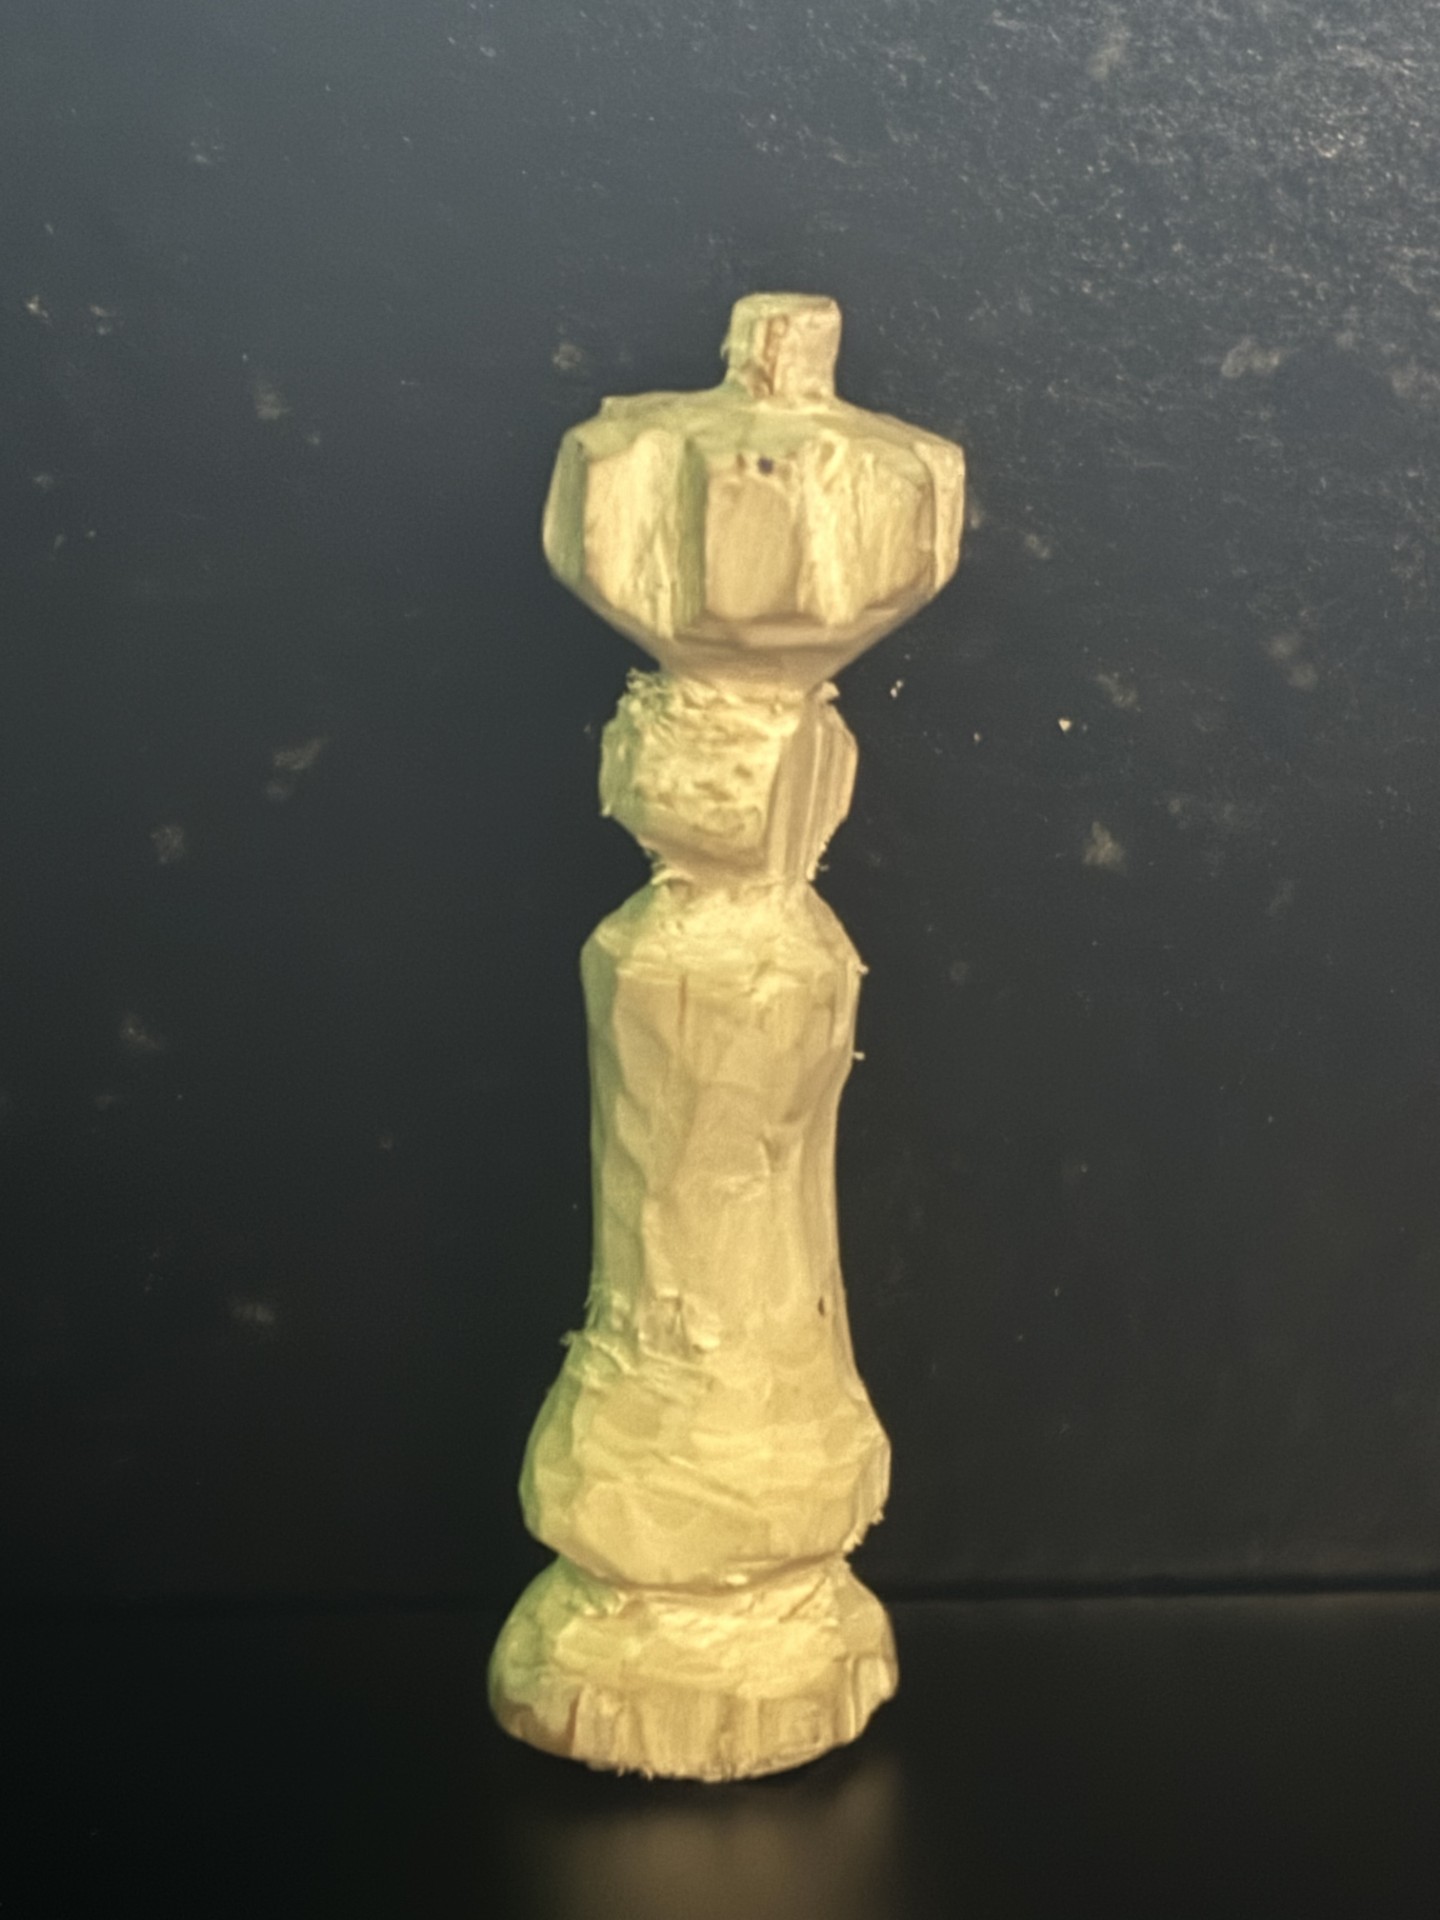
To finish off the piece, I continued to add details to the main body of the piece. I knew I wanted to have multiple indents near the top, so I began to carve out a somewhat spherical shape near the top. Unfortunately, my knife hit a weak piece of the wood and as can be seen in he image below, I took a decent sized chunk out of the sphere. I spent lots of time contemplating if I should glue the piece back on or not, but ultimately decided that part of the rustic aesthetic is the beauty that can be found in the imperfections of a piece. To ultimately complete the piece, i further carved out the concave curve in the center, and accentuated the indent at the bottom of the piece.
Figure (8): The completed form of my piece, including the chip that came off the piece
Overall, I am very happy with how this piece ultimately turned out. I think that the roughness that came with whittling allowed the imperfections and near symmetry of this piece to help it really embody the rustic aesthetic that I was aiming for. Functionally, I believe that this would work very well as a chess piece. The bottom is slightly uneven, but can stand freely without risk of falling over. I very much enjoyed getting to create this piece, and loved the challenge that carving this brought me. I am not someone who has any experience with whittling or hand carving outside of just shaving a stick into nothing when I was younger and camping. I very much enjoyed how relaxing it was to just sit down and let my creativity flow. This was a much different type of problem than I am used to solving as a mechanical engineer, but was a bit of a breath of fresh air to get to solve a problem that had no true objective correct answer. I think that I might consider carving wood more down the road, although I don’t think I will be carving an entire chess set with a pocket knife any time soon. I would call this project a great success, and am glad I was able to turn a stick that was found lying by a creek into a work of art that I can feel proud of.
References:
All other Images are my own
(2) https://chessonlineshop.com/replacment-queens2
(3) https://www.youtube.com/watch?v=CpCVhskx8NU&ab_channel=Woodcrafter%27sCorner
4 Comments. Leave new
Tay, I love how you embraced the imperfection in your wood carving! I completely agree that human imperfections are critical to rustic design so it’s kind of great that a little slip-up happened naturally. Overall, really impressive work. Do you ordinarily whittling as a hobby or was this your first exploration of the medium?
This was my first time whittling anything of substance. In the past I have shaved down sticks with a pocket knife, but I had never carved anything with intention before this project.
I really like your project Tay. I think that for sure whittling is a skill that comes with time, but for a first time, yours turned out very well. It also encapsulates your desired aesthetic incredibly well. I enjoyed how you documented your processes during each phase of the whittling process. Overall, great work.
I’m glad you liked how it turned out. I really enjoyed the entire process of it, and found carving to be very relaxing and enjoyable.