

Featured Image: Final product of bedframe built custom into my shuttle bus.
I recently have been building out an old shuttle bus to convert into a camper van for outdoor recreation. This has been a long dream of mine, and I started work on this bus conversion last May. I have finished most of the functional components, such as my solar electric system, insulation, heating, and flooring. Recently, this build has transitioned more into an interior design project. With this, I have had lots of project motivation where functionality matters, but I am mainly focused on curating a specific aesthetic. The project of highest priority recently has been building a bedframe.
To achieve this, I took immediate inspiration from Scandinavian furniture, most popularly seen through the brand IKEA. With this form of minimalism in mind, I wanted to create a custom bed frame that also used primarily natural materials to correspond with nature. I intended to upcycle old bed slats and beam components from an IKEA bed and turn them into a new frame that was suspended between the walls of the bus. I really wanted to maintain the minimalist aesthetic of the original IKEA bed and add a rustic vibe to help it match the overall design of my bus interior.
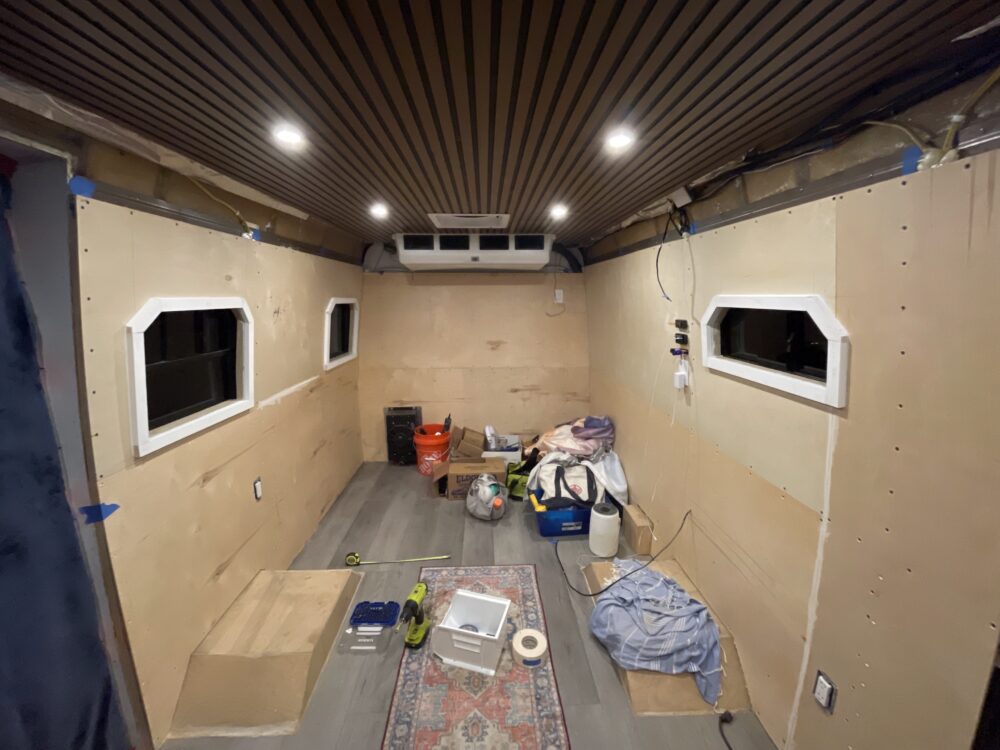
Photo 1: Building space
This was my space in the bus before this project. I had most recently finished the ceiling with brown slat wood, which I also believe fit well in with the minimalist/natural aesthetic. I wanted to match this with the bedframe, possibly including similar colors to keep consistency there. Additionally, I had to be mindful of the space, as fitting full full sized bed in the back of the bus required precision in my measurements. I liked the look of a clean wood finish, so I set out to use sanded wood as my primary building material. Additionally, with my desire to color-match the wood supports for this build, I used dark brown paint that I got custom toned at the Home Depot to the color of my ceiling paneling. This uniformity was intended to achieve a less crowded feeling in the interior.
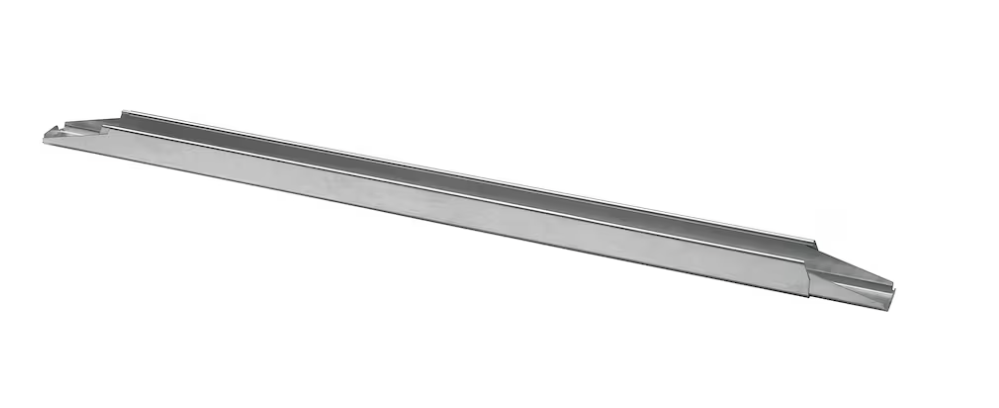
Photos 2 and 3: SKORVA and LUROY bed frame components from IKEA (IKEA)
For the upcycled components of this design, I used the SKORVA center support beams from IKEA (SKORVA beam). I then purchased metal mounting plates that screwed into the wood runners that I build, and the beams went lengthwise from runner to runner, such that the head and foot of the bed were both touching opposite side walls. Ultimately, my desire with this was to replicate a real IKEA bed frame—with the iconic minimalist wood slats—but customized to be an integrated part of my bus.
Photo 4: Inspiration Design by @TheGraeEscape (https://www.youtube.com/@thegraeescape3285)
I do want to note that I have seen other van lifers implement a similar bed frame build into their builds. They also upcycle the SKORVA and LUROY bedframe components from IKEA, and this helped me gain my inspiration. This mainly came from the following YouTube video: Shuttle Bus Conversion – Episode 15. However, I believe that every bus/van conversion is unique, and although I gained inspiration from these other designers, I designed my own modifications to curate this design to fit my personal desires.
I had accomplished a good amount of work the first week, and all of the materials got ordered then. I got 3x 6’ long 2×2 wood beam to use as the support legs. Additionally, I got a 10’ long 2×4 wood beam to use as the runner for the head and foot of the bed. I found these wood building materials on Facebook marketplace for $20 and got wood screws from the Home Depot for $10. I was still awaiting shipment from Amazon for mounting brackets, which I would eventually use to attach to the upcycled SKORVA beams that hung between the foot and head of the bed frame. These brackets were $14. Additionally, I had to purchase new wooden slats to go on top of the Skorva beams because the slats from my original bedframe were damaged. I purchased the LUROY(LUROY slats) slatted bed base for $40 from Ikea. These are the same ones that were shown in photo 3 above.
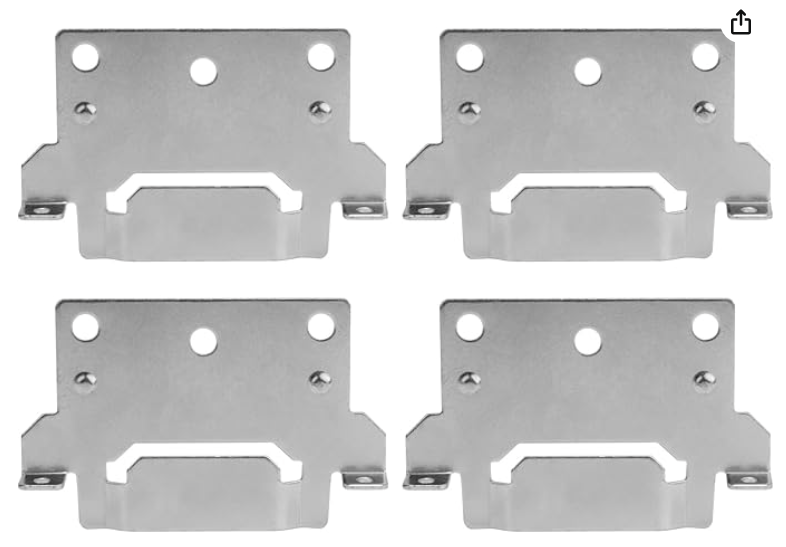
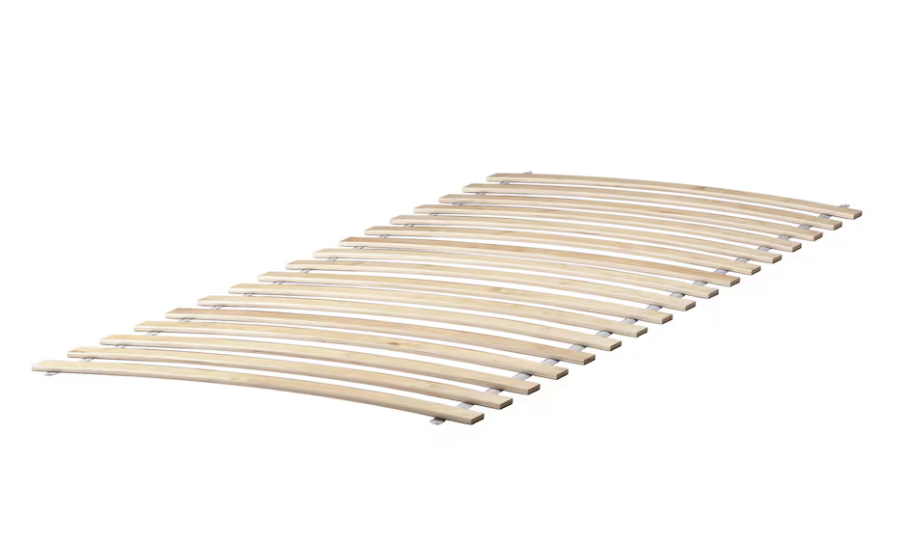
Photo 5: Mounting Brackets from Amazon
My decision to get the 2×4 wood beam for the runners was to give more moment support and alleviate stress on the screws that tack the runner board into the wall. The force distributed from the Skorva beams would be shearing down the side of the runner board, and although this force is a small distance from the central axis of the cross-section of the runner, there would be a large force from all the weight on the beams. To counteract this moment, the screws tacked into the wall were going to be in a tensile load on top of the translated shear force. By using a 2×4 beam instead of a 2×2, the distance of the screws from the central axis of the cross-section of the runner was to be doubled, and the tensile force would effectively be reduced by 2. See the below image for a schematic comparison of this force analysis. I did not go into exact engineering calculations for the failure of this, but based on general experience building with wood and screws, I felt strongly that this would be structurally sound. As for the support legs, I used the 2×2 because there was no moment force to worry about, and these were already added in precaution to alleviate shear force off of the screws. I did not worry about buckling in the legs because they were going to be tacked into the wall. I had not conducted a full structural analysis on this design, but—based on others’ uses of the Skorva beams—I felt confident with the structural integrity at that point.
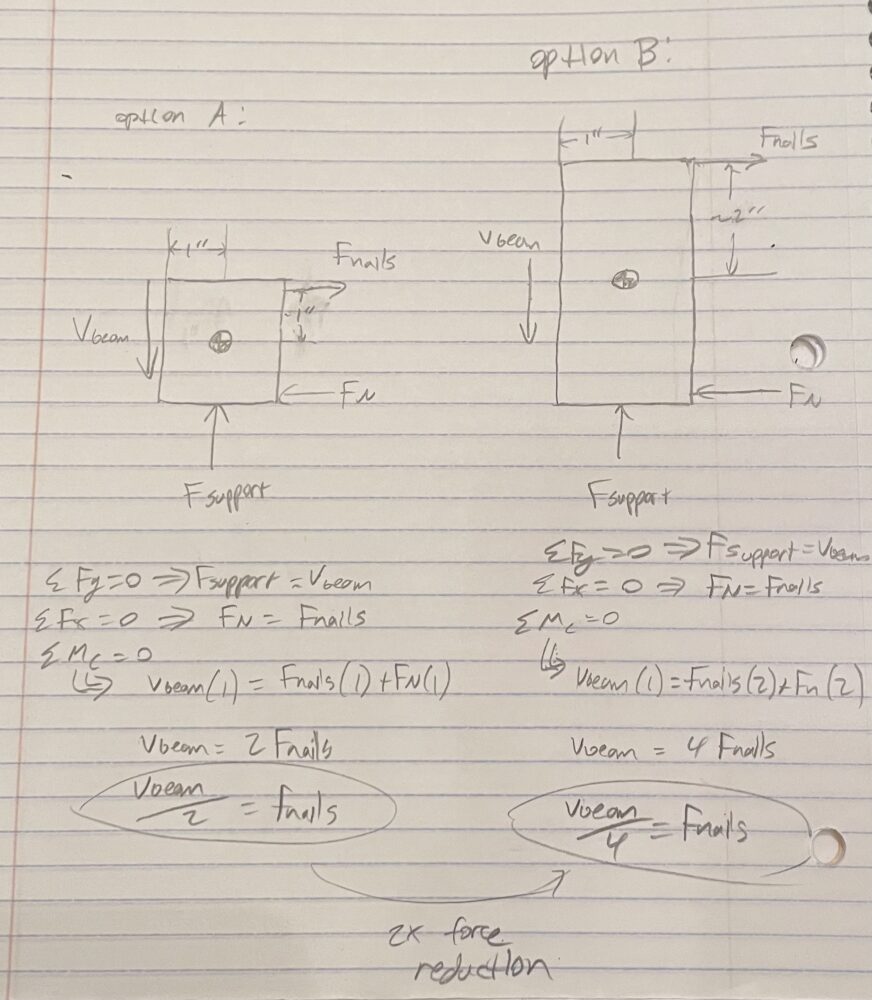
Photo 6: Nail force analysis
Alongside the build of this bedframe, I have been painting the interior of the bus. I used the same color brown as my ceiling and window trims to bring the space together and keep a minimalist aesthetic. For finishing on the bedframe components, I sanded down all of my wood. I then used 2 coats of the leftover brown paint I used for my window trim, which had primer infused in it. I originally chose this brown color because I liked the earthy and natural feeling it offered. Before painting, I cut the 2×4 board into 2x 55” runners for the foot and head of the bed frame (the width of a full bed). I cut the legs at 30” to ample space for storage underneath the bed. I used a chop saw to ensure these cuts were precise. The final results came out quite nice and I was happy with the appearance of my components. I also predrilled these legs and counterbored them so that I could quickly screw them to the walls during assembly. The image below shows the finished legs.
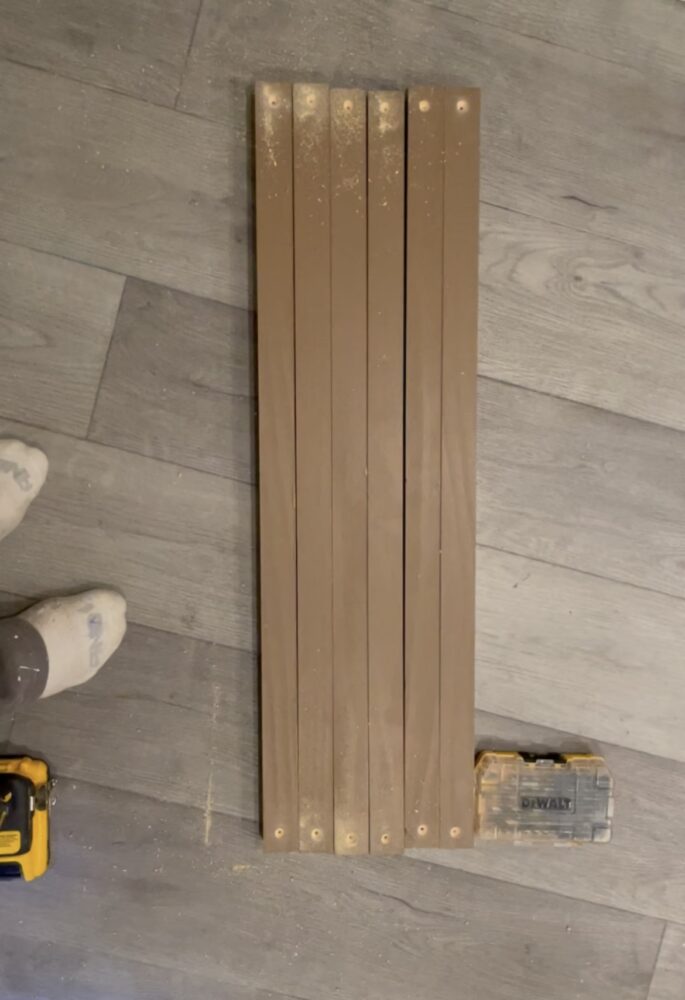
Photo 7: Drilled and painted legs
I had not yet started the assembly into the bus by screwing things together at this point, but I stacked my cuts in their assembly orientation to get a feel for the wooden support of this bed frame. I was very impressed with the overall layout and aesthetic, and I was ready to move on to the next phase of fastening everything together.
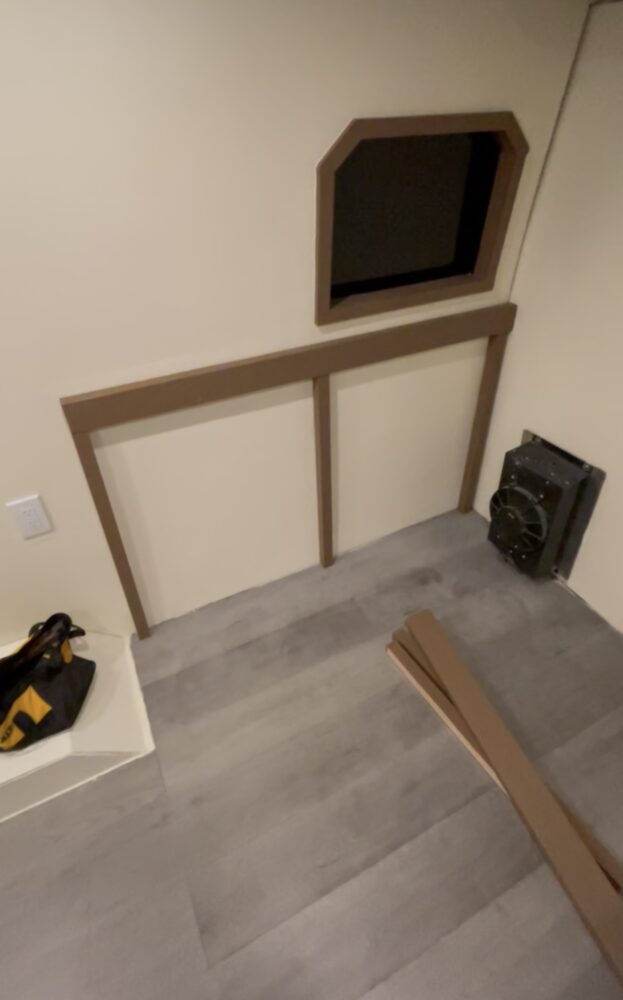
Photo 8: Layout of wood frame
For the final stage of this project, I screwed all of the legs into the wall at both the top and bottom ends where I created the counterbores. It is particularly hard to get proper alignment when building in the bus because you cannot use a level with the vehicle being slightly off-kilter. To ensure that everything was straight, I relied on measurements from the floor paneling serving as my reference points. I would make sure that all vertical beams had the same spacing at the top as they had at the bottom as well.
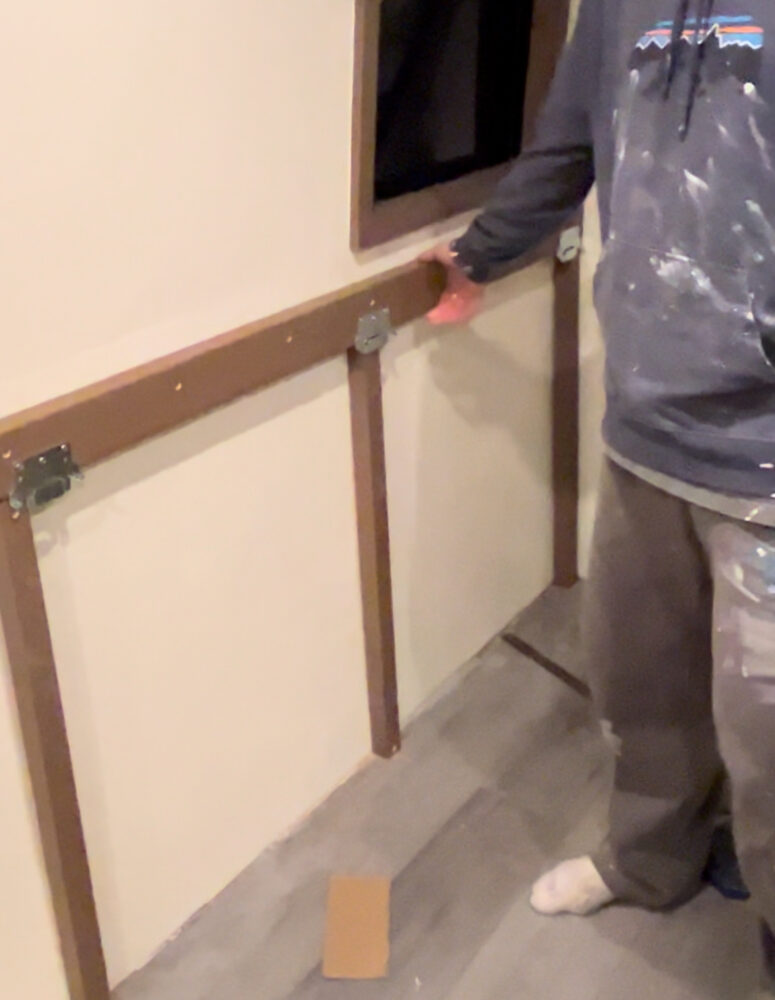
Photo 9: Mounted brackets and tacked in wood
Once the legs were screwed in, I tacked in the runner boards on top (also counterboring all of the screw holes). I drilled 7 equispaced screws along the runners, corresponding to about 8 inches of spacing. Once the wooden frame was in place, I was ready to add the brackets and upcycled SKORVA beams. Again, I used precise reference measurements from the floor and edge of the runners to ensure level mounts on the brackets. I then predrilled holes for the screws in marked locations and screwed in 6 total mounting brackets (3 on each runner).

Photo 10: Strength test
The SKORVA beams simply slipped right into the brackets, and they were able to be adjusted to the needed length for my bedframe. They sat in nice and snug, and I even did a strength test by putting the body weight of 2 people on one beam. I was very satisfied that the entire bedframe assembly didn’t budge. The final step was to drill in the LUROY slats. I marked where each slat piece would be attached to the beams, and I then predrilled a hole through the wood and into the SKORVA beam. I finished by using self-tapping screws to fasten the wood slat pieces into the beams and the project was complete. I am very happy with how this turned out. I love the color and minimalist aesthetic matching the rest of my bus. Also, the entire bedframe takes up a very small amount of space, which will be very functional when I can use the space underneath for storage.

Photo 11: Final bedframe assembly (same as featured photo)
Sources
- IKEA. TARVA Bed Frame, Pine, LURÖY. IKEA, Retrieved 29 Jan. 2025, https://www.ikea.com/us/en/p/tarva-bed-frame-pine-luroey-s29007794/.
- IKEA. LURÖY Slatted Bed Base. IKEA, Retrieved 29 Jan. 2025, https://www.ikea.com/us/en/p/luroey-slatted-bed-base-60160217/.
- IKEA. SKORVA Center Support Beam, Galvanized. IKEA, Retrieved 29 Jan. 2025, https://www.ikea.com/us/en/p/skorva-center-support-beam-galvanized-90124534/.
- YouTube. Shuttlebus conversion – Episode 15 – Building A Bed!. YouTube, 15 Feb. 2022, https://www.youtube.com/watch?v=a313_Zb1ZBw.
- FIX ZHANG. (n.d.). Mounting replacement compatible bracket. Amazon. Retrieved February 19, 2025, https://www.amazon.com/dp/B0DFCGZZ8P
2 Comments. Leave new
Hi Cooper, this is awesome. It’s super cool you’re building out your own camper van in the first place, and your bedframe turned out amazing. You’re definitely fitting the minimalist aesthetic and the bed frame fits very well with the overall aesthetic of the van. I also think it’s really cool that you double checked the structural integrity of the design using some of the things we’ve learned as engineers in our statics classes. One question I have is what was the cost difference between doing this project yourself versus finding/buying a bedframe kit pre-made? Also, when do you expect you’ll be able to finish your van?
Hi Eric, thanks for the feedback! I am very glad that you think the bed fits in well with the aesthetic of the rest of the van. For the overall cost of this project, I have put about $10,000 into it so far on top of the actual bus which costs about $9,000. Already built-out buses/vans run between $50k-$100k, but you can also purchase the vehicle and pay a professional company to build it out. These professional conversions are about $50k. I will definitely be saving a lot of money when this project is complete, but these prices don’t consider my labor time. I plan to finish up the rest of the build by the end of this summer for a total of 18 months of building.