

I have finished work on my Minimalist Woodworking Flute Mount, this has been a really enjoyable project to work on this semester. It allowed me to spend a decent amount of time in the Idea Forge Makerspace which was a first for me. First I would like to thank Josh Coyler in the Makerspace for being a huge help in the fabrication of this project, he is a fantastic resource for all things woodworking and is always happy to help.
For my Upcycling Project I created a wall mount for my Native American flute, this will allow me to have a safe place to store the flute on my wall out of the way of the everyday movements of life. I was gifted the flute shown in Figure 1 by Professor Knutsen in the Mechanical Engineering department and am very grateful for his generosity. I have now learned to play this instrument to a level where I am sure I want to keep it around so have decided to go ahead and make a mount to commemorate it.
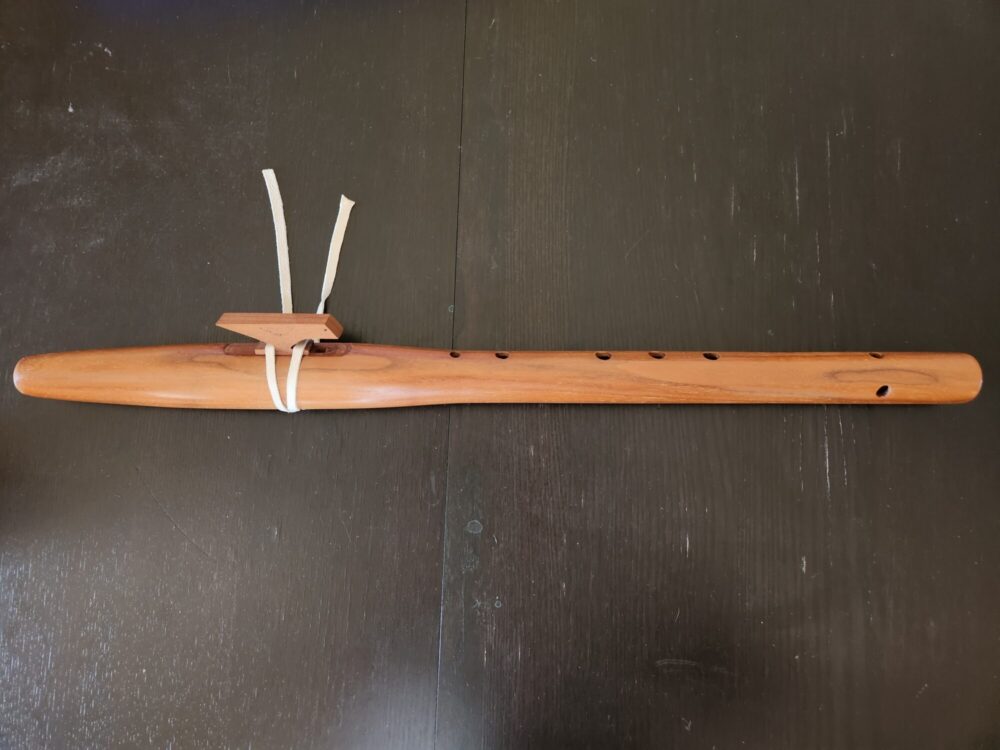
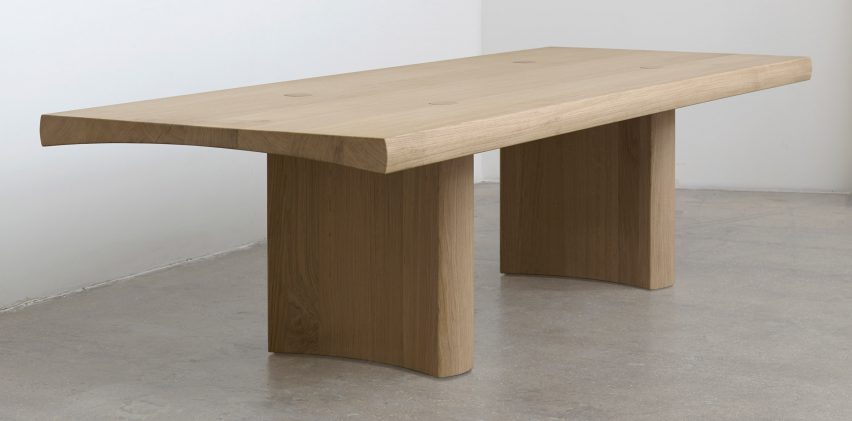
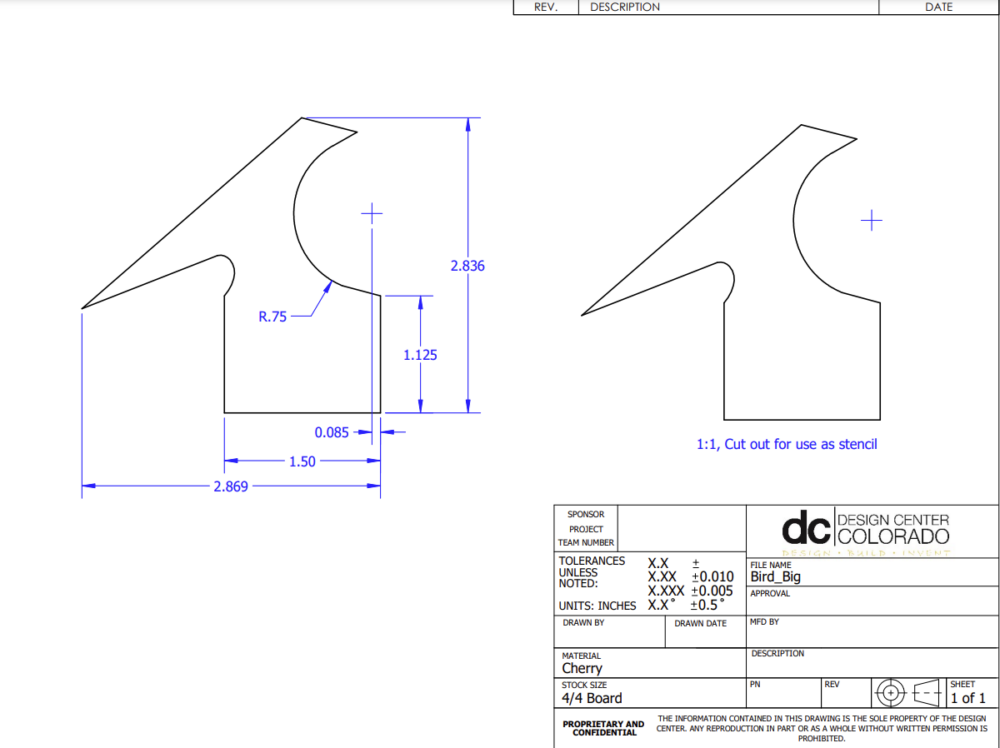
I decided to create this artifact in a minimalist woodworking aesthetic, partly I am doing this because it will match the simplistic nature of the flute itself, especially the tuning block (small piece) which is a little angular bird. I will emulate this same design motif in the wall holder itself, two similar birds will support the flute on either end. Minimalist woodworking is characterized by gentle curves, straight edges, and simple joinery in the form of hardware-less joints or very minimal hardware. Shown below in Figure 2 is a minimalist Japanese joinery style table by Barber and Osgerby, in this example they used three curved pieces of oak to create a very unique yet simple table design. I really like the minimalist aesthetic because it allows the materials and minute subtleties of the design shine, they do not get muddled in a tidal wave of information or facets.
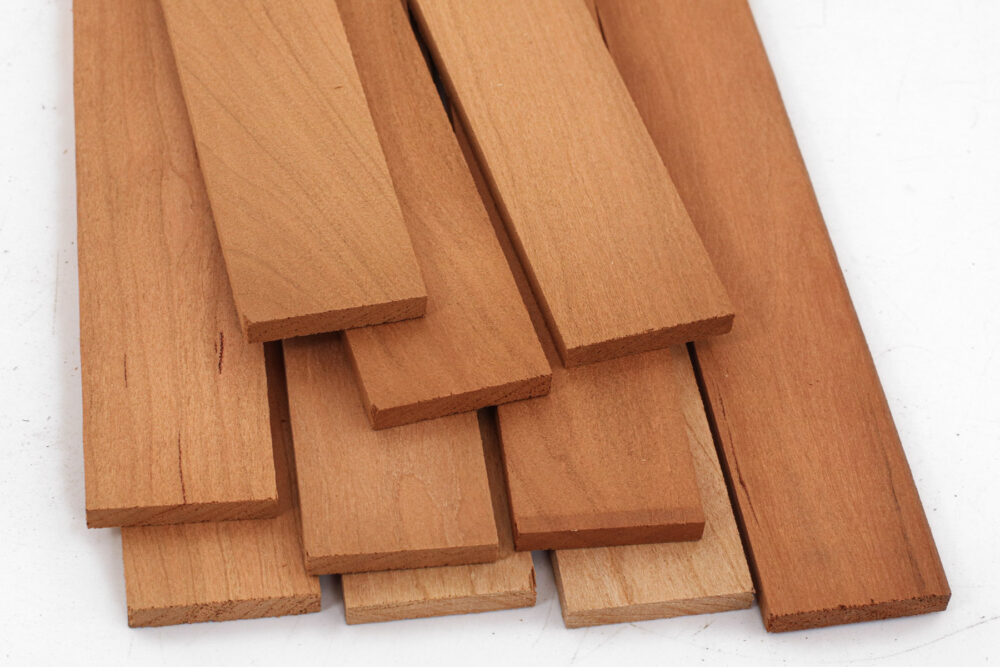
I created my wall mount out of cherry wood, cherry is a hardwood prized for its amber color that darkens with age, it starts out very light and pinkish in color then after finishing and exposure to air and sunlight it darkens more and more. Cherry can be expensive when sourced from a wood supplier but I was able to source a small piece for relatively cheap from Josh in the Makespace, he had a few boards laying around and was happy to part with them.
Below in Figure 4 you can see my initial sketch for the design of the flute holder, when I first drew the pieces that support the body of the flute I chose an even simpler piece but then decided I really wanted to emulate the bird motif that functions as the tuning block of the flute. These little birds are quite simple in their design and have only very slight carvings on either side.

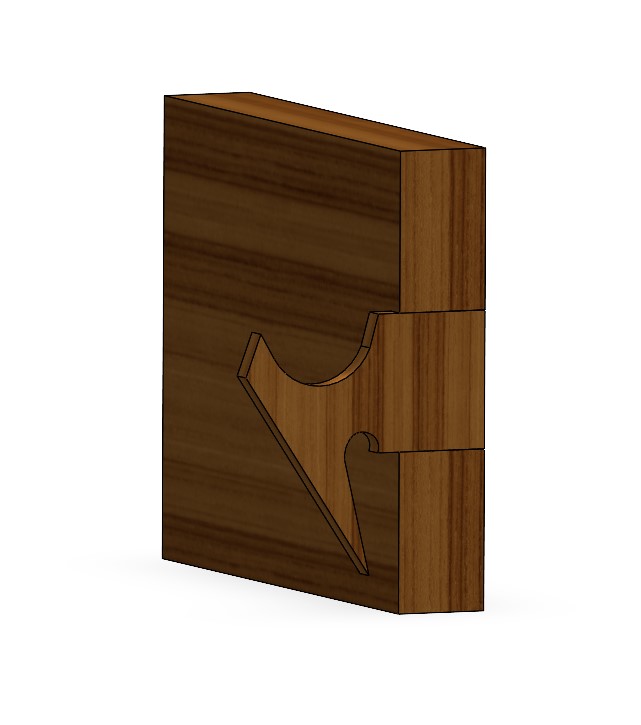
Once I had a sketch down I decided to jump into CAD, this allowed me to better visualize how the artifact would fit together and make sure the flute would be level and centered between the two bird supports. You can see my CAD of the entire assembly and a section view of the joinery method in Figures 5 and 6 respectively. During the manufacturing process I changed the joint design a little bit at the recommendation of Josh in the wood shop, he suggested I add a step to the tenon (part of bird motif that gets inserted into the board) so that it will hide any inconsistencies in my chisel-work.

Now that I had a design I was happy with I headed into the woodshop. I started with a rough sawn board of cherry and cut it to length and width on the chop and table saws respectively. Once it was square I planed it down about a 1/16th of an inch on either side so that it had a nice finish and required minimal sanding, I didn’t think to take pictures at this stage as it was more just getting the wood ready for the project. Next I printed out templates of each bird motif, I used the SolidWorks drawings themselves as the templates as seen in Figure 7, I made one view with outer dimensions and a few more critical dimensions, and a second blank view.
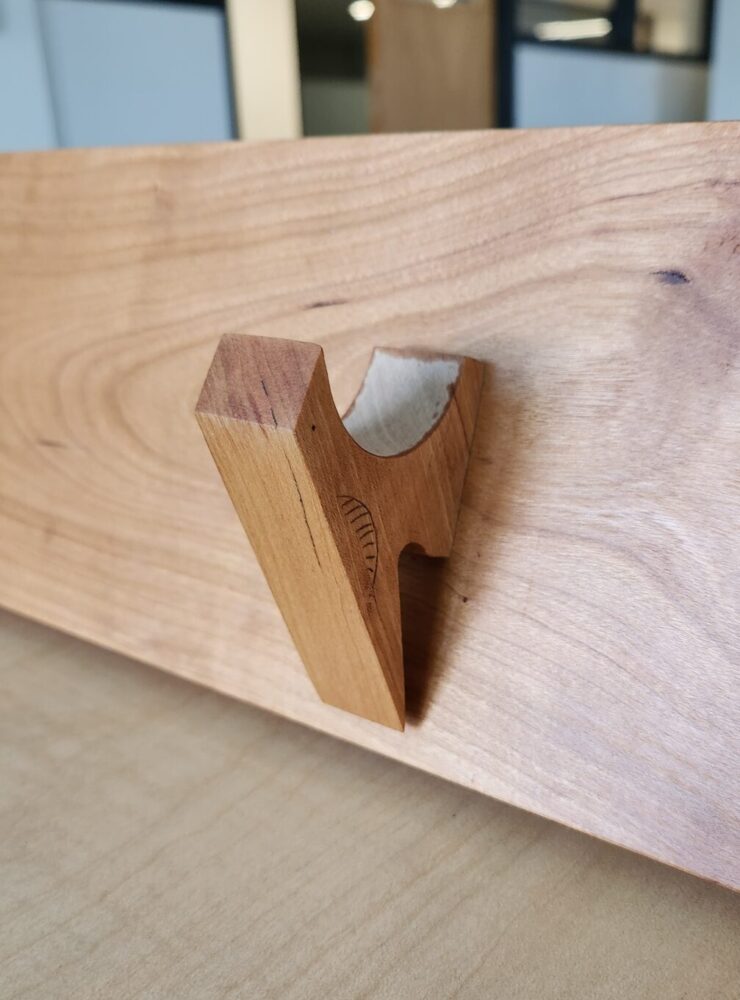
Once I cut out the stencils I could then glue them to some of the extra length of cherry I had, because each bird had a slightly different radius and angle I had to be sure I could tell which was which from here on out. I began cutting the rough shape out on the band saw, then fine tuned the shape on the belt and spindle sanders. In Figure 8 you can see both the board and bird motifs at their initial dimensions.

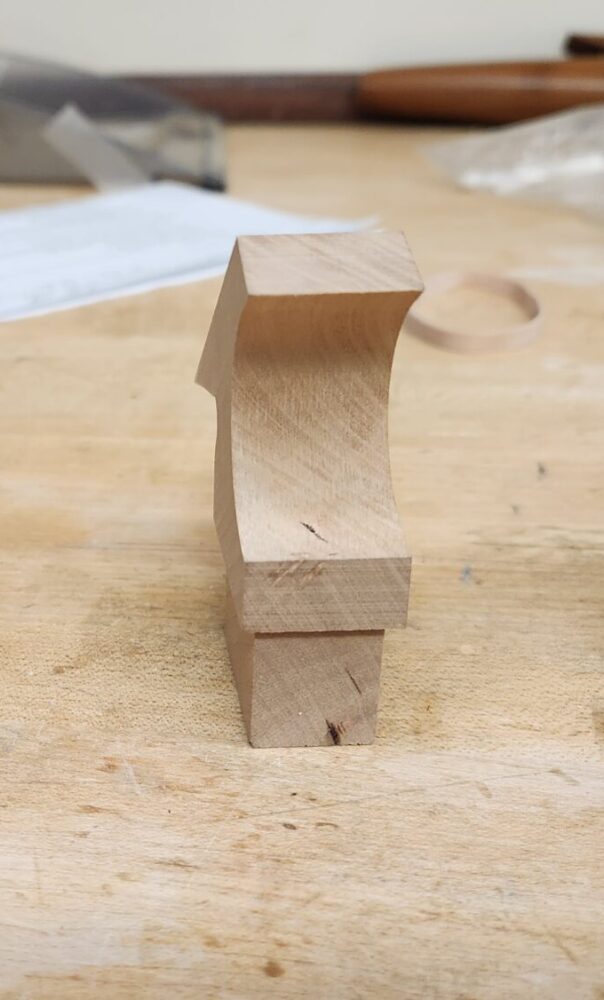
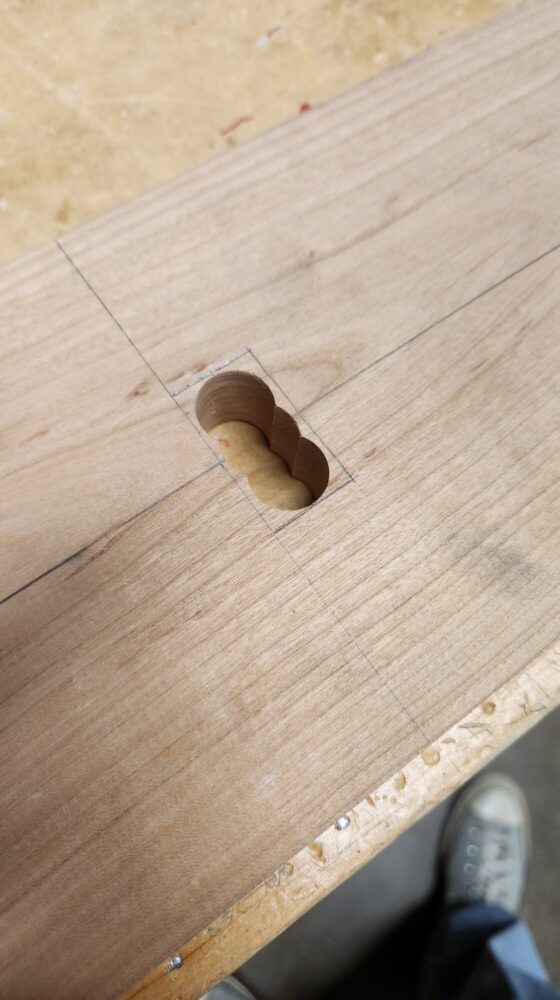
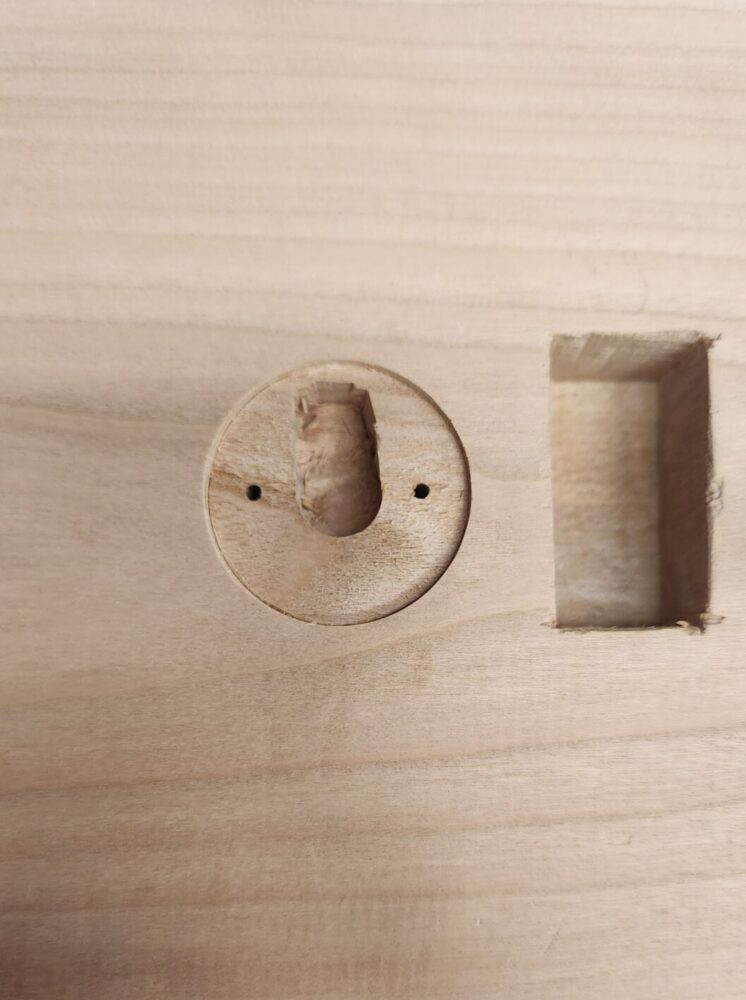
Next I had to begin the joinery, I first began this by adding stepped tenons, Figure 9, to the bottom of the bird motifs, this will hide the actual joint itself and you will see just crisp lines where the shoulder meets the head board. I did these cuts on the table saw using a sled and Josh was a huge asset here. Once I had that done I marked out the mortise locations on the backboard and drilled out the bulk of the material, I then began chiseling the inside of the mortise’s to get to the correct size.You can see both of these steps in Figures 10 and 11.

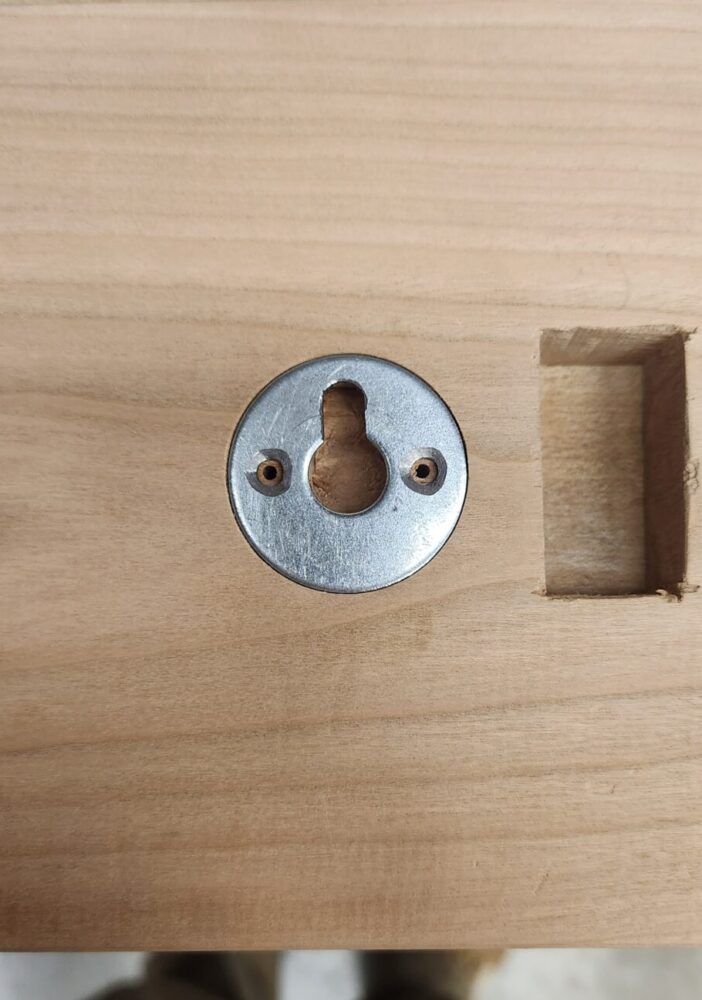
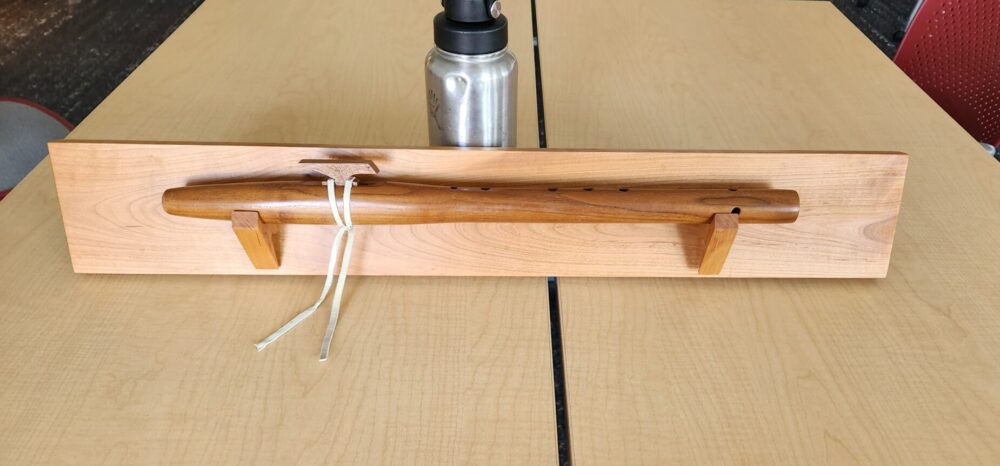
Once I had the mortises to the correct dimensions and the bird motifs could fit in easy enough not to break them but with enough friction that they hold their own I began finish sanding all of the surfaces to get any pencil marks, smudges from handling, and small surface blemishes off. I also made sure to test fit the flute in the entire assembly at this point, I made sure there was enough play in the bird holders as well as making sure the flute sat level. I also made some keyhole hangers out of washers in the spirit of this upcycle project, they came out really well and I even counterbored their mounting holes so they sit flush.
After that was done I was ready to glue the joints, because of the shape, and the already tight fit I didn’t clamp these joints, so just a little wood glue and 24 hours later they were all glued up. I made sure to clean off as much glue at this stage when it was still water soluble so that I wouldn’t have to sand or scrape much off after it dried. However there was a little post glue sanding required to ensure that it didn’t interfere with the oil finish I would be using, to make sure of this I rubbed the piece down with mineral spirits to see what the ‘wet’ or oiled piece would look like. I was satisfied with my results so began oiling the piece. I chose to use Danish Oil from Watco as my finish as it is a natural oil that doesn’t impart too much gloss, and doesn’t create much of a physical barrier on the wood.
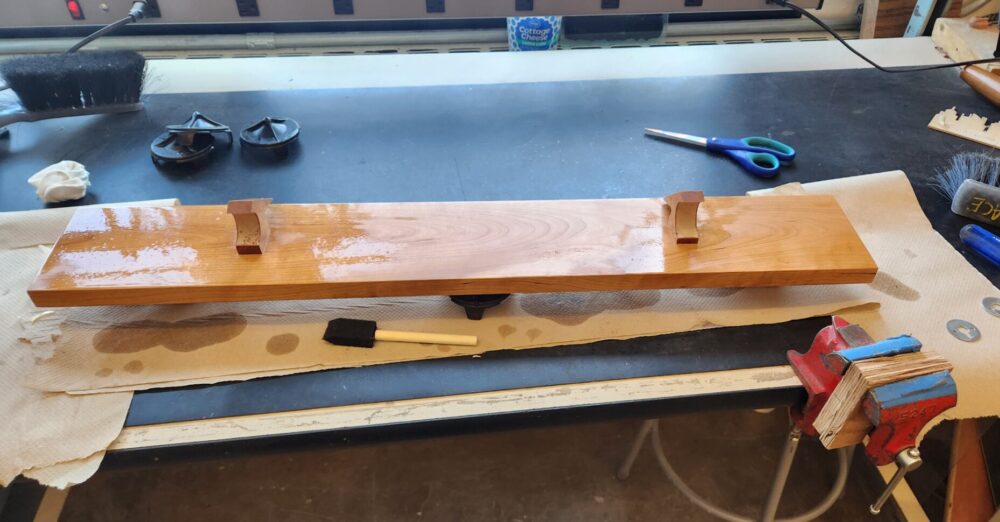
As you can see in the image above I liberally applied the oil and let it penetrate into the wood for around 10-15 minutes, I then wiped off any excess with a cloth and repeated the process again. After that the oil had to cure for 48 hours to full absorb and harden inside the wood, This resulted in a very nice finish that complements the grain of the wood beautifully. You can see below some images of the final product, note in the last image the inside circles of the bird motifs are unoiled I will discuss why later.
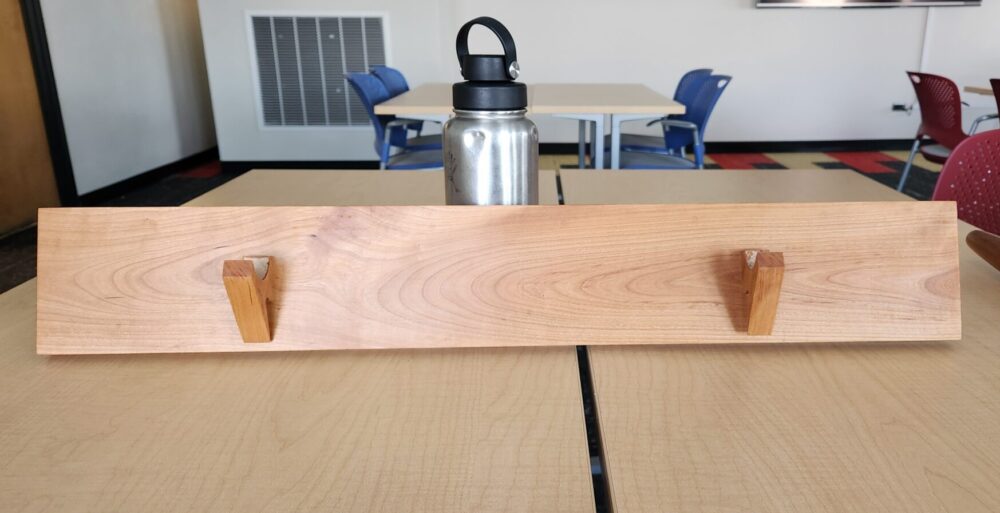
Overall I am super happy with what I have achieved, both in the functionality and the aesthetic. Functionally it works exactly as intended, however I plan on making an addition I didn’t have time to. Aesthetically I think I also achieved my goal, the only fasteners were those used for the hangers and there isn’t really a way to get around using a fastener to hang something. Other than that I believe I upheld the image of minimalism, from the joinery to the simple carvings on the bird motifs, I think it emulates the aesthetic of the flute very well and I have succeeded in my vision. I plan to glue some felt or other fabric on the inside of the bird motifs to reduce any rubbing between the piece and the flute, this is why I left those areas unoiled. I have yet to hang it yet but will most likely do that this weekend. Over time I expect the wood to darken into a rich auburn color as it gets exposed to sunlight and the air, this will end up matching the flute even better, most likely surpassing it in darkness. However this process may take months to years, so I will not be able to update this page with the results. Thanks for taking the time to read this all if you got this far, I know I delved pretty deep into the fabrication process, but that’s because its really what I enjoy the most about projects like this.
Image Sources:
Figure 2: https://www.dezeen.com/2016/09/28/barber-osgerby-japanese-minimal-oak-hakone-table-london-design-festival-2016/
Figure 3: https://www.woodworkerssource.com/cherry/cherry-14-hobby-boards.html
2 Comments. Leave new
The flute mount turned out really great! I kind of expected the wood to darken a little more with the finishing oil you used, but the aging of the wood will get it matching to the flute’s hue eventually. Hearing you play the flute the other day was also great. Once you do achieve the coloring you want, is there any plan on keeping it that color or are you content with it darkening past that? Really like the bird pattern you added at the end.
Thank you for your comment Bryan! Part of the reason the final product looks so bright was because of the reflection of the light behind me when I took photos, in person it is a little darker and more matte. I will show you when it starts to darken, but I think I will probably just let it do its thing, it will eventually stop changing color but you can’t really stop it from getting to that point, only slow it down. And thank you, the birds are my favorite part.