

Project Overview
For my Upcycle Project, I designed and built a tissue box that includes elements from the Frutiger Aero aesthetic, along with a lighting feature.
For this project, I wanted to attempt to make something stylish and functional for my desk that matches the Frutiger Aero aesthetic. It is one of my favorite aesthetics that has come out of the 21st century, and I actively follow several people online who create or collect items related to Frutiger Aero.
This aesthetic has always been very nostalgic to me. The family computer in my house when I was a kid used Windows Vista, one of the largest influences on the aesthetic. Additionally, I grew up on mainly Nintendo products, including the Wii and DS, which had similar aesthetic choices in their hardware and software design. I want this project to have the same feel as Frutiger Aero: uplifting, nostalgic, and calming.
Frutiger Aero
For the uninitiated, the Frutiger Aero aesthetic was popular from the mid-2000s to early 2010s and is characterized by glossy textures, vibrant colors, and organic yet futuristic design elements. It features bubbly, glass-like surfaces, swooshes, lens flares, water droplets, floating orbs, and smooth gradients. Often associated with Windows Vista, early smartphone UIs, tech advertisements, and video game menus, it has a sense of sleek modernity, optimism, and digital fluidity that I really enjoy.
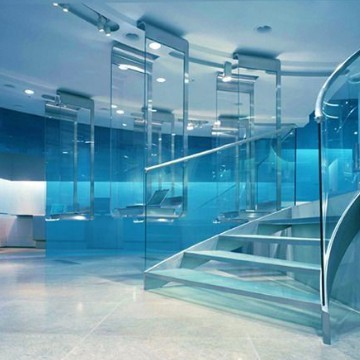
The image above exemplifies the more specific look I wanted to go for, Frutiger aero aqua. This aesthetic can be seen in the popular aqua mouse of the late 2000’s, and features many blue and white elements.
Inspiration
One material I knew I wanted to use was blue acrylic, since I already had quite a bit left over from creating a river for my Freshman projects class. In my search, I stumbled upon the image below. A designer by the name of Michuru created this tissue box using a blue plastic material, where the tissue itself was meant to appear as an iceberg.
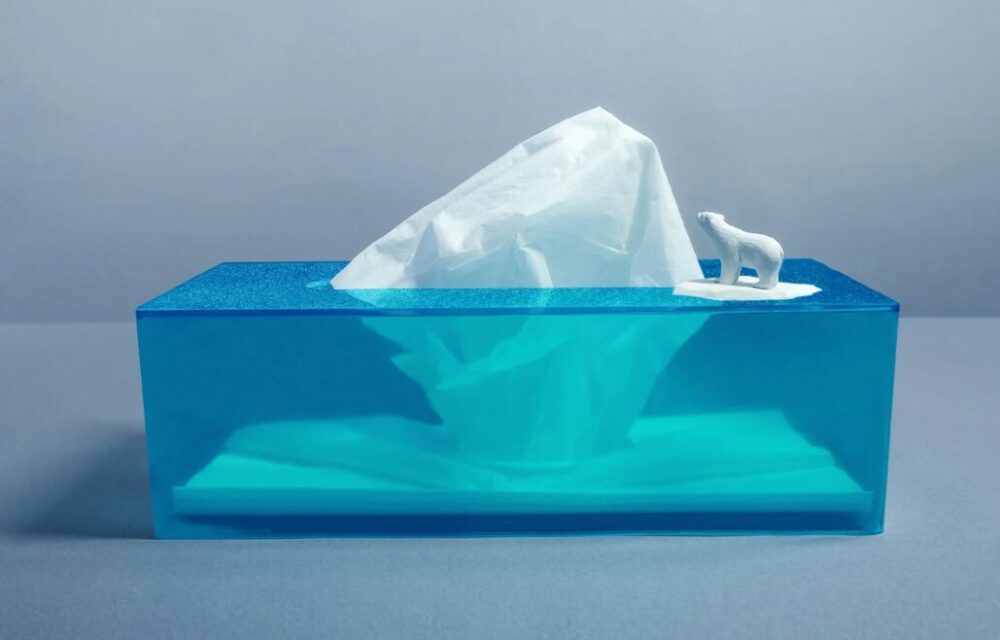
I absolutely loved this idea, as it both fit the aesthetic I wanted and utilized materials I already had on hand, fitting with the idea of upcycling to create the final result. As I began to design my project, I knew that I wanted to create something similar to what Michuru had, but with my own spin and creativity embedded so that I could make the project my own.
Design Process
One of the first things I did to start designing was take an inventory of all the things that I knew I was going to use for the project. I had a large, blue acrylic sheet, 1/8” thick, that I wanted to use the rest of on this project. This determined the overall size of the model.
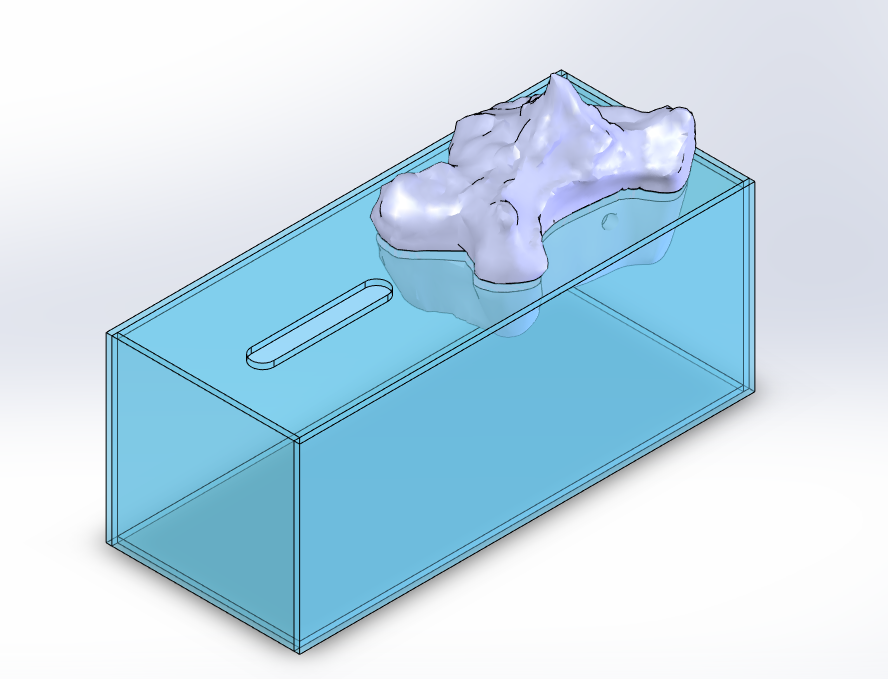
In SolidWorks, I created a layout of what I wanted the box to look like, dimensioning it to use all of my acrylic material. I then wanted to add a 3d printed element, since I already had some white ABS filament that I needed to use before it soaked up too much moisture. I searched around online and eventually found a model of an iceberg that I liked: It was detailed enough to be used on my model, and I could edit it in SolidWorks to fit the acrylic paneling. This model was original created by vandragon_de on Thingiverse (https://www.thingiverse.com/thing:2641548).
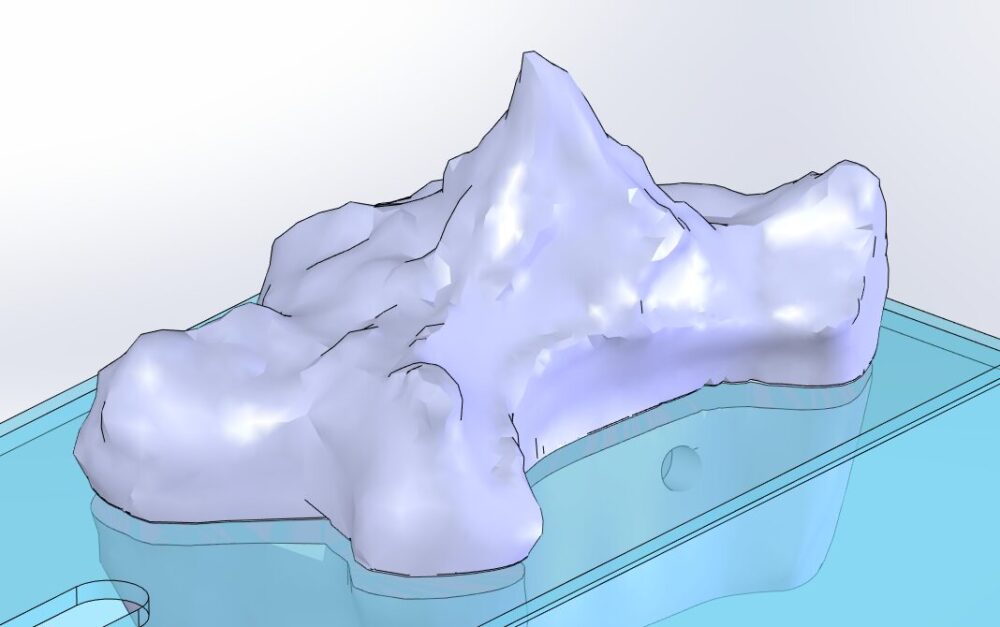
I cut the model in half and eventually fit it into a corner of the box. I wanted the model to appear partially submerged, with a gap at the water line to help with light diffusion.
Build process
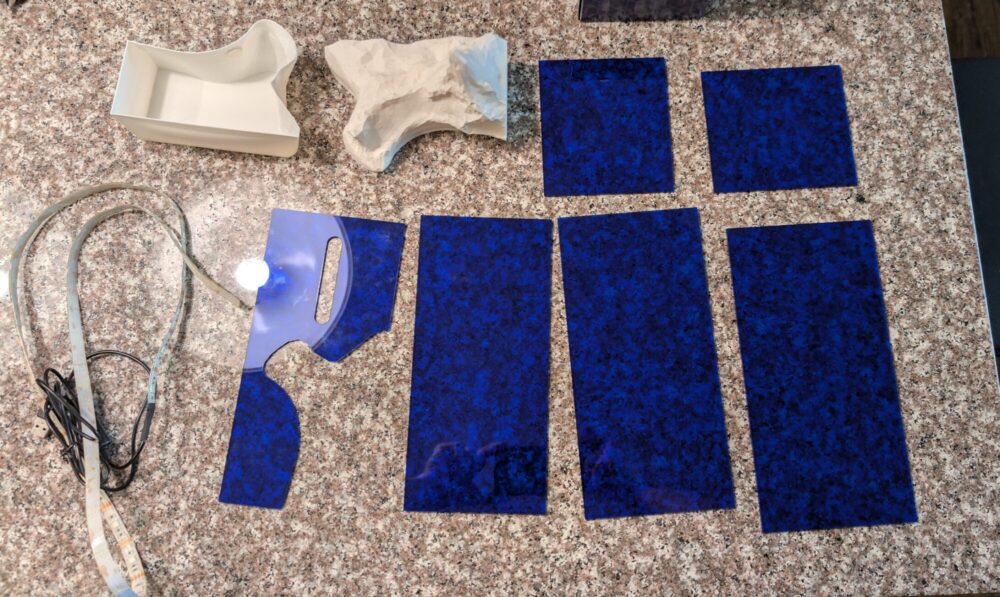
The build process started with fabricating each of the components. First, I created a flat pattern of the box by moving each piece on the same axis in SolidWorks and saving it as a dxf file. I then took this file, along with the acrylic sheet, to the ITLL on campus and laser cut all of the pieces out. This went quite smoothly, and all the of acrylic came out nicely, as acrylic has a nice finish when laser cut.
For the 3D printed components, I wanted to make both the submerged and exposed part of the iceberg completely hollow with a thin wall thickness, so that I would be able to diffuse the lights from the LED strip properly. For the bottom piece, I was able to do this pretty easily, since the walls are very steep and did not require any additional supports. I printed it with two layer thick walls, which diffused the light nicely.
For the exposed section, things got more complicated. I could avoid using an infill material to keep it hollow, however that would require me to print the model upside down. Due to its shape, I was not able to reasonably due this, as it wasted an absurd amount of filament in the process. I also was not able to print it upright, since my slicing software could not read the stl file as hollow. Eventually, I opted for a low percentage line infill, which allowed a good amount of light to pass through while conserving printing time/filament.
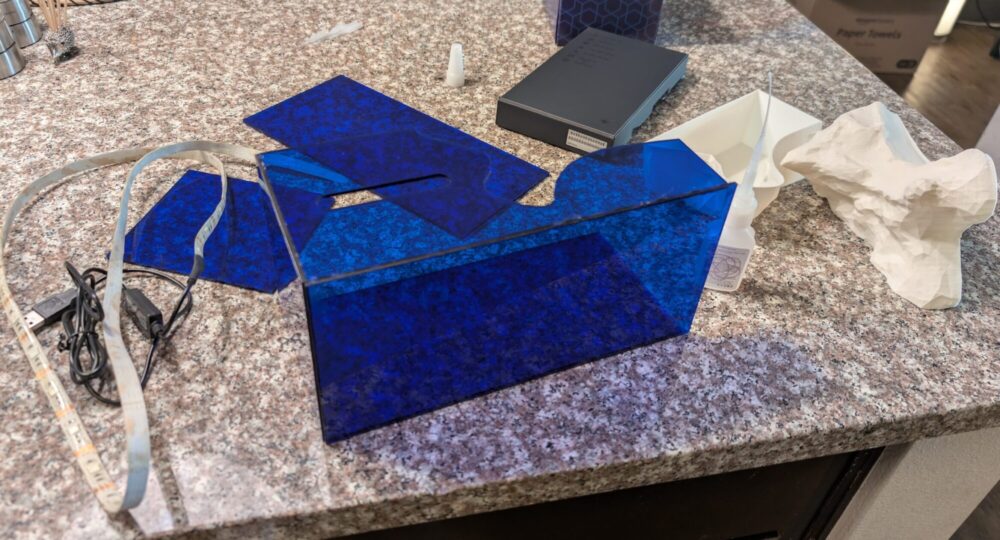
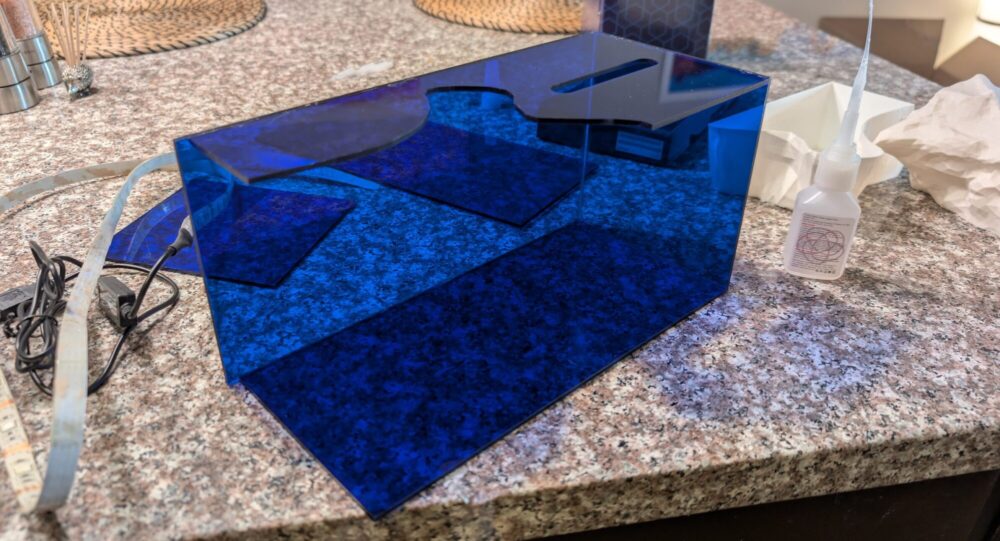
Once everything was manufactured, it was time for assembly. There are six individual acrylic pieces and two 3d printed pieces, along with an LED strip. To put all of these together I purchased a small bottle of specialized plastic glue, which would help to tightly bond all of the acrylic and ABS together. This was the one thing that I needed to go buy and not reuse, since the superglue I already had was not strong enough to bond with only and 1/8 inch thickness material to interface with.
Getting this plastic glue proved to be a great idea initially, but would come back to bite me. I learned quickly that it sets extremely fast, so if I misplace a piece of Acrylic, it would be impossible to correct. This led to me making a few alignment errors during assembly that I could not fix, but thankfully they were small enough to not be noticeable.
After gluing together all of the acrylic, It was time to attach the iceberg. It took some time to figure out how I wanted to position the LED strip, but I eventually found an orientation that allowed to to diffuse best: I wrapped the strip into a ball with all the the LEDs facing inward to prevent being able to see bright spots. Once the LEDs were in place, I cleared a spot to route the power cable, and glued everything into position. Lastly, I put in some tissues, and voila, the project was assembled.
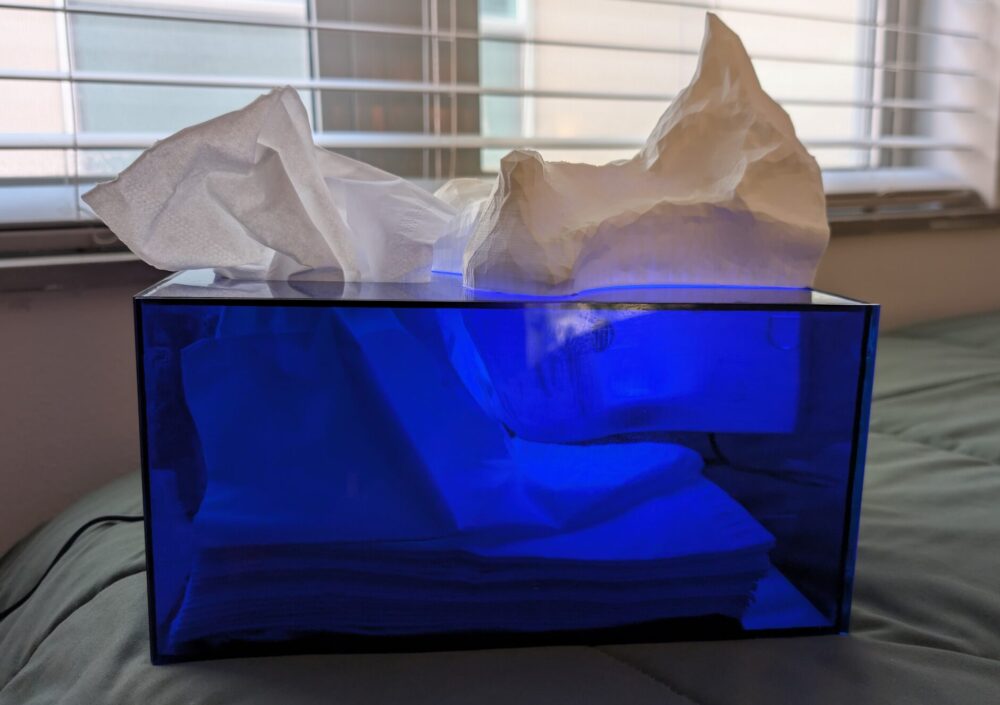
Finished Project
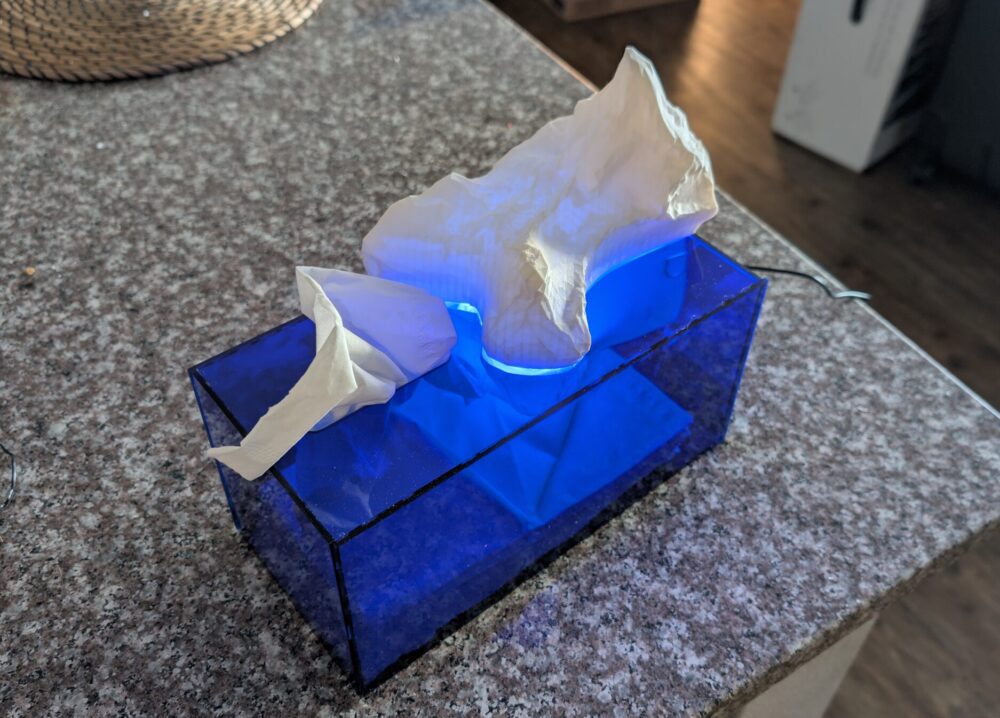
A final description of the artifact is as follows: It is a tissue box and lamp combination, comprised of 1/8 inch clear blue acrylic panels and ABS 3D printed components. It serves as both a lamp that can add ambience to an area, a tissue box, and a decorative art piece.

Functional Goals
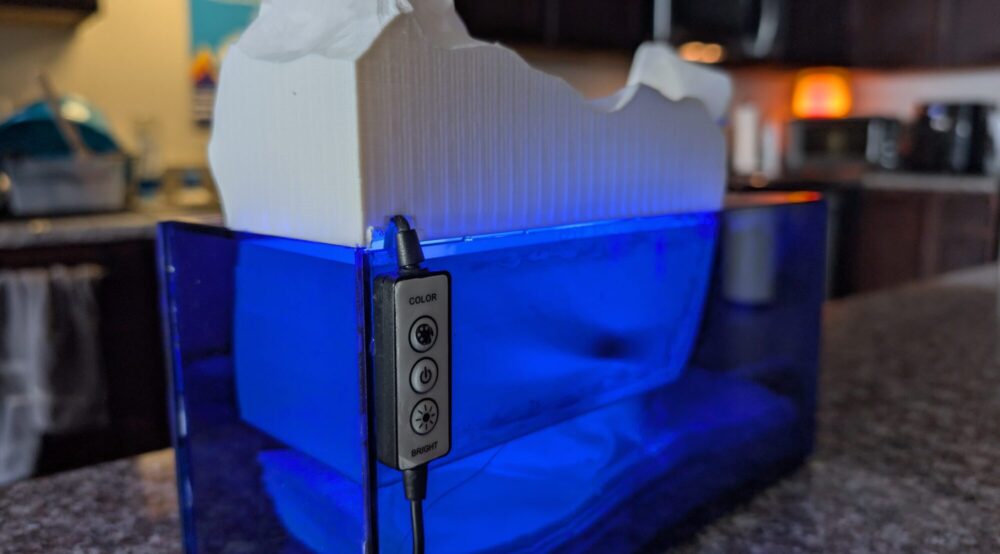
My initial functional goals were to create a lamp, tissue box, and artistic piece that I could put on a table and admire. As a lamp, it can change colors, brightness, and turn on/off with a controller glued to the back. While it is rather dim, it fills the purpose of being more of an aesthetic lamp then a functional one that you could use for reading. As a tissue box, I was satisfied by how well you could pull out tissues, and it can hold about 50 when full. An added bonus is that you can see the number of tissues you have left, so you know when you need to get more. Unfortunately, I did not incorporate an easy way to replace the tissues.
Artistic Goals
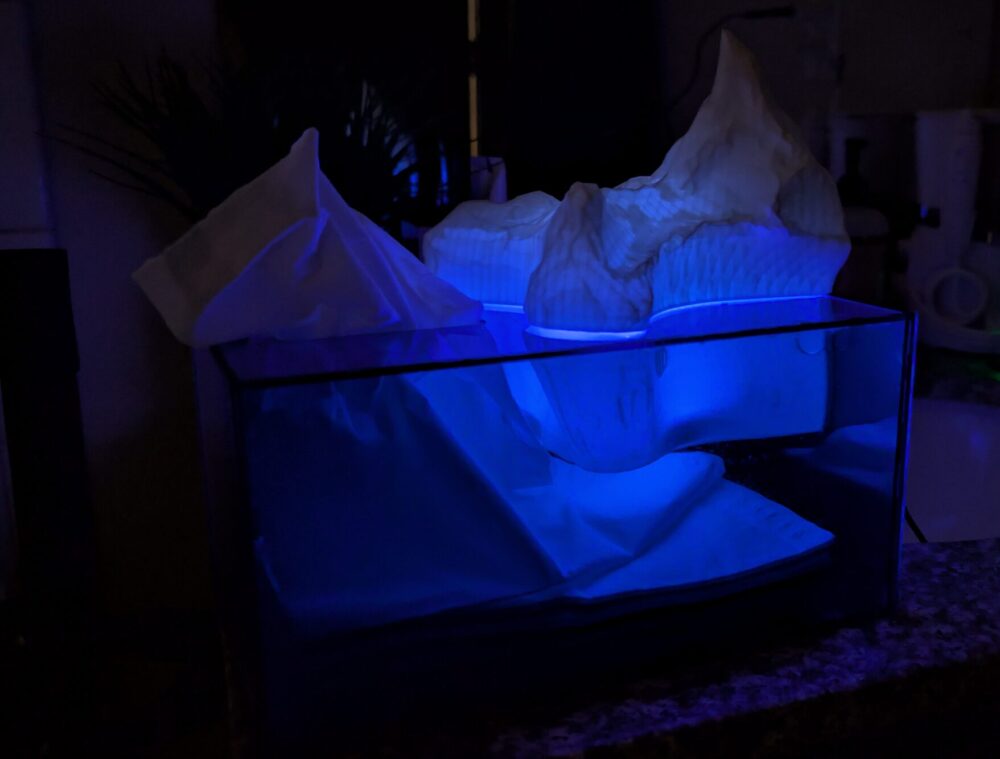
My artistic goals for this project were to create something that matches the Frutiger Aero aesthetic, and that I would be happy to look at. I feel like I fulfilled these goals: The blue and white colors and nature themes fit Frutiger Aero, and Seeing the tissue blend in as an iceberg I think looks great! The lamp portion turned out even better than expected, since when it is dark, it emits a cool blue glow that is calming and reminiscent of an aquarium.
What is next?
While I am very satisfied with my artifact, one thing I would like to improve is how I can reload tissues so that I am able to keep it in use for a long time. Other than that, I am very happy with how it turned out and plan to keep it and use it into the foreseeable future.
2 Comments. Leave new
This is so cool Bryce! I really like how this turned out. I think Frutiger Aero is a super unique and really nice aesthetic, and I think your project ended up capturing the aesthetic very well. I’m curious how long the ice berg took to print, it looks fairly complicated and I’m not familiar with the different performances of 3D printers. I also really like how you added light up LEDS to the inside of the box, it really ties the whole thing together.
Thanks Delos! I believe the top iceberg took around 7 hours, while the bottom one took around 2.5 hours since it had no infill.