

[2] Floral Skull Graphic [3] Goblincore Example
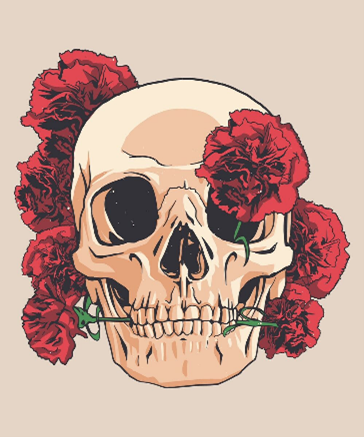
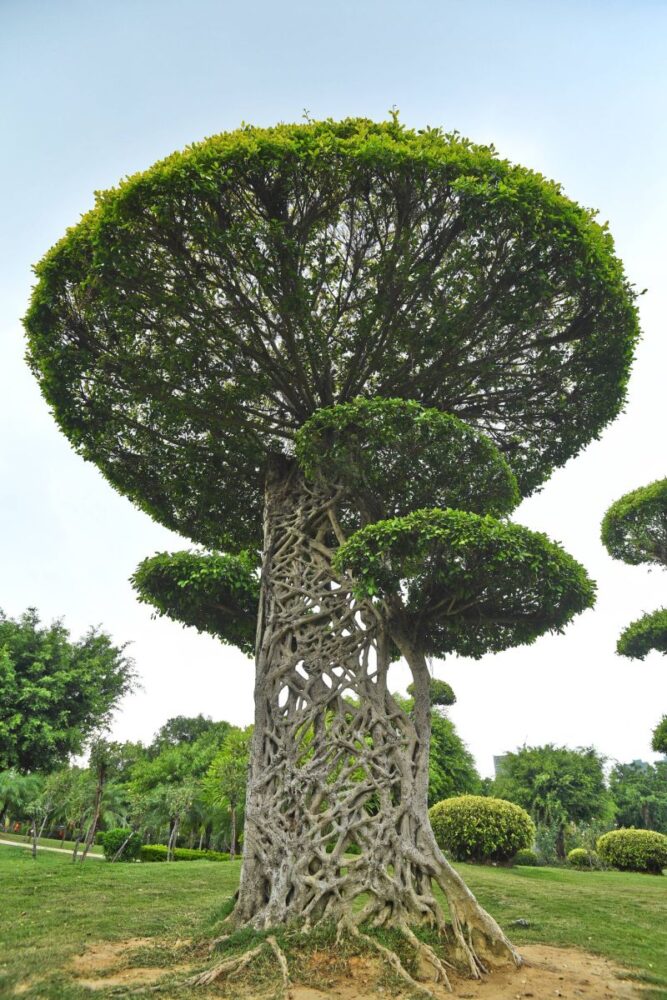
I define the beauty in death aesthetic as an appreciation and admiration of things related to or involving death. This aesthetic is typically displayed as some beautiful graphic that integrates some deathly, eerie undertone (with use of a skull, skeleton, etc.). An example of this aesthetic is shown above with figure 2. A reason as to why people may be drawn to this aesthetic is to serve as a reminder of the beauty in the finiteness/fragility of life. A modern example where you might encounter this aesthetic is the Día De Los Muertos holiday. Celebrated throughout most of Latin America, you’ll find people adorned in skeletal face paint, and outfits featuring intricate designs. The musical artist Chase Atlantic also coincidentally released an album titled “Beauty in Death”, illustrating this aesthetic as part of his album cover. Other related aesthetics include goblincore (see figure 3), appreciating the things in nature typically seen as less beautiful, and vulture culture, related to the collection and preservation of animal remains.
In my representation of this aesthetic, I wanted to incorporate a strong nature element with my design, maintaining a slightly eerie undertone, while still being beautiful and unsuspecting. Examples of this in nature include foxgloves (a poisonous flower), sundew (a carnivorous plant), and mistletoe (a parasitic plant). This is part of what led me to my choice of a strangler fig for my project.

[4] Strangler Fig Growth Animation
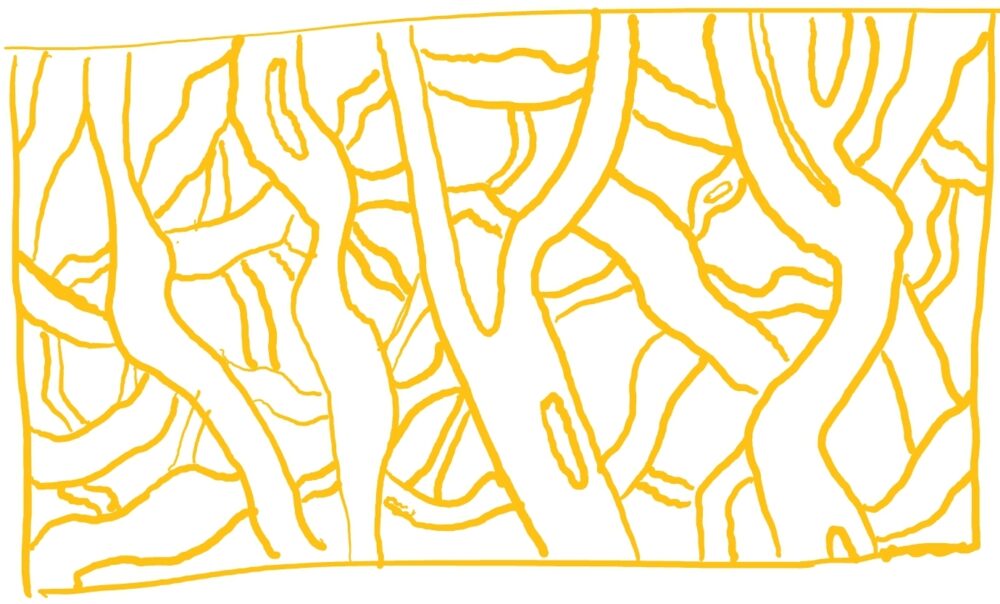
A strangler fig is a parasitic plant typically found in a dense, tropical environment. It evolved to adapt to the nutrient competitive environment by entrapping its victim with its aerial roots, limiting growth and stealing their nutrients. As the host tree dies and begins to rot away, the aerial roots of the fig remain, leaving a beautiful intertwining pattern forming a hollow cylinder (see figure 4).
[5] Strangler Fig Reference Tree
My inspiration for this project was based on my experiences while hiking in the tropics. I was able to travel to Costa Rica, and on a night hike, my guide shined their flashlight up through a strangler fig tree. This really showed off the fig’s pattern and created a very interesting illumination pattern. My project aims to replicate that pattern using the tree in figure 5 for reference.
[6] Strangler Fig Pattern Sketch
Based on my inspiration, I wanted to create a lampshade that realistically represented a strangler fig tree. I envisioned creating a 3D root structure using aluminum foil and papier mâché that attaches to a lampshade I’d get from a secondhand store. I also considered adding a tree canopy to further add to the realism of the design. With the roots surrounding the lampshade, I wanted there to be an illuminating effect when the lamp is turned on, projecting the constriction of the roots throughout the room of the viewer. I sketched out the pattern shown above as an initial attempt towards a design concept. The overall functional and artistic goals were to replicate the strangler fig’s pattern, create an eerie lighting effect, and match the beauty in death aesthetic both while the lamp is on and off.
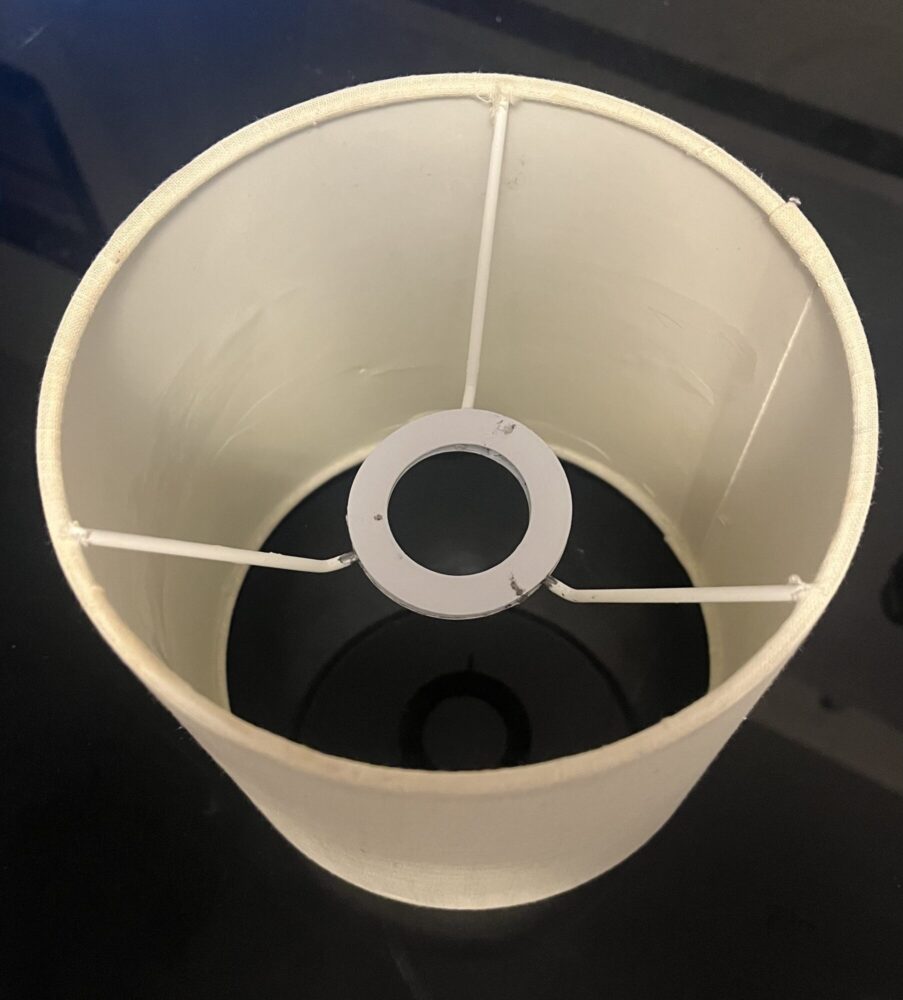
[7] Lampshade Ring/Washer Adjustment [8] Lampshade Stencil Design Test
Following my initial design concept, I found a suitable lamp and lampshade from Goodwill. One issue I encountered was that the washer/ring used to center the lampshade on the lamp didn’t fit properly. To resolve this issue, I cut the ring that came pre-attached to the lampshade and replaced it (using superglue) with the washer/ring piece that came with the lamp. I then began fabrication of my project by replicating my sketched pattern onto a paper that I wrapped around the lampshade (figure 8). This was to get a general idea of how the final project/pattern may look, as well as provide a stencil to start creating the 3D root structure. Unfortunately, I discovered that using this fabric lampshade breaks up the light passing through it such that even when an object is placed directly on the lampshade, you can’t clearly make out a discernible illumination pattern. At this point, I chose to focus on creating the root pattern rather than troubleshooting the illumination problem.

[9] Main Roots Shaped and Connected to Wire Loop
For the structure of my design, I used a wire hanger to shape the larger roots and facilitate a connection with the fabric lampshade. I shaped the wire using pliers and attempted to follow the pattern laid out by the stencil I previously created. I then connected these wires to a loop that would rest on top of the fabric lampshade using rubber bands, allowing for adjustment as needed (see figure 9).

[10] Aluminum Main Roots with Connecting Floral Wire
Once the main roots were wired, I wrapped aluminum foil around them to add a more 3D, textured form. At this point, I realized that my stencil’s design was too intricate to be effectively manufactured using papier mâché. Therefore, I chose to free-hand the rest of the design rather than continue trying to follow the stencil. Another issue I encountered was that the gauge of the hanger wire was too thick to manipulate, so I opted to use floral wire for the connecting roots (see figure 10).
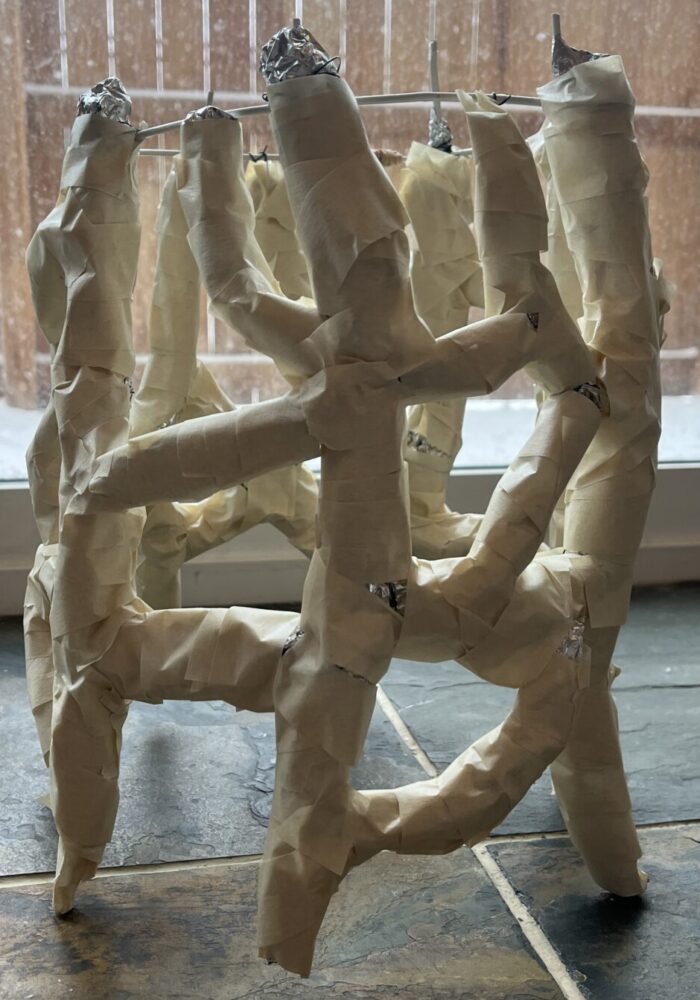
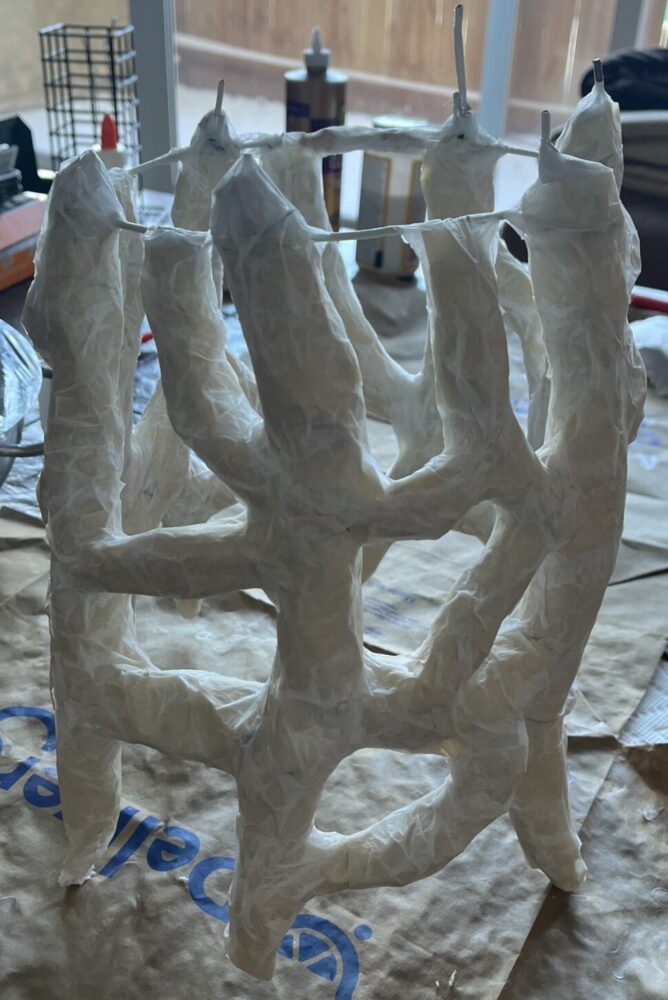
[11] Masking Tape Covered Structure [12] Papier Mâché Covered Structure
After wrapping the connecting roots in aluminum foil as well, the next step for my project was wrapping the structure in masking tape. The masking tape served the purpose of providing a good surface for the papier mâché to stick to (see figure 11). With the mold being finished, I created the paper mâché using white tissue paper and a mix of 1 part Elmer’s craft glue to 2 parts water, and layered it onto the roots (see figure 12).
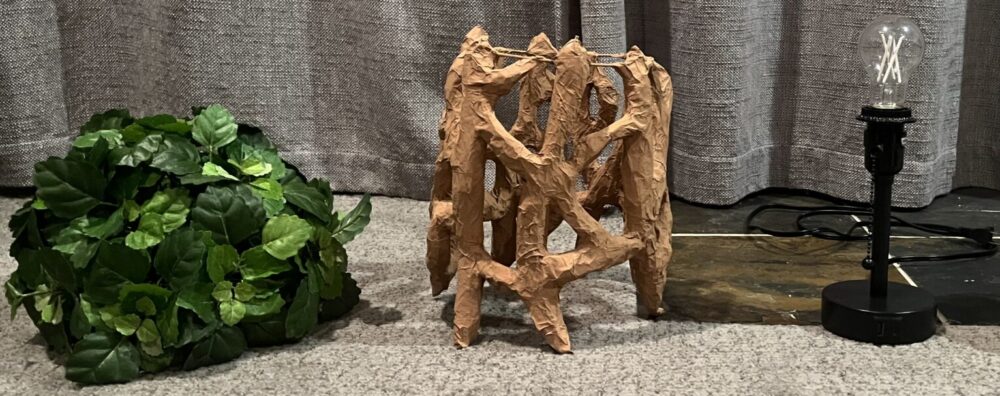
[13] Canopy Fabrication
[14] Final Project Before Assembly
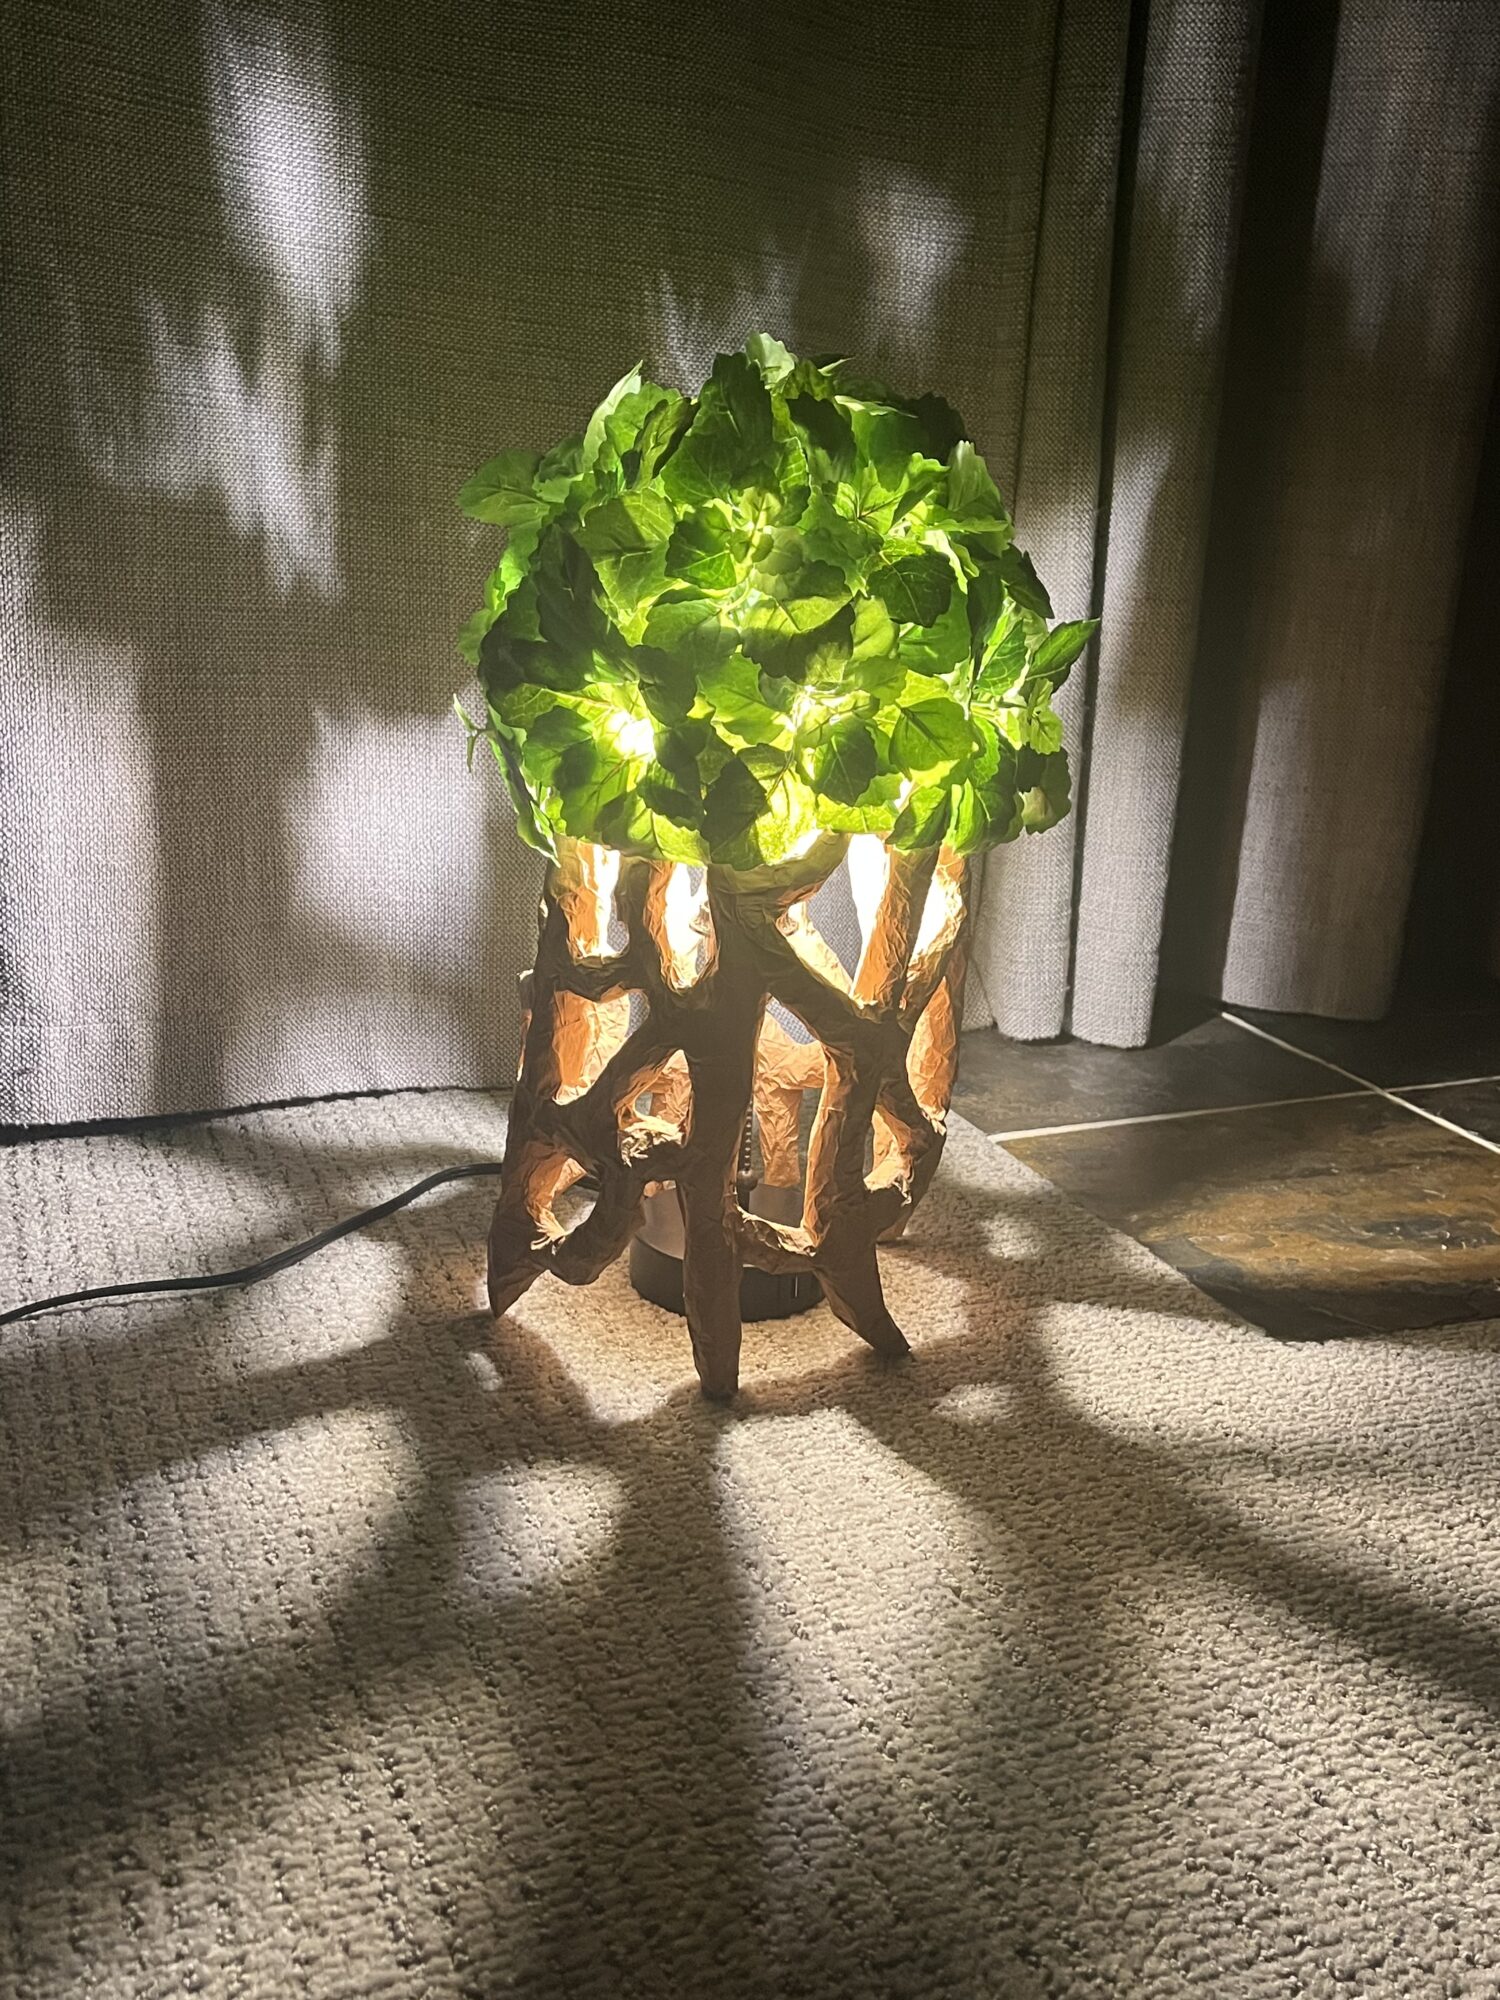
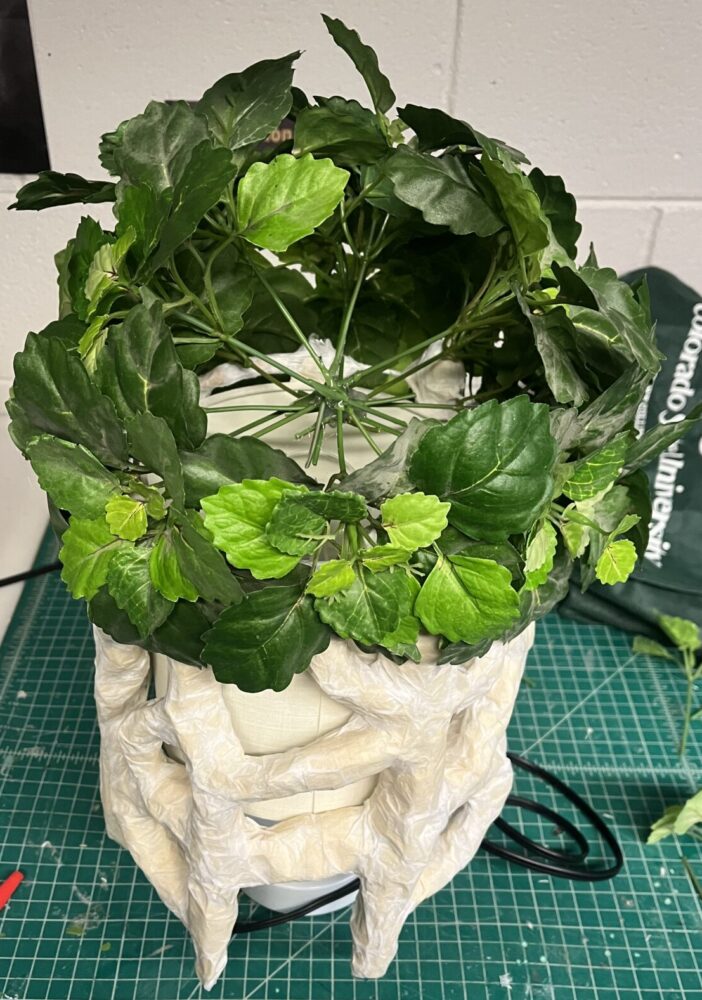
As the glue dried, I experimented with different canopy options for the top of the lamp. Previously, I had thought of using green fabric to represent the leaves on a tree; however, while shopping for various materials, I realized that I could upcycle secondhand artificial plants. With that in mind, I purchased a basket filled with leaves from Goodwill and took apart the individual stems to form the canopy. I shaped the canopy using the now dried lampshade, and hot glued the stems of the leaves together to form a hemisphere (see figure 13). The last steps in the fabrication process were painting the roots/lamp and assembly. I painted the roots a golden-brown color. This made the roots bright enough that they could be seen when the lamp is on, but dark enough to seem like a realistic tree. I also painted the lamp black so that when the lamp is off, it fades into the shadow of the design, and when the lamp is on, it doesn’t distract from the lampshade (see figure 14). The last design decision I made was removing the fabric lampshade underneath the roots. When I was testing out the assembly, I felt that the fabric lampshade detracted from the design because it awkwardly cut off halfway down the roots, the coloration contrasted with the brown paint, and most importantly, it didn’t allow for any illumination pattern. By removing this, the shadow pattern I had hoped for came though and the roots touched the ground (adding to the realism).
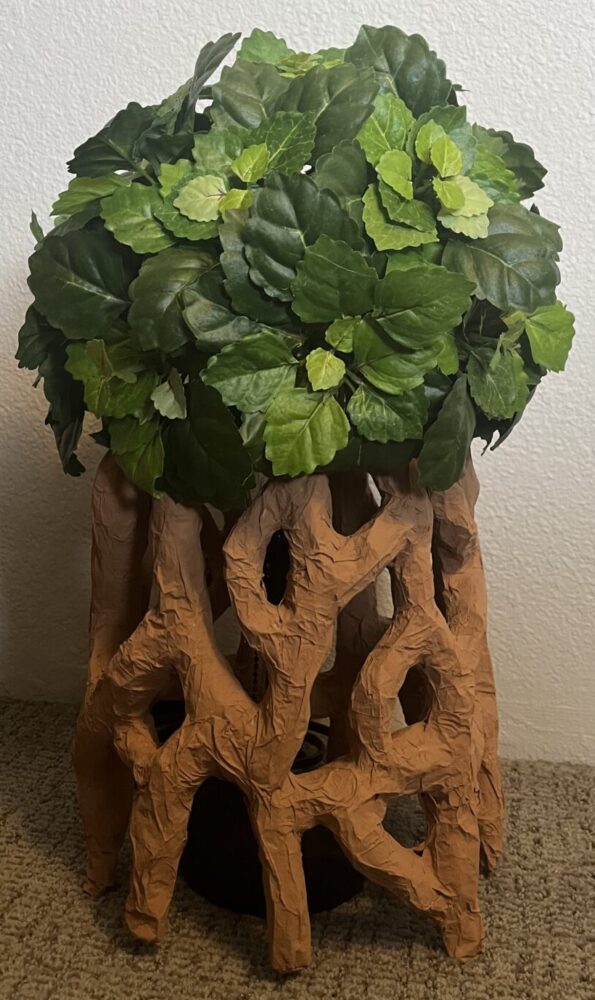
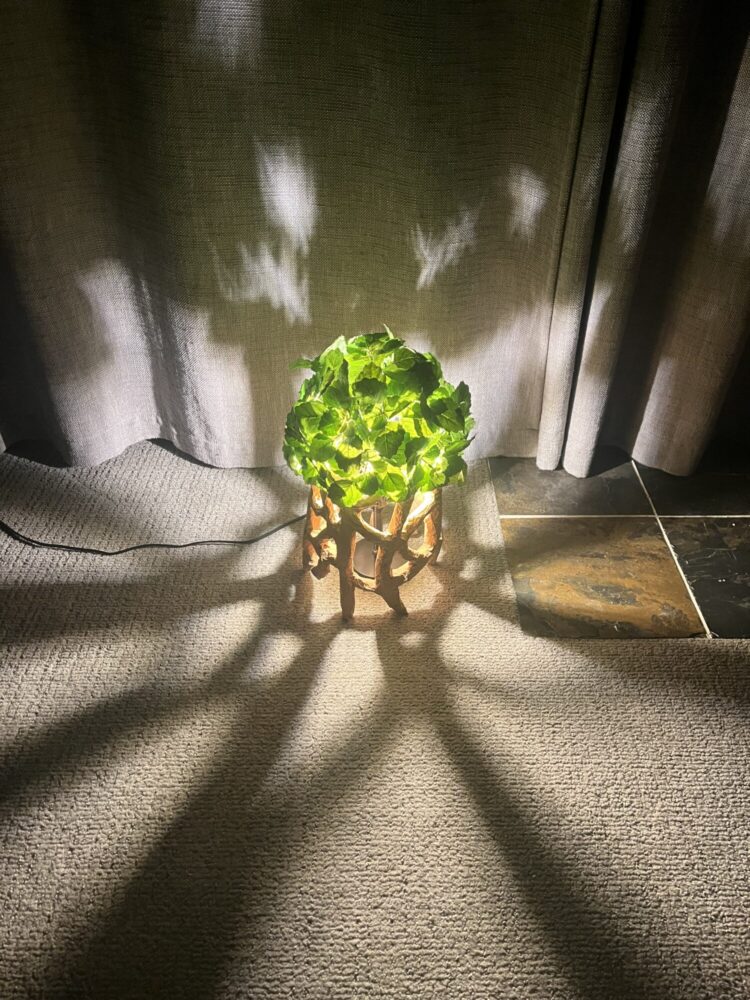
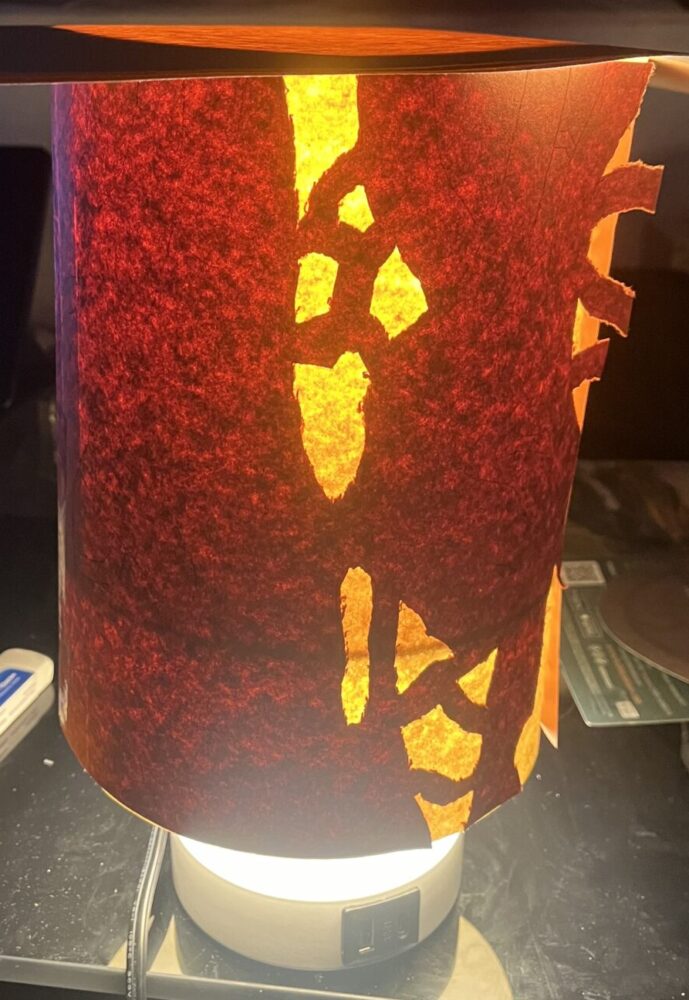
[15] Finished Project Lamp Off [16] Finished Project Lamp On
My final design is shown in figures 15, 16, and 1 (the featured image). As described above (see figure 14), it’s comprised of a black painted lamp, brown painted papier mâché root structure, and artificial leaf canopy. I believe my design effectively represents a strangler fig tree as well as the beauty in death aesthetic both when the lamp is turned off and on, with the aesthetic being exaggerated when the lamp is on. Functionally, I’m very pleased with how the illumination pattern turned out. It still lets out enough light to properly work as a lamp if/when needed.
Going forward, I would like to touch up the paint so that it isn’t a solid color (adding a bit more texture to the roots). Another change I want to add is fastening all three components together. Right now, all piece are resting around/on top of each other rather than being fastened together. This makes it a little difficult to transport and set up. Lastly, I want to alter the canopy stem connection because the hot glue connection point touches the top of the lightbulb.
Overall, I enjoyed working on this project and am very happy with how my design turned out!
Video recording of final product presentation: https://youtu.be/QxYMmushLkk
Citations:
[2] Offbeat Stickers Store, N/A, https://www.ebay.com/itm/115338783540
[3] skelobite, 2023, https://www.reddit.com/r/goblincore/comments/ydmxcs/got_inspired_by_the_aesthetic/
[4] Denny Lesmana, 2023, https://dennylesmana.medium.com/what-is-the-strangler-fig-pattern-1560443b8459
[5] Kelly Goetsch, 2024, https://www.linkedin.com/posts/kellygoetsch_theres-something-deeply-poetic-about-the-activity-7097177609452613633-rGLd/
Aesthetics Wiki, N/A, https://aesthetics.fandom.com/wiki/List_of_Aesthetics
4 Comments. Leave new
Hi Eric,
This is an incredible project! The way you captured the eerie yet beautiful aesthetic of the strangler fig is really well thought out, and the final result looks fantastic. The attention to detail in replicating the root structure and the decision to remove the fabric lampshade to enhance the illumination pattern were great design choices. The canopy made from upcycled artificial plants is also a adds to the realism. Well done!
Hi Allister, thanks for your comment! It definitely took some time trying to come up with the final design, but I’m really happy with how it turned out! I’m glad you think the roots look good and agree with my choice to take out the inner fabric lampshade.
This is such a cool idea from inspiration to finish, the piece is amazing. My favorite part is the way light interacts with the piece as if it’s glowing from the inside, and casting beautiful shadows.
Hi Sylvia, I’m super happy it ended up working out so that the shadows were cast into the room. There was a period of time where I thought I’d have to scrap that aspect of the project, so I’m glad it came together in the end!