

Brainstorming
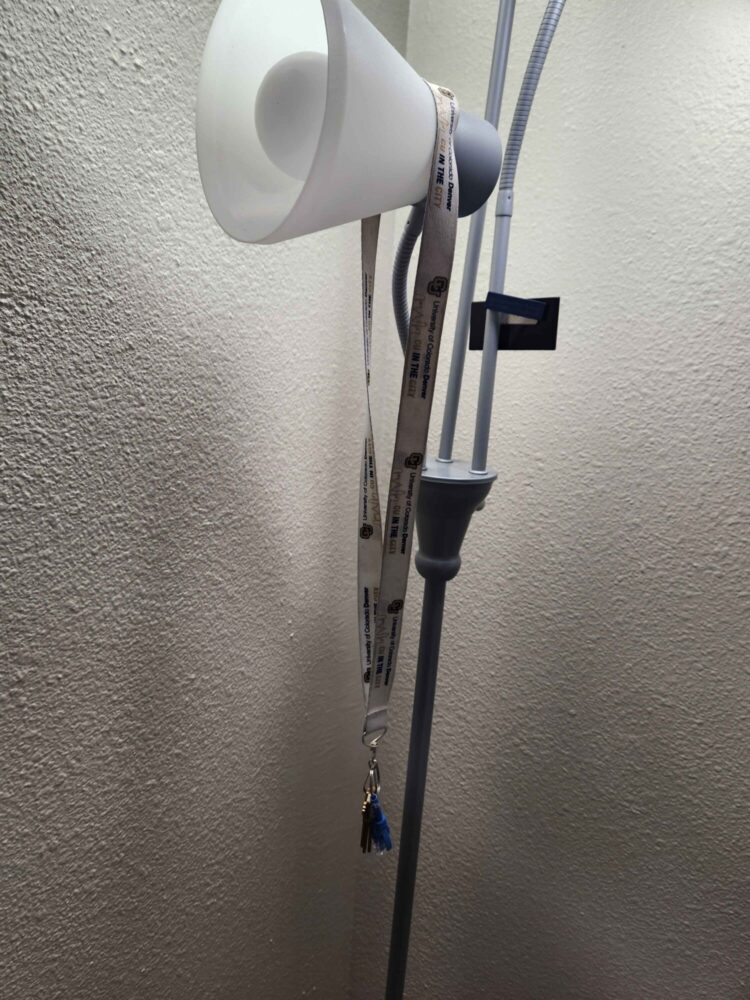
When brainstorming ideas for my upcycling project, I wanted to create something that would serve a functional purpose in my daily life. One issue that came to mind was how often I forget my house key whenever I travel between my apartment in Boulder and my home in Aurora. My apartment key, which is attached to the same keychain, is also frequently forgotten. At the time, I used the lamp at the back of my room to hang my keys by their lanyard. However, this often caused me to rush out the door without noticing my keys, as I tend to forget them in the process. With this in mind, I decided that for my upcycling project, I wanted to build an item that would provide a designated place for my keys. I wanted it to be mobile so I could position it in a location that would make it more convenient and help me avoid forgetting my keys. This idea became the foundation for my upcycling project. Below is an image of my current situation.
Project Concept inspirations and Aesthetic Choice
My project involves creating a fixture designed to hold my keys, similar to a key rack. However, instead of mounting it on the wall next to the exit door, I plan to mount it on the back of my room door. This would serve as a convenient and easily identifiable place for me to locate my keys, ensuring it’s the last place I check as I leave my room. Since I’m not allowed to drill holes into my door, I want the fixture to hang off the door if possible. The mechanism that comes to mind is similar to that of door towel hangers, which use a flat metal bar that bends around the door frame. This design is flat enough to allow the door to close properly. An image below illustrates this concept:
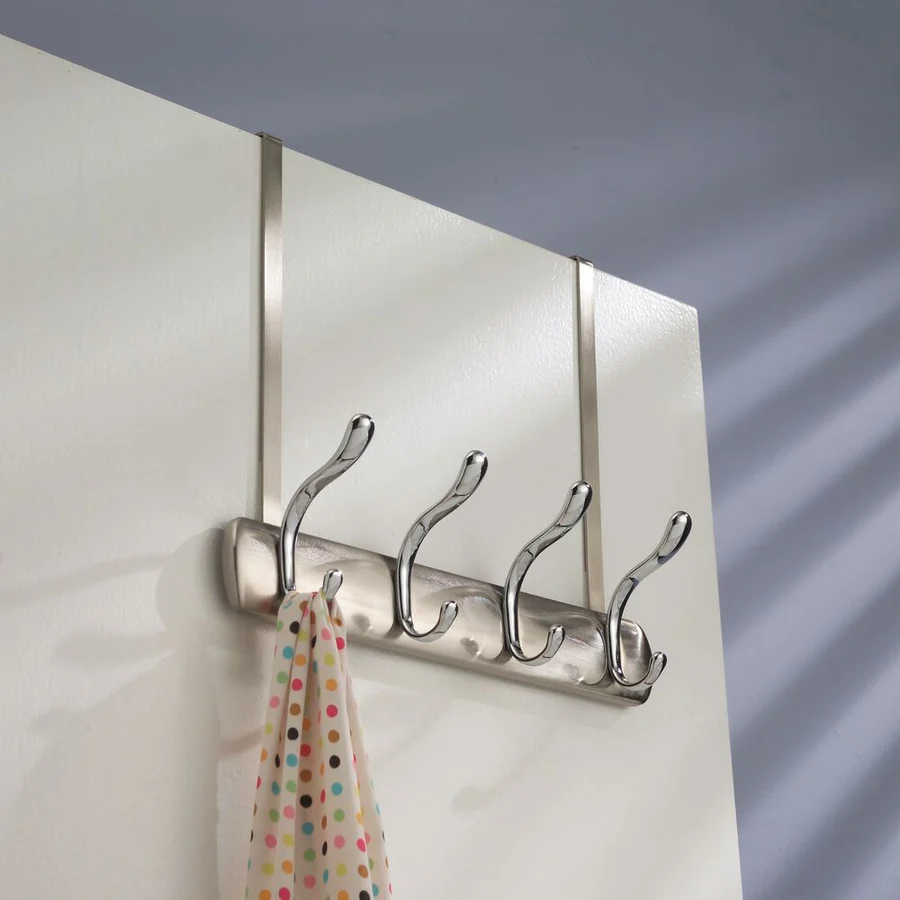
Image [2]: York Lyra Over-the-Door Rack – iDesign
In terms of finding a unique mechanism, I wanted it to relate to the aesthetic I was aiming for. Reflecting on my past experiences repairing phone devices and considering what sparked my interest in the fields of STEM and engineering, I realized that a theme of technology should be a key component of this project. However, I became confused about how to integrate all these ideas into one cohesive design. I do remember seeing a product on the market that closely resembles what I am trying to accomplish: upcycling an old guitar amplifier into a keychain holder. This guitar amp would be mounted on a wall and utilize the existing aux ports and adapters, allowing key rings to be attached securely. This design would enable users to connect their keys to the amp, keeping them organized and easily accessible. An image of this concept is shown below:
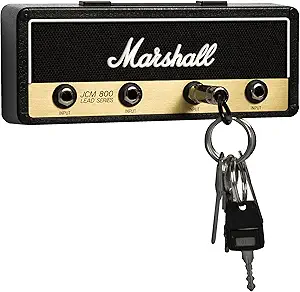
Image [3]: Marshall JCM800 Jack Rack, 2016 – Pluginz
As previously mentioned, I wanted to put my own spin on the idea revolving around technology. Rather than simply slapping components together, I aimed to create a build that not only had a cohesive look but also brought some kind of callback to the origins of a topic I’ve been interested in throughout my life: the evolution of technology. I realized that, now surrounded by modern minimalist technology—with most iterations pushing toward a more futuristic aesthetic—it would be interesting to take inspiration from the past. So, I thought, why not go back near the beginning and design something with a theme that still feels familiar to me? For me, this led to creating something reminiscent of vintage computers and gaming consoles from the late 70s, 80s, and 90s. In particular, I was drawn to the aesthetic of technology products from that era, which often featured off-white, cream, or neutral gray plastics for the casing of systems. These designs typically had boxy shapes with slightly curved edges and rounded corners to make handling more comfortable. This aesthetic was often characterized by a limited range of colors. Any hints of color that stood out from the rest of the body were usually features intended for user interaction. Notable examples of this include products like the original Nintendo Game Boy (shown in the image below).
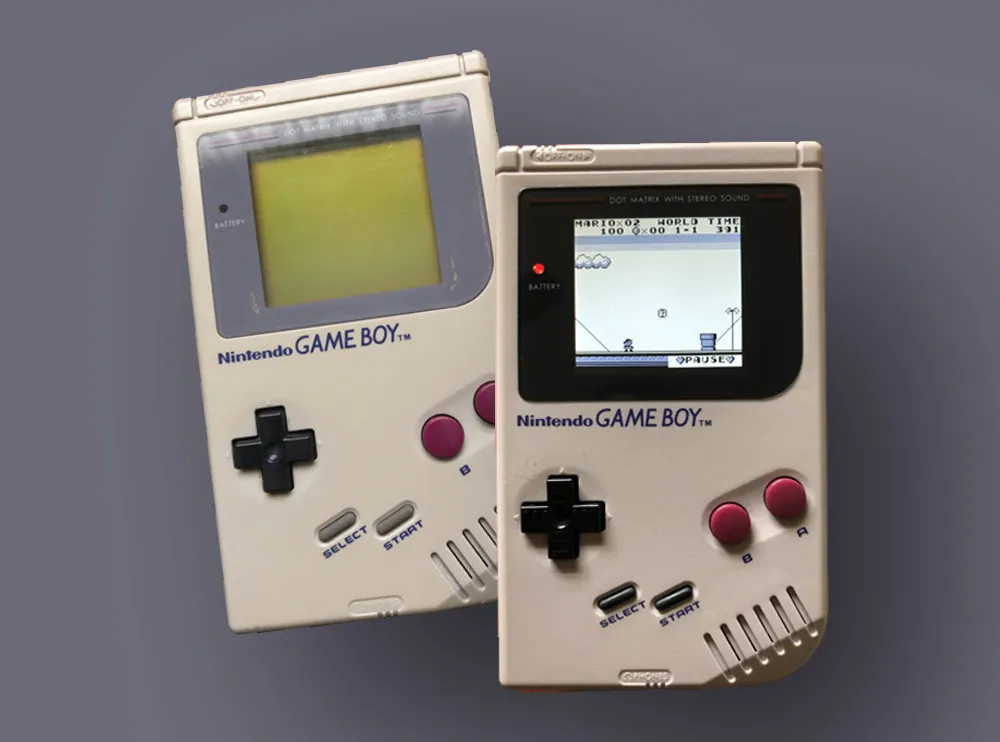
Image [4]: Nintendo Game Boy, 2020 – The Nerd Daily
Considering that this was my chosen aesthetic, I now had to find a connector that not only matched the time era but also provided the same or similar functionality as the aux jack did for the amp key holder. Specifically, it needed to allow keys to easily plug into the socket of choice while securely holding them, regardless of the number of keys attached to the connector. At the same time, this secure fit had to be quickly and easily removable, ideally through a mechanism that could be disengaged at the press of a button. While most modern ports, such as the USB-C port, offer a secure fit, they did not align with the aesthetic of using vintage technology. Upon further reflection and observation of devices I encountered during my time in school, I realized that the Ethernet port could fulfill my requirements. Not only did it serve the functional purpose I needed, but it also fit the retro technology aesthetic. Since this port would be the primary object of interaction, it presented an opportunity to incorporate color. I decided to draw inspiration from the iconic rainbow logo that Apple used in the late 1970s with the release of the Apple II, using its color palette to enhance the design.
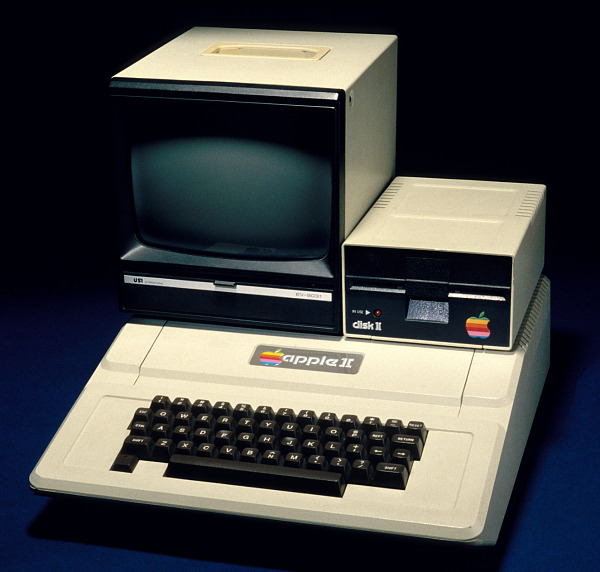
Image [5]: Apple ll, 1980 – National Museum of American History
Initial concept and Fabrication Process
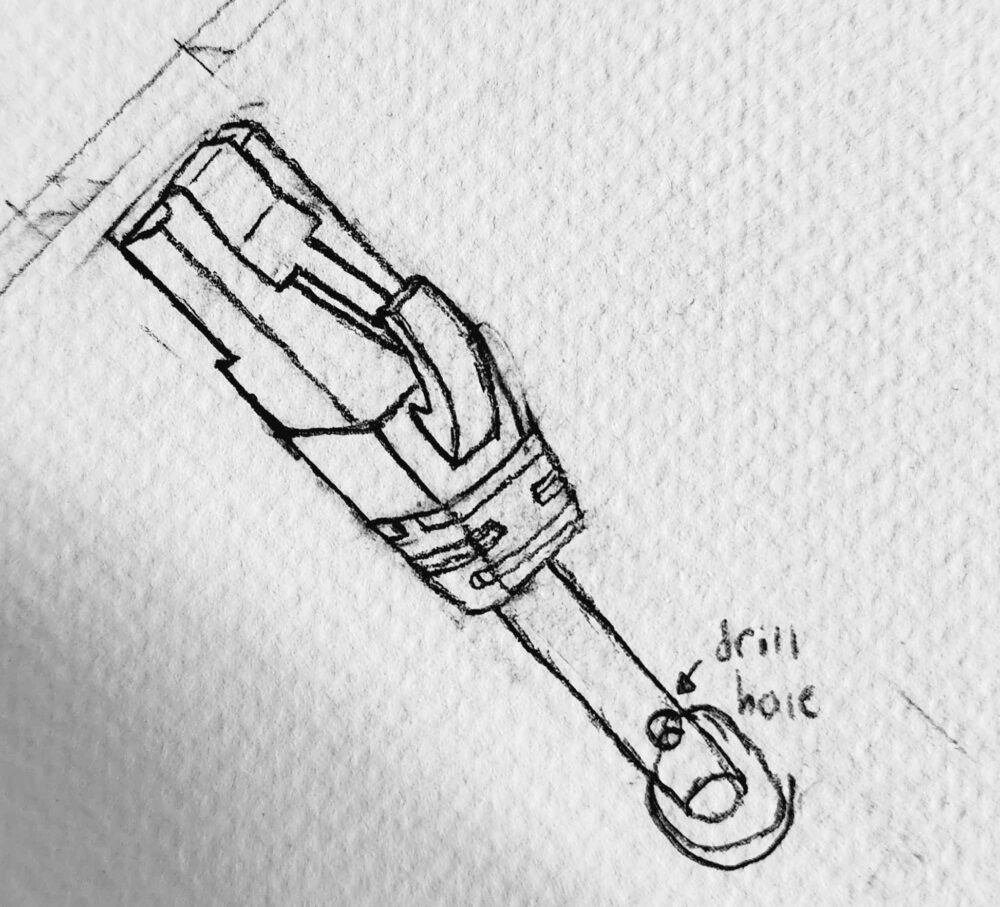
Knowing that I would be using Ethernet cables in my design, I decided to incorporate a main console—an object with the required Ethernet port. For this purpose, I planned to repurpose an old router. The router would serve as the base station where the Ethernet cable would be plugged in, providing a functional and aesthetic centerpiece for the design. This console did not need to be electrically functional either, as I would possibly be drilling into the system to attach a bar that would later be bent to fit around the top of a door. A concept of this is shown in the drawing below:

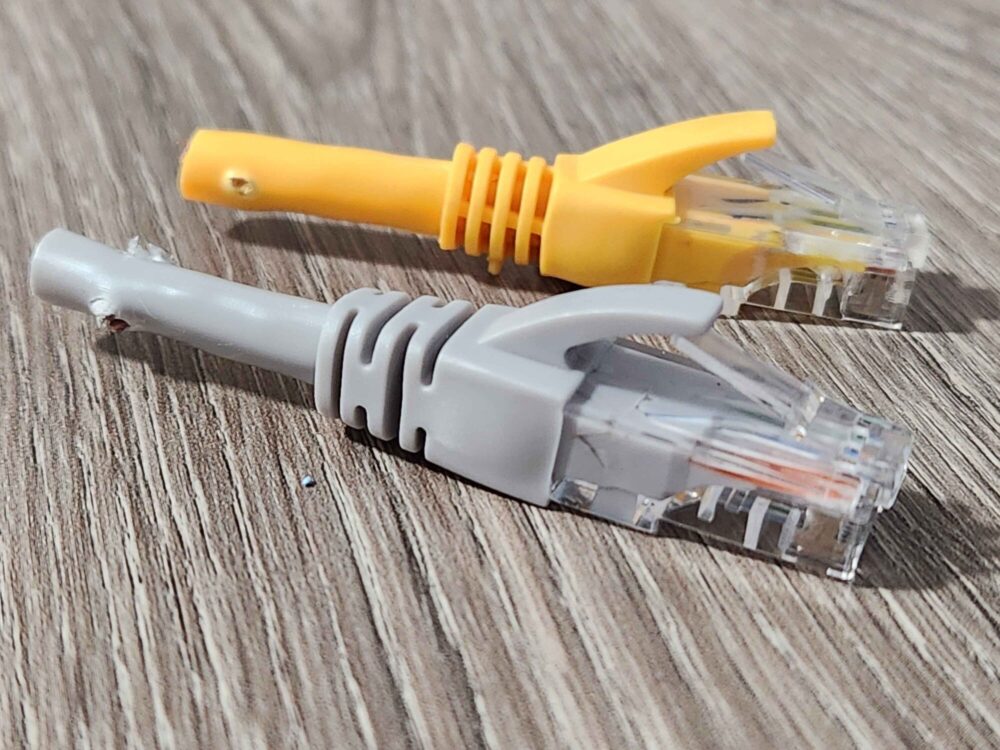
The Ethernet cables themselves were envisioned as accessories—elements that could hold keys or key rings. Since the cables were not required to be functional, I could cut them to size without concern. This made sourcing the cables much easier, as I could use faulty or discarded Ethernet cables, which are often thrown away. An idea of this is illustrated in the image below.
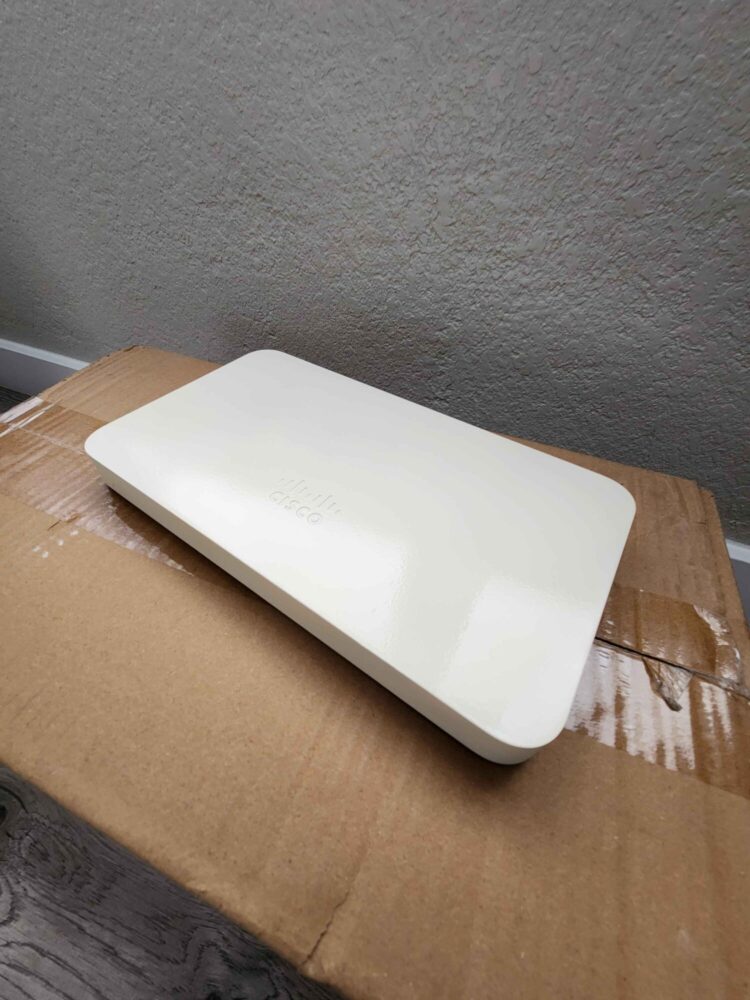
After gathering and sourcing materials—many of which I found in old technology my family had stored at home or discovered lying around at sourcing spots on campus—the process began. For the system/console, I was able to cheaply acquire a Cisco Meraki MX64, a Small Branch Security Appliance. Its state of functionality was unknown, but this did not matter for the purpose of the project.
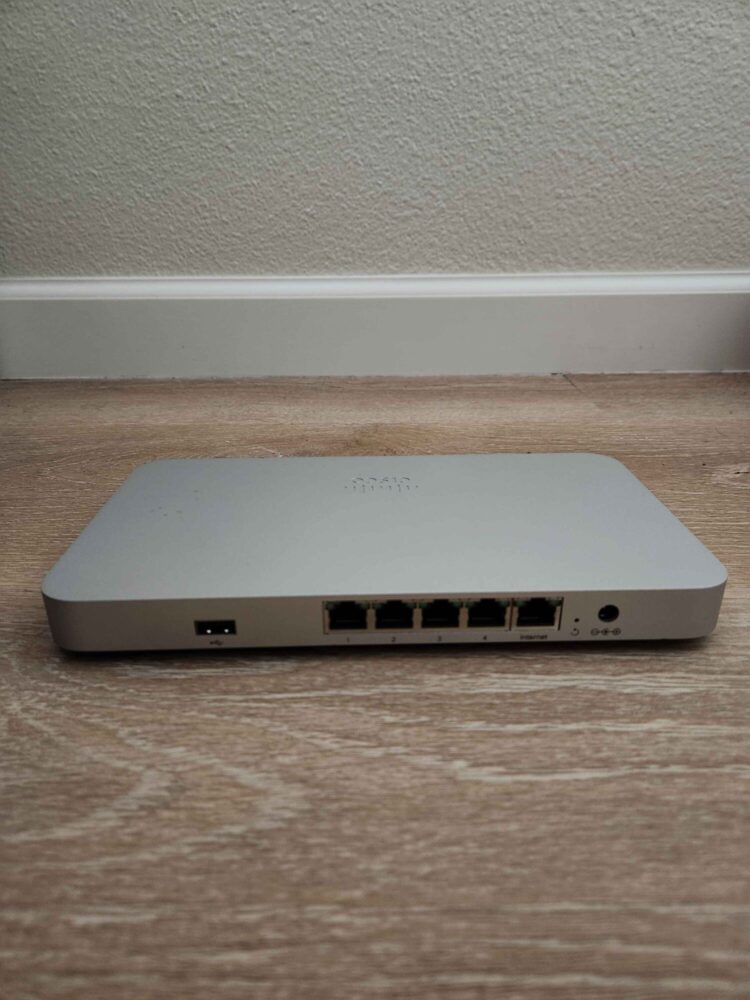
The modification to this console involved using some leftover spray paint from my dad to replicate the vintage cream plastic look commonly seen in products from the late ’70s and ’80s.
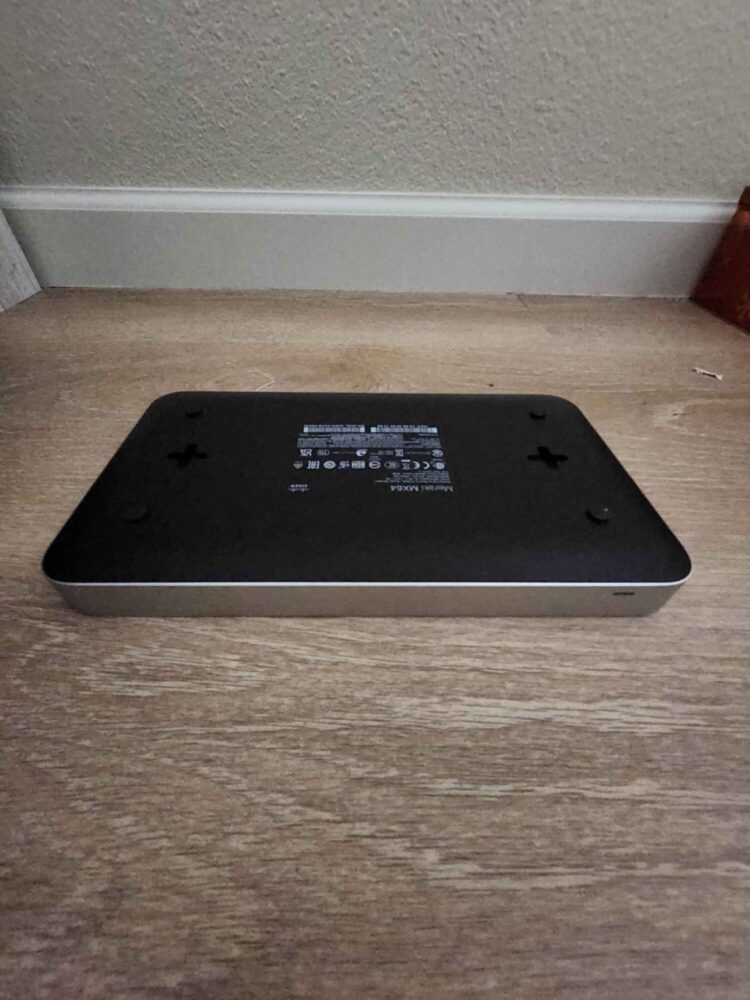
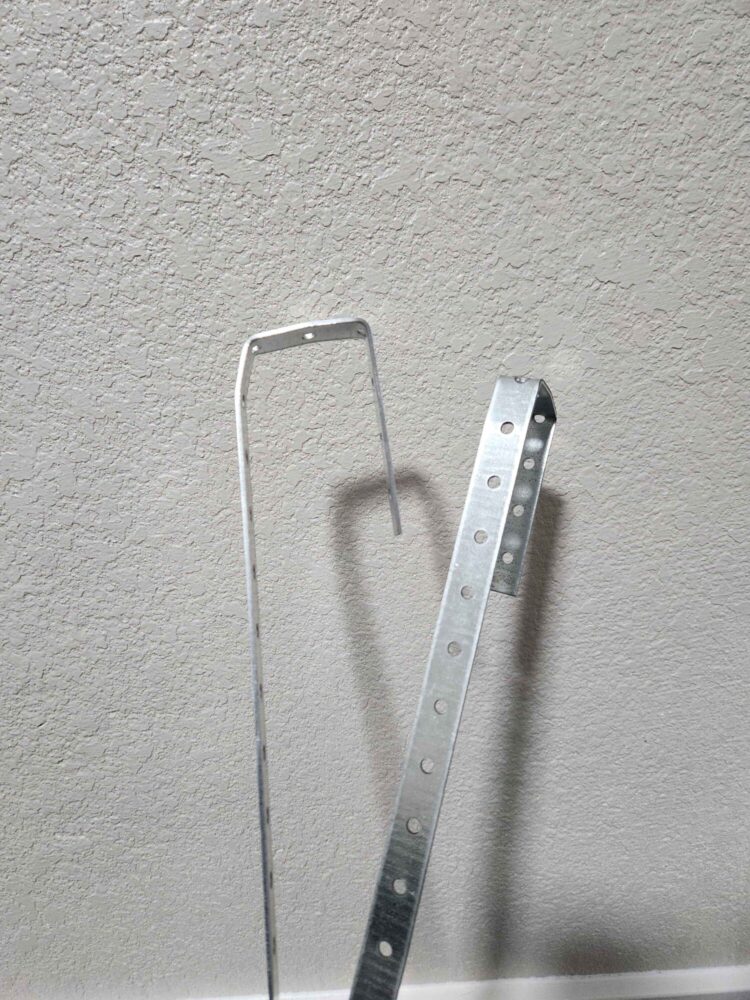
After letting the paint dry, I proceeded to drill four mounting holes, which would be used to attach two Hyco Bars. These are metal bars with holes spanning their length, often used for plumbing purposes. The bars are easily bendable, and with the help of some tools, I was able to bend them at a measured point to properly hang off my door.
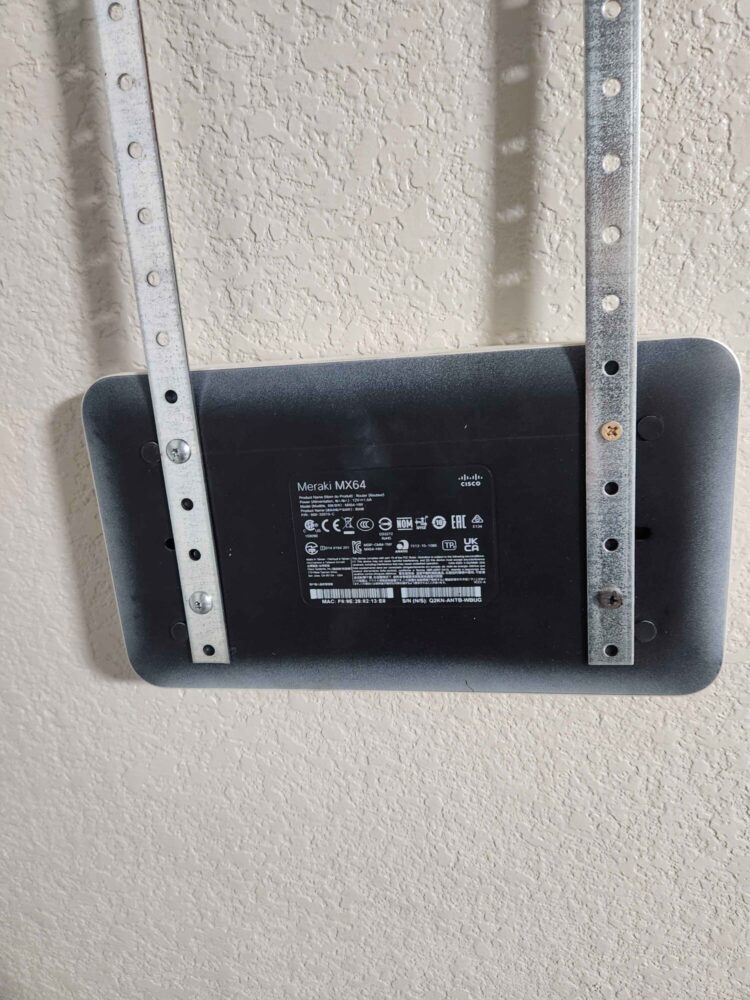
Below is an image after the mounting hole was drilled into the system, with the bars held together using four randomly selected screws that I found in my toolbox. I should mention that I didn’t expect the bottom of the console to also be made of metal, which required a lot of patience and careful use of a compact drill. I feared that my drill might give out, but thankfully, the thickness of the metal layer wasn’t too concerning.
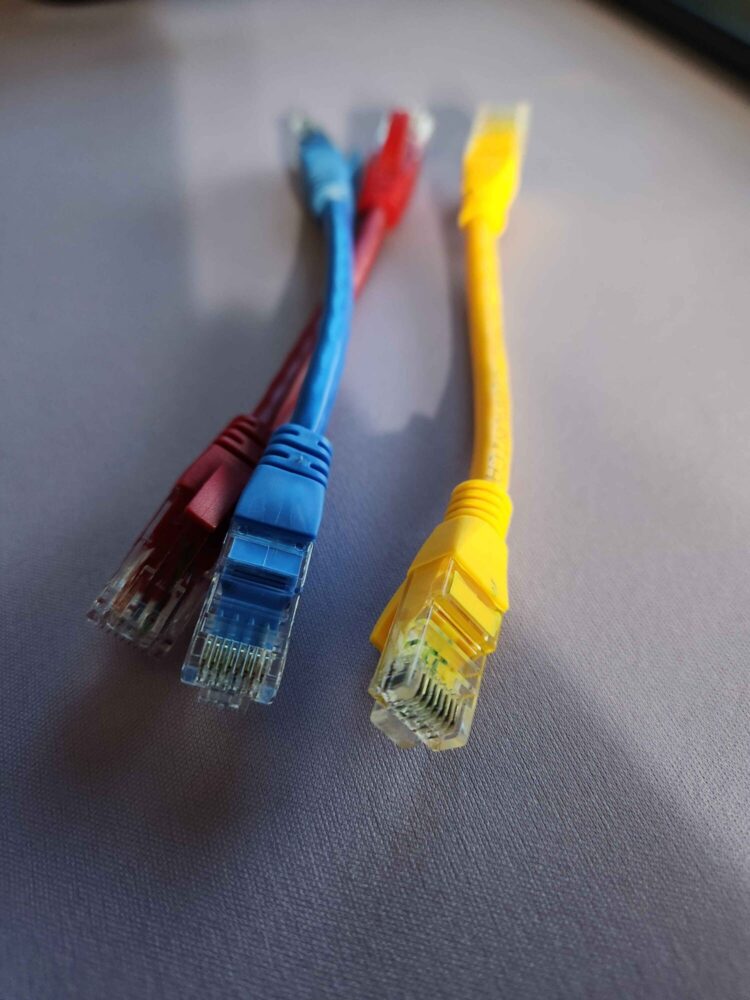
As for the other half of the build, rather than being traditional Ethernet cables meant solely for plugging into Ethernet ports, I happened to find some lying around in my lab. I plan to cut them to size and create a hole near the back end, as shown in the previous drawing. This will allow me to slip through a keyring, which can hold not only the Ethernet cable but also additional rings and lanyards if needed. The bright, vibrant colors of the Ethernet cables are intended to mimic the rainbow Apple logo and other interactive elements of retro technology.
Below is a concept of how the parts can be connected to each other and mounted to the back of a door.

After cutting the Ethernet cables to the desired length, I managed to drill a hole through the back half of the cable. This hole was intended for slipping on a key ring. However, there were issues with the inner wiring still being present, which actively blocked me from threading the key ring through. This required additional time to snip away the inner copper wiring and the plastic anti-static sleeve inside the cable.
As a final cohesive product, I feel that the concept and design had carried through to the very end. The product successfully achieves its functional goal of holding keys through the Ethernet port while being easily detachable from the console system. Functionally, it fulfills its purpose. However, aesthetically, I feel the product in its current state falls a little short of my expectations. The metal bars used to hold it up on the door give the overall product a makeshift appearance rather than a vintage look.
That said, the console itself effectively captures the retro technology vibe. The cream-colored aesthetic, rounded corners, and Ethernet ports contribute to the old-school appearance, aligning well with the intended retro theme. The Ethernet ports also serve as the standout interactive feature of the product, fitting seamlessly into the design. In terms of improvements, one suggestion I’ve received is to mount the product on a wall rather than hanging it on a door. Currently, when inserting an Ethernet cable into the port, there is no counterforce resisting the motion from the door hanger portion. This causes the entire system to lift, making it a two-handed operation—one hand must hold the console down while the other inserts the cable to ensure a secure connection. To address this, command strips or a similar mounting solution could be used to secure the product to a wall. Additionally, repositioning the Ethernet port to the front of the object, rather than underneath, would make it easier to plug and unplug cables. This adjustment would improve usability by allowing for a more natural pulling motion.
For now, I plan to leave the artifact as it is. However, if I were to revisit the project, I would aim for a more seamless design. This would involve eliminating the bar that sticks out from the console and securely mounting the product—likely on a wall adjacent to the door, as is common with most key hangers and possibly using command strips could work fine. From a technological and aesthetic perspective, I find the current design and color scheme acceptable for my original goals. For a future iteration, I might explore a more futuristic aesthetic, incorporating USB-C ports for easier connectivity. Using readily available, higher-quality parts could also enhance the overall feel of the product. For example, the Ethernet cables used in this version tended to stretch and expand when looped through the key rings, and the inner cabling interfered with the rings passing through completely. Addressing these issues would improve both the functionality and the overall quality of the product.
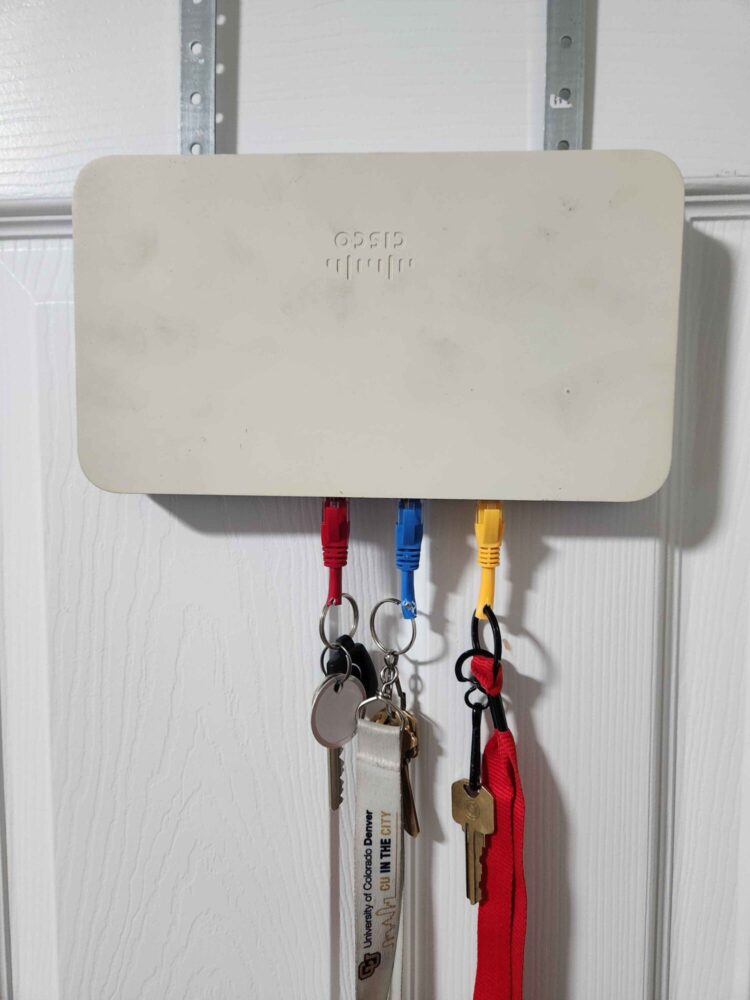
Below is an image of the final artifact and a video demonstrating its functionality.
Sources:
[2] York Lyra Over-the-Door Rack. iDesign. https://idesignlivesimply.com/products/bruschia-otd-rack-four-brushed-chrome
[3] Marshall JCM800 Jack Rack. 2016. Pluginz. https://www.pluginzkeychains.com/
[4] Allen, D. (2020). Nintendo Game Boy. The Nerd Daily. The Nerd Daily 2024. Retrieved February 14, 2025, from https://thenerddaily.com/restoring-nintendo-original-game-boy/. [5] Smithsonian Institution. (2023). Apple ll. National Museum of American History. Retrieved January 29, 2025, from https://americanhistory.si.edu/collections/object/nmah_334638.
1 Comment. Leave new
Hello Daniel,
I really like the look of your key rack. I think this project displays the aesthetic of Vintage Technology. As i was reading through your report, I enjoyed see your process of your project. I think you described it well and I like how you have many photos showing your process too. I like how it is very functionality. This is something you can use everyday. I think you did a very good job on your project.
I think one thing I would say is that since your box is white, you can see all the dirt on the box. Maybe you can clean the box to make it look a bit cleaner. But other then that, it looks really good.