
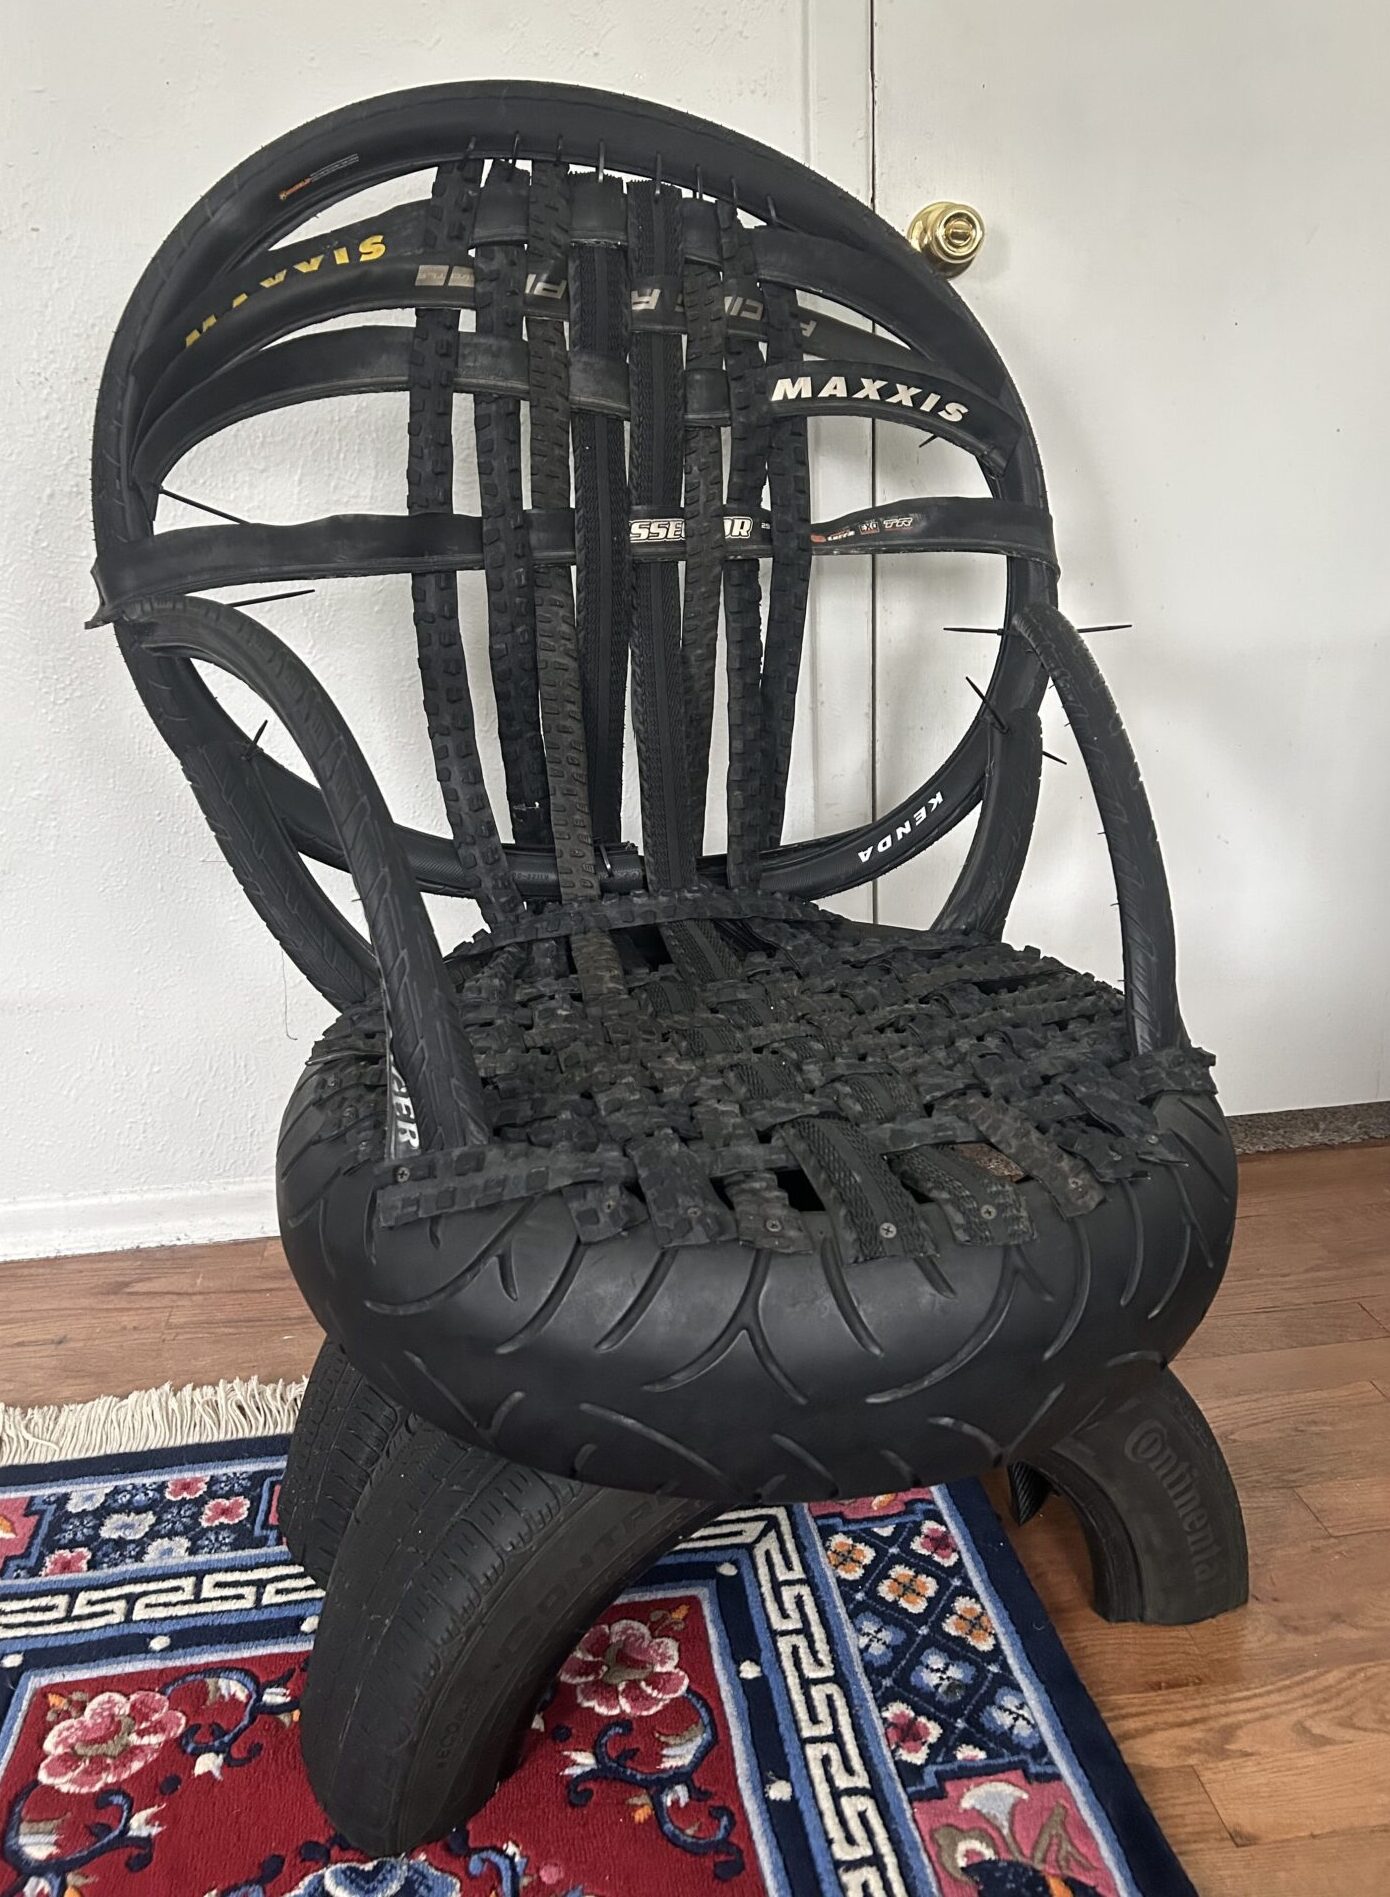
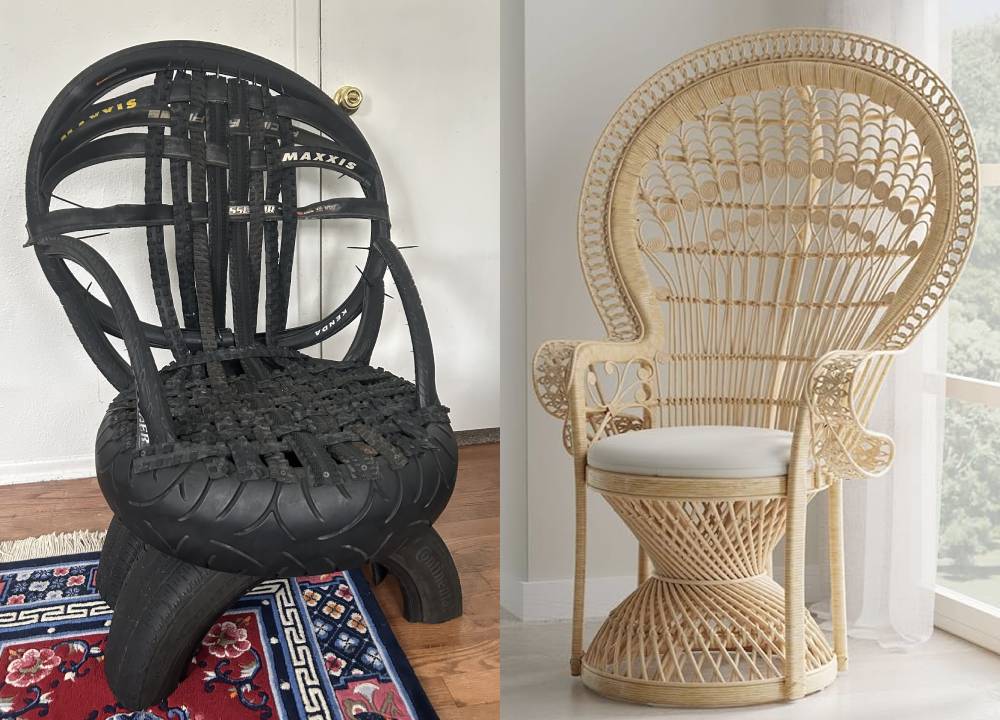
For my upcycle project I made a chair out of tires in the style of the iconic Peacock Chair. My inspiration process began with a chair that I made for another class, CVEN 5544 – Solid Waste Management and Resource Recovery. I really liked working with rubber on that assignment, and was really impressed that one could make a chair that you could comfortably lean back in out of tires.
I wanted to work with tires again but need an aesthetic. Professor Hertzberg suggested the Peacock chair aesthetic, which I had heard about from a Vox video on Youtube which I would recommend watching if you are interested in the history of this chair.
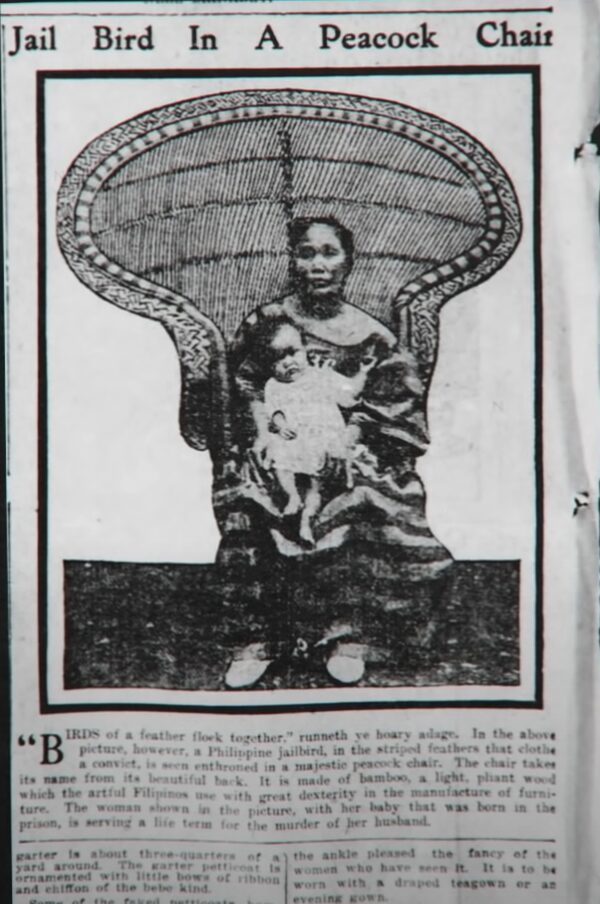
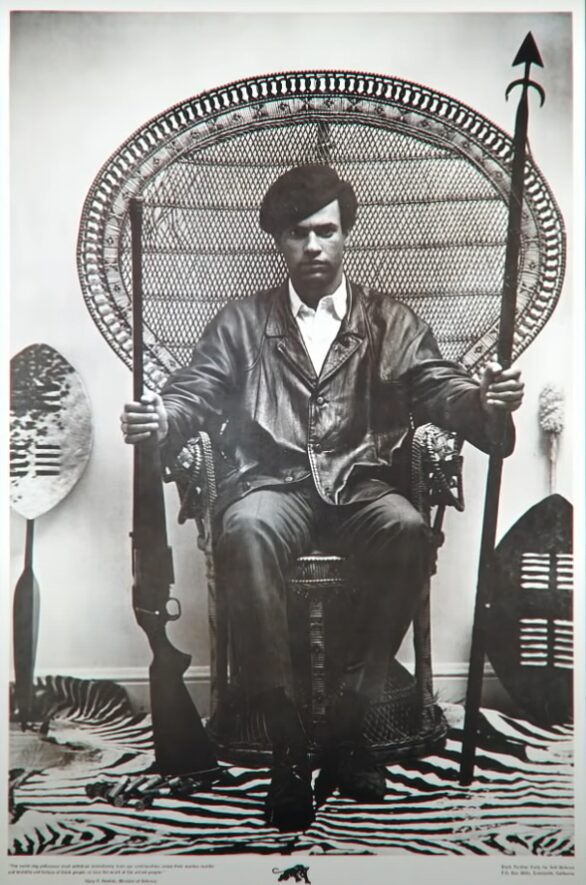
Rattan chairs were first popularized in early photography studios because they were lightweight, beautiful, and were cool under the hot studio lights. The Peacock Chair frames whoever is sitting in it with an ornate, powerful, halo-like structure that has become iconic and has now remained popular for over 100 years!

I think the peacock chair aesthetic is really beautiful, and so I decided to go with it and began designing my chair. I soon learned that sketching the circular tires with proper dimension and perspective was almost impossible, and so I began designing my chair in SketchUp by first creating tire ‘building blocks’ with proper dimensions, and then cutting them up and arranging them.
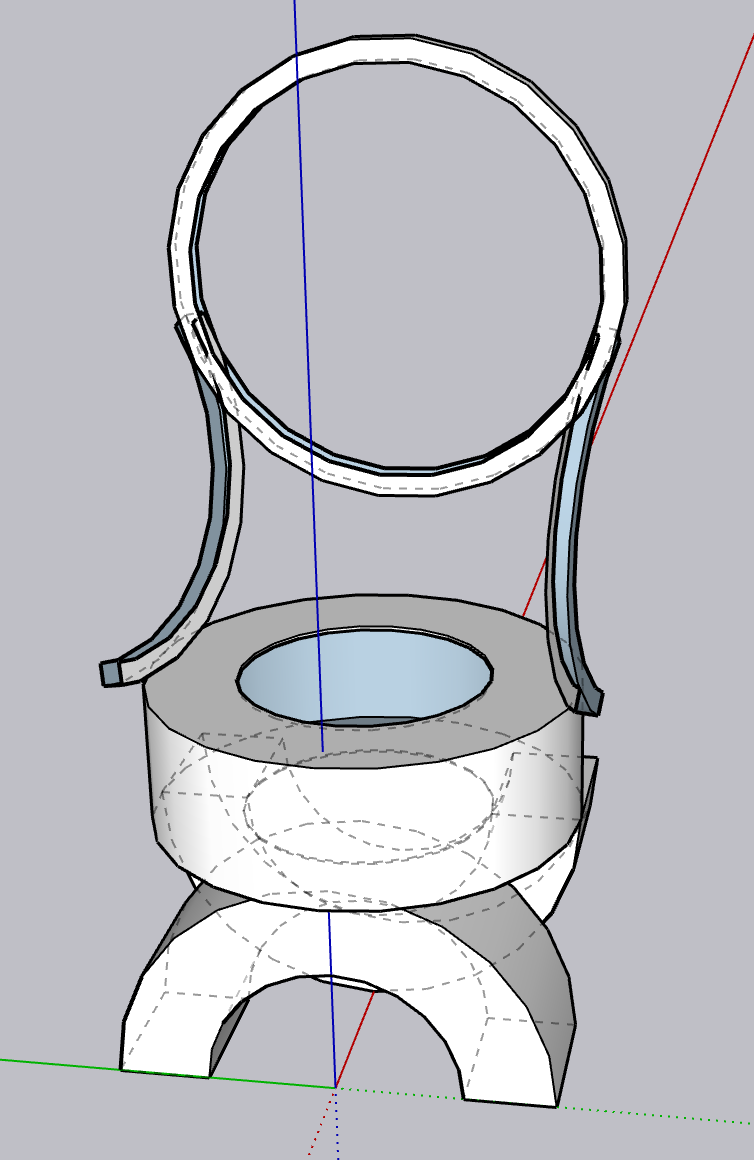

Sketchup was quite helpful at this stage as I quickly learned by base tire would need to be smaller than the seat tire, and a single uncut bicycle tire for the back would not be large enough for the look I desired.
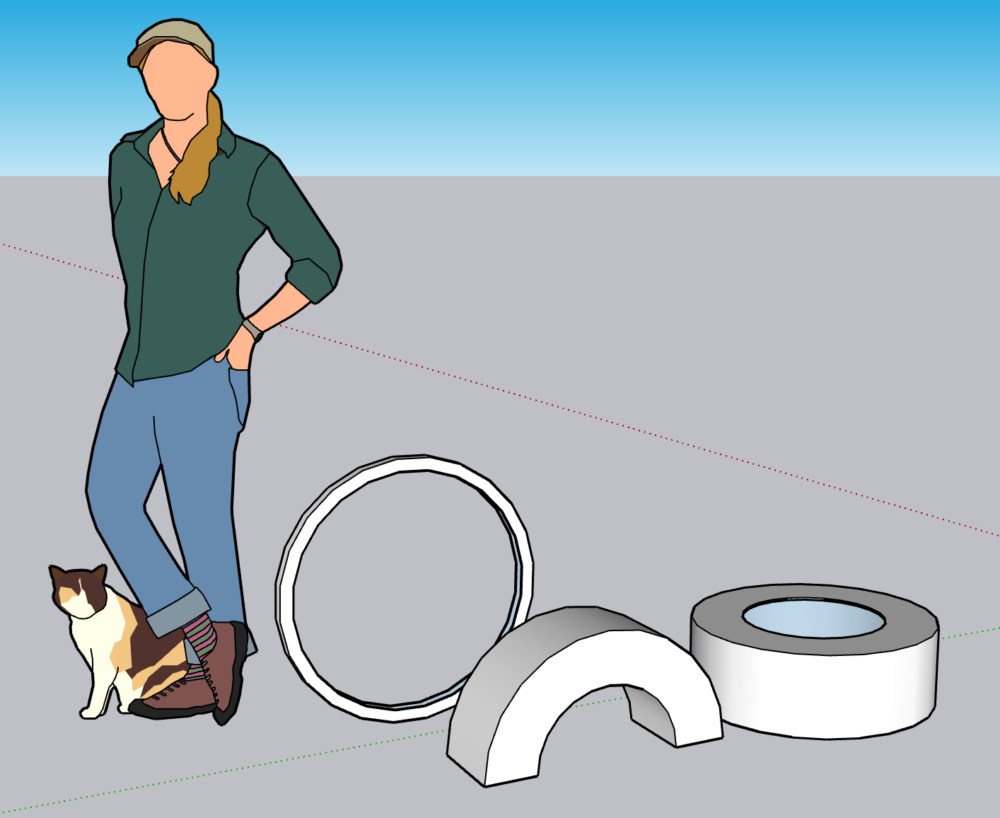
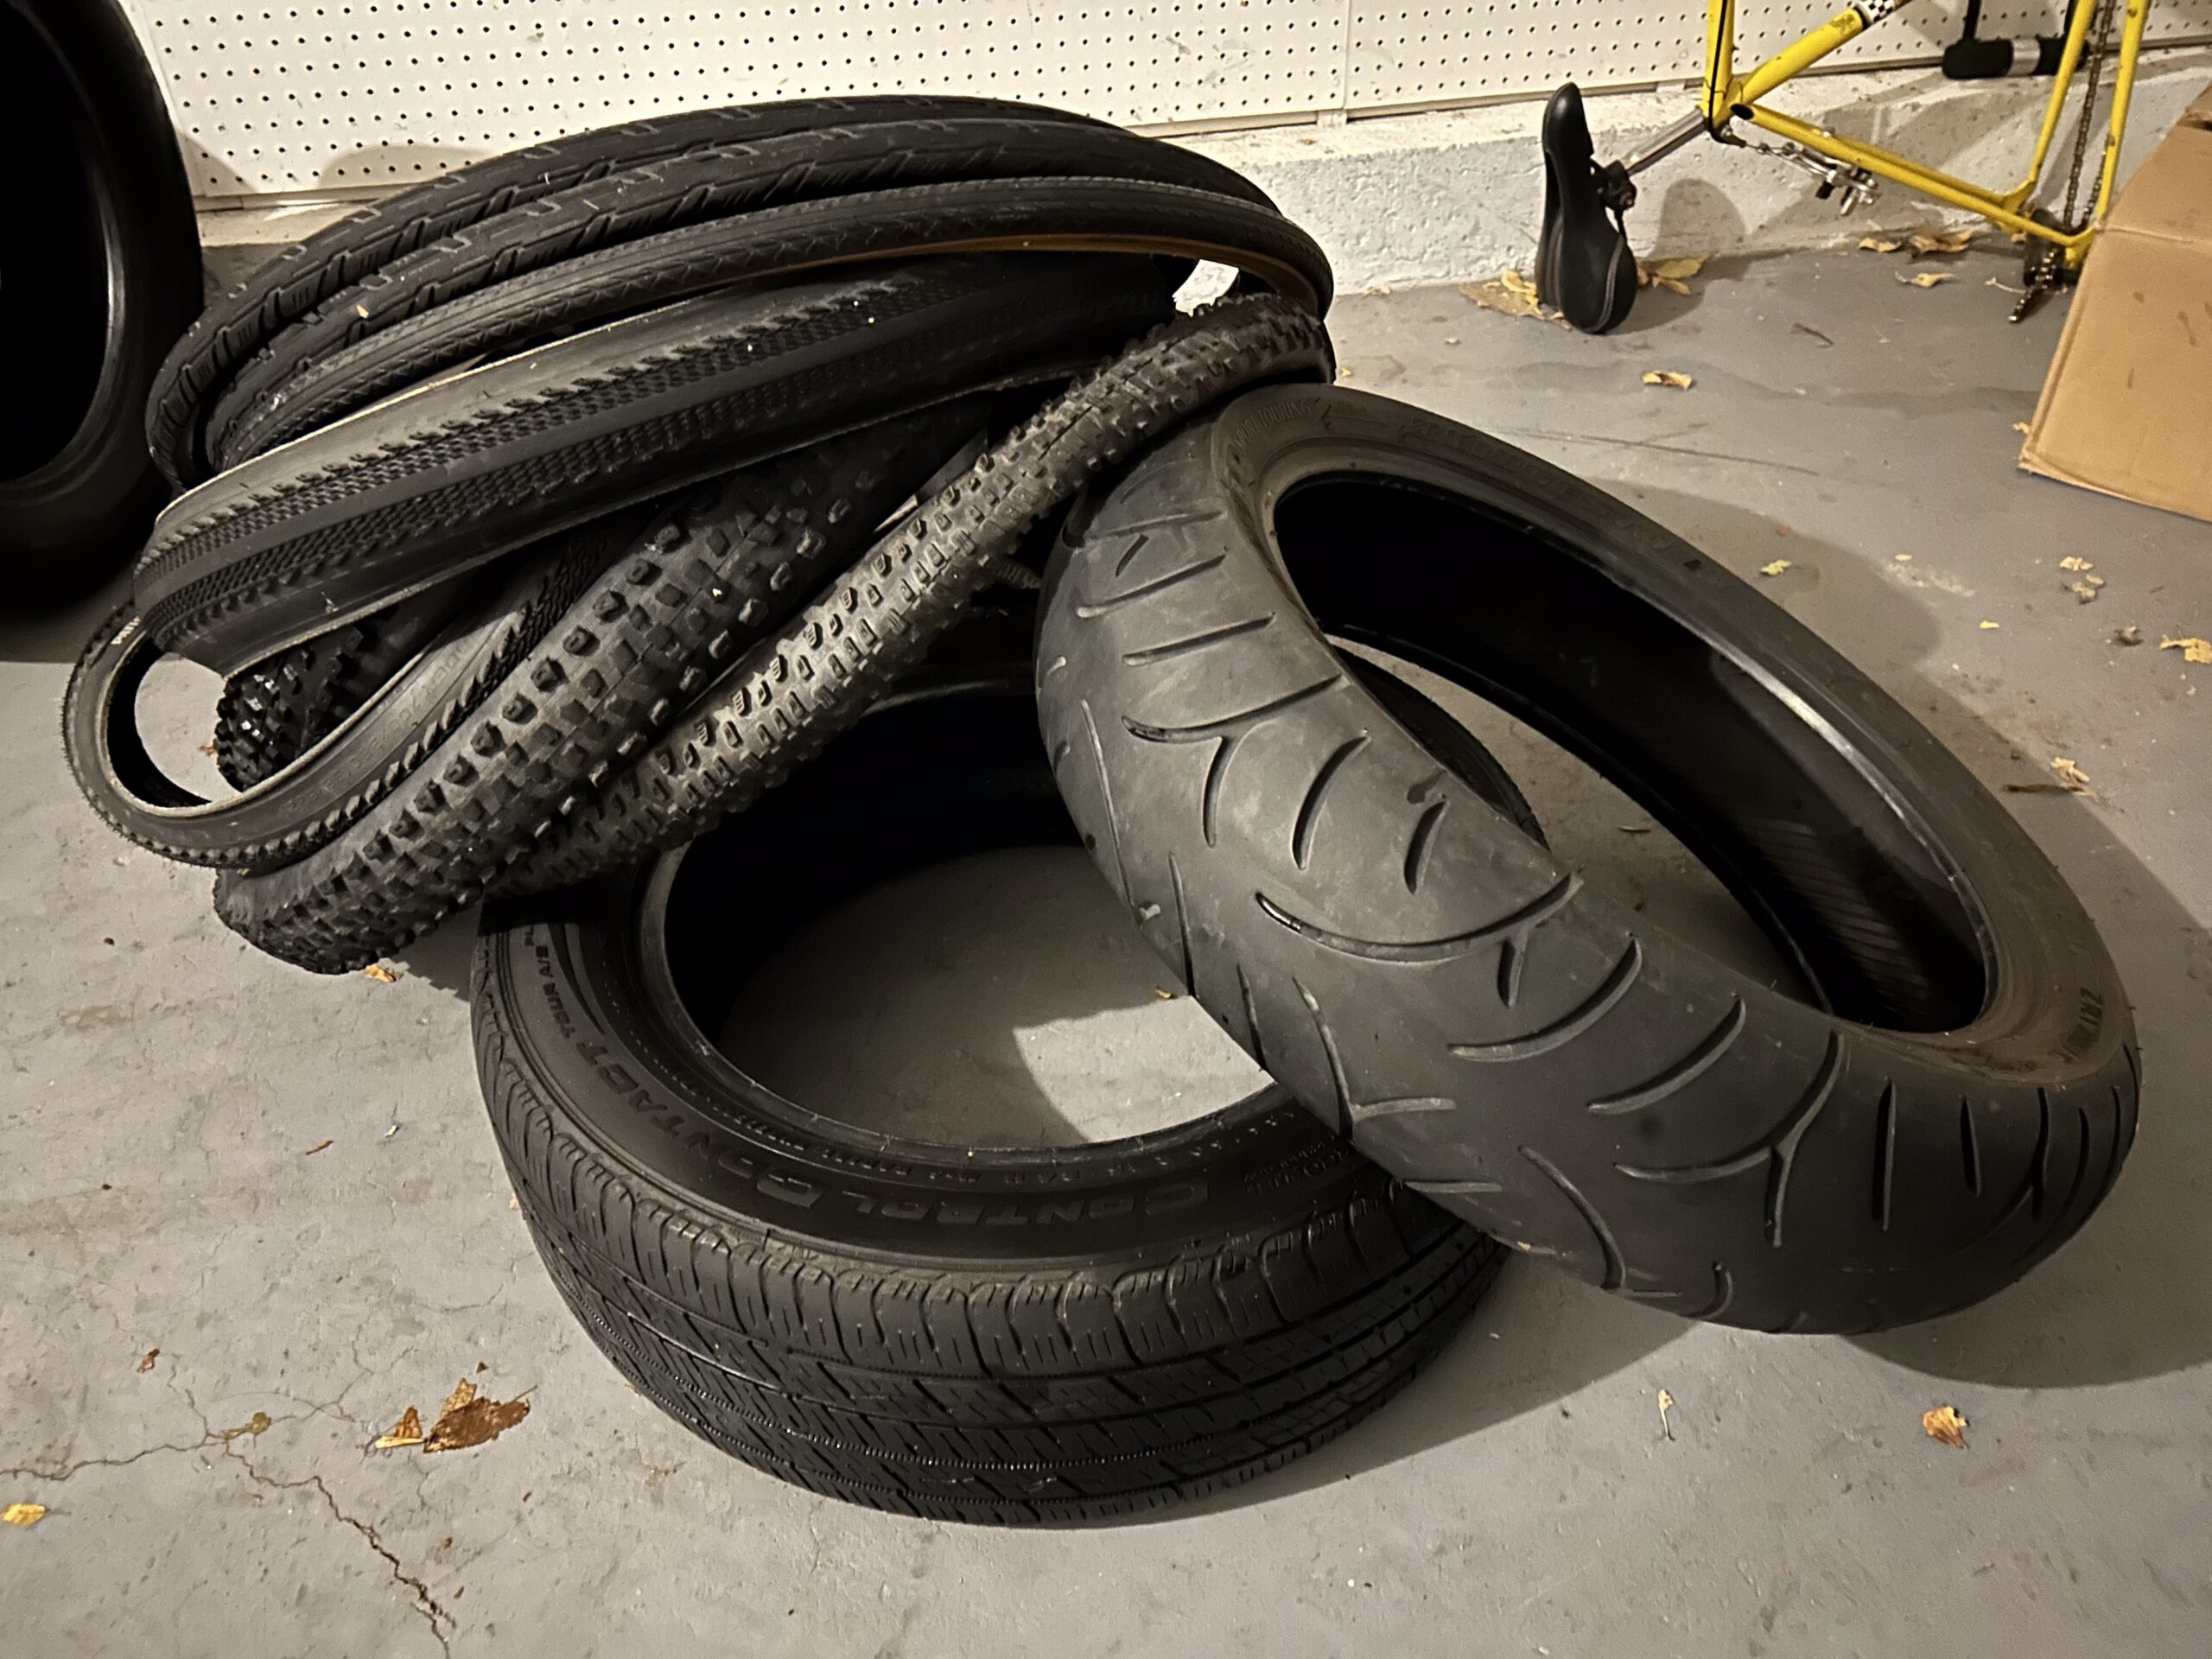
Sourcing the tires was surprisingly easy. In Colorado (and most other states), it is illegal to dispose of tires in landfills (EPA.gov), and so motorcycle, car, and bicycle stores that deal with replacing tires must pay to have their old tires disposed of properly. This means that it is likely for them to have a large selection of tires to go through and not care if you take some off their hands. I brought home three motorcycle tires (because I didn’t know which size would be right), and two car tires (one was a spare which I practiced on to get a straight cut), and then fiddled with different combinations until I found the combination which I felt had the best proportions, as seen below:
Fabricating this chair was quite difficult and involved many stages. I had to source my upcycled material, facinors, and tools. I have created a comprehensive list of the tools and materials used below, if an item doesn’t include the cost that means I already had it or is was given to me for free.
Materials used:
- 1 x Motorcycle Tire (for seat), courtesy of the House of Motorrad
- They wanted me to share the word that they offer good, fast ski tunings! (to supplement their motorcycle business in winter)
- 1 x Car Tire (cut in half for base), courtesy of Discount Tire
- ~8 x Bicycle Tires, courtesy of Community Cycles and Sports Garage Cycling
- 32 x 1″ Drywall Screws – $0.64 @$0.02 each (box cost ~$6)
- ~30 x Zip ties – $0.30 @$0.01 each (already owned)
Tools used:
- Scissors (for cutting zipties & the soft parts of bicycle tires)
- Angle grinder w/ cutting wheel, courtesy of the Idea Forge
- Wire cutters (for cutting through the metal rim of bicycle tires)
- Marker
- Electric Drill
- Knife (for cutting through parts of the car tire)
- Headlamp (for trying to find the pre-drilled holes for the zipties)
I already had a lot of the tools and materials needed, and the Idea Forge leant me the tool I didn’t have, so I only spent $6 on this project (for the screws). Assuming I wanted to make more of these chairs and need a per-chair cost estimate (excluding labor), the cost would be approximately $0.94 per chair for the facinors since the tires could be sourced for free. To cut costs, the screws could easily be sourced from construction waste as pretty much any type of screw will work well in rubber and the length of the screw doesn’t matter for this use (within reason).
The fabrication process began with trying to cut the car tires with a sawzall that Professor Hertzberg kindly lent me. Car tires are made up of many layers of rubber, metal, and kevlar which the sawzall was not capable of cutting through. The Idea Forge generously leant me one of their angle grinders with a cutting wheel, but told me I had to do the cuts at home. Cutting car tires in half is very loud, dirty, and smelly. A large amount of smoke is produced from the burning rubber and kevlar, and there are also sparks created by the metal.
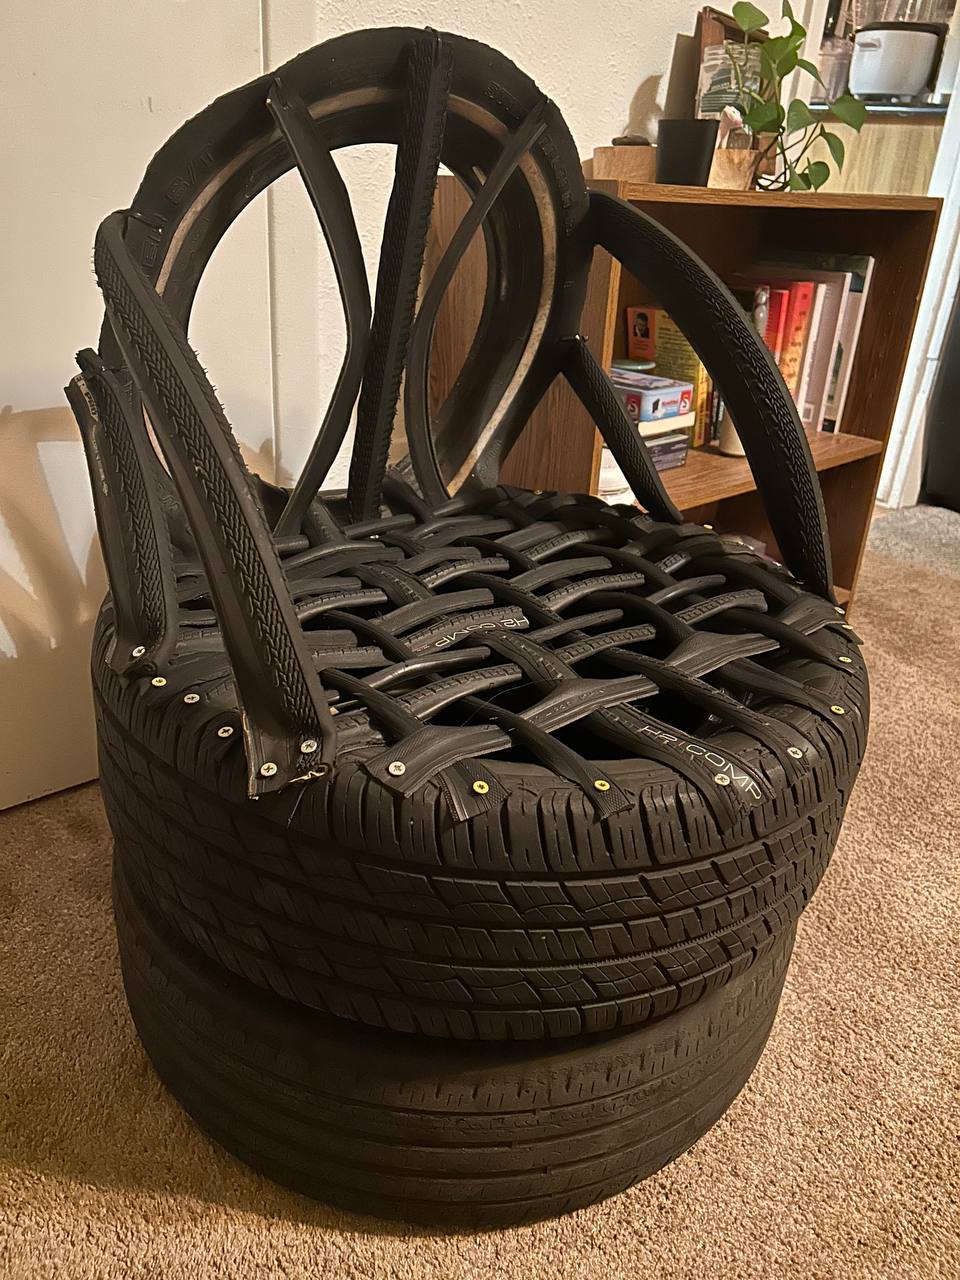
After making this cut I was able to test my base idea, unfortunately I quickly learned that my one-up one-down tire design (seen well in “1st Draft modelled in SketchUp: Below Angle”, and image below) plan was not a good idea as the cut ends only support weight well if the weight is evenly distributed over the cut ‘face’.
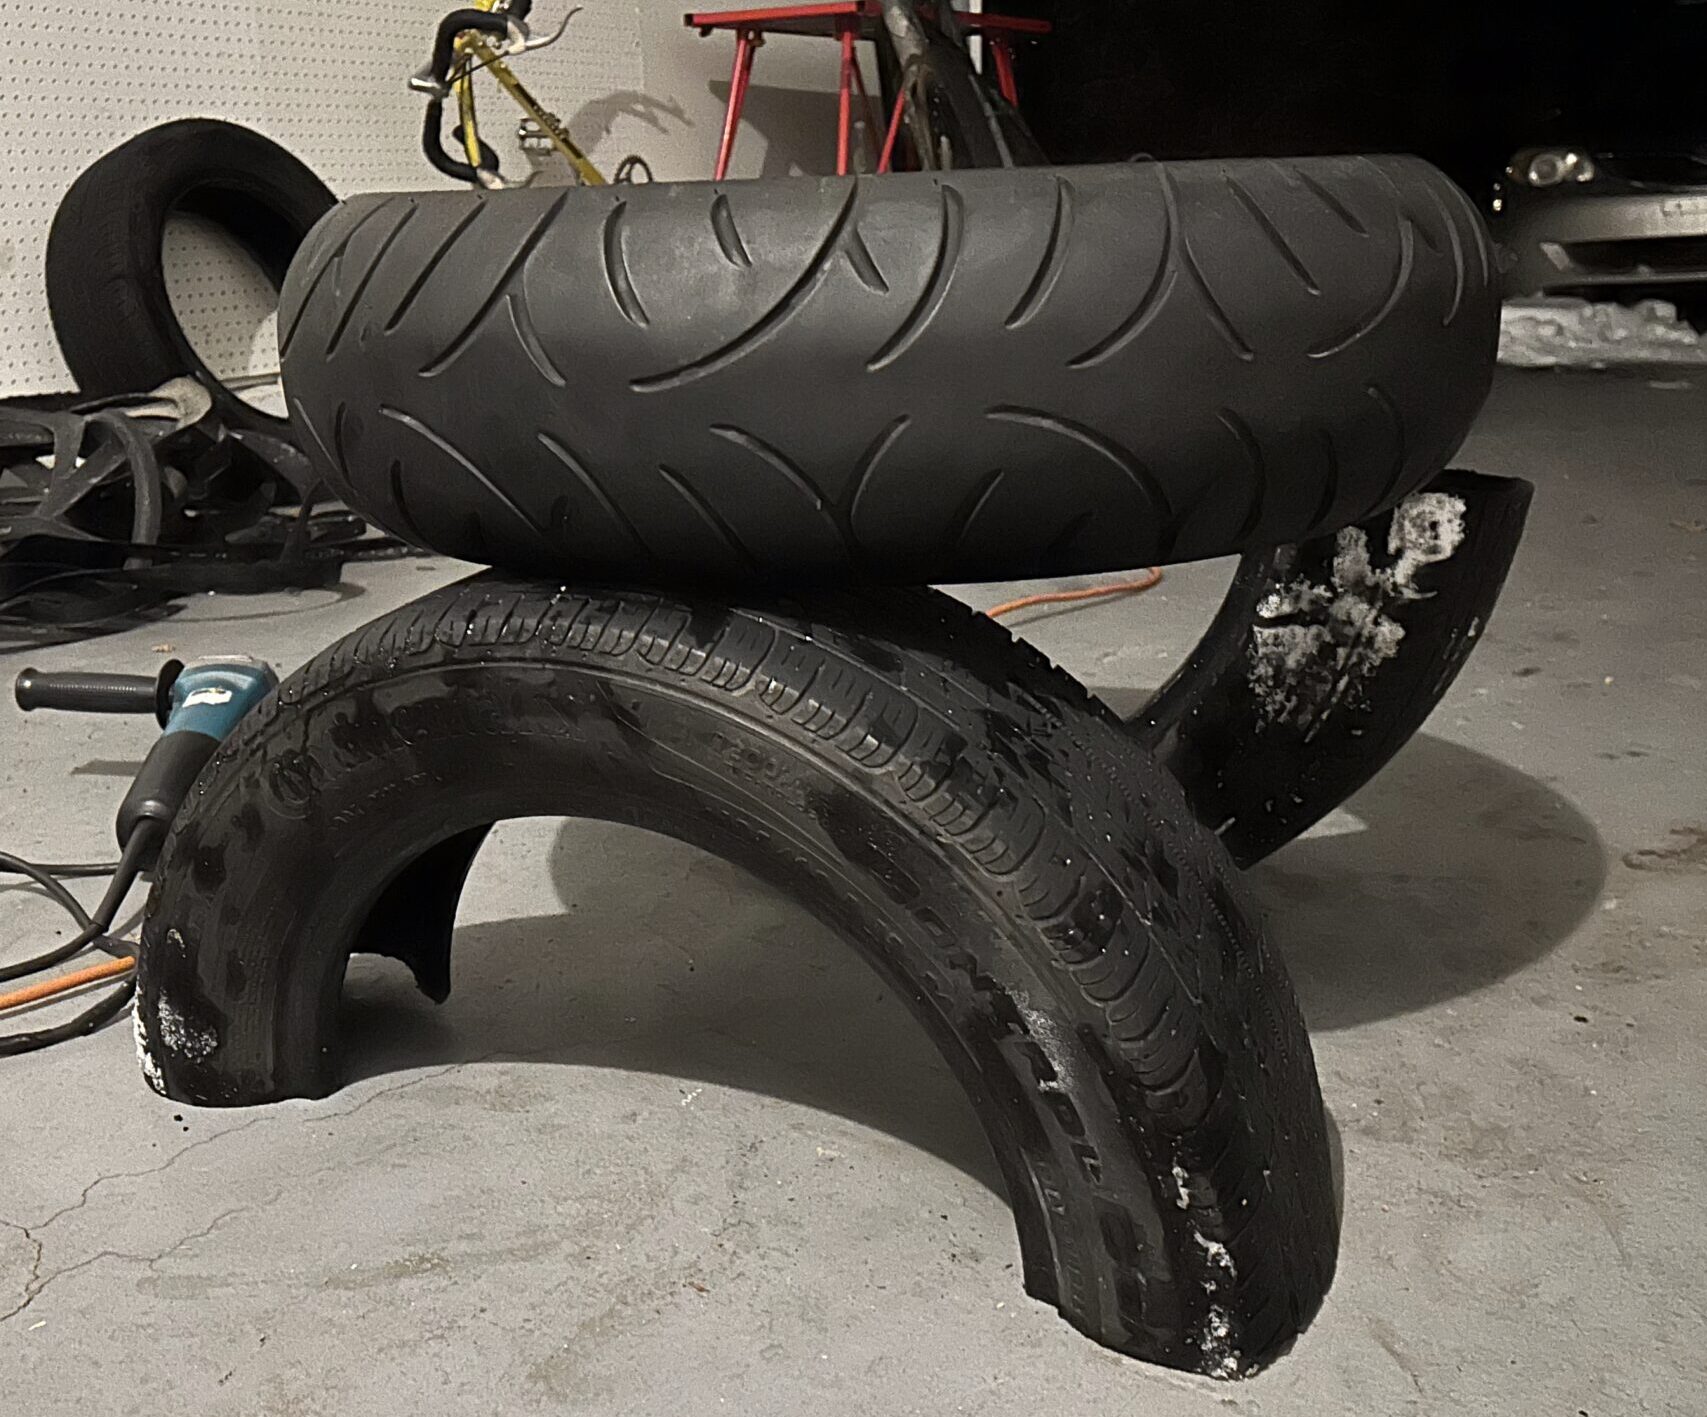
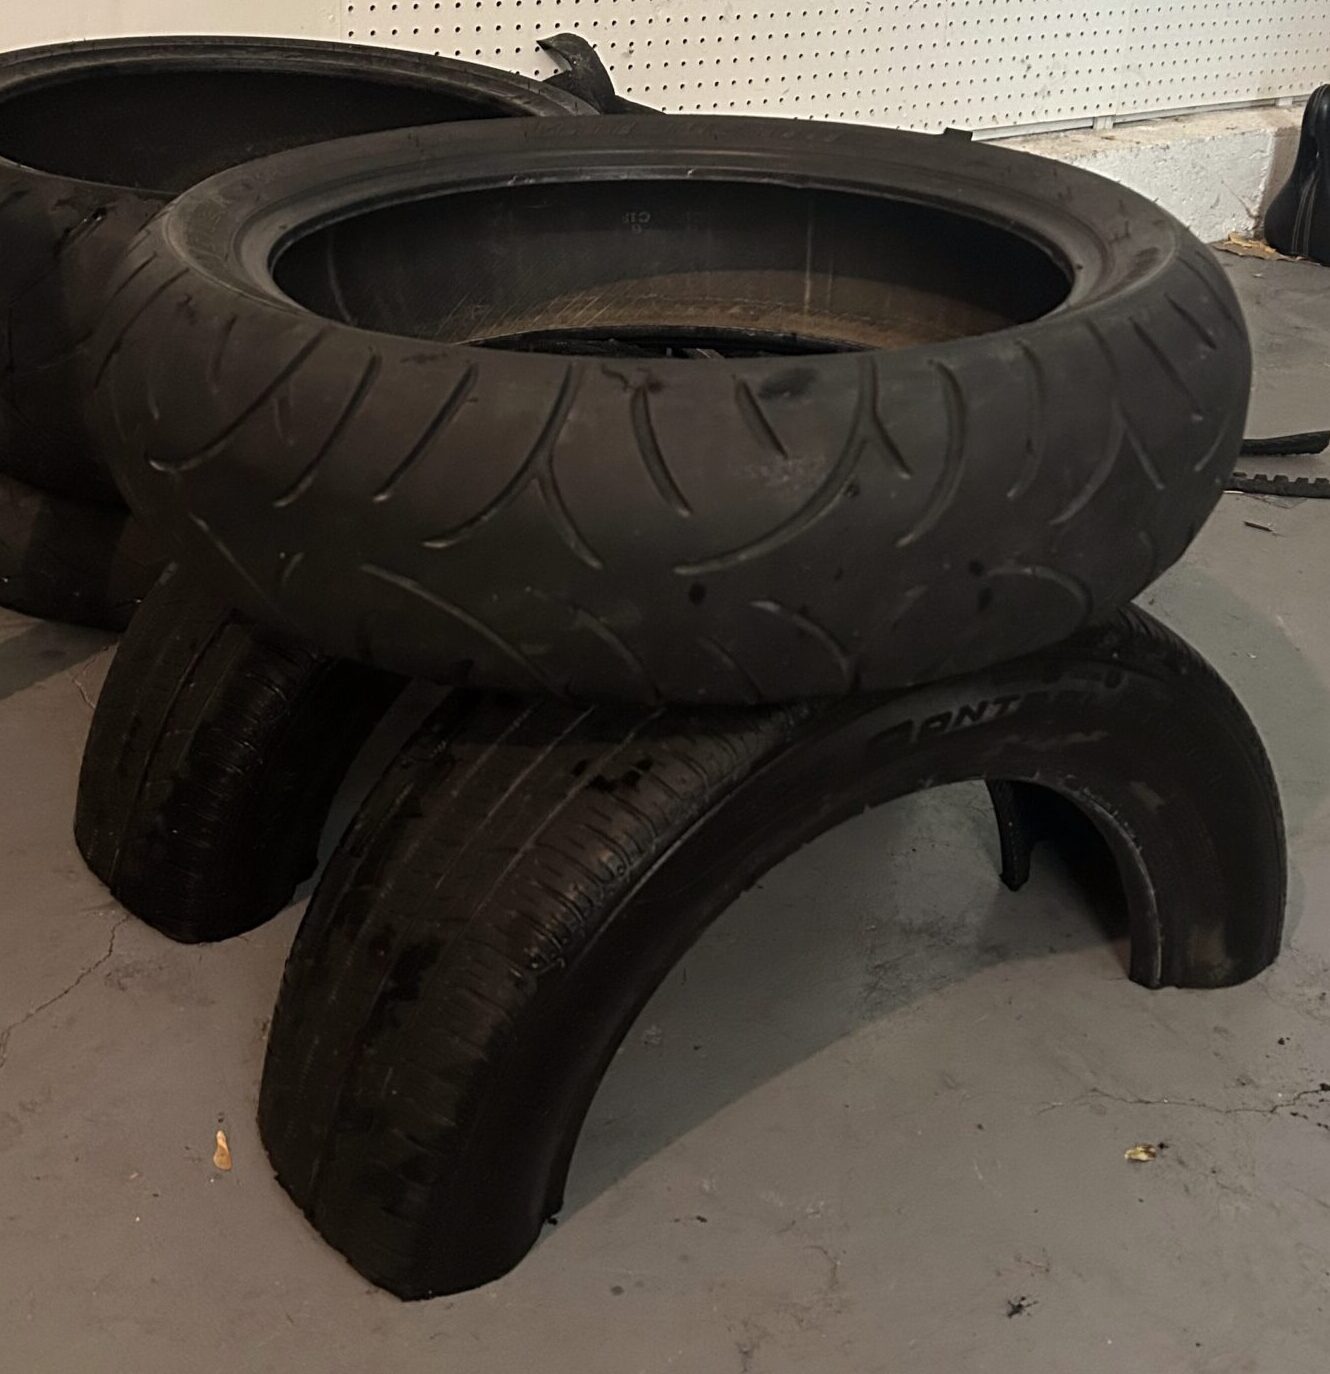
The one-up one-down design has a more spread out base which is a plus for leaning back, and so I considered trying to make it work. After pondering the design I decided that the one-up one-down aesthetic is too complicated and would take away from the center-piece which is the peacock back. I decided the base should be elegant but also simple, so I went with a both-down base design as seen below.
Next, I had to prepare the tire strips for use in the weave for the seat and back. I used tubeless mountain bike tires for this part as they were easy to source and don’t have any metal rim that is difficult to cut through.
I made the back and arms of the chair out of road bike tires that contain a metal rim, as this adds some structural stability to the tire. Cutting through the metal rim with wire cutters was very difficult but necessary for making the arms the right length and expanding the peacock back. I tried to find bicycle tires big enough to act as the ‘Peacock’ back on their own but was unsuccessful, so I had to cut a road tire in one place to make the circle larger, although this proved to add some structural instability. In order to hold the back in place while I attached the structural supports, I used tape to hang it from a pullup bar. The weaving and fabrication process can be seen in the timelapse below.
After assembling the chair, my final product supports weight through it’s base, seat, and the tire weave, and can support its own weight in the back, although it takes some ‘propping’. At this point it cannot support the weight of someone leaning back in it.
Generally, I am happy with how this chair turned out. I believe it fits the aesthetic well, but I’m not satisfied by the back as my goal was to make it functional. I was thinking of making the back smaller to make the chair more useful and hopefully comfortable, but then I got a suggestion during the critique that might save the design and the function! My pod member suggested that I extend the horizontal strips in the back to connect with the seat roughly where the arms currently are, this way there would be a continuous support feature like a Crazy Chair which supports and wraps around the person sitting in the chair. I think this is a great idea and I plan to add this feature to my chair so that it can become a useful piece of furniture for me and my housemates. I also need to cut the zip tie ends, but I need to finalize the chair before doing that as it’s very hard to tighten zip ties once they’re cut.
Sources:
https://archive.epa.gov/epawaste/conserve/materials/tires/web/html/basic.html#:~:text=38%20states%20ban%20whole%20tires,placing%20scrap%20tires%20in%20landfills.
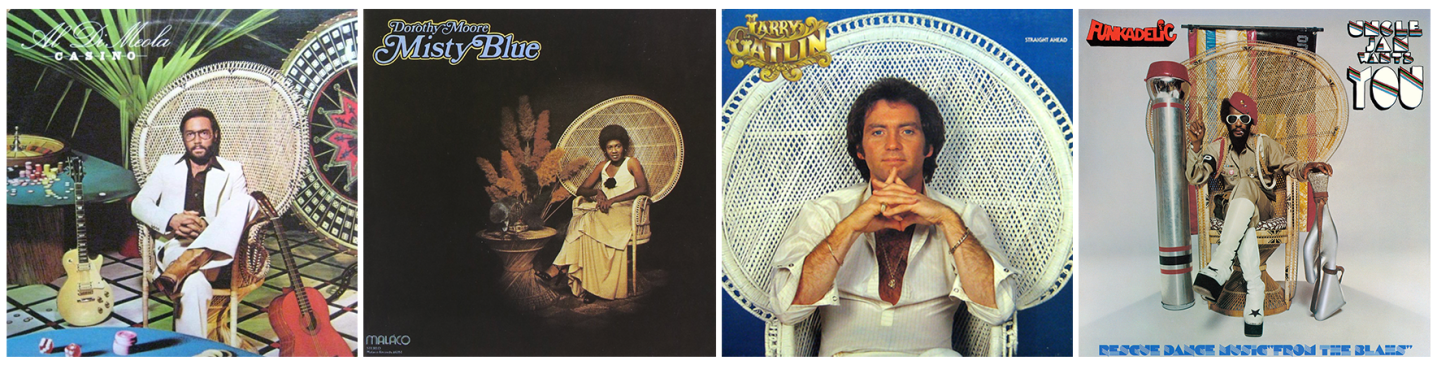
https://www.vox.com/2019/10/4/20897269/peacock-chair-album-cover
https://www.esquiremag.ph/long-reads/features/rattan-peacock-chair-bilibid-a00293-20200624-lfrm
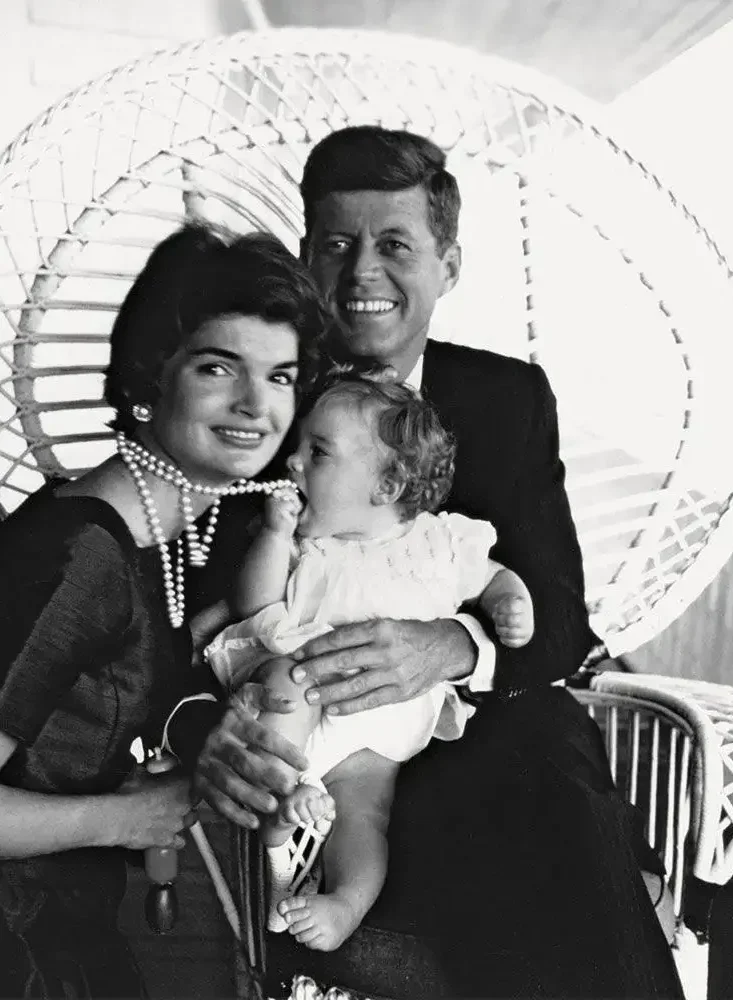
https://www.1stdibs.com/art/photography/black-white-photography/jacques-lowe-pearls-first-family-portrait-hyannis-port/id-a_958643/
2 Comments. Leave new
This is a really cool way to upcycle old tires! I liked how you used different sized tires and the weaving technique to achieve the aesthetic! I also agree with the idea of extending the tire material to the arm rests adds more to the aesthetic and gives it more support. I also really enjoyed learning about the history of peacock chairs, I learned something new today!
Now that you have built this chair and learned about the fabrication process, would you rebuild this chair again with the knowledge you have gained by building the first one? If so, what would you do different to make the build process easier/faster/stronger?
Had to check back in and see the finished product, and it looks fantastic! Really neat aesthetic, and I think the wingback style works perfectly with the material. Sweet timelapses too. Fingers crossed that support solution for the back solves your structural problem.
So, being they’re old tires, do/did you run into any problems with the rubber’s residue or smell? If so, would you plan to address those somehow?
Again, great material choice for the project, given tires are so tough to dispose of. Extremely well done!