

For my upcycling project, I set out to create a magnetic wooden knife block that seamlessly blends rustic charm with modern functionality. Drawing inspiration from the “Contemporary Chalet With Rustic Atmosphere” aesthetic by interior designer Bernd Gruber, I aimed to craft a piece that showcases the natural beauty of reclaimed wood while providing a sleek and efficient solution for knife storage.
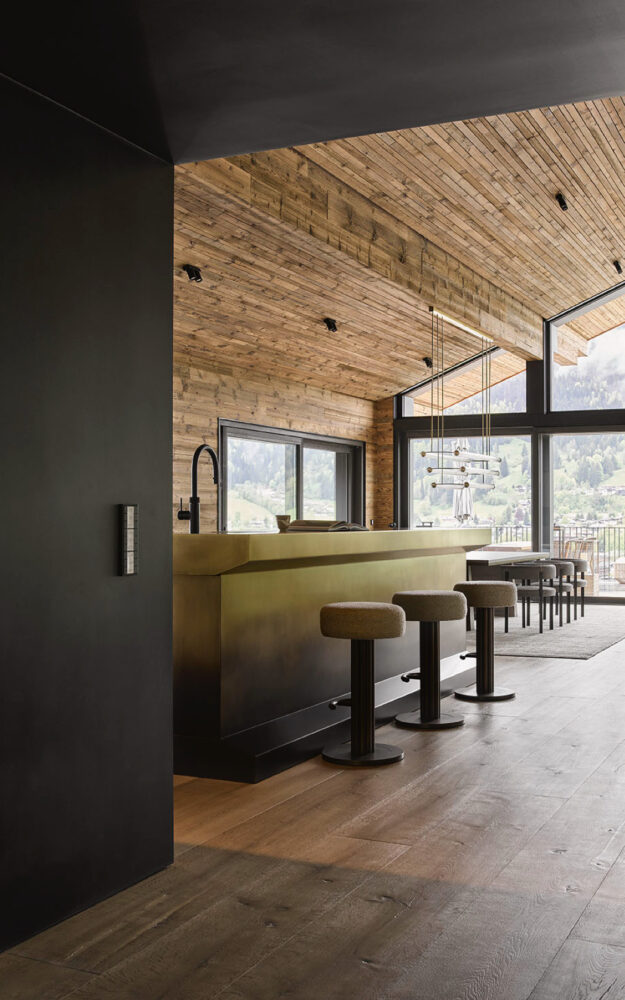
I’ve always liked the contrast between raw materials and clean surfaces. Gruber’s work stood out to me because of how he integrates aged wood into modern interiors, keeping the warmth and character of the material without making it feel rough or unfinished. Figure 1 shows one of Gruber’s chalet interiors, where the warmth of the wood and the coolness of the metal surfaces blend seamlessly. The idea is that the magnetic knife holder will have the warmth, and the knives themselves will bring the coolness.
Beyond just materials, I was also drawn to the balance of organic and geometric elements in Gruber’s designs. His work often features clean, structured lines that contrast with the natural textures of wood, giving the space a refined but inviting feel. That’s something I wanted to incorporate into my knife block, letting the organic grain of the reclaimed wood stand out while keeping the overall shape simple and intentional. The live edge gives an organic and raw aspect however, the perfectly sanded surface and straight cuts add a clean and refined look. The reclaimed wood brings in the rustic aesthetic, while the polished steel of the knives adds a sleek, modern contrast. The final design should feel both natural and precise, like it belongs in a space that values craftsmanship and functionality.
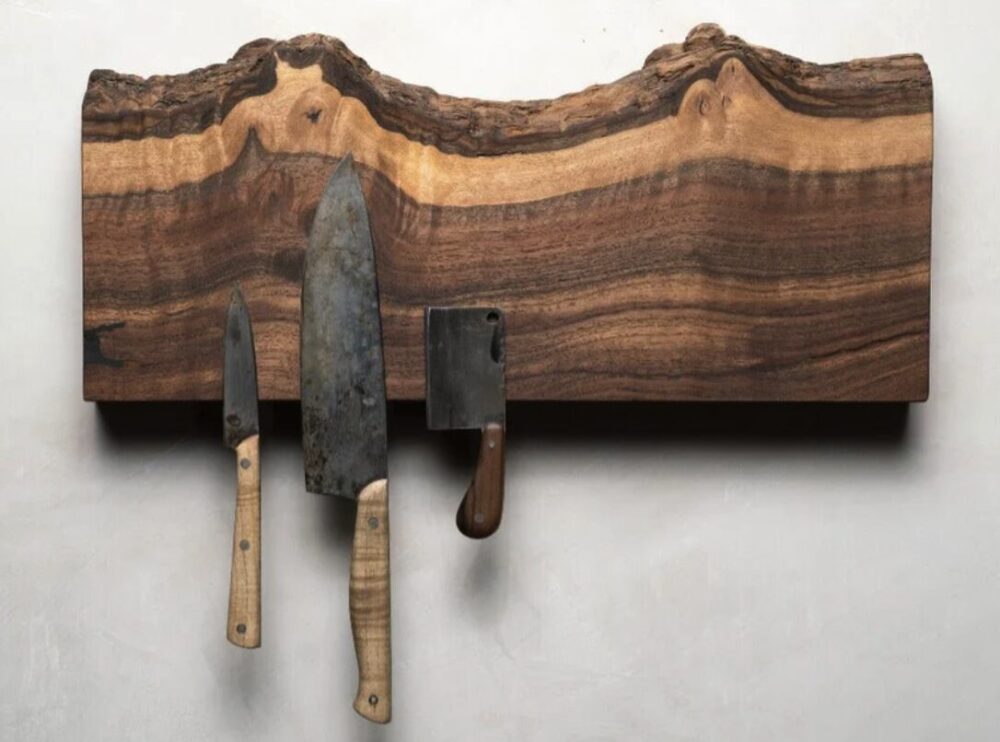
My main inspiration came from Alabama Sawyer, a woodworking company that specializes in sustainable, high-end furniture and home goods made from urban salvaged wood. They repurpose fallen and locally sourced trees, turning what would otherwise be waste into beautifully crafted pieces. The design that caught my attention was the live-edge magnetic knife holder, as shown in Figure 2.It utilizes hidden magnets to maintain the organic shape and aesthetic of the wood.
Their designs combine natural materials with a modern aesthetic, often incorporating clean lines and minimalist forms while preserving the unique character of the wood. One of their standout products is their live edge magnetic knife holder, which keeps the organic shape and texture of the wood while integrating hidden magnets for a sleek, functional design. This combination of raw, natural elements with precise craftsmanship was exactly the balance I wanted to achieve with my own upcycling project.
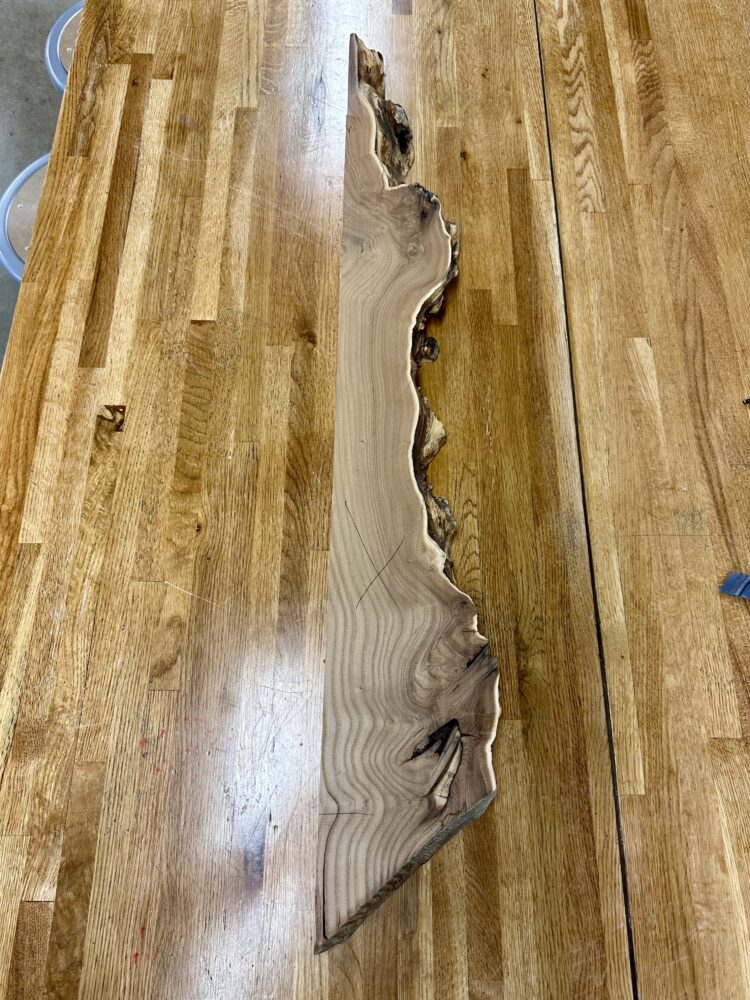
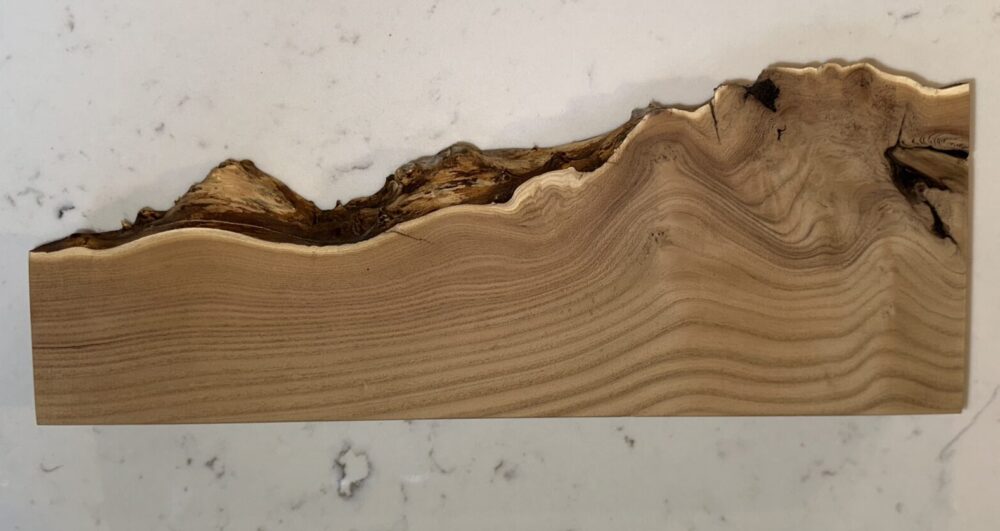
Finding the right piece of wood took some time. I spent a while searching through second-hand websites, but reclaimed barn wood was surprisingly expensive since it’s pretty rare. Eventually, I came across a local woodshop that specialized in live edge dining and bar tables. I figured they might have small offcuts they couldn’t use, so I reached out. That ended up working out; they gave me a beautiful piece of Russian Olive, as seen in Figure 3, an invasive tree in Colorado; however, it is known for its strong marbling, which adds a lot of character to the wood.
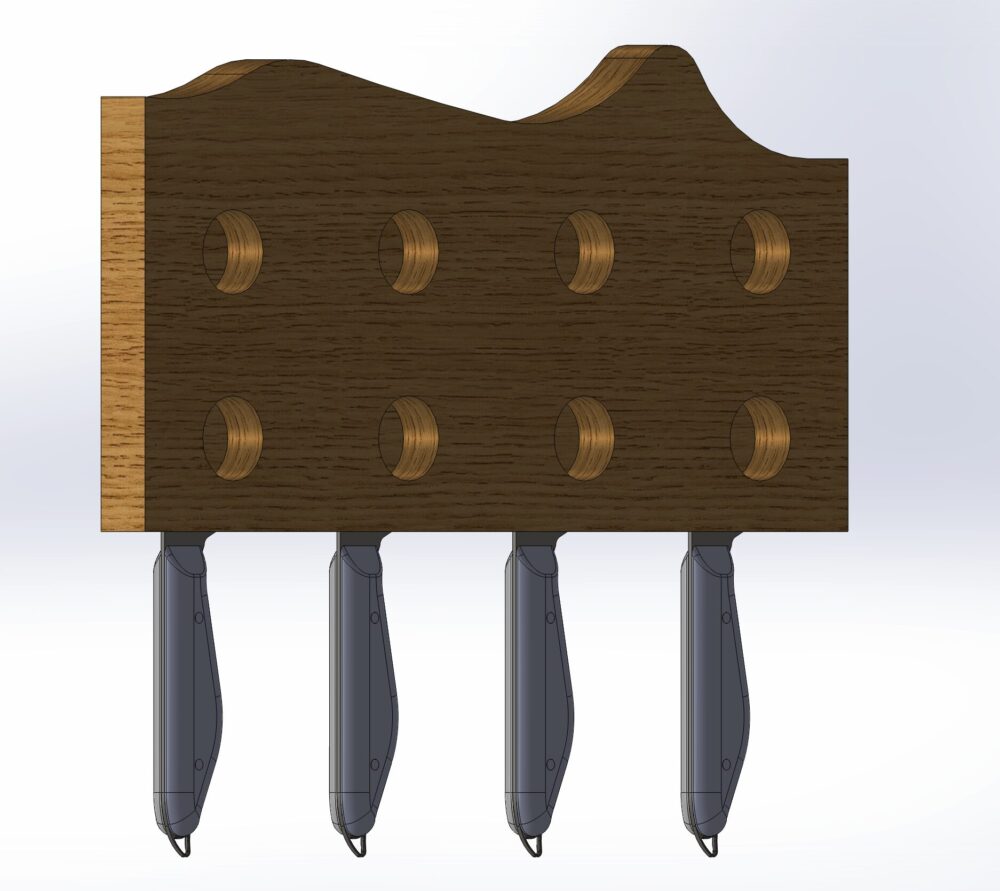
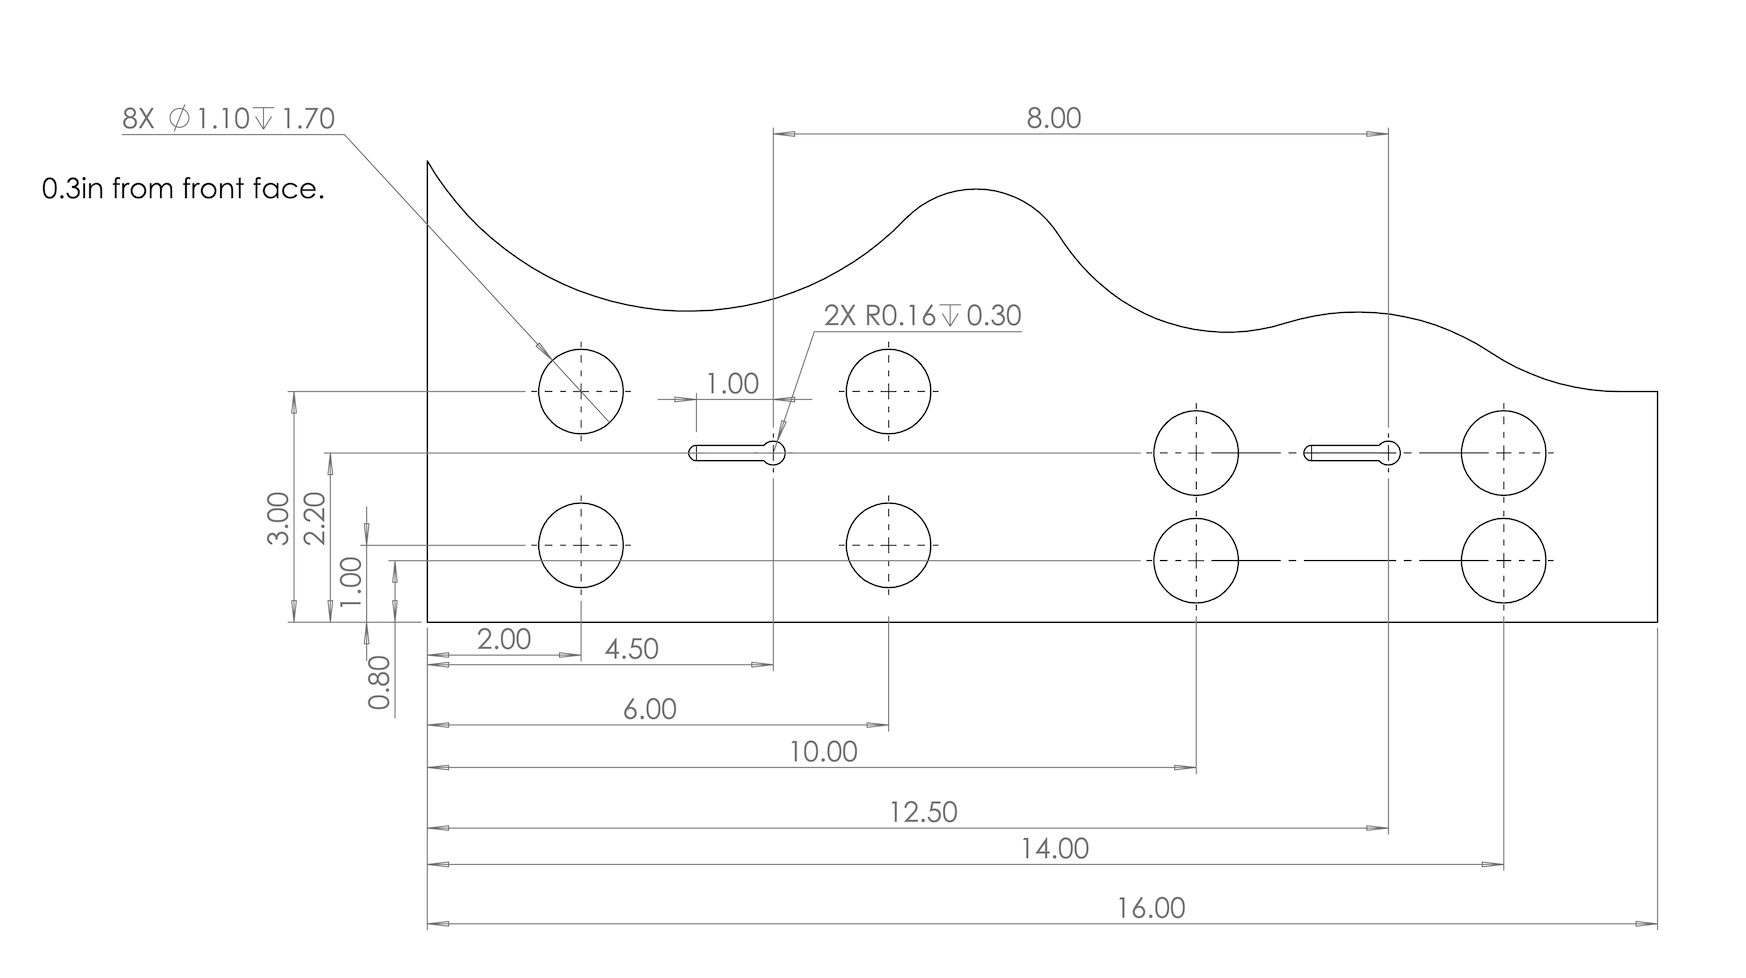
Before I could start making the knife holder, I had to complete an Idea Forge workshop to get access to the woodshop. I met with Josh, the head of the woodshop, who gave me some useful tips on my design and how to work with Russian Olive. After getting a better understanding of the tools and process, I created a SolidWorks model and drawing to finalize the dimensions and layout. I also had to rethink my choice of magnets since the ones I originally picked weren’t strong enough and were too wide. I switched to N52, 1-inch diameter magnets, which can hold roughly 30 lbs each. This was important because magnets lose a significant amount of strength when placed behind wood, and I need to make sure the knives stay in place. I tested the setup using wooden shims to ensure that the 0.3-inch gap between the magnet and the knife provided enough holding strength.
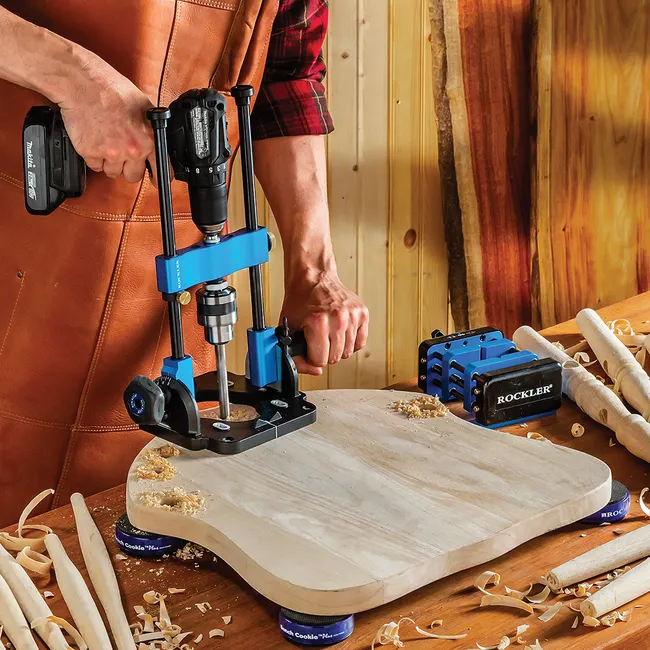
After testing and making sure my drawings and CAD model were accurate, it was time to start drilling the eight holes for the magnets. The first step was marking the exact hole locations on the wood. I transferred my sketch onto the surface using a pencil, making sure each hole was properly spaced and aligned. Since precision was key, I took my time double-checking the placements before moving on to drilling. To keep everything accurate, I used a drill guide, as seen in Figure 6, and set it to the correct depth to ensure I wouldn’t drill through the front surface. This was critical because even a slight miscalculation could ruin the look and functionality of the knife holder. The drill guide also helped keep the holes perfectly vertical, preventing any angle issues that could cause the magnets to sit unevenly. I made sure to clamp the drill guide in place before starting, which helped maintain consistency across all eight holes.
Before placing the magnets, I checked that they all had the same polarity. I did this by stacking them together and marking the top face of each one. This ensured that the magnetic fields wouldn’t cancel each other out and that the magnets would stay securely in place. During testing, I noticed that if two magnets with opposite polarities were placed next to each other, they would flip the moment the knife was removed. This could become a problem over time, especially with constant force being applied to the epoxy. Making sure all the magnets were aligned correctly prevented this issue and ensured a strong, consistent hold.
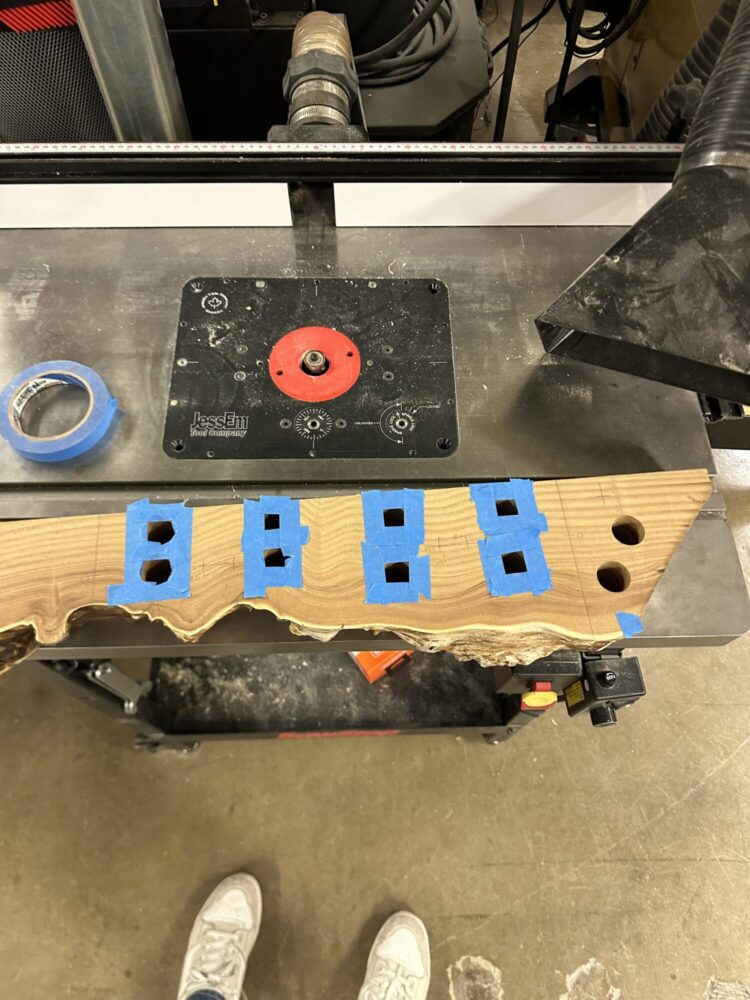
The next step was epoxying the magnets into place. Since the epoxy I used had a five-minute cure time, I had to be quick and precise with my approach. To avoid rushing and making mistakes, I decided to work in sets of four magnets at a time. This gave me enough time to position each one properly before the epoxy set. I applied epoxy into each hole, then used a magnetic driver and a wooden dowel to carefully place the magnets. Once they were in position, I set the piece onto a steel router table, which pulled the magnets flush against the front surface. This helped push the epoxy up and around the magnets, ensuring a strong bond and making sure the magnetic field wasn’t causing the magnets to move. Figure 7 shows the epoxy curing on the router table. To keep the back of the wood clean, I used painter’s tape around the holes to prevent excess epoxy from spreading. This saved me from having to resand the back after everything was set.
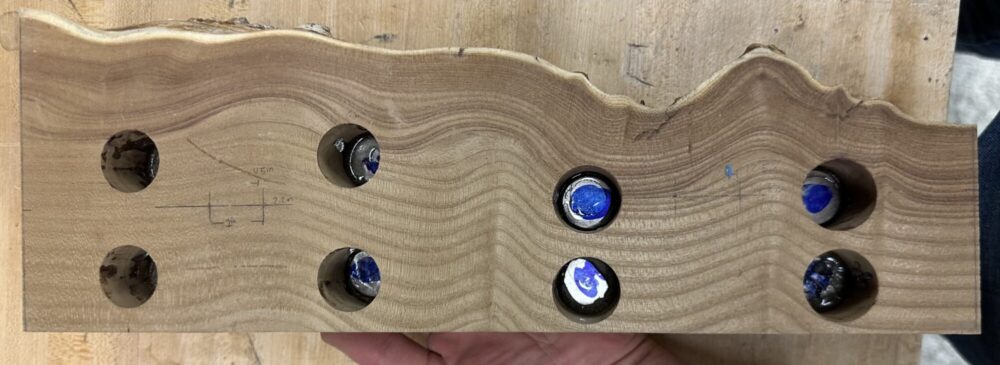
Figure 8 illustrates the final back side of the knife holder, which currently lacks the wall mounts. As shown by the difference between Figures 7 and 8, I used a miter saw to cut the piece to length. I did this as the final step to protect the edges. The wall mounts will be created using a special slotted router bit that will carve two slots into the back face, positioned 8 inches apart. These slots will enable the entire holder to be securely mounted using two flat-head screws.
The final step was to sand all the surfaces, which I completed using up to 400-grit sandpaper. Since the side surfaces were small, I found it easiest to sand them by hand. To ensure the front surface was flat, I used a marble stone with sandpaper attached to it. This is a simple and common method for sanding larger, flat surfaces.
The final step was sanding all the surfaces. I sanded up to 400 grit to get a smooth, polished finish while still keeping the natural texture of the wood. It’s important not to sand too fine, otherwise, the oil won’t be able to soak into the wood properly. Since the side surfaces were small, the easiest way to sand them was by hand. For the front surface, I needed to make sure it stayed completely flat, so I used a marble slab with sandpaper glued to it. This is a simple and effective way to sand larger flat surfaces, as the weight of the stone keeps it stable when placed on a table.
I worked through the grits gradually, removing excess epoxy and fine scratches while keeping the live edge intact. The last step will be oiling the wood, which I’ll do when I get home. I want to use the same oil we already have on other wooden items in the kitchen, so the knife holder matches the existing tones and blends in better with the space.
This upcycling project was a great way to combine a passion project with design, functionality, and academics. In terms of functionality, I’m really happy with how strong the magnets turned out: almost too strong! But that actually makes placing the knives really satisfying since they snap right into place. It also ensures that the knives stay secure, so if someone accidentally bumps into the holder, there’s no risk of one falling.
For the aesthetic goals, I couldn’t have asked for a better piece of wood. The marbling is incredible, and the fact that one side was already squared off made the whole fabrication process much easier. I honestly wasn’t expecting to find such a high-quality offcut, so that was a nice surprise. I think the final piece fits perfectly into the modern rustic aesthetic I was aiming for. The live edge and natural grain give it that raw, organic feel, while the precise cuts and soft, sanded surface keep it looking clean and minimal.
The process involved a lot of planning, testing, and fabrication, from finding the right wood, creating the CAD model and making sure the magnets were strong enough without affecting the overall look. The final result matches my original goals, keeping the natural character of the wood while incorporating simple, geometric cuts to create something that’s both functional and visually appealing.
Moving forward, I want to expand on this project by using the leftover scraps to make a magnetic key holder. The concept would be the same, just on a smaller scale. All it would need is a small magnet on the keys, allowing them to attach to the holder just like the knives.
Citations:
Images:
Figure 1: https://www.bernd-gruber.at/en/projects/familyhome-kitz/
Figure 2: https://alasaw.com/products/magnetic-wooden-knife-holder
Figure 3, 4, 5: Taken by me
Figure 6: https://www.rockler.com/rockler-portable-drill-guide
Figure 7, 8, 9, 10: Taken by me
Writing Assistance:
This report was written with the assistance of ChatGPT
2 Comments. Leave new
This project balances rustic and modern functions well, and your attention to detail shines throughout the process. The choice of Russian olive wood stands out. I appreciate your highlighting its marbling and sustainability while maintaining its live edge, which adds to the rustic aesthetic. Your explanation of the magnet placement and strength testing was especially interesting—it’s clear that much planning and problem-solving went into making this functional and aesthetically pleasing. The way you tied your inspiration from Bernd Gruber and Alabama Sawyer into your design choices made for a compelling narrative.
Since magnets are spaced along the wood, does it still hold a knife if you place them in between? Would a strip of some kind work better, or are the magnets strong enough that they can hold a knife anywhere on the wood?
This turned out amazing and was a really creative way to upcycle the wood into something you’ll use everyday. In your opinion, how helpful was the cad mockups in the process of making this vs just sketching out and doing the calculations by hand?