

For my upcycling project, I created a Rustic Modern wood mosaic wall art piece using leftover firewood that had been sitting outside for years. The Rustic Modern aesthetic embraces the unique balance of comfort and sophistication by combining warm and neutral tones with visually appealing patterns.
Inspiration
I have always loved woodworking and wanted to rekindle my skills for this project. Since I am a remote student, I needed to work with the limited tools available at home. While researching ideas, I found a variety of inspirational wood mosaic designs online. I got more in-depth into the various mosaic pieces I used for this project in my Post 2. However, these inspirations incorporated either a monochromatic tone of wood or a well-established pattern using the various tones of wood. As I progressed through this project I did not know what I wanted the final pattern to look like. However, I found the mosaic in Figure 1 and thought it would be perfect for my project. It incorporates various warm tones of wood, but there is no well-established pattern.

Manufacturing Process
Step 1: Cut the firewood into blocks.
For this step, I first cut both ends of the eight firewood logs to have a clean, straight edge to create the blocks as shown in Figure 2.
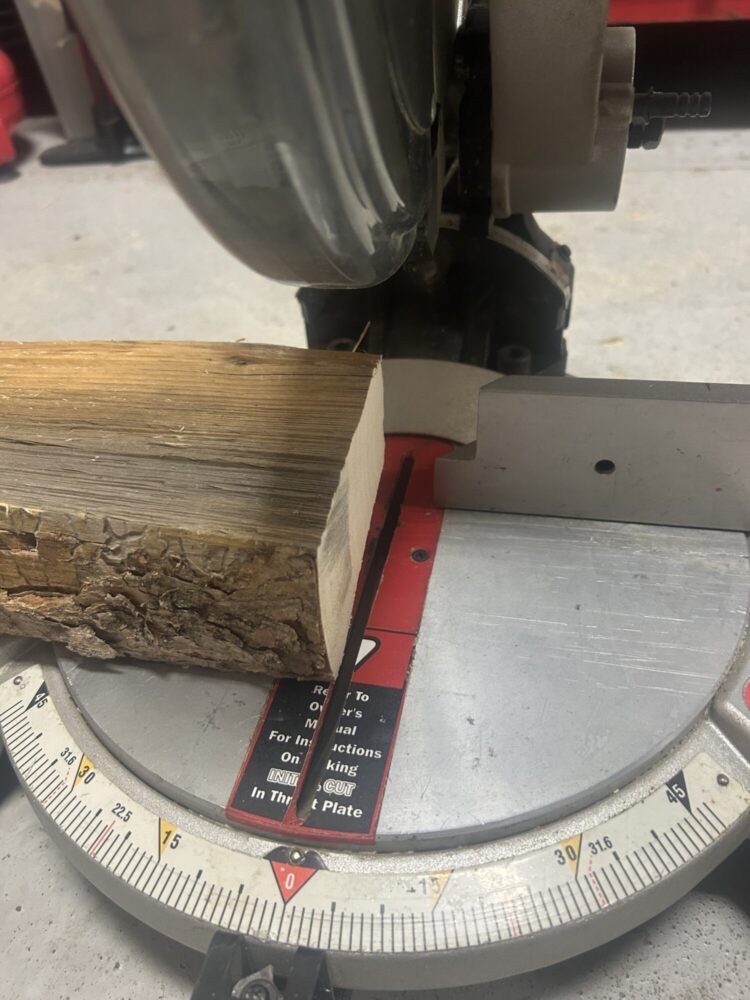
The next process was to cut the firewood logs at various angles. I achieved this by using a 10-inch compound miter saw that locks at various angles. I alternated between 15, 17, and 20-degree cuts. Additionally, I did not precisely measure the thickness of the blocks. Instead, I intentionally cut some thicker and others thinner to create dimension in the final piece. Figure 3 shows the miter saw setup during this process.

I repeated this process until all eight of the logs were used.
Step 2: Sand the wood blocks.
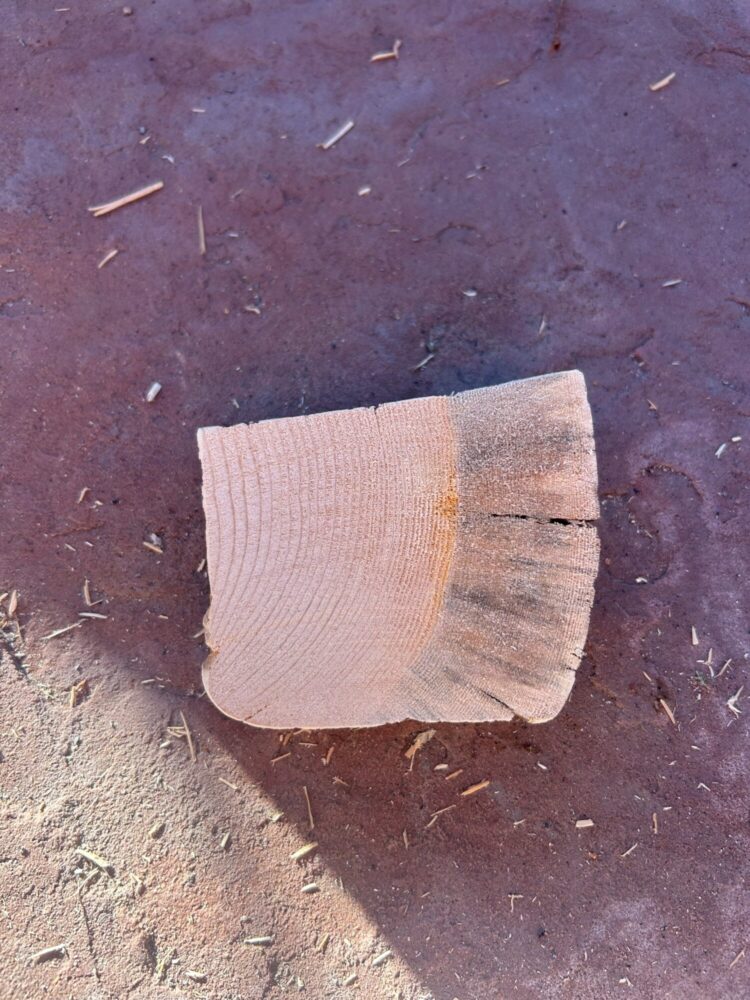
For this process, I used various sandpaper grits to achieve a clean, smooth surface to eventually stain the wood blocks. To begin, I used 60 grit sandpaper to remove the frayed edges and any splinters that were coming off the sides. Figure 4 showcases the before and after of this process. Once the frayed edges were removed the wood blocks were much easier to handle.
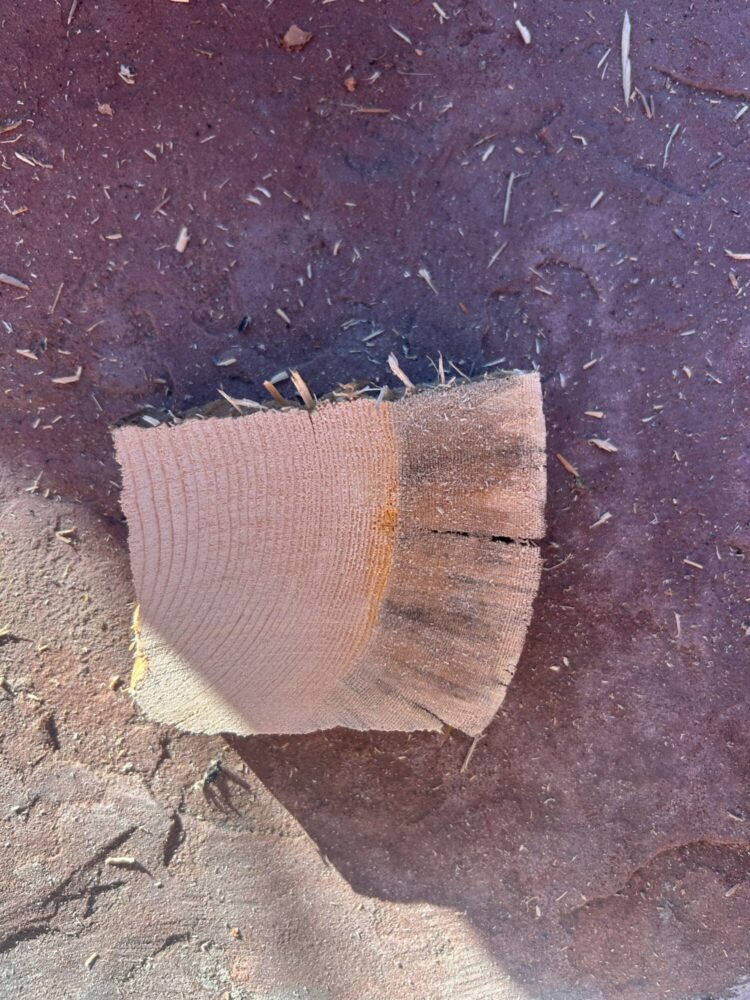
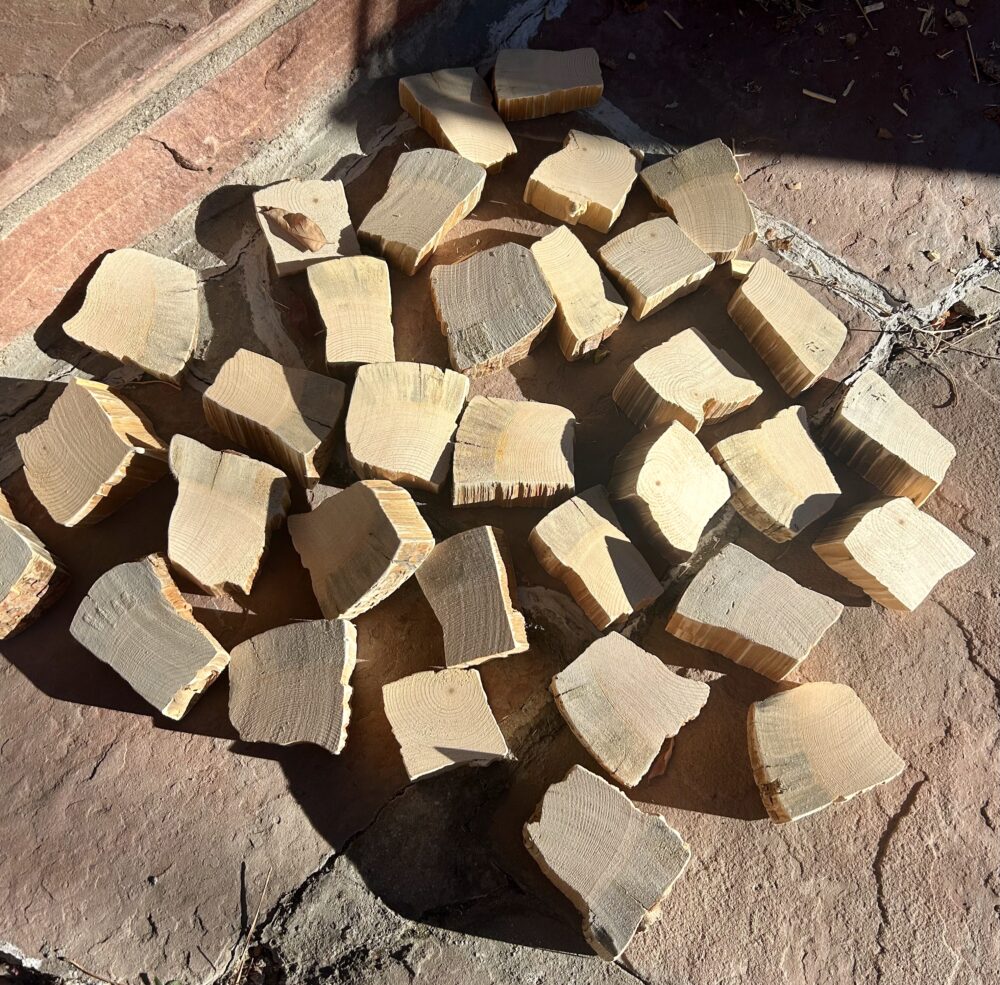
Next, I used 150 grit sandpaper to prep all of the surfaces of the wood blocks for stain. I spent a lot of time on this step. I was going to use a higher grit sandpaper to make the surfaces more refined, but I began to notice that some of the natural markings on the wood were disappearing as I sanded more. I decided to only use 150 grit sandpaper to preserve the natural features of each of the blocks in the final piece. The final blocks are shown in Figure 5.
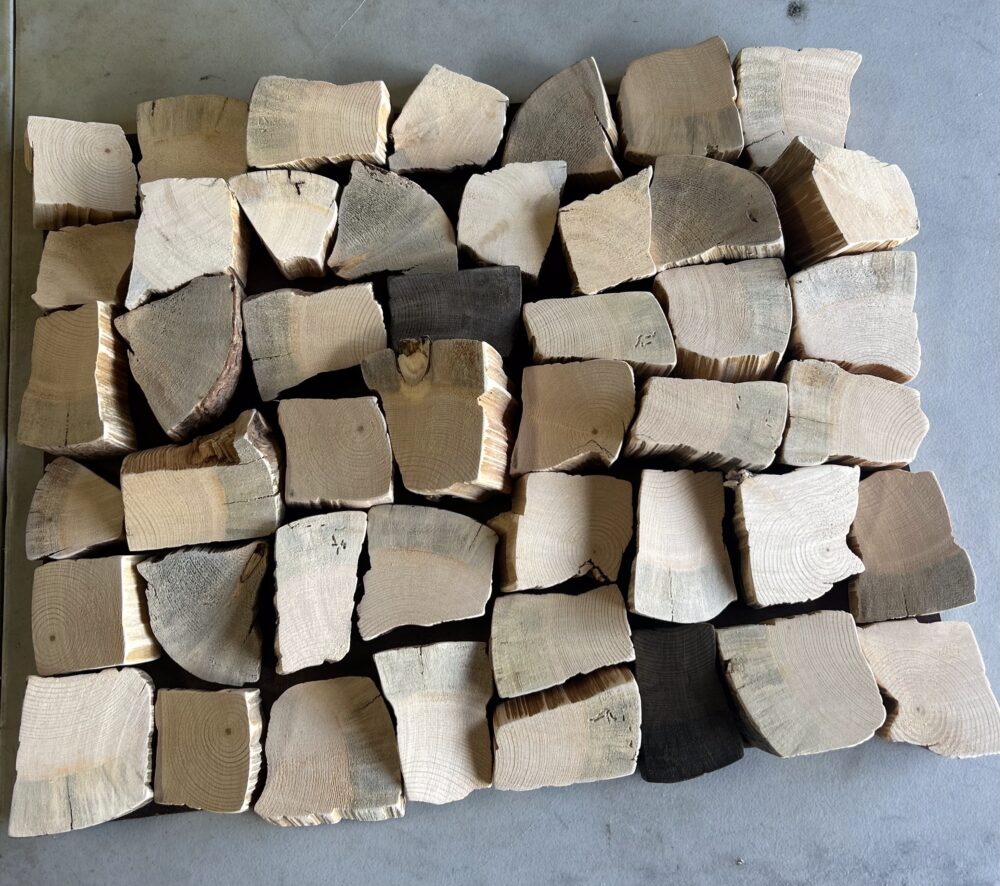
Step 3: Place the wood blocks into the desired positions.
I spent a lot of time to place the blocks into the desired positions. This was the most challenging aspect of the project. My goal was to minimize gaps while still showcasing the organic edges and natural shapes of each block. Unlike my inspirations, which used perfectly square blocks, my design embraces organic, irregular shapes, making my piece unique. The final positions I have decided on for my piece are shown in Figure 6.
Step 4: Cut and stain the wood backing
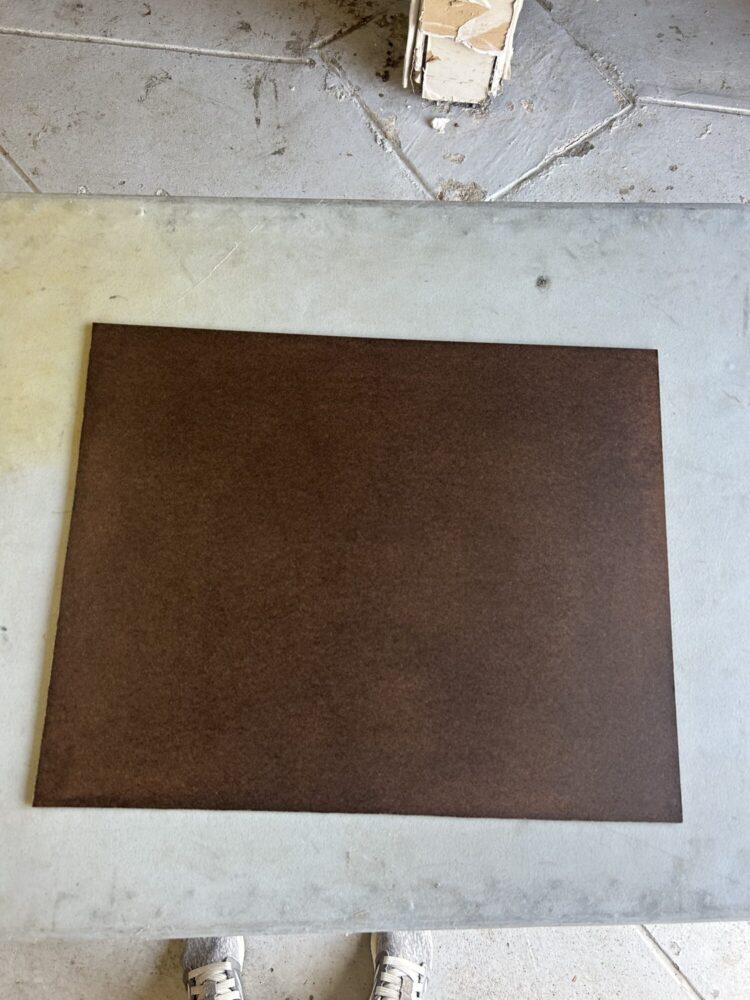
I did not have any wood to use as the backing for the wood blocks. I bought a 1/8″ Hard Board 2’x4′ to use for the backing. It came in light brown and was easily visible when the blocks were placed on it. I stained the board with my darkest, accessible stain to make it blend into the background. I cut the board to size, but slightly underfitting it to the layout seen in Figure 6. The final board cut to size and stained is shown in Figure 7.
Step 5: Stain the wood blocks
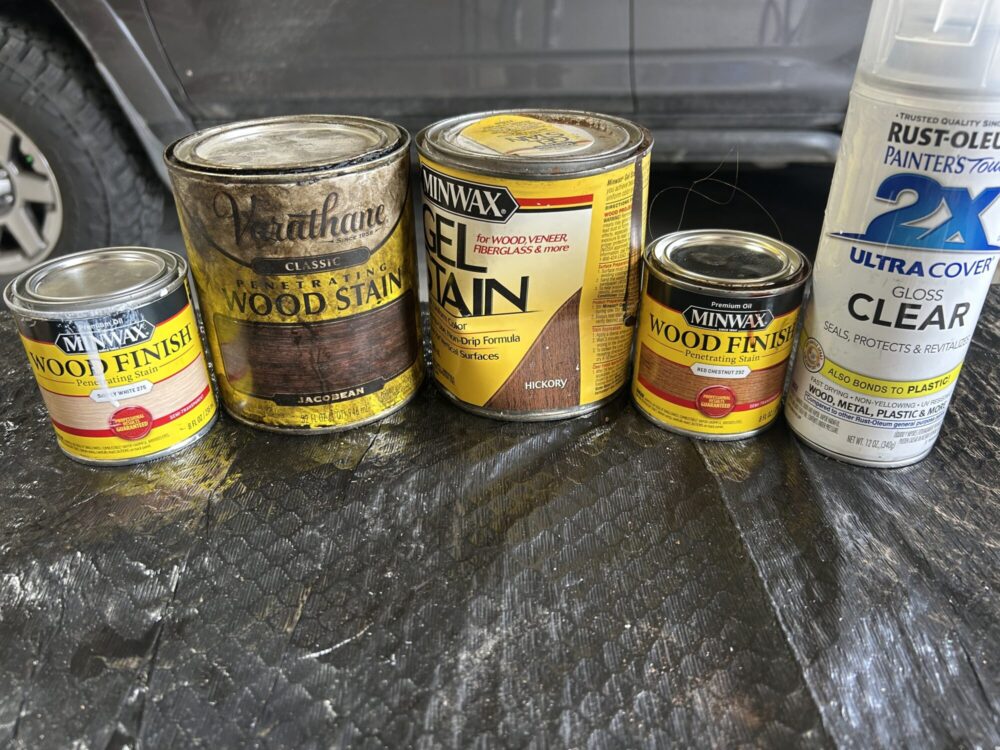
The most important feature of this project to achieve the Rustic Modern aesthetic was incorporating various warm and neutral tones in this piece. Figure 8 shows all of the different stains I used for this piece. I used a total of four stains, with a glossy, clear coat for the finish. Since I had these various stains already I decided that a scattered pattern of the various tones would look the best for this piece.
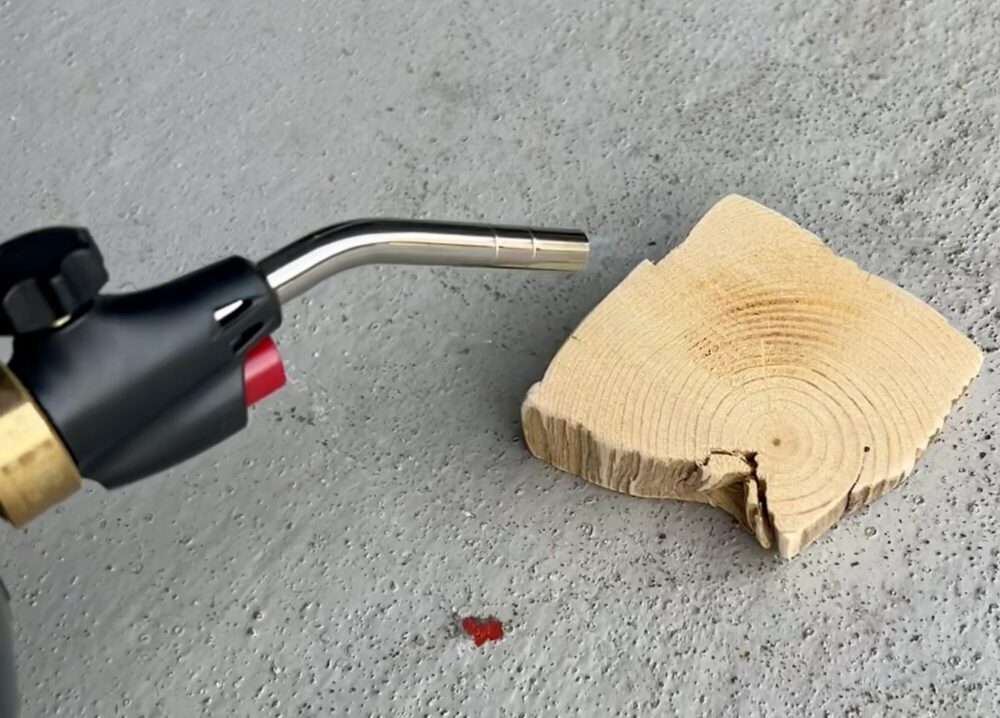
As I was laying out the blocks and placing the different stains onto the blocks, I felt like the piece was missing some warmth. One of my inspiration mosaics used a wood-burning technique, and I decided to give it a try. Figure 9 shows an in-progress picture of me wood burning one of the wood blocks. This process was the most fun part of the project since I got complete control of how I wanted the final block to look.
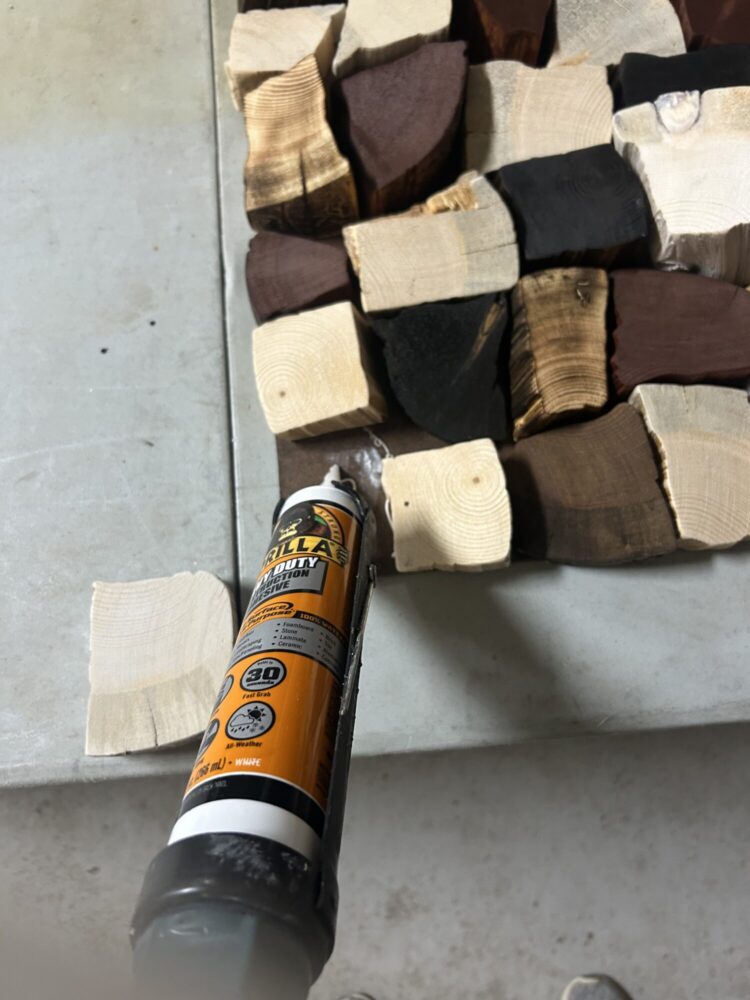
Step 6: Glue the wood blocks onto the wood backing
In order to ensure that each of the pieces would not fall off the wood backing as gravity pulled on them as it was hung up, I used construction adhesive to glue the blocks to the backing. Figure 10 shows the process for this. Some of the pieces I had to glue twice after the first coat dried, but all of the blocks were secured onto the backing.
Step 7: Spray clear coat onto the final piece and attach wall-mounting hook
The final piece ended up being a lot heavier than I anticipated. I found wall-mounting wire that held up to 30 lbs, which is well above what this piece weighed to make sure it would not fall when it was hung up on a wall. The wall mounting mechanism can be seen in Figure 11. I used screws that screw through the board into one of the wood blocks, D-ring picture hangers, and hanging wire to hang this piece onto the wall.

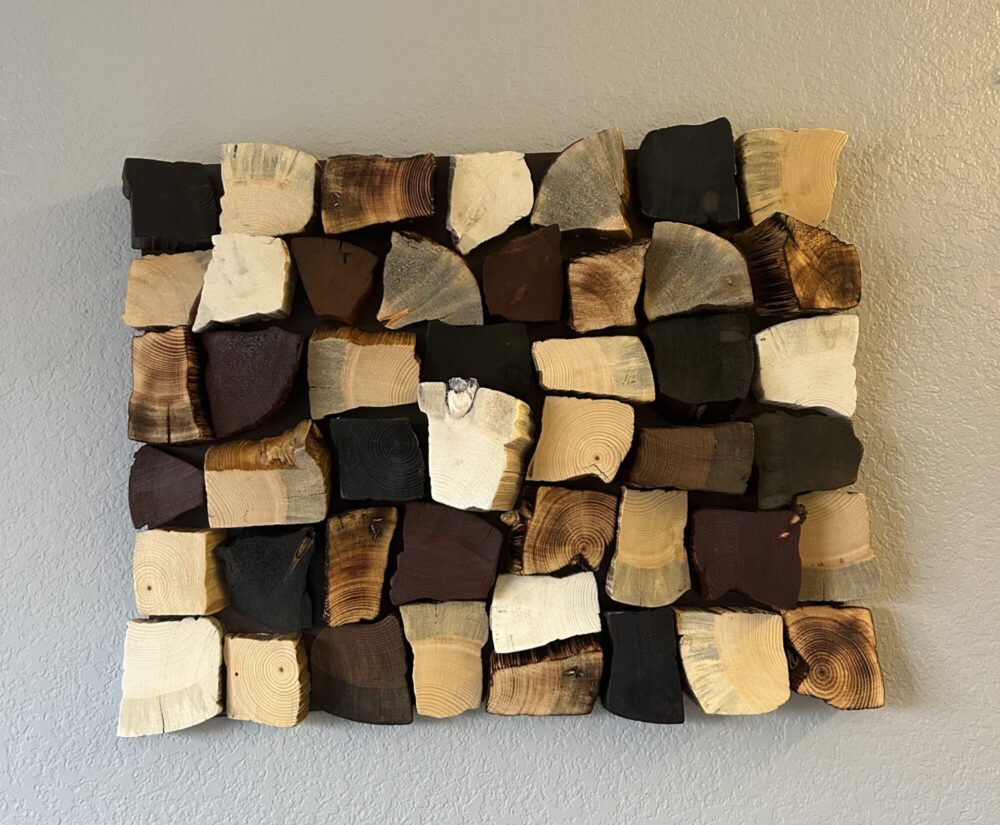
Figure 12 shows the final piece that I created. I used several coats of clear, glossy spray paint so that there was a shine to the final piece.
Reflection
The final piece I created features a rich combination of warm and neutral wood tones that effectively captures the Rustic Modern aesthetic. The blocks, cut at varying angles and thicknesses, create a dynamic sense of depth, making the piece visually engaging whether viewed head-on or from an angle. Although I initially considered cutting the blocks into perfect squares, the limitations of my tools led me to embrace the natural, irregular shapes instead. This choice ultimately enhanced the piece by emphasizing the organic character and raw beauty of the wood. The wood-burning technique and diverse stains further accentuated the natural grains and textures, bringing out the wood’s inherent warmth and rugged elegance. From a functional perspective, I achieved my goal of crafting a structurally sound, durable wall art piece that I can proudly display for years to come. I stayed true to my original vision throughout the process, and I am incredibly pleased with the final result. I plan to keep this piece as a permanent fixture in my space, and while I don’t anticipate making any refinements, I am inspired to create a larger, more expansive version in the future.
References
[1] https://abeautifulmess.com/wooden-block-mosaic-art-diy/
2 Comments. Leave new
I like the changing angles in your raw wood. Layering those with the various stains and finishes made for fantastic depth. I’m doubly impressed that your hanging method is sound for a heavy piece. It would be nice to have the piece covered with matte spray paint.
I love that you cut the logs into different shapes and heights. It really helped preserved the characteristics of the wood that you used and matched your rustic aesthetic. I also found it interesting how scorching some of the logs made the ring texture more visible. I found it intriguing that the ring pattern on some of the darker stained pieces were clearer and was wondering if there was a reason behind that.